
Listen, if you’re anything like me, turning a recipe into a little piece of edible magic is half the fun! I absolutely live for making desserts that tell a story or look like they came straight out of a secret lab or an old spellbook. That’s how I landed on this absolute showstopper: the Polyjuice Potion Cheesecake. Seriously, this isn’t just a dessert; it’s an experience.
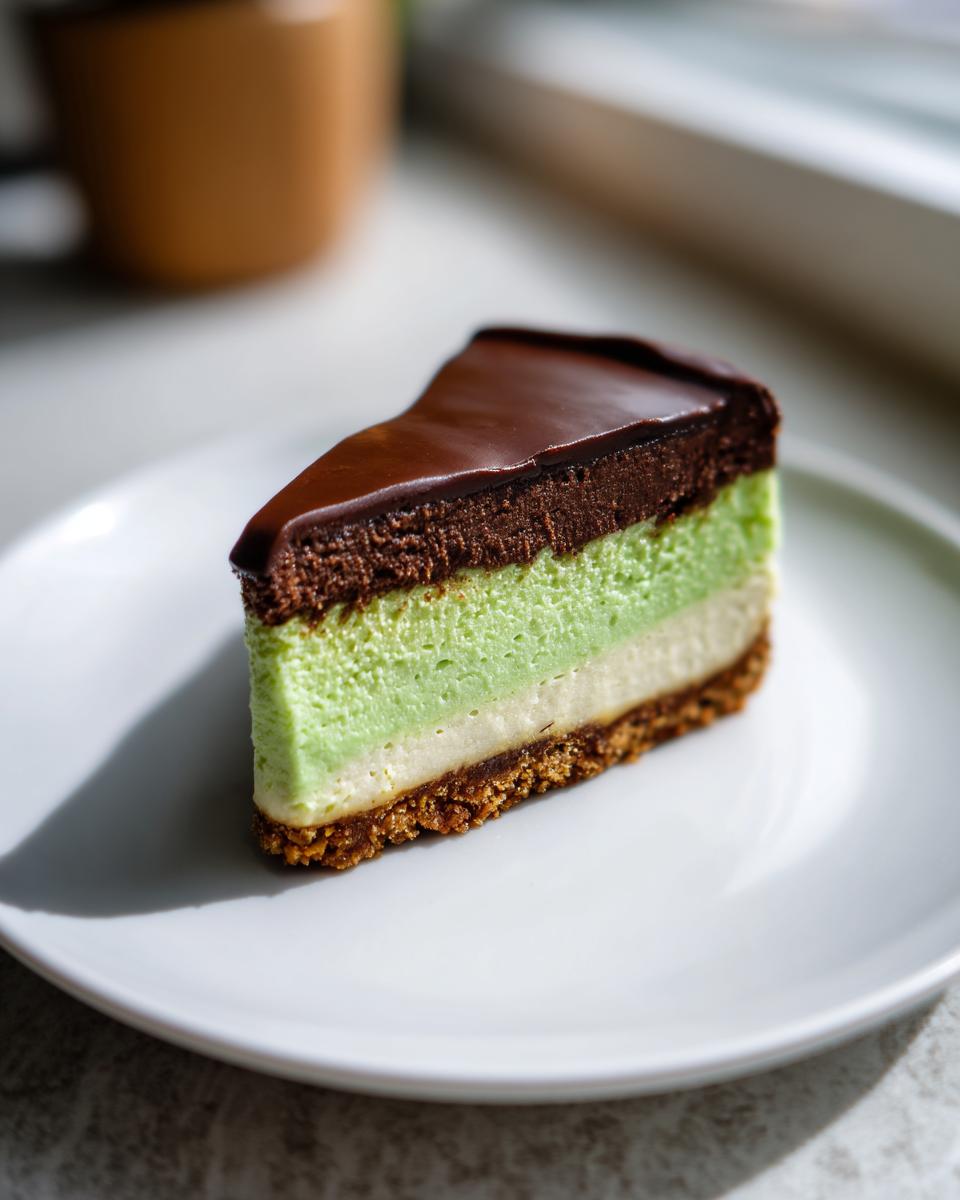
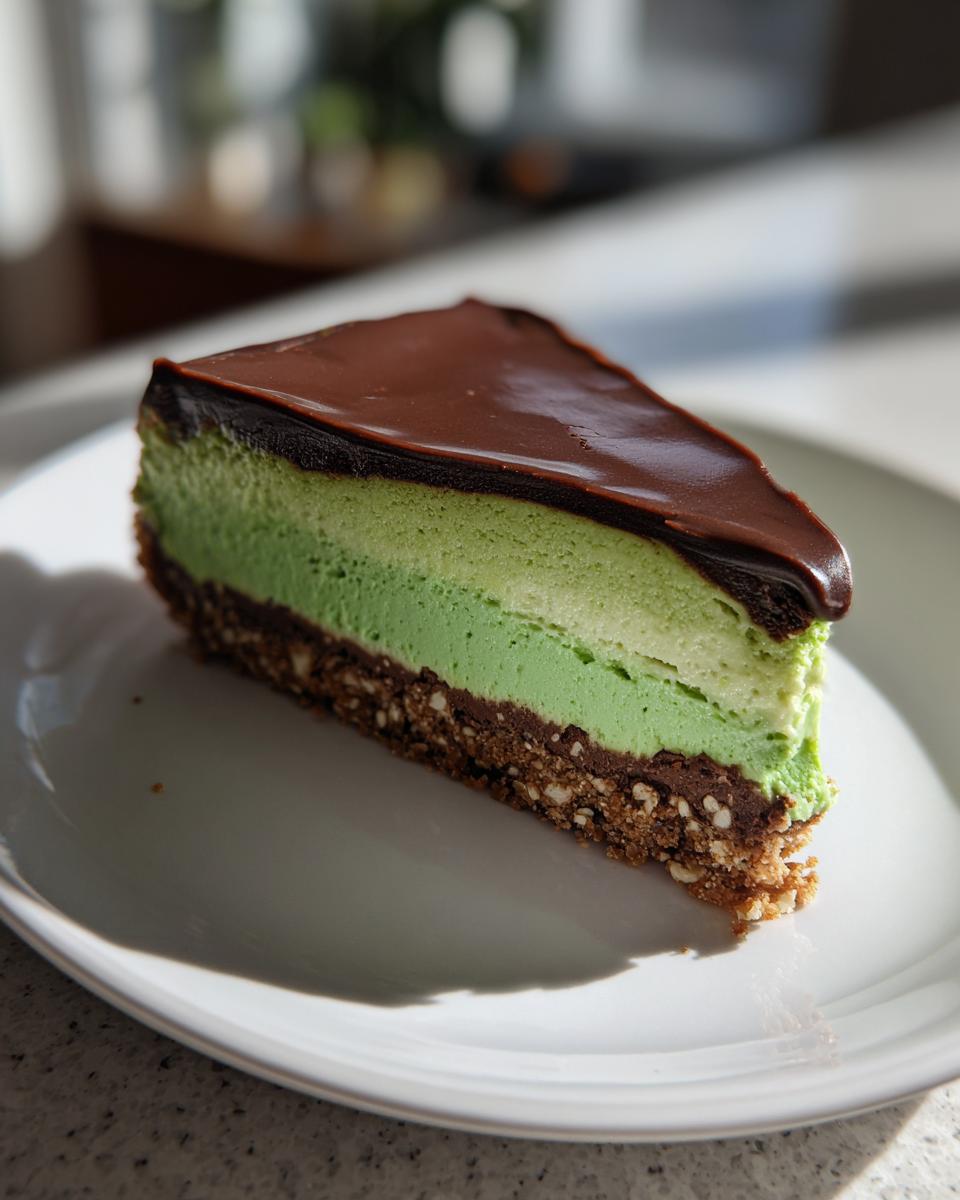
What makes it so special? It’s all about those distinct layers—that mesmerizing, slightly eerie green layer mixed right into the smooth, rich cream base, topped with a dark, sophisticated chocolate coffee ganache that mimics something brewed just right. Trying to bake up the perfect show-stopping, themed dessert like this is totally my jam. Trust me, once you master this two-toned beauty, your weekend gatherings won’t be the same.

Why You Will Love This Polyjuice Potion Cheesecake
I promise you, this cheesecake has layers of reasons why it deserves a spot on your baking rotation. It moves beyond just being delicious—though trust me, it is! If you’re looking for something that feels a little extraordinary, this is it.
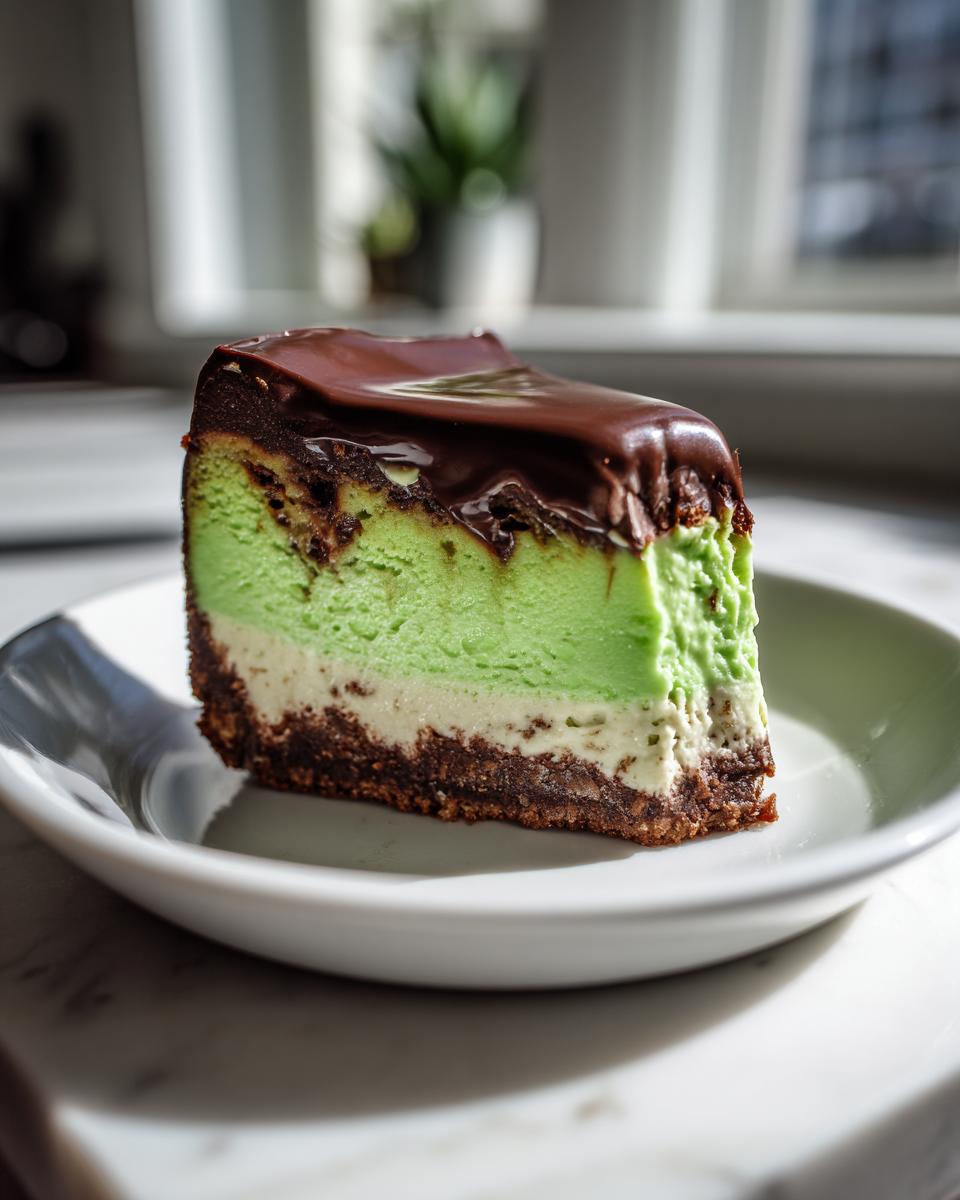
- It’s visually stunning! The swirl of creamy white and that perfectly eerie green batter is just fun to look at, especially when you pull it out of the pan.
- The flavor combo is way more interesting than your standard cheesecake. You get that vanilla creaminess balanced out by the subtle bitterness of the chocolate coffee topping, which reminds me a bit of the richness in a good caramel cake.
- It’s a conversation starter! Everyone is going to ask how you got the color so spot-on. It’s perfect for parties or just making a random Tuesday feel magical.
Essential Ingredients for the Perfect Polyjuice Potion Cheesecake
Okay, gathering your ingredients is like gathering your components before starting a tricky potion—measure twice, check everything once! Getting the right texture and color depends entirely on using ingredients that are prepped correctly. Don’t substitute the cream cheese brand or try to sneak in liquid food coloring; trust me, it changes everything. I keep mine organized into three little bowls before I even start mixing so I don’t forget anything crucial, especially the things that give us that gorgeous green hue!
For the Graham Cracker Crust
This needs to be pressed in firmly so it holds up to the heavy filling. Don’t skimp on the butter here!
- 1 1/2 cups graham cracker crumbs
- 1/4 cup granulated sugar (Just this small amount for the base!)
- 6 tablespoons unsalted butter, melted
For the Layered Cheesecake Filling
This is where the magic happens. Make sure your cream cheese is truly, completely softened—that’s rule number one for smooth cheesecake.
- 2 (8 ounce) packages cream cheese, softened
- 1 cup granulated sugar
- 1 teaspoon vanilla extract
- 3 large eggs, added one at a time!
- 1/2 cup sour cream
- 1/4 cup all-purpose flour
- Green food coloring (Gel food coloring is the secret weapon here; it gives you great color without thinning out your batter like the liquid kind does. You need a lot, trust me!)
For the Chocolate Coffee Topping
This topping is so rich and cuts through the sweetness perfectly. The coffee blends right in, bringing a deep background note reminiscent of a wonderful key lime cake but darker!
- 1/2 cup chocolate chips
- 1/4 cup heavy cream
- 1 teaspoon instant coffee powder
Step-by-Step Instructions for Your Polyjuice Potion Cheesecake
Alright, grab your apron, because we are officially entering the baking laboratory! Making a cheesecake that looks like it needs a special wand to stir it requires a bit of patience, but the steps are super straightforward. Remember, this is a baked cheesecake, so we want to treat it gently. We preheat our oven to 350°F (175°C) first. If you were using a traditional water bath—which I usually skip for simplicity here—wrapping the springform pan tightly in heavy-duty foil is our defense against any rogue leaks!
Preparing the Crust and Baking
First things first: the foundation! Mix your graham cracker crumbs, the small amount of sugar (remember, that’s only 1/4 cup for the crust!), and your melted butter until it looks like damp sand. Press this mixture down super firmly into the bottom of your prepared 9-inch springform pan. It needs a quick ten-minute head start in the oven to set up right. Once that’s done, pull it out and let it cool completely while you whip up the main event.
Creating the Two-Tone Polyjuice Potion Cheesecake Batter
Beat your softened cream cheese until it’s light and fluffy, then slowly stream in the cup of sugar. Vanilla, eggs (one at a time, seriously!), sour cream, and flour get added next. Now, here’s the crucial part: only mix until everything is *just* combined. Overmixing the eggs is what causes those dreaded cracks we talked about before—it whips in too much air! Scoop exactly half of that beautiful plain batter into the pan over the cooled crust. Take the remaining half and aggressively stir in the gel food coloring until it’s that rich, potion-like green color you want. Gently pour the green batter right on top of the plain layer.
Baking and Slow Cooling the Polyjuice Potion Cheesecake
Bake this masterpiece for about 45 to 55 minutes. You’re looking for edges that feel set when you nudge the pan, but the absolute center should still have a tiny, gentle jiggle, like perfectly set gelatin. Now for the most important anti-crack trick: turn the oven OFF. Crack the door open slightly—just an inch or so—and leave the cheesecake inside that warm, quieting environment for a full hour. Sudden temperature changes are the enemy! After an hour, take it out, let it fully cool on the counter, and then chill it overnight if you can. It needs that long cold nap!
Making and Applying the Chocolate Coffee Topping
While the cheesecake is chilling, you can whip up your topping, or save it for later—it keeps fine in the fridge! Melt those chocolate chips and heavy cream together slowly in a tiny saucepan over low heat. You don’t want it scorching! Once it’s super smooth, whisk in that instant coffee powder until it vanishes completely. This ganache needs to go onto the cheesecake only after the cheesecake is completely chilled—at least four hours later! Spread that lovely dark layer evenly over the top, then pop it back in the fridge until the ganache sets up before you slice into this magic. It’s almost as good as a slice of homestyle yellow cake, but way more exciting!
Tips for a Crack-Free Polyjuice Potion Cheesecake
Cheesecake seems intimidating, right? Everyone worries about those awful cracks, especially when you’ve gone to the trouble of making a cool, two-toned confection like this Polyjuice Potion Cheesecake. But honestly, it’s all about managing temperature and respecting the batter. If you follow these three golden rules, your topping will sit perfectly smooth on top of a pristine green and white landscape, looking every bit the successful potion it is!
My number one piece of advice? Room temperature ingredients are non-negotiable. If your cream cheese is cold, you’ll end up overbeating it trying to get it smooth, and that introduces air bubbles, which leads to cracks. Seriously, let those 8-ounce blocks sit out for at least an hour before you start beating them. It makes the whole mixing process so much smoother, almost like sneaking a cookie after making chocolate chip tahini cookies!
Next, stop mixing once the flour is incorporated! Once those eggs are in, you’re just trying to combine, not whip. Any extra air you beat in now will expand in the oven and then contract too quickly when cooling, resulting in a sunken center or a giant split right down the middle. Fold gently! This ensures a dense, beautifully creamy texture that doesn’t puff up like a soufflé.
Finally, the slow cool-down is your best friend. I know you’re excited to see the final result, but you cannot take that hot cheesecake straight from a 350-degree oven and set it on your cold counter. That shocks the structure. The method I laid out—turning the oven off and leaving the door cracked for an hour—is the magic key. It eases the cake down into room temperature territory gradually, which seriously minimizes shrinkage and those frustrating surface cracks.
Serving Suggestions for Your Polyjuice Potion Cheesecake
Once this gorgeous, green creation is chilled and the ganache topping is set firm, you have to think presentation! This Polyjuice Potion Cheesecake deserves a dramatic reveal, not just a quick slice on a paper plate. It’s fun, it’s decadent, and the chocolate coffee really pulls the flavor in a more grown-up direction, unlike a super sweet simple coffee cake.
For a truly magical look, try dusting just one side of the serving plate with a light layer of edible shimmer dust—gold or silver works perfectly! It gives the impression that some of the magic spilled out while you cut it.
Flavor-wise, keep it simple since the cheesecake is already quite rich. You don’t need much alongside it. A small dollop of fresh, unsweetened whipped cream on the side is perfect to cut the richness of the chocolate topping. If you want to lean into that slight coffee note, consider serving it alongside a tiny flute of cold milk or, for the adults, strong, cold espresso.
When slicing, use a long, thin knife dipped in hot water and wiped dry between every cut. Clean slices really show off that amazing color contrast between the layers!
Storage and Reheating Instructions for Leftover Polyjuice Potion Cheesecake
I know, I know. You swear you’re going to eat the whole thing in one sitting, especially when it looks this cool! But if, by some miracle, you have any of this amazing Polyjuice Potion Cheesecake left—and I really hope you do so you can taste it the next day—storage is key. Remember, this is a premium baked cheesecake experience, not a sturdy slice of banana bread that can sit on the counter!
The absolute minimum time this needs in the fridge is four hours, but honestly? You’re not really experiencing it until it’s been tucked away overnight. That cooling period lets the filling truly firm up and allows the chocolate coffee topping to get that perfect, slightly fudgy set. Always cover the springform pan loosely with plastic wrap or transfer a slice to an airtight container designed for cakes.
Since we’re dealing with delicate cream cheese and eggs, keeping this cozy in the refrigerator is the only safe option. It usually lasts perfectly well for about four to five days in the fridge. Make sure you keep it away from strong smells, like last night’s leftover garlic bread, because cheesecake really absorbs flavors!
Now, reheating? That’s not really a thing for a chilled cheesecake. Trying to warm up this beautiful creation would melt that ganache right off and make the texture sad. Instead, my advice is to let your slice sit out on the counter for about 20 to 30 minutes before serving. That little bit of time takes the chill off the edges, letting the cream cheese soften up just enough so you get that perfect, velvety mouthfeel back. It’s truly the best way to enjoy those leftover magical bites!
Frequently Asked Questions About the Polyjuice Potion Cheesecake
I totally get it! When you’re tackling a themed bake like this, you always have a few specific concerns. Making sure this cheesecake turns out *just right*—not cracked, perfectly colored, and the right flavor balance—is worth covering all the bases. Here are the main things readers always ask me about making this incredible strawberry cheesecake cookies-inspired dessert!
Can I make this Polyjuice Potion Cheesecake ahead of time?
Oh, absolutely! In fact, I highly recommend it. Cheesecake honestly tastes better on day two anyway; all those wonderful, complex flavors get to mingle and settle in. If you’re baking for a party, get it done the day before. The crust, filling, and chilling process should all be completed the day before serving. I wait until the morning of the party, or just a few hours before I plan to present it, to spread on that delicious chocolate coffee topping. If you top it too early and leave it covered in the fridge, the topping might get a little sticky from condensation.
How do I get the green layer so bright?
This is all about the coloring agent, my friend! If you try to use basic liquid food coloring you find in the grocery store dyeing aisle, you’ll have to add so much that it changes the consistency of your excellent batter. That’s why I stressed using **gel food coloring**! A tiny toothpick dip into the gel gives you intense color without adding excess water. Just keep adding little pinches of the gel until you hit that murky, potion-like green you’re aiming for. Also, remember to scrape down the sides of the bowl when coloring to make sure everything is evenly mixed, just like we did when perfecting the cheesecake cookie batter!
What if I don’t like coffee flavor in the topping?
That’s an easy fix! While I think the coffee powder marries brilliantly with the dark chocolate and balances the sweetness of the whole Polyjuice Potion Cheesecake, I totally understand if coffee isn’t your favorite note. You can simply leave the instant coffee powder out altogether. If you want to replace that small boost of depth, try replacing the coffee powder with about 1/4 teaspoon of very strong vanilla extract, or even a tiny drop of almond extract if you want a slightly different baking spice hint!
Estimated Nutritional Data for Polyjuice Potion Cheesecake
So, we’ve nailed the magic and the flavor, but let’s talk fuel for a minute! I always like to give a rough idea of what’s in a slice of this spectacular dessert, just so you know what you’re diving into. Be warned, cheesecake is always a treat, and we certainly packed this one full of rich cream cheese and chocolate for that perfect potion texture!
I pulled these numbers based on the recipe scaled for 10 servings, so if you cut more generous slices—which, let’s be honest, is tempting—the numbers will shift a bit. Think of these figures as a good ballpark estimate for your post-baking planning. If you’ve ever followed a recipe for something like a classic simple lemon cake, you know the nutritional breakdown can change dramatically based on how much sugar ends up in the frosting, and the same goes for our ganache here!
Here’s the rundown based on one serving:
- Serving Size: 1 slice
- Calories: 410
- Fat: 28g (with 17g of that being saturated fat—hello, cream cheese!)
- Carbohydrates: 35g
- Sugar: 32g (Watch out for that one!)
- Protein: 7g
- Cholesterol: 110mg
- Sodium: 250mg
A little disclaimer from me to you: Since this recipe has been fiddled with and perfected over time, and depending on the exact brands of chocolate chips or cream cheese you use, these nutritional stats are solid estimates. They are great for getting a general sense of the dessert, but they aren’t certified dietitian numbers! Just enjoy the magic, and know that every single calorie is worth the effort you put into that gorgeous green layer.
Share Your Magical Polyjuice Potion Cheesecake Creations
Whew! You made it! You successfully navigated the tricky art of creating a layer-swirled, coffee-kissed, decadent cheesecake. Seriously, give yourself a pat on the back. Now that you have this incredible Polyjuice Potion Cheesecake cooling in the fridge, I absolutely need to see what you created!
When you finally slice into that beauty and see that perfect separation between the plain and the potion-green layers, you have to tell me about it! Did you stick to the dark chocolate coffee topping, or did you try something completely different? Food blogs thrive on sharing those little tweaks people make, just like when people add sprinkles to a classic yellow birthday cake!
When you get a chance, please come back here and leave a star rating for the recipe. It really helps other bakers know if this potion is working its magic for them, too! And if you snapped a picture of your spooky-yet-delicious creation, tag me on social media! I love seeing your finished results. Knowing that my tips helped you avoid a cracked top while achieving that perfect potion color makes all the writing worth it.
Happy baking, and may your next batch of whatever you whip up be totally magical!
Print
Polyjuice Potion Cheesecake
- Total Time: 6 hours 20 min
- Yield: 10 servings 1x
- Diet: Vegetarian
Description
A unique, layered cheesecake inspired by the Polyjuice Potion, featuring distinct green and brown layers.
Ingredients
- 1 1/2 cups graham cracker crumbs
- 1/4 cup granulated sugar
- 6 tablespoons unsalted butter, melted
- 2 (8 ounce) packages cream cheese, softened
- 1 cup granulated sugar
- 1 teaspoon vanilla extract
- 3 large eggs
- 1/2 cup sour cream
- 1/4 cup all-purpose flour
- Green food coloring (gel preferred)
- 1/2 cup chocolate chips
- 1/4 cup heavy cream
- 1 teaspoon instant coffee powder
Instructions
- Preheat your oven to 350°F (175°C). Wrap the bottom of a 9-inch springform pan in heavy-duty aluminum foil.
- Combine graham cracker crumbs, 1/4 cup sugar, and melted butter. Press the mixture firmly into the bottom of the prepared pan. Bake for 10 minutes. Let cool.
- Beat the softened cream cheese and 1 cup sugar until smooth. Mix in vanilla extract, eggs one at a time, sour cream, and flour until just combined.
- Pour half of the batter over the cooled crust. Add several drops of green food coloring to the remaining batter and mix until you achieve a potion-like green color. Pour this green batter over the plain batter.
- Bake for 45 to 55 minutes, or until the edges are set and the center has a slight jiggle. Turn off the oven, crack the door open, and let the cheesecake cool inside for 1 hour.
- Remove the cheesecake from the oven and cool completely on a wire rack. Refrigerate for at least 4 hours, or preferably overnight.
- For the topping, melt the chocolate chips and heavy cream together in a small saucepan over low heat, stirring until smooth. Stir in the instant coffee powder until dissolved.
- Spread the chocolate coffee ganache over the chilled cheesecake. Return to the refrigerator until the ganache is set before serving.
Notes
- Use gel food coloring for a more intense green color without thinning the batter.
- Do not overmix the batter after adding the eggs to prevent cracking.
- Allow the cheesecake to cool slowly to avoid sudden temperature changes that cause cracks.
- Prep Time: 25 min
- Cook Time: 55 min
- Category: Dessert
- Method: Baking
- Cuisine: American
Nutrition
- Serving Size: 1 slice
- Calories: 410
- Sugar: 32g
- Sodium: 250mg
- Fat: 28g
- Saturated Fat: 17g
- Unsaturated Fat: 11g
- Trans Fat: 0.5g
- Carbohydrates: 35g
- Fiber: 1g
- Protein: 7g
- Cholesterol: 110mg
Keywords: cheesecake, chocolate, green, coffee, graham cracker crust, baked dessert, potion