
Oh my gosh, if you are staring down a last-minute Halloween party invitation or just need a fun, spooky treat without turning the oven on, I have found your new favorite recipe. Seriously, these are the simplest, most festive Oreo Witch Hat Cookies you will ever attempt! I mean, minimal fuss, maximum impact—that’s my kind of baking philosophy, especially when school events are looming.
I whipped up three dozen of these little beauties last year while waiting for my lasagna to bake, and they were gone before the main course was even on the table. Forget complicated doughs or scraping frosting bowls; this no-bake assembly is so quick, even your middle-schooler can handle it perfectly. Trust me, needing just four basic ingredients makes this recipe completely foolproof, and the payoff is huge!

Gathering Your Ingredients for Oreo Witch Hat Cookies
You won’t believe how short this shopping list is! That’s the beauty of turning a simple sandwich cookie into a truly spooky treat. We avoid complicated flavor extractions or specialty flours because these hats rely almost entirely on what you already have in your pantry. We just need four things to make these adorable Oreo Witch Hat Cookies come together in minutes. Seriously, grab these items, and you are halfway there.
When you gather your items, make sure you have the right sizes, though. Getting the package size right for the Oreos ensures you get the perfect number of hat bases for the amount of chocolate coating we’re melting down. Don’t worry about breaking out the stand mixer; this is purely assembly work!
Essential Components for Perfect Oreo Witch Hat Cookies
You are going to need:
- One package (that’s the standard 14.3 ounces) of good old Oreo cookies. The crucial part here is to make sure the cream filling stays in place on at least one half of the cookie when you separate them.
- One bag, about 12 ounces, of standard chocolate chips—milk chocolate works great, but feel free to use semi-sweet if you prefer!
- Just one tiny tablespoon of shortening. This is our secret weapon for making the chocolate perfectly dippable.
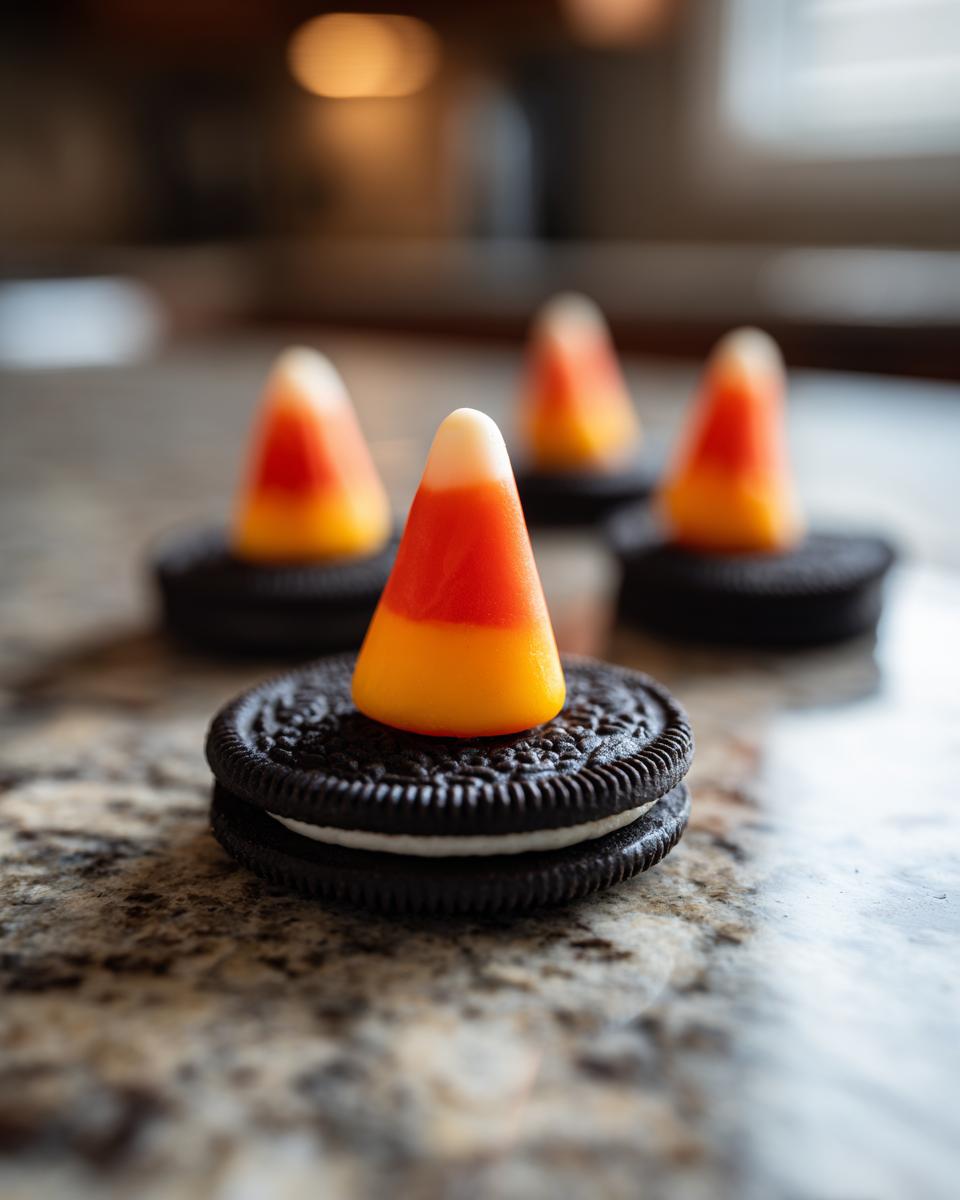
- And finally, one cup of those brightly colored candy corn pieces. These are the pointy little tips for our witch hats!
Why You Will Love Making Oreo Witch Hat Cookies
Honestly, these cookies are my go-to when I need something festive fast. The best part about these little black hats floating around during October is that they require zero actual baking time. Zero! That right there is a huge win for busy weeks.
We are talking about a recipe so simple that setting up the assembly line is faster than preheating an oven. If you need treats tomorrow for school or work and haven’t prepped anything, these are your saving grace. They look wonderfully spooky but are so easy to pull off.
Key Benefits of These No-Bake Oreo Witch Hat Cookies
Here’s why I always reach for this particular Halloween treat:
- You seriously will not turn on your oven! Cook time is listed as 0 glorious minutes.
- The total prep time is about 15 minutes once you get into a rhythm. It’s lightning fast!
- They are absolutely perfect for those super last-minute Halloween snacks you forgot you needed to make.
- You only need a few common pantry staples; no specialty shopping required here.
- They are just plain fun! Kids absolutely love pressing the candy corn tip on top.
Step-by-Step Instructions for Assembling Oreo Witch Hat Cookies
This is where the magic happens, but you have to move with a little bit of purpose! Since we aren’t baking, our chocolate coating is our only glue, so we need to work efficiently so things don’t slide off. Don’t stress, though; I always break the task into batches of about five cookies at a time so nothing gets rushed. Remember, you can always check out how others do similar chocolate dips in things like this Oreo delight for reference!
Preparing the Oreo Base
First things first: we need our bases. Carefully twist apart the Oreo cookies. Your goal here is to separate the two cookie wafers but keep all that sweet, sweet cream filling stuck neatly onto one of the halves. Seriously, don’t lose the cream! This cream filling is what holds the candy corn ‘tip’ in place later on, so it needs to be present and centered on the cookie half you plan to dip.
Melting the Chocolate Coating for Oreo Witch Hat Cookies
Time to handle the chocolate! I take the chocolate chips and the tablespoon of shortening and put them into a microwave-safe bowl. Now, the key here is patience during microwaving. Heat them in 30-second bursts. Pull the bowl out after each 30 seconds, give it a really good stir, and then pop it back in if needed. Keep doing this until the mixture is completely smooth and glossy. If you find your chocolate seems just a *touch* too thick to dip easily, just stir in a few more drops of shortening until it flows nicely. It should drip smoothly off a spoon without clumping.
Dipping and Attaching the Candy Corn Tip
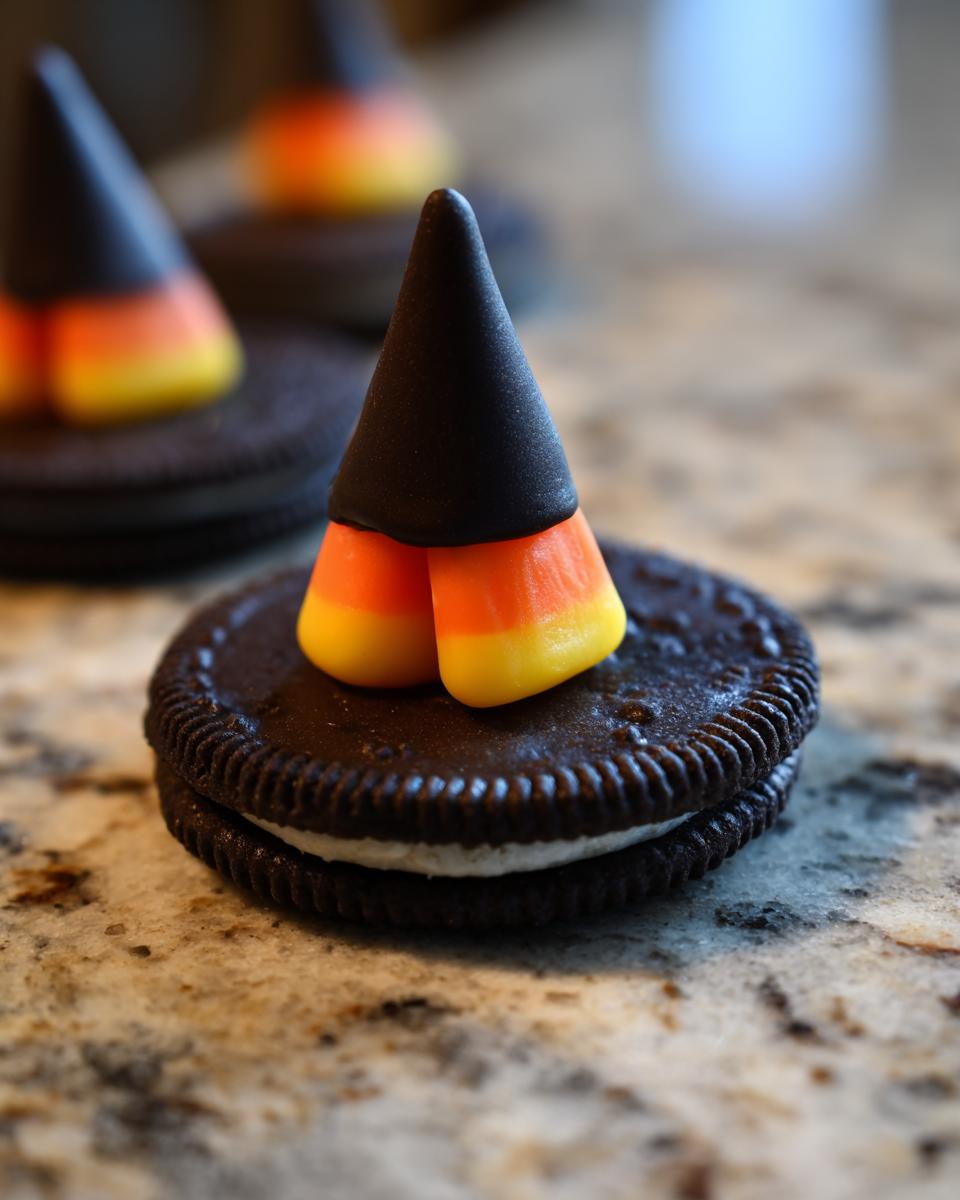
Okay, focus time! Work quickly now because the chocolate starts setting up fast. Take an Oreo half (cream-side up) and gently dip the top—that’s the cookie part—into the melted chocolate, coating it completely. Lift it out, letting the extra drip back into the bowl. Immediately place that chocolate-coated cookie half, chocolate side up, onto your wax paper. This cookie is the wide brim of the witch hat.

This is critical: while that chocolate is still wet, grab a candy corn piece and press the wide, flat end right into the center of the melted chocolate on top of your cookie base. Make sure the pointed end is sticking straight up—that’s the hat tip!
I also always remember my own rule here: don’t set up all your cookies before dipping, or the chocolate will harden before you get the candy corn on! Work in small batches of four or five at a time.
Setting the Finished Oreo Witch Hat Cookies
Once your little army of witch hats is assembled, you just need to let them do their thing. They can set up just fine sitting out on the counter at room temperature until the chocolate feels totally firm to the touch. If you’re in a rush, pop the tray into the refrigerator for about ten minutes. Once they are solid, they are ready to wear (or eat!). Wow, they look so perfectly spooky already!
Tips for Perfect Oreo Witch Hat Cookies Assembly
Look, I know I said this recipe was foolproof, but when you’re working with melted chocolate, things have a habit of going sideways if we aren’t paying attention! Since these are no-bake, the chocolate consistency and the speed at which you work are the only things standing between you and perfectly smooth, pointy little hats. If you’ve ever tried dipping something and the coating looked thick and gloopy, here are my tricks to avoid that disaster.
It’s all about making that chocolate mixture behave exactly the way you want it to before you even grab the first Oreo base. For more great holiday dipping project ideas, check out these other Halloween cookies recipe ideas!
Chocolate Consistency: The Key to Great Oreo Witch Hat Cookies
I mentioned the shortening earlier, but I cannot stress this enough! That tiny bit of shortening is what turns standard chocolate chips into something beautiful for dipping. Fat helps lower the viscosity, meaning the chocolate thins out just enough to coat the cookie evenly without piling up too thick around the edges. If you dip and the chocolate looks sticky or gloppy, add just a few more drops of shortening and stir it really well. You want it smooth enough that when you lift the cookie, only a thin, even layer drips off.
Working Speed for Oreo Witch Hat Cookies
If you take too long between dipping the base and popping the candy corn on top, you’re guaranteeing a messy hat! The chocolate needs to be molten when the candy corn goes in so the candy corn sinks just slightly into the chocolate, creating a firm anchor. If you wait too long, the chocolate hardens on the wax paper, and when you press the candy corn in, you end up smushing the chocolate base outward, creating a thick, ugly ring around the bottom of your witch hat.
So, my advice is: dip one cookie, place it down, add the candy corn tip immediately, and then move to the next one. Don’t try to prep five bases before dipping three! Small batches keep everything moving quickly and looking sharp.
Storage and Making Ahead for Your Oreo Witch Hat Cookies
Planning ahead for a big spooky bash? That’s smart thinking! The best news about these Oreo Witch Hat Cookies is that once that chocolate shell is nice and firm, they become super stable. They don’t need refrigeration, which is just wonderful for keeping your fridge space open for drinks!
Because we used simple chocolate and Oreos—no frosting or perishable dairy involved other than that tiny bit of cream filling—these are great candidates for being made a day or two early. If you’re making a huge batch for a school bake sale, this definitely helps ease the pressure on Halloween day. For more ideas on making treats ahead of time, check out this amazing no-bake S’mores Lasagna recipe!
Storing Your Finished Oreo Witch Hat Cookies
Once the chocolate has hardened completely—make sure they aren’t tacky at all—you’ll want to transfer them immediately into an airtight container. I just use my regular plastic storage box with a secure lid. You can stack them gently, but try not to press down, or you might squish the candy corn tips! Since they are so sturdy, they keep perfectly well just tucked away in the pantry at room temperature for three or four days.
Variations on Classic Oreo Witch Hat Cookies
Even though these Oreo Witch Hat Cookies are super cute exactly as they are, you know me—I can never resist giving a classic a little creative spin! Since we are only working with chocolate, it’s really easy to switch things up without adding any extra baking steps. This lets you match my little hats exactly to whatever color theme your Halloween party has going on!
If you are looking for inspiration on other ways to use candy corn in fun, non-baking recipes, you absolutely have to check out these candy corn cheesecake bars—they are incredible!
Changing the Chocolate for Oreo Witch Hat Cookies
That milk chocolate coating is classic for a reason, but if you want a different look, it’s so easy to change! If you want a sharper contrast with the black Oreo, switch out the milk chocolate chips for a bag of dark chocolate chips. It makes them look wonderfully mysterious, like a classic black felt hat. Or, go totally whimsical and use white chocolate chips instead! I like melting white chocolate and then stirring in just a drop or two of black gel food coloring. That gives you a shiny, deep black hat that pops even more than the dark brown kind.
Adding a Hat Band Detail
This is my favorite easy customization! Once you have your candy corn tip pressed into the wet chocolate base, you can give your witch a touch of flair with a faux hat band. Just take a tiny bit of colored gel icing—purple or green are my go-to colors—and pipe the tiniest ring around the base where the candy corn meets the chocolate brim.
If you don’t want to mess with icing, just grab a tiny pinch of edible glitter or some festive orange or purple sanding sugar. Sprinkle just a little bit right around that base before the chocolate sets. It makes the Oreo Witch Hat Cookies look instantly professional and so much more festive!
Frequently Asked Questions About Oreo Witch Hat Cookies
I always get questions when I post pictures of these little guys popping up around the house in the fall! They are so simple that people often wonder if they missed a trick or if there’s some secret step I’m not mentioning. Nope! But here are the common things folks ask me so you can make your batch of Oreo Witch Hat Cookies perfectly the first time around.
Can I use a different cookie instead of Oreos for these witch hats?
That’s a fair question! Oreos are my number one preference because that round, flat base is the perfect size for a hat brim, and the cream filling gives us that nice little bump for the candy corn to sit on. If you absolutely have to substitute, you can—just look for a cookie that has a similar diameter and is firm enough to hold up to dipping. If you use something smaller, you’ll need to use fewer candy corn pieces or maybe even a smaller candy for the tip. You really want that cookie base to be flat and about two inches across for the best proportions.
What if I don’t have shortening for the chocolate dip?
Shortening is my go-to because it helps the chocolate set up super firm and shiny without getting that weird, streaky look some people get when using only chocolate chips. If you are out—oops!—you can definitely swap it out for coconut oil or even a neutral, flavorless vegetable oil. Just keep in mind that coconut oil sets up harder than shortening sometimes, and oil might make your chocolate a little runnier. You might need to use just a little less than the one tablespoon I called for, so dip a test cookie first to make sure you aren’t getting too much runoff.
Are Oreo Witch Hat Cookies safe to leave out for a party?
Absolutely, yes! This is one of the reasons I love them so much for parties—zero fridge space required once they are set. Since the moisture is locked inside the Oreo and the coating is pure chocolate (plus that candy corn!), they are really stable once that chocolate hardens up. You can safely leave your finished Oreo Witch Hat Cookies out on a platter at room temperature for several hours, making them fantastic for setting up on a buffet table early in the day.
Estimated Nutritional Snapshot for Oreo Witch Hat Cookies
Now, I always tell people not to worry too much about the exact numbers when you are dealing with something this delightfully simple and fun—it’s a holiday treat, after all! But since I know some of you check the details, I ran these ingredients through a general calculator just to get a rough idea.
Please know that these figures are only estimates, based on using standard ingredients and serving size calculated as exactly ONE finished Oreo Witch Hat Cookie. Since we aren’t baking or adding any crazy extra layers, they actually come in surprisingly reasonable for a chocolate-dipped treat. If you are making these for a large group, remember these numbers are per cookie, so plan accordingly!
Here’s the general breakdown for one sweet little hat:
- Calories: About 150
- Fat: Around 9 grams
- Carbohydrates: Roughly 17 grams
- Protein: About 2 grams
As you can see, the majority of the fat and sugar comes right from the Oreo cream filling and the chocolate coating itself. They’re quick, they’re easy, and they satisfy that spooky sweet tooth without requiring a ton of heavy baking ingredients!
Share Your Festive Oreo Witch Hat Cookies Creations
That’s it! You are officially armed with the easiest, most adorable Halloween treat recipe I know. Look at what you made—perfect little Oreo Witch Hat Cookies ready for your party table!
I really, honestly, want to see what you all come up with! Because there are so many fun ways to customize the chocolate color or the band, I bet some of your creations look even cooler than mine did. Remember that little rush of pride when you find a recipe that’s this simple but looks like you spent hours on it? That’s what we are celebrating here!
So please, if you loved how fast these came together, or if your kids had a blast assembling them, leave me a rating right down below. It helps other busy parents find this great no-bake hack. And if you managed to snap a picture of your table full of these spooky little treasures, tag me on social media! I can’t wait to see your gorgeous, chocolate-dipped Oreo Witch Hat Cookies!
Print
Oreo Witch Hat Cookies
- Total Time: 15 min
- Yield: About 15 hats 1x
- Diet: Vegetarian
Description
Simple cookies shaped like witch hats using Oreos and chocolate.
Ingredients
- 1 package (14.3 ounces) Oreo cookies
- 1 bag (12 ounces) chocolate chips
- 1 tablespoon shortening
- 1 cup candy corn
Instructions
- Separate the Oreo cookies, keeping the cream filling intact on one half.
- Melt the chocolate chips and shortening together in a microwave-safe bowl in 30-second intervals, stirring until smooth.
- Dip the top (the cookie side) of the cream-filled Oreo half into the melted chocolate, coating it completely.
- Place the chocolate-coated cookie half, chocolate side up, onto a sheet of wax paper. This is the base of the hat.
- Take one candy corn piece and press the wide end gently into the center of the melted chocolate on top of the cookie base. The pointed end should face up, forming the tip of the hat.
- Allow the cookies to set completely at room temperature or briefly in the refrigerator until the chocolate is firm.
Notes
- If the chocolate mixture is too thick, add a few more drops of shortening to thin it slightly.
- Work with a few cookies at a time so the chocolate does not set before you add the candy corn.
- Prep Time: 15 min
- Cook Time: 0 min
- Category: Dessert
- Method: No-Bake Assembly
- Cuisine: American
Nutrition
- Serving Size: 1 cookie
- Calories: 150
- Sugar: 15
- Sodium: 80
- Fat: 9
- Saturated Fat: 4
- Unsaturated Fat: 5
- Trans Fat: 0
- Carbohydrates: 17
- Fiber: 0
- Protein: 2
- Cholesterol: 5
Keywords: Oreo, witch hat cookies, Halloween, no-bake, chocolate, candy corn