
Oh, my goodness, the simple joy of a marshmallow! Remember those squishy, sweet cushions from your childhood? Nothing, and I mean *nothing*, beats the fresh, airy texture of homemade ones. I’m here to tell you that making your own batch of incredible **Stay Puft Marshmallows** from scratch is totally achievable, even if you’ve never touched a candy thermometer before. Once you taste this fluffiness—it’s so much better than the stuff in the bag—you’ll never look back! It’s incredibly rewarding to create something this magical right on your own countertop.
Why You Will Make These Stay Puft Marshmallows Again and Again
I’ve tried every shortcut out there, but these homemade ones just win every time. Forget that slightly stale texture you get from the bag; these are pure, cloud-like excellence. Trust me when I say, once you nail this recipe, you’ll be making them constantly!
- The texture is unbeatable: light, bouncy, and incredibly fluffy.
- They taste infinitely fresher—you really notice the vanilla!
- They are perfect for upgrading your hot chocolate game instantly.
- They aren’t as scary to make as they sound, honest!
Essential Ingredients for Perfect Stay Puft Marshmallows
Okay, let’s talk about what you need to gather up before we even think about turning on the stove. This recipe uses surprisingly few ingredients, but their quality really matters when you’re dealing with pure sugar and gelatin. Make sure your gelatin is fresh because that’s doing all the heavy lifting holding everything up!
Here’s your shopping list for about three dozen marvelous squares:
- Three whole packets of unflavored gelatin
- One cup of cold water, but we use this in two different stages, so pay attention!
- One cup of granulated sugar
- A full cup of light corn syrup
- A quarter cup of water (for the syrup phase)
- Just a tiny pinch of salt
- One teaspoon of pure vanilla extract
- And of course, plenty of confectioners’ sugar for dusting everything down!
Ingredient Notes and Substitutions for Stay Puft Marshmallows
I know some of you might look at the corn syrup and think, “Can’t I just use honey?” Resist that urge! The corn syrup is totally crucial here. It stops the sugar from crystallizing once it gets hot, which keeps your final marshmallows silky smooth instead of gritty. Seriously, don’t skip it.
Also, since gelatin is the backbone of the whole operation, use the unflavored kind, like Knox, and make sure you let it bloom properly in that cold water for ten minutes—don’t rush that part! And since the flavor profile is so simple, splurge a little on really nice vanilla extract. You’ll taste the difference instantly when you’re craving that classic **Stay Puft Marshmallows** flavor.
Equipment Needed to Craft Your Stay Puft Marshmallows
You don’t need a giant candy factory, thank goodness, but a few key tools make this process smooth sailing. The absolute MVP here is your stand mixer—you need that power for whipping for a full 15 minutes! If you don’t have one, don’t worry, your arm will get a workout, but a mixer is best.
You definitely need a reliable candy thermometer too, because guessing that 240 degrees F mark is just asking for trouble. Don’t forget your trusty 9×13 pan! That’s our mold for perfect, fluffy squares.
Step-by-Step Instructions for Making Fluffy Stay Puft Marshmallows
This part looks intimidating, mainly because of the hot syrup, but I promise, just follow my lead and you’ll be fine. First up, get your 9×13 inch pan greased up real good and then dust it generously with confectioners’ sugar. I mean generously—you want a thick, snowy blanket in there! If your stand mixer bowl is glass, you might want to put your gelatin bloom into a metal bowl instead; it helps the heat move through the mixture better later on. Don’t forget to sprinkle that gelatin over the cold water and let it sit and get all wiggly for ten minutes while you deal with the sugar.
Now for the candy thermometer magic! Combine the granulated sugar, corn syrup, that last quarter cup of water, and salt in a saucepan. Stir it over medium heat until the sugar totally dissolves. Once it starts bubbling, you have to stop stirring—this is crucial! You just let it boil until that thermometer screams **240 degrees F**. That soft-ball stage is non-negotiable for your perfect **Stay Puft Marshmallows** texture.
While that syrup is heating, start your mixer on low just to get the gelatin softened up more. Once the syrup hits the mark, turn the mixer speed up a little bit and *slowly* drizzle that molten sugar down the side of the mixer bowl. Be careful, splash zone alert!
The Crucial Whipping Stage for Stay Puft Marshmallows
This is where the volume appears! Once all that hot syrup is incorporated, turn the mixer up to high speed. You need to beat this mixture for a solid 12 to 15 minutes. I know, it feels like forever, but don’t peek or stop it! You’re looking for the mixture to look brilliant white, thick enough to make huge, stiff peaks that stand straight up when you lift the whisk. When it feels cool to the touch and holds form perfectly, then—and only then—beat in your vanilla for the last glorious minute.

Setting and Cutting Your Homemade Stay Puft Marshmallows
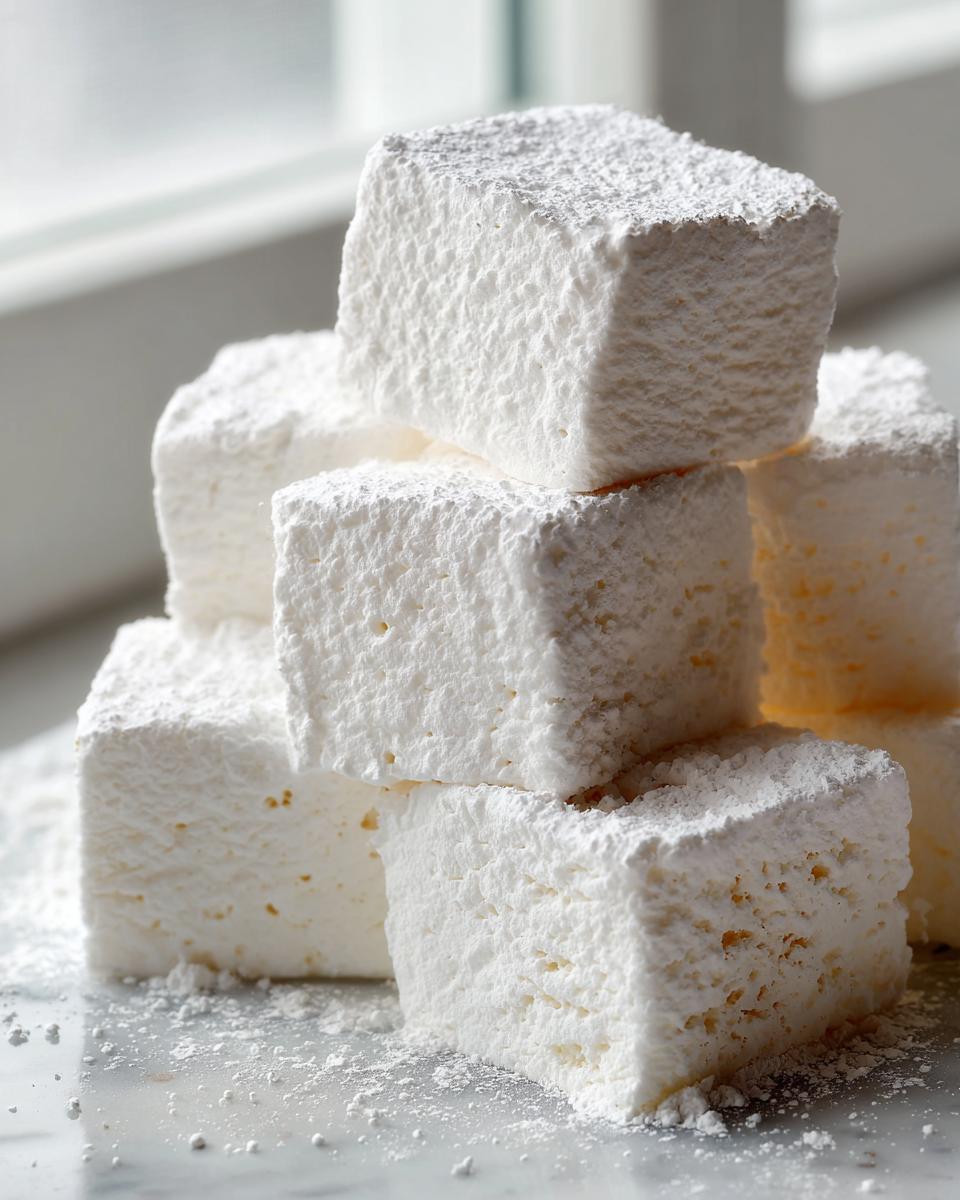
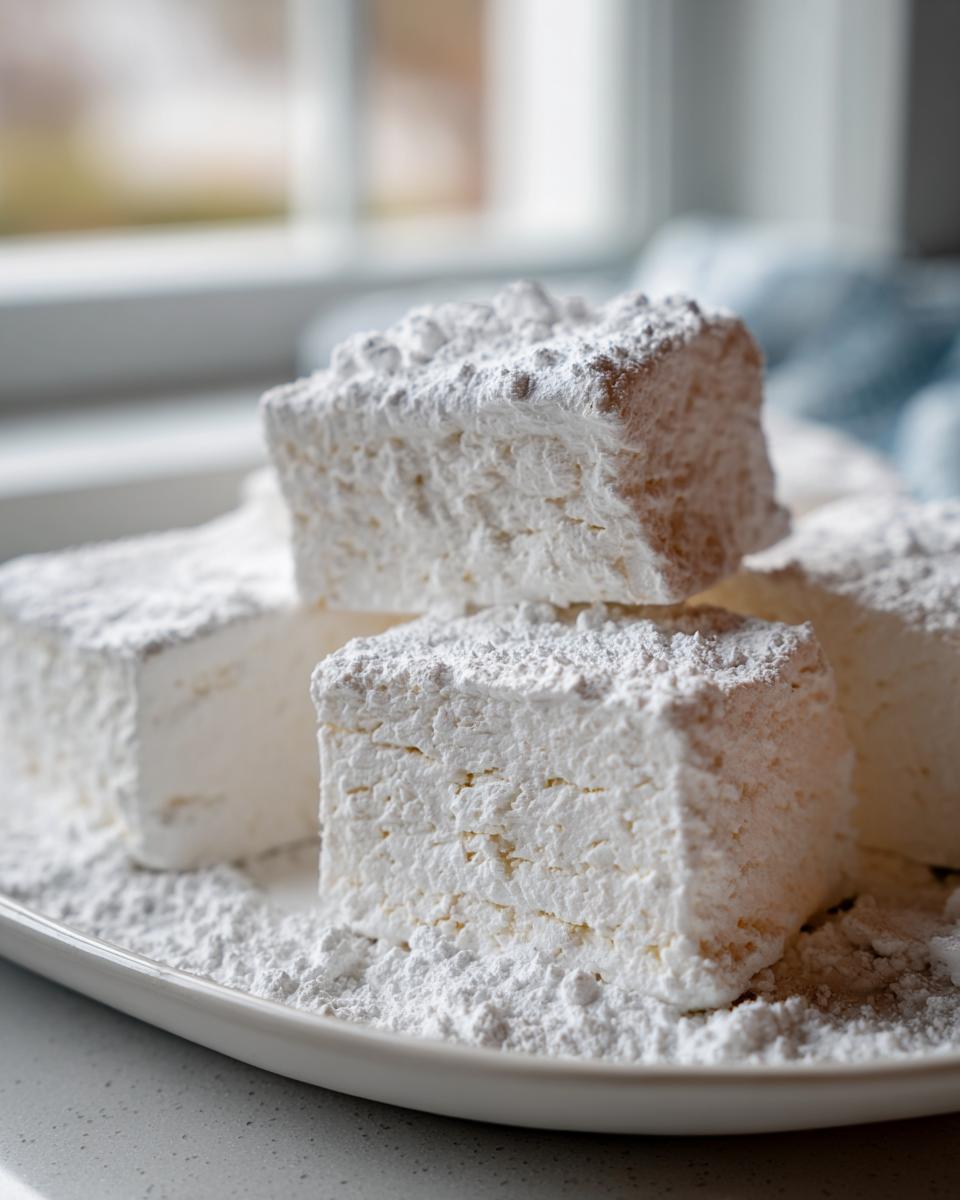
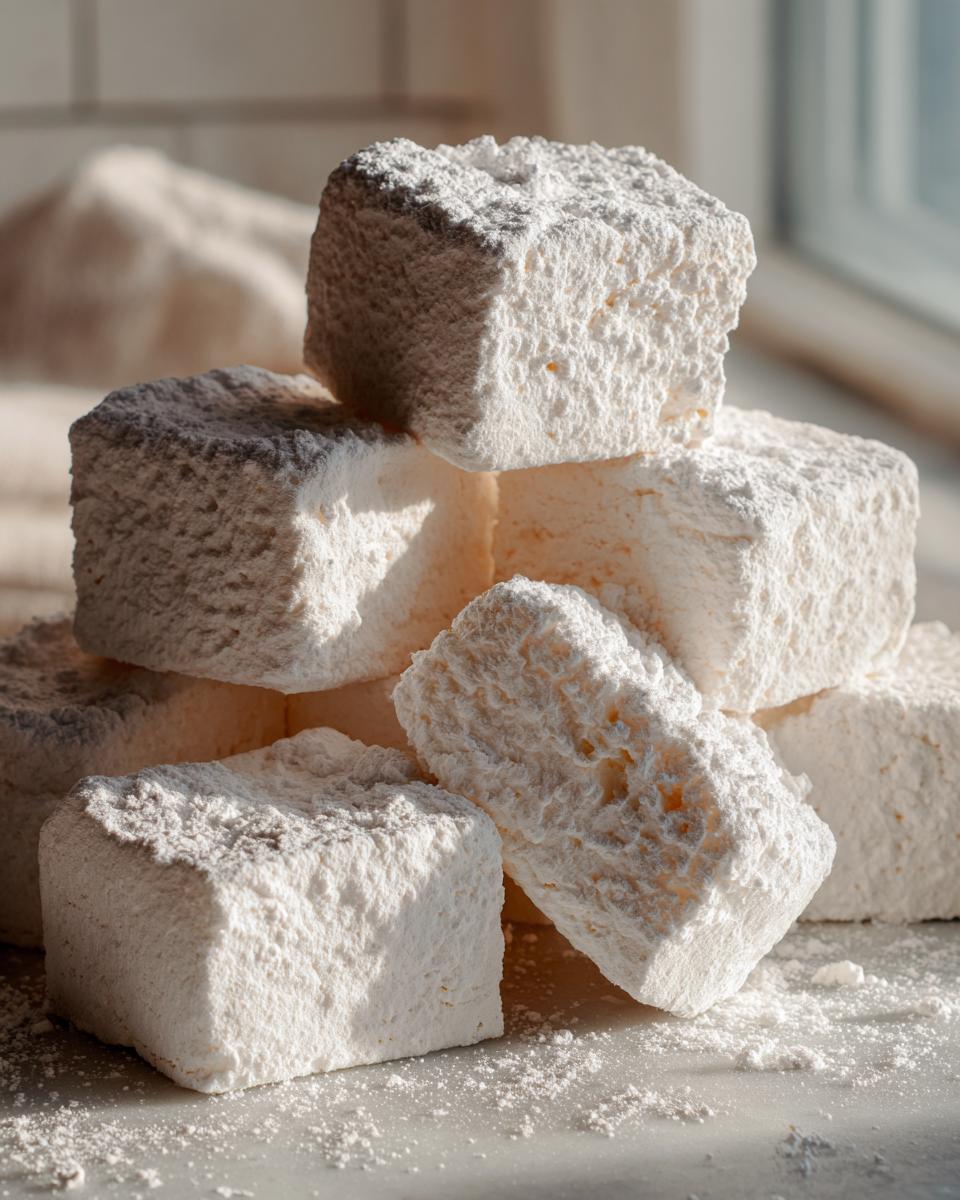
Gently use a spatula to scrape that gorgeous, cloud-like fluff into your prepared pan. Try not to deflate it too much! Dust the top lightly with more confectioners’ sugar. Then, the hardest part: walking away. You need to let these set up completely, ideally overnight, but at least four hours at room temperature. If you try to cut them early, they will turn into sticky soup. When they’re ready, flip the whole block out onto a heavily sugared cutting board. I like running a little bit of neutral oil on my pizza cutter or a very sharp knife; this keeps the edges super clean as you cut them into squares.
Tips for Success When Making Stay Puft Marshmallows
I want your homemade **Stay Puft Marshmallows** to be life-changingly perfect, so let me share a couple of things I learned the hard way. First, humidity is your enemy! If it’s pouring rain outside, maybe wait another day. High moisture in the air makes the marshmallows sticky before they’re even set, which is a total nightmare when you try to cut them.
Also, be super careful when you are streaming that hot sugar syrup into the mixer. You must pour it slowly, right down the side of the bowl, not onto the fast-moving whisk attachment. That hot sugar can seriously burn you if it splatters, so take your time here. Slow and steady wins the fluffy race, I always say!
Creative Variations for Your Stay Puft Marshmallows
Once you’ve mastered the classic white, pillowy look, you’ll feel like you can conquer anything! The basic vanilla recipe for these **Stay Puft Marshmallows** is just the jumping-off point. Think about all the holidays and parties coming up—this is where you get to take creative control!
If you’re making a batch for a winter bonfire, try adding a teaspoon of cooling peppermint extract along with the vanilla in that last minute of beating. They taste amazing dunked into hot chocolate!
For something richer, you can absolutely swirl in some color. I often divide the batter right before pouring it into the pan and mix in a teaspoon of cocoa powder into one half. When you gently layer the vanilla and chocolate mixtures, you get these gorgeous mocha swirls that look fantastic cut into cubes.
- Color Pop: Add a few drops of gel food coloring during the final minute of whipping for vibrant squares—perfect for birthdays!
- Boozy Bits: For an adult treat, soak your small batch of marshmallows in a bit of Kahlua or Bourbon before drying them out—it adds a lovely depth of flavor.
- Fruity Fun: A little bit of citrus zest, like lime or orange, actually works really well too, especially if you pair it with a matching food coloring. It cuts through the sweetness perfectly!
Whatever you choose, remember that intense flavors are better when added near the end of the whipping process. If you try adding strong extracts too early, they sometimes weaken during the long beating time. Try these fun twists, and while you’re dreaming up amazing desserts, check out how I use rich flavors in my chocolate caramel toffee cake recipes!
Serving Suggestions for Homemade Stay Puft Marshmallows
So, you’ve successfully made, cut, and dusted your fluffy squares—congratulations! Now comes the best part: eating them! Honestly, the best way to enjoy homemade marshmallows is ridiculously simple: just eat one straight off the cutting board. It’s warm, airy, and melts almost instantly in your mouth. It’s like eating sweetened air, honestly.
But if you need to share them (and you should!), they truly elevate standard treats. Forget those sad, dry grocery store marshmallows for your next camping trip; these are absolutely mandatory for gourmet S’mores. The way they toast up golden brown and then collapse into gooey perfection is just incomparable.
And, of course, topping a rich, dark hot chocolate is a classic for a reason. If you haven’t tried topping your cocoa with one of these homemade beauties, you are missing out on true winter luxury. I love making mine with a slight cocoa dusting, which looks amazing floating on top of a warm cup. If you want to see how I make my favorite spicy drink to pair them with, check out my recipe for the Italian-style hot chocolate! They look fantastic nestled right alongside homemade cookies too—just pile them high on a platter!
Storage and Reheating Instructions for Stay Puft Marshmallows
Now that you’ve put in all that work, let’s make sure these gorgeous **Stay Puft Marshmallows** last! The good news is they are pretty hardy, but they do have one major nemesis: moisture. Never, ever store these in the refrigerator. I learned that lesson the hard way—the fridge humidity turns them into one giant, sticky goo-brick, and we certainly don’t want that!
Your best bet is keeping them sealed up tight in an airtight container at room temperature. If you dusted them really well with confectioners’ sugar, they hold up beautifully for quite a while. I usually find they are perfect for about three weeks, maybe even closer to four IF your house isn’t too humid!
Can you freeze them? Yes, you absolutely can! If you’re swimming in marshmallows after a big batch, wrap them tightly in plastic wrap first, and then slide them into a freezer-safe bag. They usually last three months frozen, but remember, they’ll likely get a little sticky when they warm up, so you’ll need to toss them in more confectioners’ sugar after thawing.
As for “reheating,” don’t worry about it! These aren’t like bread. You don’t need an oven or microwave. You just bring them out of storage, if they are a little stiff from the cold container, let them sit on the counter for about 30 minutes, and they’ll soften right back up to that perfect bouncy consistency.
Frequently Asked Questions About Stay Puft Marshmallows
I knew you’d have questions! This process involves hot syrup, and that always makes people nervous. Don’t sweat it; I’ve covered all the wobbles and worries folks usually have when making homemade marshmallows for the first time. These answers should get you squared away!
Can I use honey or maple syrup instead of corn syrup?
Oh, I totally get wanting to switch out the corn syrup! It seems like the obvious substitute, but please, don’t! Honey and maple syrup cook differently than corn syrup. If you use them, you risk crystallization, and instead of smooth, fluffy squares, you end up with a slightly grainy, sticky mess. The corn syrup is essential for preventing that sugar from hardening up into rock candy. If you are out of it, I find sometimes you can use golden syrup if you happen to have some lying around, but honey just doesn’t bind the same way.
How do I keep my finished marshmallows from getting sticky?
Stickiness is the number one complaint, but it’s usually easy to fix once you know the secret! First, make sure you generously dust that 9×13 pan before the mixture even goes in. After cutting, you absolutely *must* toss every single side of every cut piece in confectioners’ sugar.
If they are still sticky after that, it usually means they didn’t set quite long enough, or maybe your environment was super humid. If you have to, mix a little bit more confectioners’ sugar with an equal amount of cornstarch, and toss them in that blend. It’s a professional trick to keep everything perfectly dry!
Can I make these tasty Stay Puft Marshmallows without a stand mixer?
Yes, you can, but I’m warning you now—it is a serious arm workout! The recipe calls for whipping the mixture on high for 12 to 15 minutes straight. If you are using a hand mixer, you *must* work in short bursts and let the motor cool down in between, or you’ll burn it out before the peaks form. If you’re doing it by hand with a whisk, start early in the day because you’ll need a break or two! If you’re interested in replacing the thickening agent entirely next time, maybe look into how to make homemade cake flour substitute recipes for different baking projects.
My syrup cooked too fast and went over 240°F! What do I do?
Oops! If your syrup went past 240°F—say, hit 245°F or higher—it’s cooked past the soft-ball stage and is heading toward hard candy territory. If it’s only slightly over, you might still have a usable marshmallow, but it will be much firmer. If it is significantly over, I’m afraid you have to toss the syrup and start over. The temperature is so critical for getting that signature homemade fluffiness!
Nutritional Estimate for Homemade Marshmallows
Okay, look, these are basically pure sugar and gelatin, so let’s not pretend they’re a health food! But because we are using whole ingredients and skipping all those weird stabilizers the big companies toss in, I feel a little better about enjoying a few. If you cut the batch down into those classic small cubes, here’s what the numbers look like for about four of those squares.
Please remember, this is just an estimate based on my recipe measurements. If you use more vanilla or skip the coating sugar, the numbers wiggle a bit. But for reference, here’s the breakdown:
- Serving Size: About 4 squares
- Calories: Roughly 150
- Sugar: Around 30 grams (Yep, that’s what makes them delicious!)
- Total Carbohydrates: About 38 grams
- Protein: 2 grams
- Fat: Zero! That’s one win for us.
So yes, they pack a sweet punch, but they are completely fat-free and feel so much cleaner than any store-bought treat. Enjoy them responsibly!
Share Your Homemade Stay Puft Marshmallows Creations
Now that you’ve conquered gelatin, gotten your syrup to the perfect temperature, and successfully whipped something that defies gravity, I really want to see what you made! Seriously, that shiny, sticky process results in something totally show-worthy, and I bet yours look incredible.
Did you stick to the pure white vanilla flavor, or did you get adventurous with some of those flavor additions we talked about? Tell me everything! Did you use a specialized cookie cutter, or are you a traditional square cutter like me?
If you loved how light and fluffy these **Stay Puft Marshmallows** turned out, please take just a second to give this recipe a rating—five stars if you’re feeling generous! Hearing from you guys helps everyone else feel brave enough to try making candy at home. You can drop your thoughts, your flavor combos, or even just a quick “I survived the candy thermometer!” note in the comments below. Happy fluff-tasting!
Print
Homemade Marshmallows
- Total Time: 4 hr 30 min
- Yield: About 3 dozen 1x
- Diet: Vegetarian
Description
A simple recipe for making soft, fluffy marshmallows at home.
Ingredients
- 3 packets unflavored gelatin
- 1 cup cold water, divided
- 1 cup granulated sugar
- 1 cup light corn syrup
- 1/4 cup water
- 1/4 teaspoon salt
- 1 teaspoon vanilla extract
- Confectioners’ sugar, for dusting
Instructions
- Lightly grease a 9×13 inch baking pan. Dust generously with confectioners’ sugar.
- In the bowl of a stand mixer, sprinkle gelatin over 1/2 cup cold water. Let it sit for 10 minutes to bloom.
- In a medium saucepan, combine granulated sugar, corn syrup, 1/4 cup water, and salt. Heat over medium heat, stirring until sugar dissolves. Stop stirring once it boils.
- Cook the syrup without stirring until it reaches 240 degrees F (soft-ball stage).
- With the mixer running on low speed, slowly pour the hot syrup into the bloomed gelatin mixture.
- Increase the mixer speed to high and beat for 12 to 15 minutes until the mixture is thick, white, and holds stiff peaks. Beat in the vanilla extract during the last minute.
- Pour the marshmallow mixture into the prepared pan. Lightly dust the top with more confectioners’ sugar.
- Let the marshmallow set at room temperature for at least 4 hours, or preferably overnight.
- Once set, turn the marshmallow out onto a surface dusted with confectioners’ sugar. Cut into squares using a lightly oiled knife or pizza cutter.
- Toss the cut pieces in confectioners’ sugar to prevent sticking.
Notes
- You can use a candy thermometer for accuracy when cooking the syrup.
- For flavored marshmallows, add extracts like peppermint or almond with the vanilla.
- Store finished marshmallows in an airtight container at room temperature.
- Prep Time: 20 min
- Cook Time: 10 min
- Category: Dessert
- Method: Mixing/Setting
- Cuisine: American
Nutrition
- Serving Size: 4 squares
- Calories: 150
- Sugar: 30
- Sodium: 25
- Fat: 0
- Saturated Fat: 0
- Unsaturated Fat: 0
- Trans Fat: 0
- Carbohydrates: 38
- Fiber: 0
- Protein: 2
- Cholesterol: 0
Keywords: marshmallows, homemade, gelatin, corn syrup, vanilla, sweet treat