
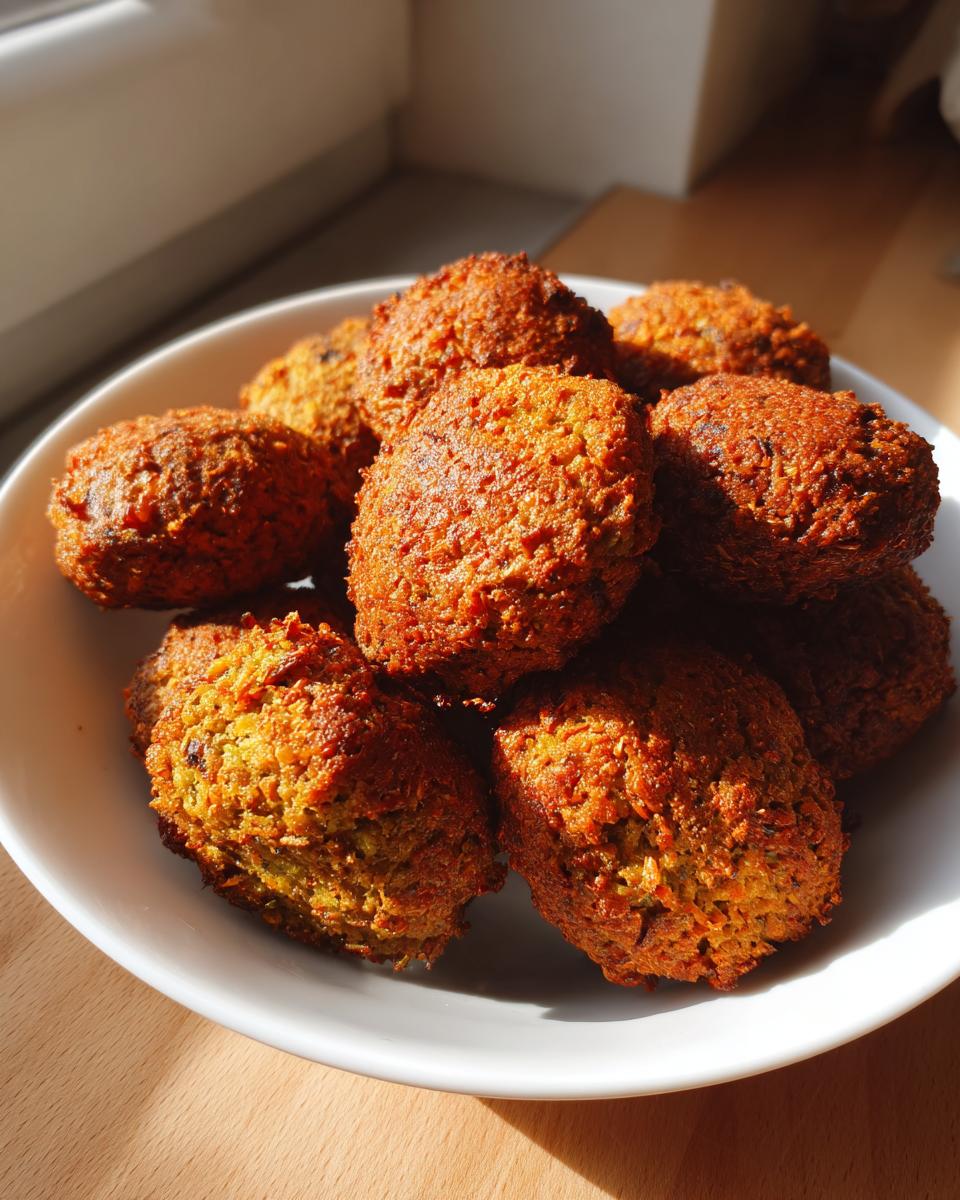
Oh my gosh, if you think you need to stop by that super busy stand on the corner for authentic Middle Eastern food, think again! Making amazing, flavorful Falafel right in your own kitchen is surprisingly simple, and trust me, the texture is miles better than anything pre-made. The secret isn’t complicated tools; it’s just using dried chickpeas soaked overnight—not those sad, mushy canned ones. You get this perfect, slightly crumbly, herby bite that just sings! Seriously, once you try homemade, you won’t go back. It’s totally worth the overnight soak!
Why You Will Master This Falafel Recipe
I know you might be nervous about frying or handling raw chickpeas, but honestly, this recipe is foolproof. I’ve laid it out simply so you can get that real, restaurant-quality flavor without the fuss. You’ll be amazed at how easy it is once you see:
- You get the best internal texture because we’re using dried, soaked chickpeas—no canned shortcuts here!
- The herb-to-chickpea ratio is spot-on, guaranteeing bright, fresh flavor in every patty.
- It comes together faster than you think; just pulse, chill, then fry!
- This recipe tastes so profoundly traditional, your friends will ask where you ordered them from.
Essential Ingredients for Perfect Falafel
This isn’t a recipe where you can just toss in whatever you have sitting around. The flavor really relies on fresh components and, most importantly, the right foundation. Forget the can entirely if you want that wonderfully light, crumbly texture. Believe me, soaking those dried chickpeas overnight is the non-negotiable first step for truly authentic Falafel.
Chickpeas and Herbs for the Falafel Base
The star, as you probably guessed, is the chickpea. You need one full cup of dried chickpeas that have soaked all night long—this softens them just enough so they break apart nicely in the processor without turning into baby food. Then, we pack in the fresh green flavor! I use a hearty half-cup of fresh parsley and a quarter-cup of fresh cilantro. Use what’s bright and vibrant; dried herbs just won’t cut it here for this crucial step!
Spices and Binders for Flavoring Your Falafel
This is where the Middle Eastern magic really happens. We rough chop a small onion and three cloves of garlic, which adds a lovely punch. For the spices, keep it simple but potent: one teaspoon each of ground cumin and coriander—those are the backbone flavors. Don’t forget the seasoning: half a teaspoon of salt and just a pinch of black pepper. Finally, to hold it all together during the pulse and frying stages, we mix in a quarter-cup of all-purpose flour. If you’re going gluten-free, chickpea flour works like a charm, too!
Equipment Needed for Making Falafel
You really don’t need a ton of fancy gadgets for these amazing chickpea patties. I keep things straightforward in my kitchen, and that’s totally possible here! The most important tool you’ll need is a good, sturdy food processor. This is where the magic happens, breaking down those soaked chickpeas and herbs into the perfect coarse mixture.
For the frying part, you’ll need a heavy-bottomed, deep skillet or a Dutch oven—something that holds heat well. And please, make sure you have a decent thermometer to keep an eye on that oil temperature; it makes a huge difference between crispy gold and burnt mush!
Once they are done, you just need a slotted spoon to gently pull them out and a few paper towels to drain off any extra oil. If you’re looking for different ways to mix things, sometimes people use a powerful blender, but I find the food processor gives you that necessary coarse texture. For more ideas on powered processing tools, you can check out some great tips on mixing methods.
Step-by-Step Instructions to Prepare Authentic Falafel
Okay, take a deep breath! This is where the magic happens, but remember, the texture is everything. We aren’t making hummus here; we want fluffy little nuggets, not a wet paste. Follow these steps carefully, especially when you get to the food processor, and you’ll have the best falafel you’ve ever tasted.
Processing the Falafel Mixture
First things first: grab those chickpeas you’ve been soaking all night! Drain and rinse them well—and I mean it, do NOT cook them. We’re using them raw! Toss the chickpeas, along with all those gorgeous fresh herbs, the onion, garlic, and all your spices, into the food processor. Now, here is the crucial part: you must only pulse this mixture! We are looking for a coarse, crumbly dough. If you run the processor too long until it’s smooth, you’ve made mud, not falafel. Stop when it just barely clings together!
Chilling and Shaping Your Falafel Patties
Once you’ve pulsed it perfectly, transfer that crumbly mixture to a bowl and stir in your flour until it’s just barely combined. That flour helps it hold its shape once it hits the hot oil. Cover the bowl tightly—I usually use plastic wrap right over the mixture—and stick it in the fridge. You absolutely must chill this dough for at least 30 minutes. Seriously, don’t skip this; it firms everything up! When you take it out, form your mixture into little patties or balls, about one inch thick. Try to keep them uniform so they cook evenly.

Frying the Falafel to Golden Perfection
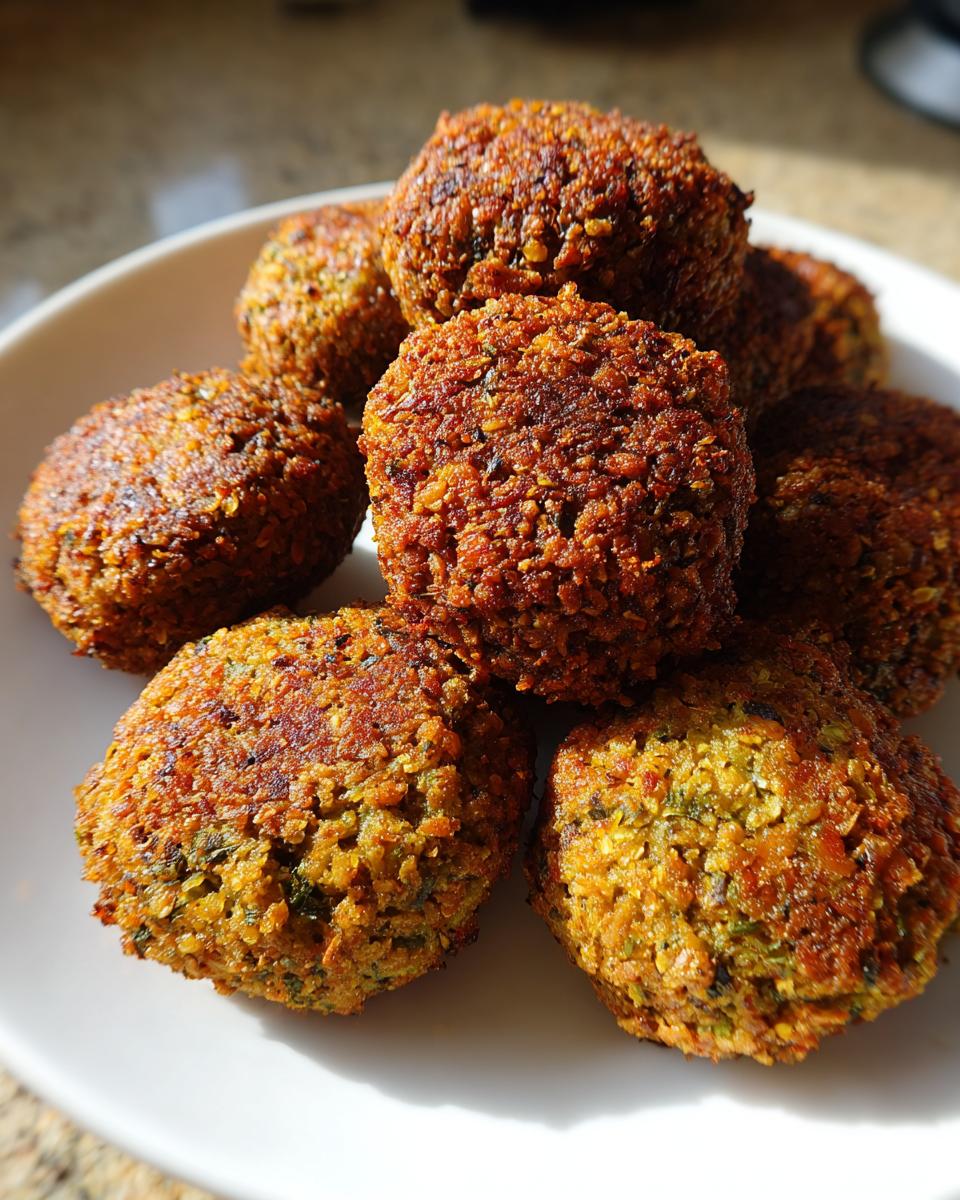
Get your oil going in that deep skillet; you want about two inches deep, and you’re aiming for a steady temperature of 350°F (175°C). Temperature control is key here! Carefully lower your patties into the hot oil, but please, work in small batches. If you overcrowd the pan, the oil temperature drops fast, and you’ll get greasy results. They only need about 3 to 4 minutes per side until they are beautifully golden brown all over. When they float up and look perfectly crisp, scoop them out with a slotted spoon and let the excess oil drip off onto some paper towels. Perfection!
Expert Tips for Success with Homemade Falafel
Now that you know the basic rhythm, let me share the little secrets that elevate these from good to *wow*. These are the things I learned through trial and error, especially that one disastrous batch where I rushed the soaking time!
First, that note about using only dried chickpeas? That is gospel. If you have ever tried using canned chickpeas in a recipe like this, you know they turn immediately to paste in the processor. The texture is just wrong for achieving that signature, slightly sandy interior of a quality Falafel.
Sometimes, even with perfectly soaked beans, the mixture can feel a little too loose, especially if your herbs are incredibly juicy that day. If you squeeze the mixture in your hand and it feels too wet—like it won’t hold its shape well—don’t panic! Just stir in one extra tablespoon of flour. I learned this the hard way; I tried to fry a mushy patty and it just disintegrated into crumbs in the oil. That little bit of extra binder saves the day!
Remember, chilling is your friend. If you get impatient and skip that mandatory 30-minute chill, the mixture heats up and the fat softens, leading to mushy patties that absorb too much oil when frying. Stick with the chilling time; it allows those spices to really bloom, too.
Variations on Classic Falafel
Now, I absolutely adore the crisp, golden crunch you get from frying these Falafel the traditional way. There’s just nothing like it! But let’s be real, sometimes I’m trying to keep things a little lighter, or maybe I am just too lazy to deal with 2 inches of hot oil on a Tuesday night.
For those times, baking is your best friend! It’s a fantastic, healthier variation that still gets you a wonderfully flavorful chickpea patty, just with a slightly different final texture—less intensely crisp on the outside, perhaps, but still delicious and much lower in fat. You get to feel a little better about having three instead of two!
When you switch to baking, you need to adjust your approach slightly. You want to bake these beauties at a pretty hot temperature: 400°F (200°C). Lay your shaped patties on a parchment-lined baking sheet. Yes, you have to line the sheet, or they will stick something awful! They need about 20 minutes total in the oven. Keep an eye on them, though, and make sure you flip them halfway through so they bronze up evenly on both sides. If you are thinking about other veggie alternatives you can crisp up, check out my recipe for easy zucchini fritters for another great oven option!
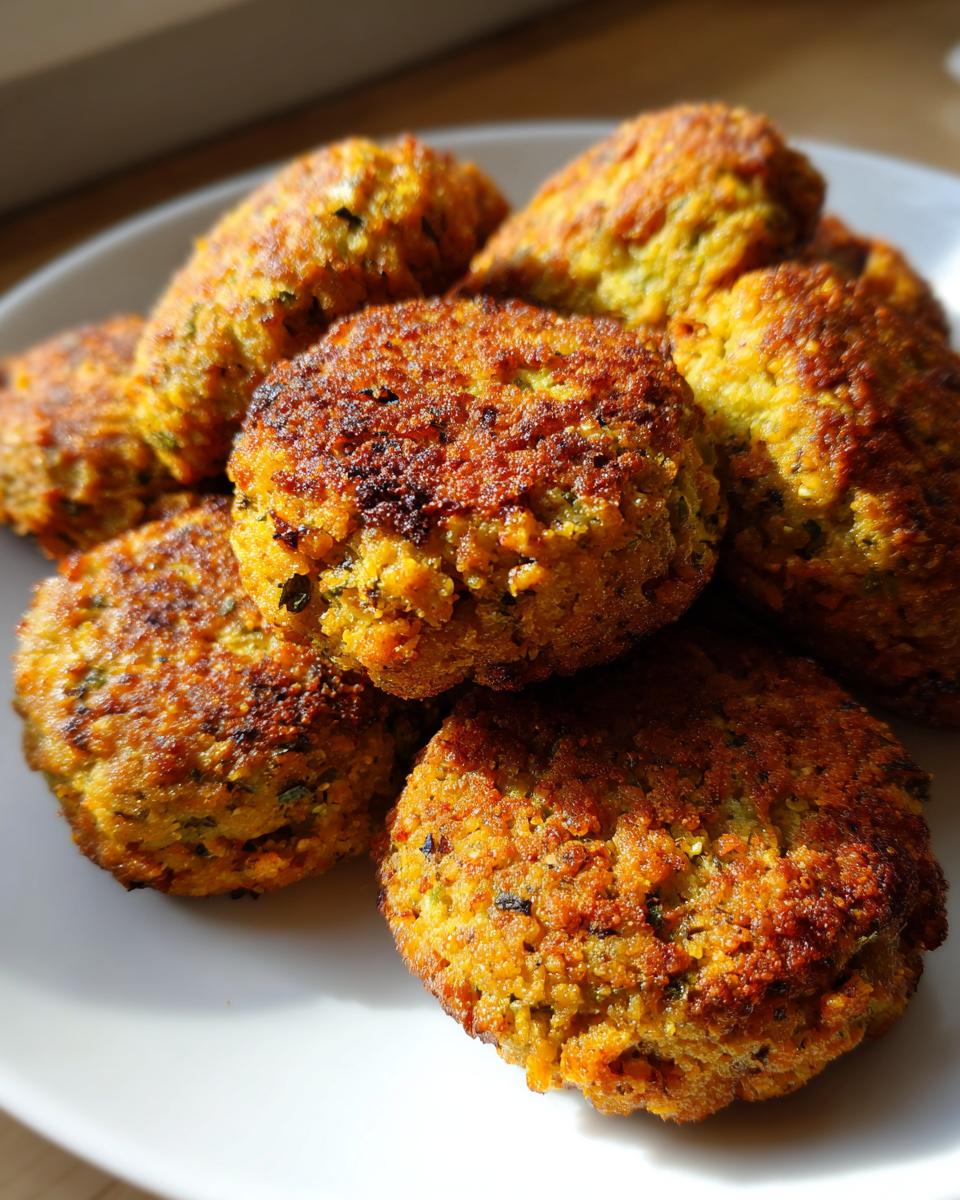
Serving Suggestions for Your Falafel
So, you’ve got these perfectly cooked, golden Falafel patties cooling on the rack—what’s next? This is the fun part where we build the meal! Forget eating them plain (though I totally do sometimes while standing by the counter!). These little flavor bombs belong wrapped up or piled high. You absolutely need warm, soft pita bread. I love making mine fresh, or you can find a great recipe for easy pita bread right here on the blog!
Next, load them up with crisp salad—shredded lettuce, tomatoes, cucumbers, maybe some pickled turnips if you can find them! And the sauces? A drizzle of creamy tahini sauce is mandatory. A dollop of spicy harissa really wakes things up. It’s the perfect vegetarian snack or main dish!
Storage and Reheating Instructions for Falafel
The best thing about making a big batch of these homemade Falafel? Leftovers! Though I always say they taste best fresh out of the oil, they are surprisingly sturdy for planning ahead. If you have too many chickpea patties, don’t sweat it. They store beautifully, provided you give them the right environment.
For simple refrigeration, let the cooked falafel cool down completely first. Pop them into an airtight container layered with a paper towel—that paper towel is doing the heavy lifting of absorbing any residual moisture. They’ll last happily in the fridge for about four days. Just make sure that lid is sealed tight!
If you are thinking long-term, freezing is the way to go. Arrange the fully cooled falafel in a single layer on a baking sheet and pop that sheet into the freezer until they are solid. Once they are hard little nuggets, you can transfer them all to a large zip-top freezer bag. This stops them from sticking together permanently! They freeze great for up to three months.
Now, for reheating—we need to bring back that crispiness! Please, for the sake of deliciousness, avoid the microwave if you can. The microwave turns these gems into sad, steamy blobs. If you want them perfect, use your oven or, even better, your air fryer. Set your oven to about 375°F (190°C) and heat the falafel for about 10 minutes until they warm right through and crisp up again. The air fryer is even faster; usually 5 minutes at the same temp will make them taste oven-fresh!
Frequently Asked Questions About Falafel
I know you probably have a few lingering doubts, especially if you’re new to making these from scratch! Don’t worry, that’s what the FAQ section is for. I’ve gathered the most common things people ask me when they try this recipe for the first time. I want you to feel totally confident whipping up these amazing vegetarian snacks!
Can I use canned chickpeas to make Falafel?
Oh, I get asked this all the time! The short answer is: please don’t if you want the authentic result. Canned chickpeas are already cooked and contain too much moisture and starch. If you try to use them, your food processor will turn the mixture into a smooth, wet paste instead of the coarse, crumbly dough we need for crispy Falafel. You really must use dried chickpeas soaked overnight for that perfect internal texture!
How can I make my Falafel less greasy?
If you are nervous about deep frying, or maybe you just want a lighter meal, remember that baking is a fantastic alternative! It totally works, and you still get a tasty result. For the least greasy option, just follow the baking variation I detailed earlier: 400°F (200°C) for about 20 minutes, flipping them halfway through. It’s much cleaner, and they still crisp up nicely.
What is the best way to serve these chickpea patties?
Honestly, any warm, soft bread is the best vehicle! I always serve them stuffed inside warm pita bread, loaded with fresh salad greens, tomatoes, and cucumbers. Don’t forget the sauces! A good swipe of tahini or a spicy yogurt sauce really finishes the plate. If you’re looking to make everything from scratch, I’ve got a great recipe for easy pita bread that pairs perfectly!
Print
Simple Falafel Recipe
- Total Time: 35 min
- Yield: About 12 patties 1x
- Diet: Vegetarian
Description
Make classic falafel patties from scratch using dried chickpeas.
Ingredients
- 1 cup dried chickpeas, soaked overnight
- 1/2 cup fresh parsley, chopped
- 1/4 cup fresh cilantro, chopped
- 1 small onion, roughly chopped
- 3 cloves garlic
- 1 teaspoon ground cumin
- 1 teaspoon ground coriander
- 1/2 teaspoon salt
- 1/4 teaspoon black pepper
- 1/4 cup all-purpose flour (or chickpea flour for gluten-free)
- Vegetable oil for frying
Instructions
- Drain and rinse the soaked chickpeas. Do not cook them.
- Place the chickpeas, parsley, cilantro, onion, garlic, cumin, coriander, salt, and pepper into a food processor.
- Pulse the mixture until it forms a coarse, crumbly dough. Do not over-process into a smooth paste.
- Transfer the mixture to a bowl and stir in the flour until just combined.
- Cover the bowl and chill the mixture for at least 30 minutes.
- Heat about 2 inches of oil in a deep skillet to 350°F (175°C).
- Shape the mixture into small patties or balls, about 1 inch thick.
- Carefully place the falafel into the hot oil, working in batches. Do not overcrowd the pan.
- Fry for 3 to 4 minutes per side, until golden brown and cooked through.
- Remove the falafel with a slotted spoon and drain on paper towels.
Notes
- For best results, use dried chickpeas, not canned.
- If the mixture is too wet to form patties, add one more tablespoon of flour.
- You can bake these at 400°F (200°C) for 20 minutes, flipping halfway, for a lower-fat option.
- Prep Time: 20 min
- Cook Time: 15 min
- Category: Main Dish
- Method: Frying
- Cuisine: Middle Eastern
Nutrition
- Serving Size: 2 patties
- Calories: 250
- Sugar: 1
- Sodium: 300
- Fat: 15
- Saturated Fat: 3
- Unsaturated Fat: 12
- Trans Fat: 0
- Carbohydrates: 25
- Fiber: 7
- Protein: 9
- Cholesterol: 0
Keywords: falafel, chickpea patties, vegetarian, Middle Eastern food, fried snack