
Oh my gosh, are you tired of the morning scramble? You know the drill: the alarm goes off, you realize you need to actually make something besides toast, and suddenly, your beautiful weekend brunch plans turn into a stressful, messy negotiation over who has to pull out the mixer.
Well, trust me, I have been there since I started hosting holidays—I have perfected the art of breakfast trickery! That’s why this Overnight French Toast Casserole is my secret weapon. You literally assemble this beauty the night before, pop it in the fridge, and walk into the morning like a domestic genius!
It’s all about preparing when you’re calm, so you can rest later. When that golden, custardy dish comes out of the oven, you’ll swear I’m a miracle worker. It’s the easiest, most impressive make-ahead breakfast on the planet, I promise!

Why This Overnight French Toast Casserole is Your New Favorite Make-Ahead Breakfast
Let’s be real; who wants to whisk eggs at 7 AM? Not me! This recipe takes all the work out of the morning, turning a normally frantic breakfast into a relaxing event. It’s the ultimate peace offering to your future self.
- Zero Morning Mess: You mix everything the night before. That’s it! No juggling pans or scrambling eggs right before guests arrive.
- Incredible Texture: Seriously, the soaking time is crucial. It makes the inside unbelievably custardy and light—way better than quick-soak recipes.
- Entertaining MVP: This is perfect when you have people over. You can handle all the prep while enjoying a glass of wine the night before. For more inspiration on entertaining, check out these great ideas for Father’s Day brunch: brunch ideas.
The Magic of Preparing Overnight French Toast Ahead of Time
The reason this is called Overnight French Toast isn’t just a cute name; it’s the secret sauce! Leaving the bread soaking in the egg and milk custard for 8 or more hours lets every single cube fully absorb that spiced liquid. If you rush it, you end up with dry edges and raw centers, which is just a tragedy.
When you do this right, the bread kind of melts into this unified, fluffy blanket of delight. It’s sturdy enough to serve a crowd easily, but it still has that amazing homemade flavor that store-bought mixes just can’t touch. It truly sets you up for a stress-free brunch around here.
Essential Ingredients for Perfect Overnight French Toast
Okay, let’s get down to what actually goes into this magic! The success of your Overnight French Toast really hinges on using good quality basics. I’m not talking about fancy gourmet stuff here, just paying attention to the details. We’re looking for one full loaf, cubed—that usually ends up being about twelve cups of bread, which sounds like a lot, but trust me, it soaks up!
You need six large eggs and two full cups of milk. This ratio is key to getting that beautiful, creamy custard that doesn’t turn into soup overnight. Don’t skimp on the vanilla or those warm spices either; cinnamon and nutmeg are non-negotiable for that classic flavor!
Bread Selection and Custard Components
This is where so many people go wrong! You absolutely must use thick-cut bread. If you use regular thin sandwich bread, it dissolves into mush. I’ve had massive success using challah recently—the slightly denser texture holds up perfectly to the long soak. Brioche is another winner if you want a richer taste. Make sure you cube it relatively evenly, about one or one-and-a-half inches, so everything bakes evenly.
When you mix your custard, it’s about two parts milk to every one egg, visually speaking, which balances out nicely with the two tablespoons of sugar we toss in there. Grease that pan well with melted butter—don’t use cooking spray here; butter adds flavor and helps the edges crisp up just a little bit!
Step-by-Step Instructions for Overnight French Toast
This is where the magic really happens, but remember: the most important step takes place when you aren’t even awake! We need to combine patience with precision here. You want everything saturated just right so you avoid that disappointing crunch on the bottom layer the next day. This recipe gives you enough custard to really soak those cubes, which is what makes it the best *Overnight French Toast* around.
Assembling Your Overnight French Toast Casserole
First things first, grab your 9×13 dish and brush it generously with that melted butter. Don’t skip this; it’s insurance against sticking! Then, arrange your bread cubes so they fill the dish nicely. Try not to just dump them in one towering pile; spreading them out helps them absorb the liquid evenly.
Now, for the custard. You’ve got to whisk those six eggs until they are completely smooth—no streaks of white allowed! Then pour in your milk, vanilla, spices, and sugar. Whisk it again until everything looks perfectly blended. Slowly pour that liquid over your bread cubes. Gently press down on the bread with a spatula to help it all soak in, covering the whole dish tight with plastic wrap before it heads to the fridge for at least eight hours. Honestly, overnight makes it so much better!
Baking and Finishing the Overnight French Toast
Pull that covered dish out first thing in the morning. Set your oven to 350 degrees Fahrenheit. Take off the plastic wrap—the bread should look pretty saturated, maybe a little settled. Pop it in the preheated oven and let it bake for about 40 to 45 minutes. You’re looking for it to be puffed up high and wonderfully golden brown on top. Don’t just pull it out based on the clock, though! Stick a thin knife near the center; it has to come out clean, only showing moist crumbs, not wet batter. Once it passes that test, let it sit on the counter for five minutes before you slice into it. That short rest period lets the structure really settle down so it doesn’t fall apart when you serve it. For more tips on getting that perfect bake, check out how to make thick-sliced French toast: Thick Slice French Toast.
Expert Tips for Next-Level Overnight French Toast
Listen, this recipe is great on its own, but I’ve spent years tweaking it so it comes out flawless every single time—even when I’m distracted by unexpected houseguests! A little insider knowledge really elevates this from good to mind-blowing. We want that perfect, unified texture, not a soggy pile of bread!
Don’t worry if your milk choice isn’t exactly 2% either. I often use whole milk for richness, but I have successfully used 2% milk in a pinch. Just be aware that lighter milk might slightly increase the required soaking time by an hour or so because it absorbs slightly differently than whole milk.
I learned this the hard way a few years back when I tried using those really soft, pre-sliced white loaves you find everywhere. Huge mistake! They disintegrated into a grainy paste by morning. Since then, I stick to hearty bread, or I lightly toast my bread cubes for 10 minutes before cubing and soaking. This little step adds structure, kind of like building a scaffold for your custard! For other casserole inspiration, take a peek at this great recipe: Paula Deen Breakfast Casserole.
Ingredient Substitutions for Overnight French Toast
The bread is the most discussed swap, like I mentioned above. If you opt for a really dense bread like a thick-cut brioche, you might see that it needs those extra few hours to fully penetrate. If it feels heavy the night before, you might want to reduce the milk by just a quarter cup; the bread carries a lot of its own moisture.
When it comes to dairy, skim milk definitely works for your Overnight French Toast, but honestly, you lose some of that luscious richness. If you need to use non-dairy milk—say almond or oat milk—I strongly recommend using the un-sweetened vanilla versions. Just know that oat milk can sometimes thicken the entire mixture slightly more than dairy milk does, so give it an extra good whisk before covering it up!
Serving Suggestions for Your Overnight French Toast
This baked French toast is fantastic straight out of the oven, but it really shines when you dress it up a bit! Since the casserole itself is sweetly spiced and custardy, you want toppings that offer a nice textural contrast or a bit of bright freshness. I always keep a few things on hand specifically for this dish because the cleanup is done, so the toppings are the fun part!
The most obvious and essential topping, as noted in the recipe, is high-quality maple syrup. Don’t grab the pancake syrup that’s mostly corn syrup; get the real stuff! A light drizzle across the warm squares is heavenly. I like to serve mine in individual squares, which makes plating so much easier.
For freshness, you can’t beat a simple bowl of mixed berries—strawberries, blueberries, maybe some raspberries if they look good at the store. The tartness cuts right through the richness of the baked custard. If you want to get fancy, dust the top lightly with powdered sugar right before serving; it looks so professionally done!
Another favorite around here is toasted pecans or walnuts sprinkled over the top right after it cools for five minutes. That crunch against the soft interior is just divine. Honestly, once you try this Overnight French Toast served warm with a little something extra, you won’t go back to pan-frying individual slices, I guarantee it!
Storage and Reheating Your Overnight French Toast
One of the best parts about making this dish ahead of time is that the leftovers are almost as good as the main event! I always make an extra-large batch because my family tends to grab seconds the next day. Don’t fret about storing it; this casserole holds up beautifully in the fridge.
You want to store the leftovers right in the baking dish, but you need to cool the casserole completely first. Once it’s room temperature, cover the whole thing tightly with aluminum foil or a tight-fitting lid if you have one. It will keep wonderfully in the refrigerator for up to three days. Seriously, three full days of easy breakfasts!
For reheating, you have two main options depending on how much you need to warm up. If you’re eating the whole thing, pop it back into a 350-degree oven, covered with foil, for about 15 to 20 minutes. Covering it keeps it from drying out while it heats through evenly.
Reheating Individual Servings of Overnight French Toast
If you’re just grabbing a slice or two in the morning, the microwave is your friend, but you have to be careful! Microwave reheating can sometimes turn the edges tough or rubbery. To prevent that, reheat one slice at a time on a microwave-safe plate for about 45 seconds. If it’s still a little cold in the middle, add 15 more seconds.
For the absolute best texture when reheating a single piece, I like to use my toaster oven! Pop a square in there on a low setting—maybe 300 degrees—for about 8 minutes, turning halfway through. It crisps up the top layer just like it was fresh from the oven this morning, giving you that perfect bite.
Can You Freeze Overnight French Toast?
Yes, you absolutely can freeze this! If you know you won’t get to the leftovers within three days, freezing is a lifesaver. Once the casserole is completely cooled, you can slice it into individual servings or keep it whole. Wrap each piece tightly in plastic wrap first, then slide the whole thing into a heavy-duty freezer bag.
It keeps perfectly fine in the freezer for up to two months. When you want to eat it, transfer the frozen portion to the fridge overnight to thaw most of the way. Then, reheat it in the oven as mentioned above, adding an extra 10 to 15 minutes to the baking time since you are starting from a cooler temperature. It tastes just as good, making that future breakfast stress-free too!
Troubleshooting Common Overnight French Toast Issues
Even with the best planning, sometimes things go a little sideways in the oven, right? Don’t panic if your beautiful Overnight French Toast doesn’t look exactly like the professional pictures right away. Cooking is all about reacting to what the food tells you, and this casserole is no exception. Most issues boil down to temperature or moisture control, which are easy fixes!
If you pull your casserole out and the knife comes out wet right in the center, your first instinct might be to turn the heat up, but trust me, fight that urge! High heat blasts the outside while leaving the inside uncooked. If the center is wet, it likely just needs more time at the original 350 degrees. Just put it back in, maybe tent it loosely with foil to protect the edges from burning, and give it another 5 to 10 minutes.
My biggest past mistake was placing the casserole dish on the very top rack. That exposed the top too closely to the heating element, and it went from perfect to burnt in about four minutes flat! If your top is looking dark brown but the center is still struggling, move your rack down to the middle position. That ensures heat encircles the dish more evenly.
What If My Overnight French Toast Is Drying Out on Top?
This happens if your bread cubes weren’t fully submerged the night before, or if you left the casserole uncovered in the oven. The solution is super simple: foil tenting! As soon as you notice the top looking too dark or crusty—usually around the 30-minute mark—grab a sheet of aluminum foil and drape it loosely over the entire dish.
This deflects the direct heat from the top element but still allows the heat to penetrate centrally, finishing the baking process without scorching those beautiful spiced edges. You can leave the foil on until the knife test confirms the center is done.
Why Are My Edges Crispy But My Middle Soggy?
This is a classic sign of inconsistent soaking, or maybe you used a bread that was just too soft, like standard sandwich bread (we talked about why we avoid that!). If this happens, move the casserole to a lower oven rack, as I mentioned. That lower positioning allows the residual cool custard sitting in the middle to warm up and absorb better before the dry heat sets the outside too firmly.
Another thing to check is the custard ratio. If you accidentally used too much milk, the bread simply can’t absorb it all evenly. If you suspect this, let it sit on the counter for an extra 30 minutes before baking, even after the overnight soak, to see if the bread will miraculously soak up a bit more liquid!
Frequently Asked Questions About Overnight French Toast
You know I get asked the same things over and over about this recipe because people are always trying to squeeze it into their busy schedules! It’s great that you’re asking questions because it means you want this Overnight French Toast to turn out perfectly. Let me clear up a few common concerns I hear about the timing and ingredients!
Can I skip the overnight chilling time for this Overnight French Toast?
Oh, you absolutely can try, but please don’t say I didn’t warn you! If you try to make this as a quick *baked French toast* recipe the same day, the bread doesn’t have nearly enough time to absorb that custard properly. You end up with this weird texture where the top is dry and the middle is basically raw, eggy bread slime. No thank you! The entire point of a make-ahead breakfast is letting the liquid work its magic slowly overnight.
What is the best bread to use for Overnight French Toast?
Again, the bread choice is huge for this recipe! You want something sturdy that can handle being totally saturated without breaking down. My number one choice is challah—it’s already a bit rich and thick. Brioche is a close second. A fantastic trick, though, is slightly stale bread. If your loaves are fresh, I suggest cubing them and letting them sit out on the counter, uncovered, for a few hours before you mix the casserole. That slight dryness helps them absorb the custard without turning mushy while baking. If you’re looking for other fun ways to use bread for breakfast, check out these pancake poppers!
Can I leave the casserole out on the counter instead of the fridge overnight?
Absolutely not! That’s a huge food safety concern. Since this recipe contains raw eggs and milk, it has to stay refrigerated once assembled. You don’t want to risk food poisoning just to save putting the dish away after dinner. Always cover it tightly with plastic wrap and keep it chilled until you are ready to bake it the next morning. Safety first, always!
Nutritional Estimates for Overnight French Toast Casserole
Now, listen up, because I know some of you are tracking calories or macros, and that’s totally fine! But I have to keep it real with you: the exact nutritional breakdown for this Overnight French Toast casserole is tricky. We aren’t using store-bought mixes or pre-measured tubs of anything, right?
The final numbers depend entirely on the type of bread you use—is it regular white bread, or are you splurging on rich brioche? Are you using 2% milk or whole milk for the custard? Even the brand of maple syrup you drizzle on top throws everything off!
Because this recipe is so adaptable, I don’t want to give you numbers that might send you down the wrong path. I always suggest grabbing the nutritional information for your specific loaf of bread and your chosen milk, then plugging those into an online calculator if you need a precise measurement per serving. Trust me, focusing on how amazing and stress-free your morning is will do more for your well-being than worrying about the exact calorie count!
Print
Overnight French Toast Casserole
- Total Time: 60 min
- Yield: 8 servings 1x
- Diet: Vegetarian
Description
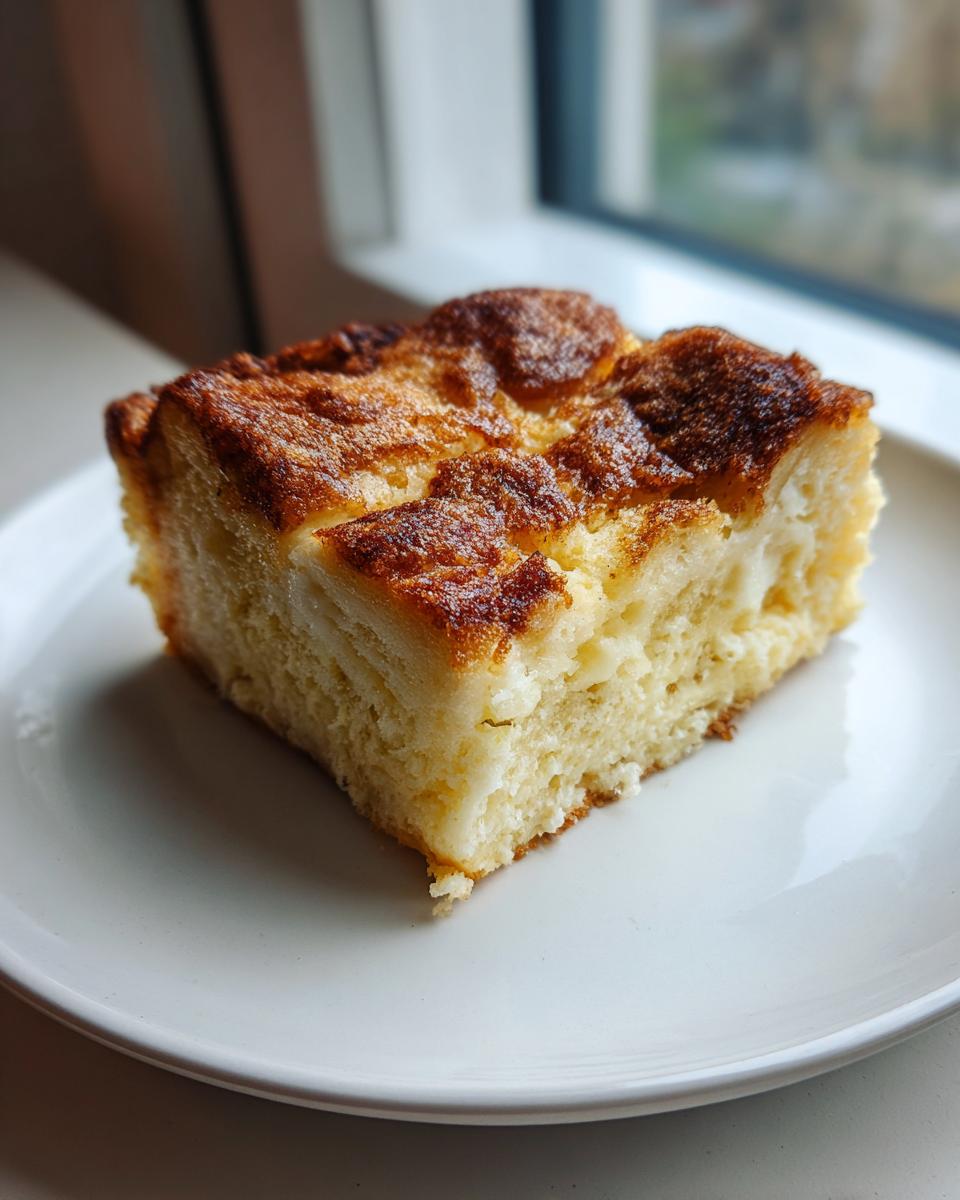
Prepare this French toast casserole the night before for an easy breakfast or brunch.
Ingredients
- 1 loaf (about 1 pound) thick-cut bread, cubed
- 6 large eggs
- 2 cups milk
- 1 teaspoon vanilla extract
- 1/2 teaspoon ground cinnamon
- 1/4 teaspoon ground nutmeg
- 2 tablespoons granulated sugar
- 1 tablespoon butter, melted (for greasing)
Instructions
- Lightly grease a 9×13 inch baking dish with melted butter.
- Arrange the cubed bread evenly in the prepared baking dish.
- In a large bowl, whisk together the eggs, milk, vanilla extract, cinnamon, nutmeg, and sugar until well combined.
- Pour the egg mixture evenly over the bread cubes.
- Cover the dish tightly with plastic wrap.
- Refrigerate for at least 8 hours, or preferably overnight.
- The next morning, preheat your oven to 350 degrees Fahrenheit (175 degrees Celsius).
- Remove the plastic wrap.
- Bake for 40 to 45 minutes, or until the casserole is puffed and golden brown and a knife inserted near the center comes out clean.
- Let stand for 5 minutes before serving.
Notes
- Serve with maple syrup or fresh fruit for topping.
- You can substitute brioche or challah bread for standard white bread.
- Prep Time: 15 min
- Cook Time: 45 min
- Category: Breakfast
- Method: Baking
- Cuisine: American
Nutrition
- Serving Size: 1 slice
- Calories: 250
- Sugar: 8
- Sodium: 300
- Fat: 10
- Saturated Fat: 5
- Unsaturated Fat: 5
- Trans Fat: 0
- Carbohydrates: 32
- Fiber: 1
- Protein: 12
- Cholesterol: 100
Keywords: Overnight French Toast, French Toast Casserole, make-ahead breakfast, baked French toast, easy brunch