
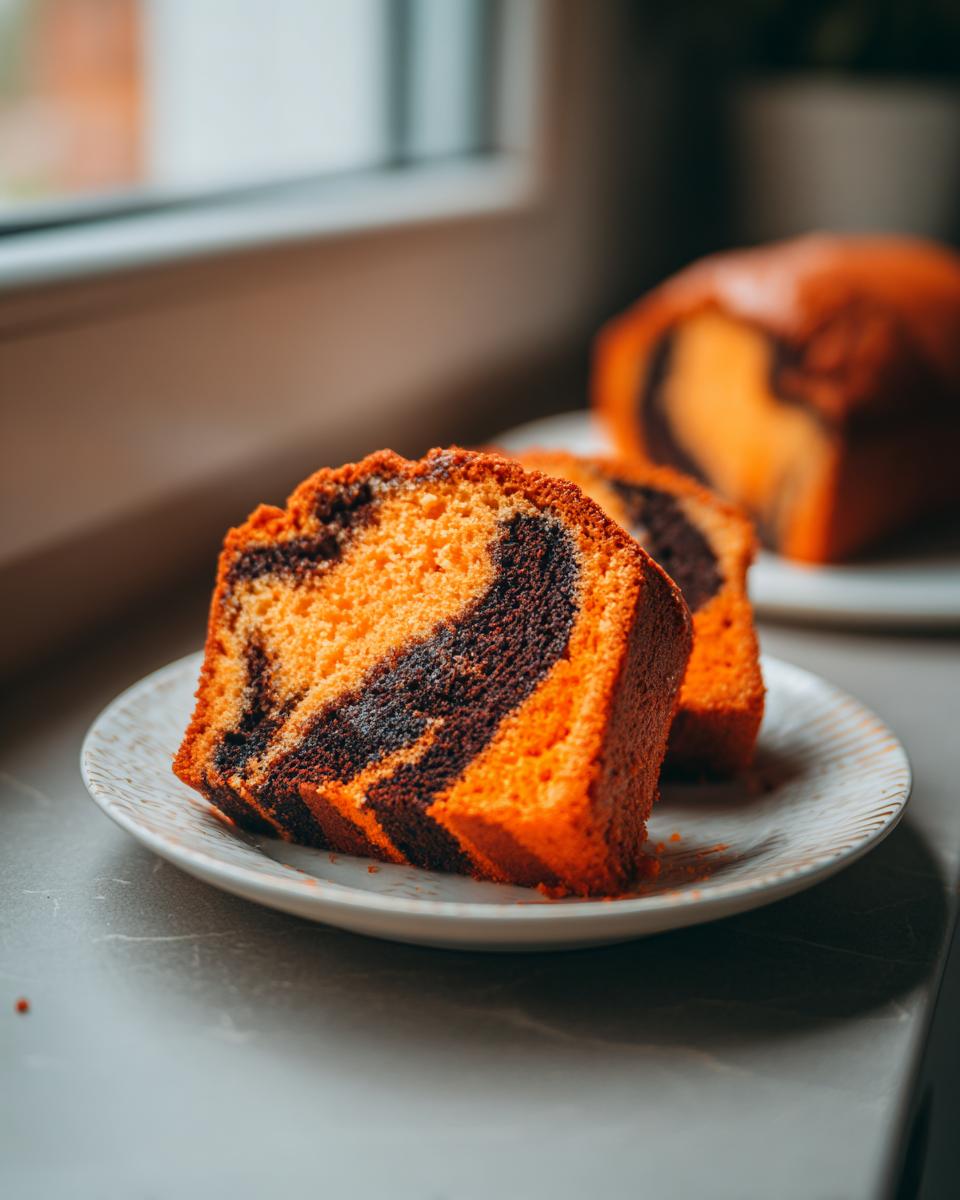
Oh, Halloween baking! It’s secretly my favorite holiday to be in the kitchen. Forget the heavy pies or complicated cookies; when October rolls around, I need something that screams spooky fun without demanding hours of my life. That’s why the Orange And Black Halloween Marble Cake is my number one secret weapon. Trust me, the kids go absolutely wild for the dramatic swirls, and honestly, it takes barely any extra effort compared to a plain vanilla cake. I’ve been making this specific cake for school parties and neighborhood gatherings for years because it always looks like I spent hours on it—when in reality, it comes together faster than you can carve a pumpkin! The flavor is perfectly simple vanilla, letting those vibrant colors really steal the show.
Why This Orange And Black Halloween Marble Cake is Your Holiday Must-Bake
When you’re juggling costumes, candy buckets, and carving timers, you need a dessert that delivers big impact with low stress. This marble cake is the hero your Halloween table needs. It’s incredibly reliable, and you don’t need to be a pastry chef to make it look amazing. It’s just so satisfying when a relatively easy vanilla batter transforms! If you’re looking for more easy wins in the baking department, you should seriously check out how simple an easy dump cake can be too.
Perfectly Simple Marble Effect for Beginners
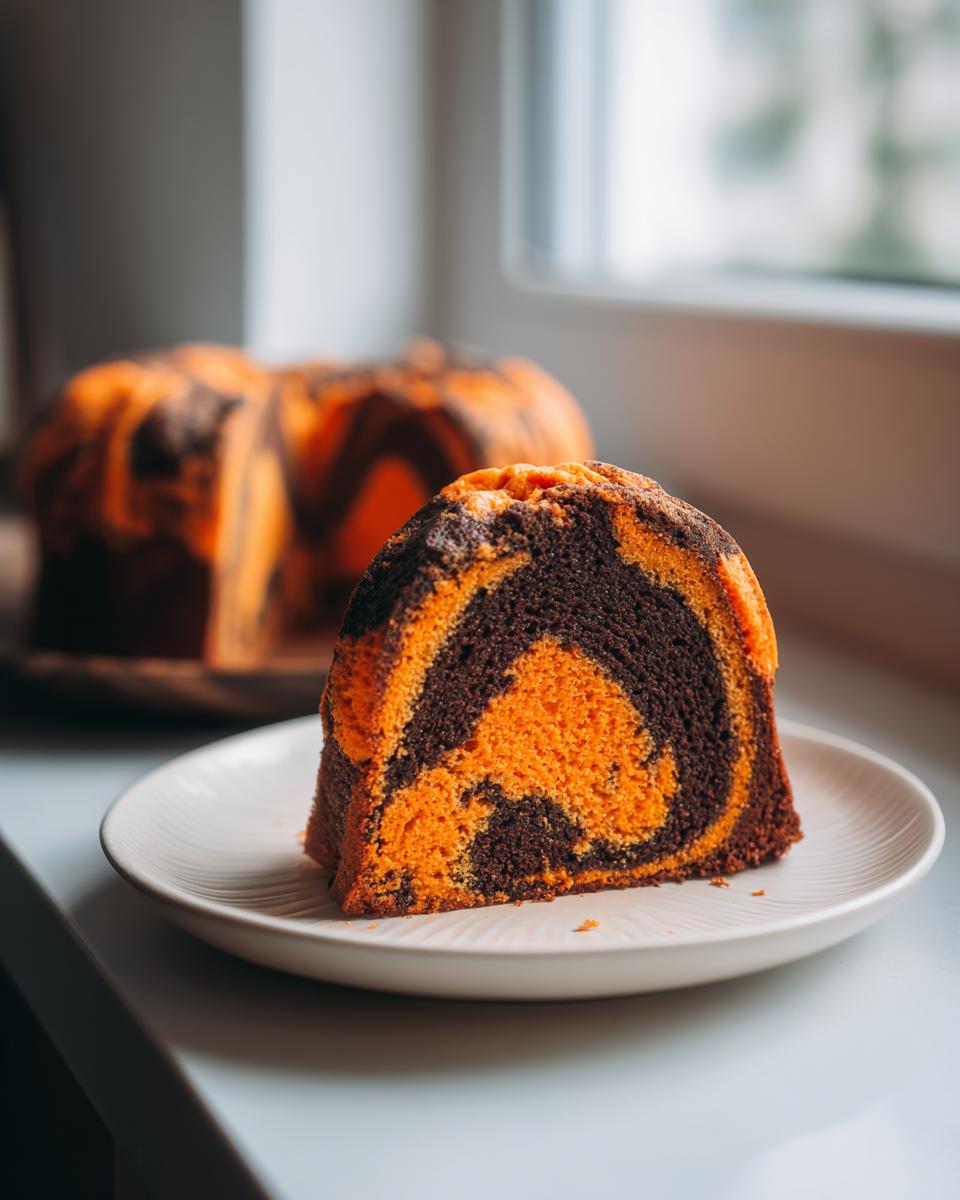
Listen, swirling batter sounds intimidating, but it’s not! We aren’t trying to create perfect little rivers of color; we just gently lay the white, orange, and black dollops in the pan and give it a quick jab with a knife. It’s virtually impossible to mess up this marble effect. The colors blend just enough in the heat of the oven to look intentionally spooky, not messy. That’s the magic of the Orange And Black Halloween Marble Cake—maximum visual payoff for minimum skill required.
Vibrant, Festive Orange and Black Colors
Let’s be real, almost everything tastes better when it’s neon orange and black in October. This cake looks fantastic naked, but even better under a thin coat of plain vanilla icing. It immediately sets the mood for a party or a cozy movie night. The contrast between that bright Halloween orange and deep black means this Orange And Black Halloween Marble Cake is instantly recognizable as holiday fun. It’s the perfect centerpiece!

Essential Ingredients for Your Orange And Black Halloween Marble Cake
Okay, gathering your supplies is the next crucial step before we mix up this gorgeous Halloween treat. While the colors are the star of the show, the foundation of this cake is a super simple, reliable vanilla base. It holds up beautifully to the addition of food coloring without getting weird or dense. Think of this as a super-charged yellow cake base, which is why I always start with good quality ingredients. If you’re ever interested in a different kind of classic base, my friend’s homestyle yellow cake recipe is fantastic, but for this marble effect, we stick to the basics.
You’ll need:
- 1 1/2 cups all-purpose flour
- 1 1/2 teaspoons baking powder
- 1/2 teaspoon salt
- 1/2 cup unsalted butter, softened (this is important!)
- 1 cup granulated sugar
- 2 large eggs
- 1 teaspoon vanilla extract
- 1/2 cup milk
- Orange food coloring
- Black food coloring
Ingredient Notes and Substitution Tips
A little advice here—make sure that butter is truly softened, meaning you can press your finger into it easily without it melting or becoming greasy. The same goes for your eggs; room temperature eggs mix way better into that creamy butter mixture. Now, about the colorants! The cocoa powder trick sometimes used in other marble cakes won’t work here because we need those vibrant orange and black layers. I always recommend using gel food coloring if you can find it. It’s much more concentrated than the liquid droppers, so you get that deep, spooky hue without adding too much extra liquid to your delicate batter. If you only have liquid, just add a little more orange or black drop by drop until you love the shade!
Step-by-Step Instructions to Make the Orange And Black Halloween Marble Cake
Alright, this is where the magic really starts! Don’t let the steps scare you; we’re just tackling one small task at a time. If you follow these steps exactly, your Orange And Black Halloween Marble Cake will be a showstopper. I always like to have my pan greased and my oven hot before I even start mixing the wet stuff. For anyone looking for a vanilla base that bakes up beautifully, check out these tips for making a great yellow birthday cake—that method is basically what we’re using here!
Preparing the Dry and Wet Components
First things first, get that oven preheated to 350°F (175°C) and grease and flour your 9-inch round pan. You don’t want any sticking later! In a medium bowl, whisk together the flour, baking powder, and salt. Set that aside—it’s our dry mix. Now grab your big bowl for the creaming step: beat that softened butter and sugar until it’s genuinely light and fluffy. This takes a minute or two, but don’t rush it; that air makes the cake light! Then, beat in your eggs one at a time, really mixing after each one, and stir in the vanilla. Finally, we slowly add the dry ingredients alternating them with the milk. Seriously, mix until it’s *just* combined. Overmixing now means a rubbery cake, and we absolutely do not want that.
Coloring and Creating the Orange And Black Halloween Marble Cake Batter
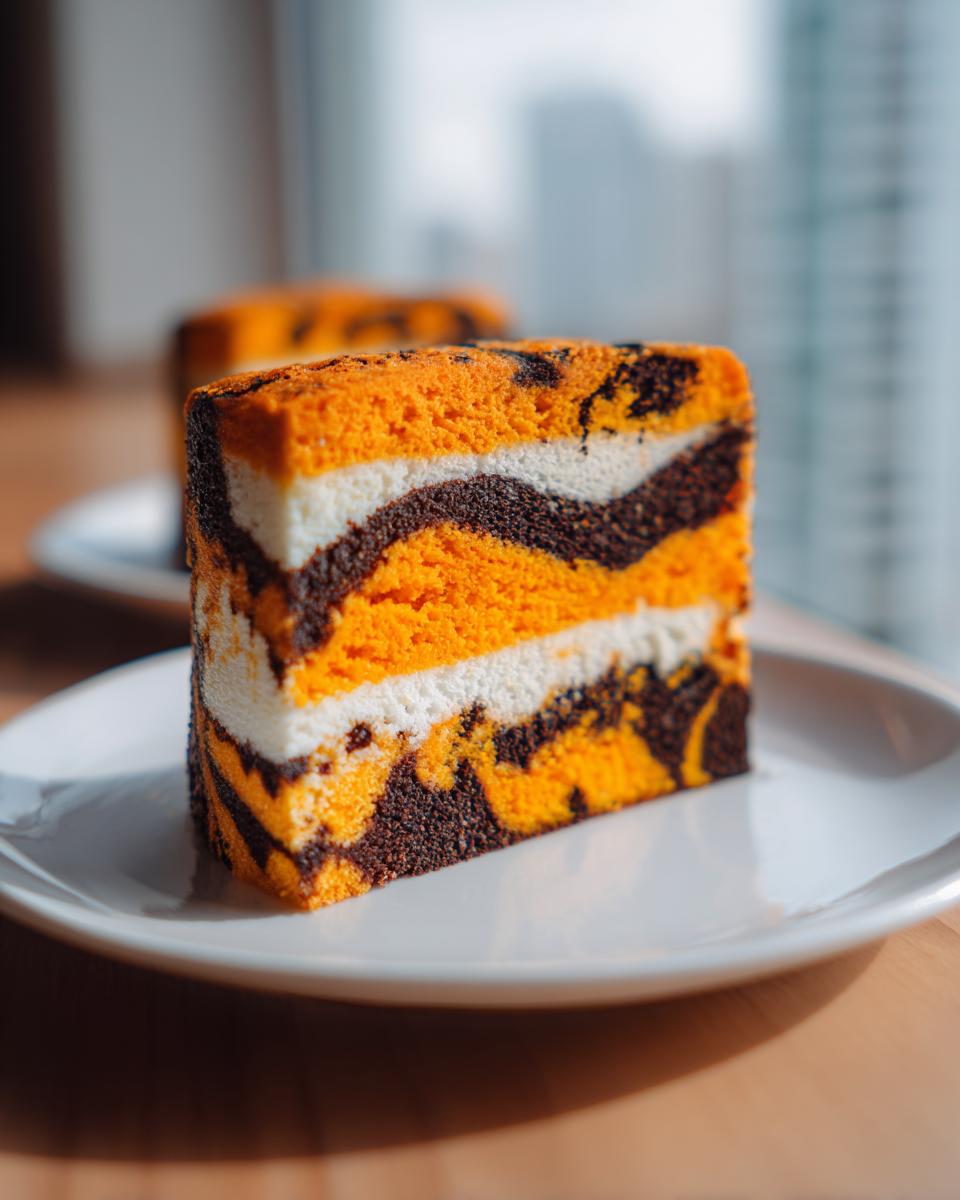
Stop right there! Now that you have your perfectly mixed pale batter, take a deep breath and divide it evenly into three separate bowls. One bowl stays plain white, which is going to be your beautiful base color! To the second bowl, add drops of orange food coloring. Mix that gently until the color is totally uniform. Then, hit the third bowl with your black coloring. Again, mix until that deep black is even. You want three distinct piles of color representing spooky Halloween fun!
Marbling and Baking the Orange And Black Halloween Marble Cake
Time to assemble our masterpiece! You’re going to layer the color by spooning alternating dollops of the white, orange, and black batters straight into your prepared pan. Don’t think too hard about placement; random is good! Once all the batter is in, take a knife or, if you have one, a long skewer, and run it through the different colors just once or twice. You only want to swirl gently! If you over-swirl, you’ll just get gray mud, and we want defined orange and black lines. Slide that pan into the oven for about 30 to 35 minutes. Test it with a wooden pick—if it comes out clean, it’s done! Let it cool in the pan for about 10 minutes before flipping it out onto a wire rack to finish cooling completely. Patience during cooling is key!
Tips for a Flawless Orange And Black Halloween Marble Cake
Even though this Orange And Black Halloween Marble Cake is super easy, there are two little tricks I rely on every time to make absolutely sure it looks perfect when I slice into it. These aren’t in the recipe steps, but they are my personal gold standards for foolproof marbling!
First up, the biggest mistake people make is over-swirling. I know it’s tempting to keep dragging that knife through the batter to see the colors, but resist! You only need a couple of slow passes—maybe a figure-eight motion across the entire top—and then stop. If you blend too much, I promise, your beautiful orange and black will just turn into a dull, muddy brown. We want defined contrasts for the Halloween look, remember?
Secondly, make sure your batter isn’t too thin when you go to color it. If your base vanilla batter feels a bit loose, that extra liquid from the food coloring can thin it out even more, causing the colors to bleed into each other way too quickly during baking. If you’re using gel colors, this isn’t a problem, but if you are leaning on the liquid drops, maybe pull back just a tiny bit on the milk when mixing the main batch. You can always add a splash more, but you can’t take it out!
When it comes to finishing this beauty, the provided notes mention frosting possibilities, and here’s my take: You can go wild! A simple vanilla or cream cheese frosting is always reliable. But for maximum Halloween impact, try this: don’t frost the whole cake. Just spread a thin, stark white layer of cream cheese icing over the top, and then sprinkle half of it with black sanding sugar or a few dark chocolate shavings, and the other half with bright orange sprinkles or zest. It keeps that gorgeous marbled interior visible while giving you a fun, festive topping. If you want to dive deeper into making sure your vanilla layers are perfect before you color them, you absolutely have to read up on the secrets in this vanilla cake secrets guide!
Serving Suggestions for Your Halloween Cake
Once your gorgeous Orange And Black Halloween Marble Cake has cooled completely—and I mean completely, no warm slices allowed, or frosting will slide right off!—it’s time to think about presentation. The cake itself is so visually busy from the marbling that it honestly doesn’t need much fuss, which is another reason I love it for busy holidays like Halloween. It looks fantastic just sitting on a plain white platter!
But if you want to lean into the holiday theme a bit more without wasting time on complex decorations, I have a few no-fuss pairing ideas that really make the orange and black pop. For me, the simplest garnish is the most effective when the cake already does the heavy lifting.
First, consider a dusting of powdered sugar, but only in specific areas. After you’ve applied your glaze or frosting, use a fine-mesh sieve and dust lightly over the top edge only, creating a sort of spooky, snowy look. This contrasts beautifully with the dark black swirling underneath!
If you want something richer to serve alongside it, try pairing a slice with a scoop of vanilla bean ice cream. The cold, creamy white looks stunning next to the dark, festive cake slice. You could even drizzle a tiny bit of melted dark chocolate over the plate just before serving—it looks artful, and dark chocolate is always the perfect match for a vanilla base, even one this colorful.
I also love to add a little bit of citrus to the plate to hint at that lovely flavor profile, even though this is strictly a vanilla cake. A few thin slices of fresh orange or even a small sprig of rosemary makes the whole platter look more sophisticated. It just elevates the entire dessert.
If you are looking for something slightly less sweet for a morning-after treat, this cake pairs surprisingly well with coffee. Honestly, it’s almost like a dessert coffee cake when served warm with a hot brew. If you ever want to see how they take a similar vanilla base and lean into the coffee flavor, check out my favorite coffee cake recipe sometime!
Storage and Reheating for the Orange And Black Halloween Marble Cake
We need to make sure this spooky masterpiece lasts past Halloween night, right? A cake this good shouldn’t just disappear in one day! How you store it really depends on whether you’ve frosted it yet. Since this is a simple vanilla base without a lot of heavy, perishable fillings, we have a couple of easy options.
If you’ve decided to leave your Orange And Black Halloween Marble Cake totally bare—no icing, no glaze—it’s super durable. Just wrap the cooled cake tightly in plastic wrap, making sure you eliminate any air pockets. You can keep that wrapped cake on the counter at a cool room temperature for about three days. Honestly, it tastes best on day two! I find the moisture settles in overnight, making the crumb even better.
Now, if you went wild with that cream cheese frosting I suggested earlier, things change slightly. Dairy-based frostings don’t love sitting out on the counter for days, especially if your house is warm from the oven or the heating is cranked up for October! In that case, once the cake is completely cool—and I mean no residual heat at all—you need to cover it or pop it into an airtight container and move it straight to the refrigerator. It will keep beautifully for up to five days in the fridge.
If you do refrigerate it, though, remember that cold air zaps moisture from baked goods! Before you plan to serve those slices the next day, you absolutely have to bring it back to life. Don’t try to serve cold marble cake; it tastes dense and flat. Pull the cake out of the fridge about an hour before you plan to slice it. Letting it come up to room temperature allows the butter and crumb to soften up again, rejuvenating that lovely vanilla flavor. If you’re in a huge hurry, you can slice off individual servings and microwave them for just 10 to 15 seconds, but letting the whole thing warm up slowly on the counter is always my preference for the best texture!
Frequently Asked Questions about the Orange And Black Halloween Marble Cake
I get so many questions after I post pictures of this cake around Halloween! It’s clear everyone wants that festive look without the fuss. If you’re worried about timing or making those colors pop, don’t stress. Most questions I get revolve around keeping the colors distinct or making sure the cake isn’t too heavy since we are dividing the batter into three parts. If you’re curious about making a loaf version, check out this marble loaf cake guide for alternate baking times!
Can I use natural coloring instead of food dye for this orange and black cake?
That’s a great question, especially if you’re trying to go as natural as possible! You certainly *can* try, but I have to be honest—the results won’t be nearly as vibrant for this specific Orange And Black Halloween Marble Cake. Turmeric gives you a lovely yellow-orange, but it’s usually more earthy than Halloween neon. For the black, you’d need a ton of extra sifted, unsweetened cocoa powder, and that extra powder might actually dry out your batter or slightly change the vanilla flavor profile we want to keep clean. To get that show-stopping look, I really recommend the concentrated gel food coloring.
How do I prevent the orange and black colors from mixing too much during swirling?
This is the secret handshake of marble cakes! What you want to do is use very little pressure when you swirl. Don’t drag the knife deep into the batter; keep your swirling tool close to the surface. Think of it like gently writing an ‘S’ motion across the top of the batter a couple of times. You should see the colors cross over each other, but you shouldn’t see the white disappearing entirely beneath the other colors. Resist the urge to go back over an area a second time. A quick, gentle pass is the key to keeping that beautiful contrast between the orange and black.
Estimated Nutritional Overview
Now, I know some of you are watching macros, and others are just curious about what goes into this fun Halloween indulgence! Before we wrap up, I want to give you a quick peek at the estimated nutrition for this Orange And Black Halloween Marble Cake. Remember, these numbers are just rough guesses—they are estimates based purely on the standard ingredient amounts listed in the recipe, especially since we aren’t adding any heavy frosting here! If you go heavy on the sugar or use different coloring agents, these figures can certainly shift a bit.
Think of this as general guidance for one slice, assuming you divide the cake into 8 standard servings. It helps to know what we’re dealing with when we sneak a slice after trick-or-treating!
- Calories: Around 300 per slice
- Sugar: Roughly 35 grams (It is a cake, after all!)
- Total Fat: About 15 grams
- Carbohydrates: Approximately 38 grams
- Protein: A small boost at 4 grams
- Sodium: About 150mg
If you’re making this for a large gathering, remember that dividing the cake into 10 or 12 slices instead of 8 will obviously shrink those numbers down. I usually just eyeball it for my family, but for party planning, it’s good to have a baseline!
Share Your Spooky Creations
I truly hope you have as much fun baking this Orange And Black Halloween Marble Cake as I do every year! It’s such a simple recipe, but every time I pull those vibrant colors out of the oven, I get so excited. Once it’s cooled and you’ve done your frighteningly easy frosting job, I would absolutely love to see what you came up with!
Please, don’t be shy! Head down to the comments section below and leave me a little star rating if you enjoyed this recipe. Even better, tell me how the marbling turned out for you—did you nail that perfect swirl, or did you get a wonderfully spooky, blended look? Your feedback helps me keep improving recipes for everyone!
And if you took pictures while you were baking or decorating your Halloween masterpiece, please tag me on social media! Seeing your kitchen in action is the highlight of my season.
If you ever have a question while you’re in the middle of baking and need to reach out directly, my contact page is always open. You can find the best way to get in touch over at the contact section. Happy Haunting, and happy baking!
Print
Orange and Black Halloween Marble Cake
- Total Time: 55 min
- Yield: 8 servings 1x
- Diet: Vegetarian
Description
A simple recipe for a Halloween-themed marble cake using orange and black colors.
Ingredients
- 1 1/2 cups all-purpose flour
- 1 1/2 teaspoons baking powder
- 1/2 teaspoon salt
- 1/2 cup unsalted butter, softened
- 1 cup granulated sugar
- 2 large eggs
- 1 teaspoon vanilla extract
- 1/2 cup milk
- Orange food coloring
- Black food coloring
Instructions
- Preheat your oven to 350°F (175°C). Grease and flour a 9-inch round cake pan.
- In a medium bowl, whisk together the flour, baking powder, and salt. Set aside.
- In a large bowl, cream the butter and sugar together until light and fluffy.
- Beat in the eggs one at a time, mixing well after each addition. Stir in the vanilla extract.
- Gradually add the dry ingredients to the wet ingredients, alternating with the milk, mixing until just combined. Do not overmix.
- Divide the batter evenly into three separate bowls. Leave one bowl plain (white).
- Add several drops of orange food coloring to the second bowl and mix until the color is uniform.
- Add black food coloring to the third bowl and mix until the color is uniform.
- Spoon alternating dollops of the white, orange, and black batters into the prepared cake pan.
- Use a knife or skewer to gently swirl the colors together to create a marble effect. Do not over-swirl.
- Bake for 30 to 35 minutes, or until a wooden pick inserted into the center comes out clean.
- Let the cake cool in the pan for 10 minutes before inverting it onto a wire rack to cool completely.
Notes
- You can use a simple vanilla or cream cheese frosting for decoration.
- For a deeper orange color, use gel food coloring.
- Prep Time: 20 min
- Cook Time: 35 min
- Category: Dessert
- Method: Baking
- Cuisine: American
Nutrition
- Serving Size: 1 slice
- Calories: 300
- Sugar: 35
- Sodium: 150
- Fat: 15
- Saturated Fat: 9
- Unsaturated Fat: 6
- Trans Fat: 0
- Carbohydrates: 38
- Fiber: 1
- Protein: 4
- Cholesterol: 50
Keywords: Halloween cake, marble cake, orange and black, vanilla cake, holiday dessert