
You know those nights? You walk in the door, you’re starving, and you need something hearty and deeply satisfying, but you only have about half an hour before you completely melt into the sofa? That’s exactly why I developed this extremely simple Japanese Katsu Bowls recipe. Seriously, I used to think making crispy Tonkatsu at home was some huge production, but trust me, I cracked the code.
We’re talking about crispy, golden pork tucked over warm rice, drowning in this addictively savory-sweet sauce. I promise you, this recipe gets you that authentic texture and flavor faster than takeout. Within 30 minutes, you’ve got piping hot Japanese Katsu Bowls on the table. Let’s jump right in; you’re going to love how easy this is!

Why This Simple Japanese Katsu Bowls Recipe Works
I know what you’re thinking—crispy fried meat over rice sounds messy and time-consuming. Nope! Not with this method. This approach cuts all the fussy steps but keeps all that amazing texture and depth of flavor you crave. It makes a fantastic weeknight dinner, and honestly, cleanup isn’t half bad if you manage your oil right.
I really wanted to nail down a version of Japanese Katsu Bowls that worked even when I was running on fumes after work. It’s all about efficiency without sacrificing that essential crunch. This recipe is my go-to because it truly delivers on speed and taste. Once you nail the breading process, you can whip up other quick weeknight favorites just as fast!
- It comes together in about 30 minutes total—seriously!
- We get that perfect, irresistible crunch from the panko breadcrumbs.
- The homemade sauce balances sweet and savory perfectly without needing hours of simmering.
Quick Prep and Cook Time for Japanese Katsu Bowls
Thirty minutes is the magic number here. We prep the pork, bread it quickly, and the frying only takes about 7 minutes total for both sides. That means by the time you’ve fluffed your rice and whisked together the sauce ingredients, the meat is resting and ready to slice. It’s the ultimate fast food, but made right in your own kitchen.
Authentic Flavor in Minimal Steps
The secret to keeping this dish authentic while speeding things up lies in the two main components. First, we use Panko breadcrumbs; nothing else gives that light, airy crust that shatters when you bite into it. Second, the sauce is simple—just soy sauce, mirin, sugar, and water—but it hits that critical sweet-salty note that defines real Tonkatsu sauce without the need for fancy ingredients most people don’t stock.
It’s the perfect marriage of texture and taste for quick Japanese Katsu Bowls.
Essential Ingredients for Perfect Japanese Katsu Bowls
Okay, let’s talk ingredients! I call this recipe essential because you don’t need a huge shopping list or ingredients you’ll never use again. It’s all about setting up your pork cutlet for maximum crispiness and mixing up a quick, balanced sauce. Make sure you grab some high-quality Panko breadcrumbs, though. That’s the non-negotiable star here; those coarse flakes are what make it genuinely crispy, unlike regular dried breadcrumbs. If you’re looking for similar quick meal ideas, you should check out how they handle breading on this fun recipe!
Every component here serves a real purpose in making these Japanese Katsu Bowls taste amazing in such a short time.
Pork Cutlet Components
You’ll need two boneless pork chops, and the most important first step is pounding them thin—we want them to be about 1/4 inch thick so they cook fast and evenly. Then we set up our dredging station, which needs three shallow dishes. You’ll use plain all-purpose flour first, then two beaten eggs, and finally, that gorgeous, airy mound of Panko breadcrumbs. We only season the meat lightly now, because the sauce brings most of the heavy flavor later!
The Japanese Katsu Bowls Sauce Recipe
The sauce is what elevates this from simple fried pork on rice to a proper Katsu Bowl experience. You only need four simple things: soy sauce, mirin (that sweet Japanese rice wine—don’t skip it!), white sugar, and plain water. The trick here is really important: you have to simmer that mixture gently until the sugar is completely dissolved. If you leave any graininess, your sauce won’t coat the pork nicely later on. It should become just slightly syrupy and glossy.
Step-by-Step Instructions for Japanese Katsu Bowls
Alright, this is where the magic happens! Don’t let the frying part scare you off. If you’ve made a basic breaded cutlet before, you know this drill, but paying attention to the temperatures is key to getting that restaurant quality crunch. I always set up my station first—flour, egg, panko—so I can move fast once the oil is ready. You can look up some tips for managing hot oil if you’re nervous, but honestly, this is pretty straightforward once you get the hang of it.
Preparing and Breading the Pork Katsu
First things first: take those half-inch pork chops and pound them down! You want them nice and thin, about 1/4 inch all over. This ensures they cook super quick without drying out. Lightly season them now with just salt and pepper. Then, you’re going one by one through the breading station. First dip in the flour—shake off any extras! Next, a quick swim in the beaten egg, letting the excess drip back into the bowl. Finally, really press that meat into the Panko breadcrumbs. I mean really press! You want a thick, even coating that looks super shaggy. That shagginess is flavor, trust me.
Frying the Katsu to Golden Perfection
Time to fire up the oil! You’ll want about an inch of vegetable oil simmering in a deep skillet. Get that temperature up to 350°F (175°C). It’s important not to rush this or let the oil get too hot, or the Panko burns before the pork cooks. Carefully lower your breaded cutlets into the hot fat. Fry them for about 3 to 4 minutes on each side until they are that beautiful deep golden brown color. Safety check: you’re looking for an internal temp of 145°F (63°C). Once done, pull them out immediately and let them rest on a wire rack for at least 5 minutes. Don’t skip the rest! This lets the juices settle, keeping your pork nice and tender inside.
Making the Quick Katsu Sauce and Assembly for Japanese Katsu Bowls
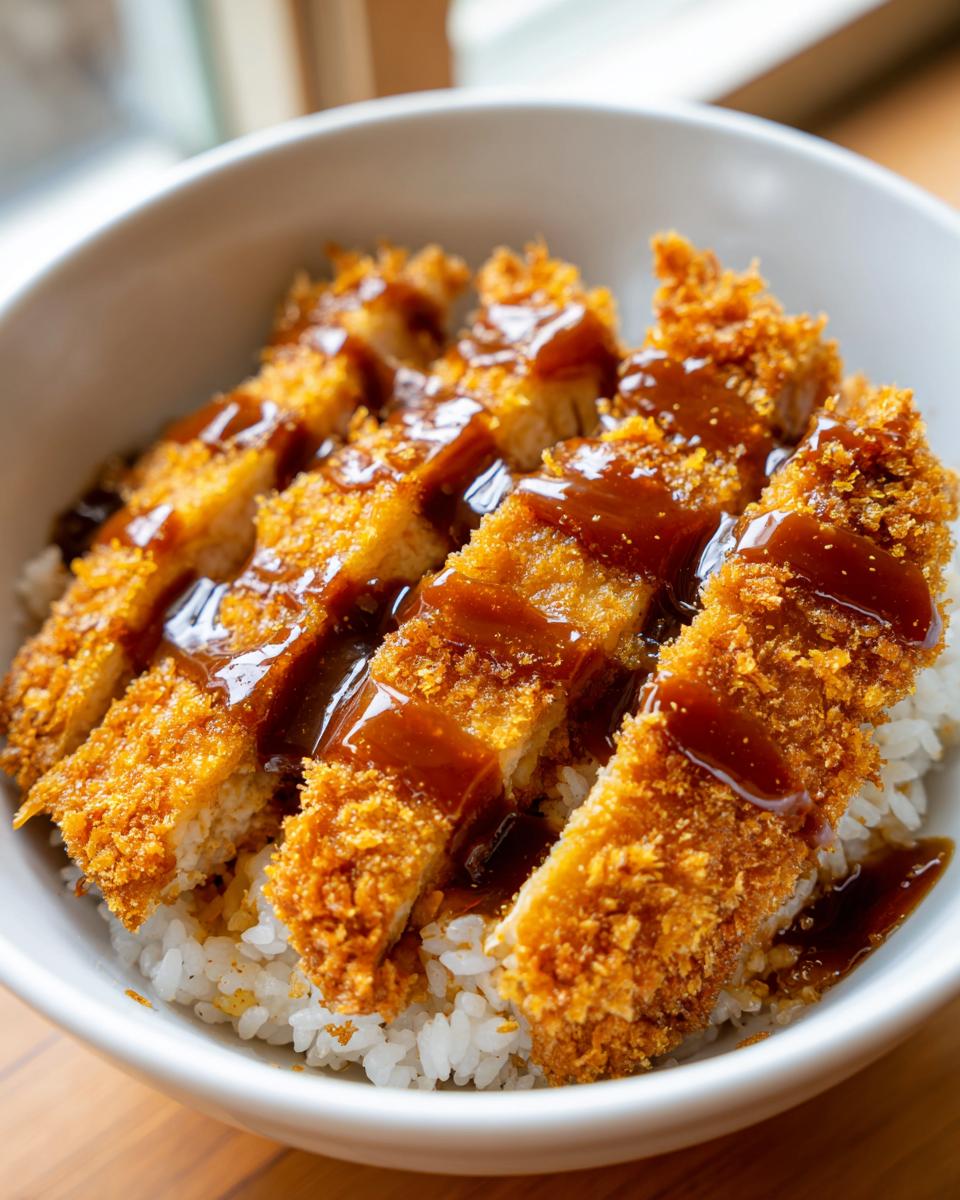
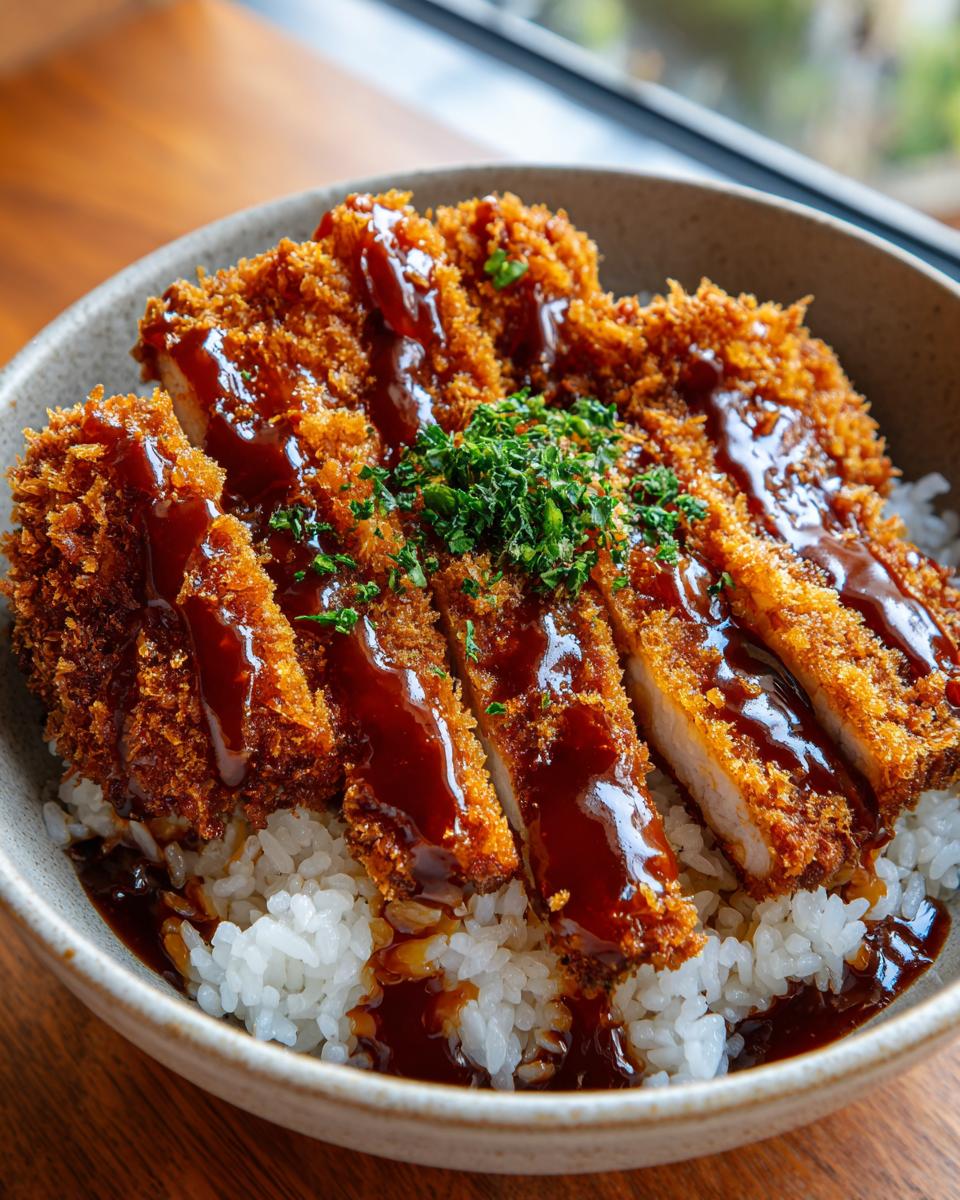
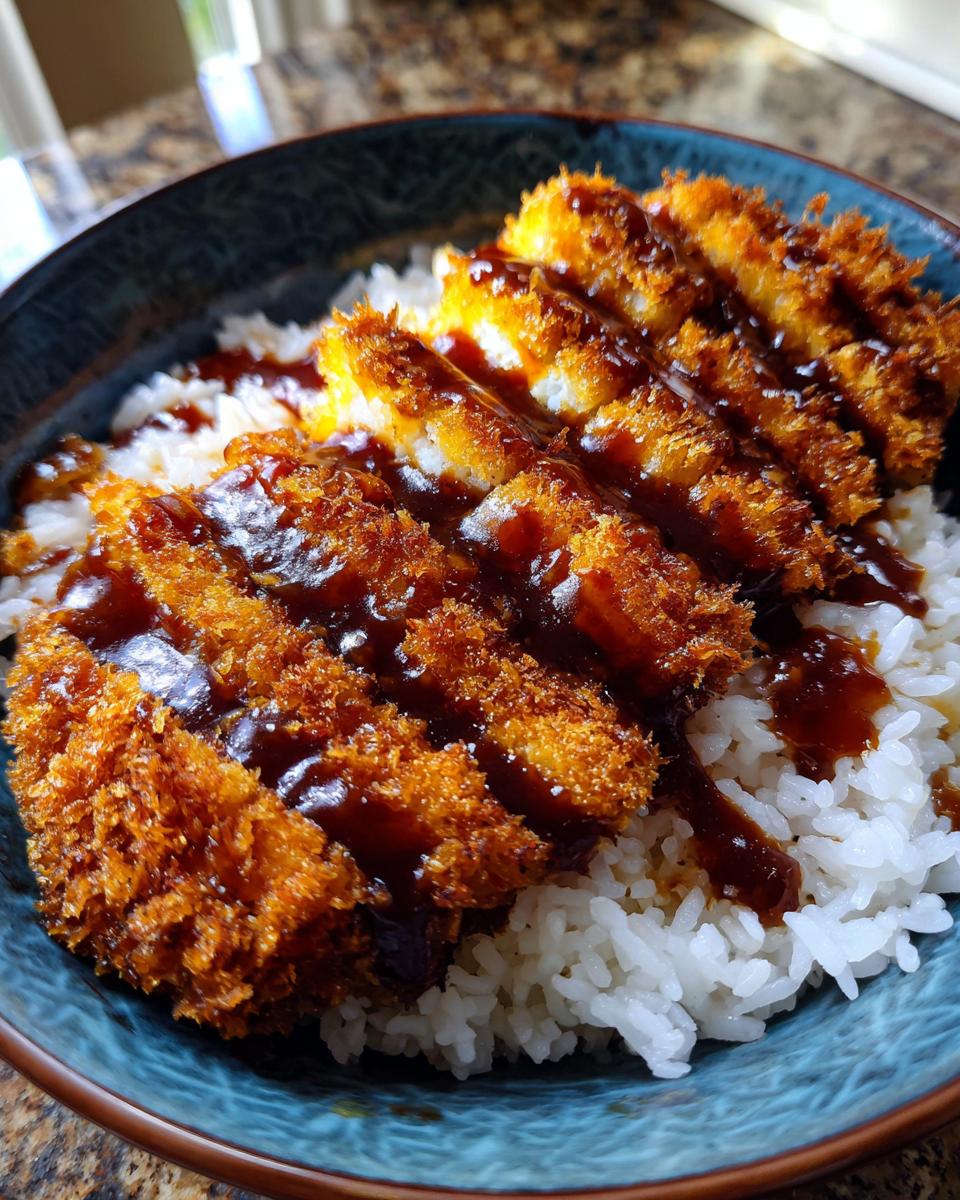
While that wonderful pork is resting, whip up your sauce. In a tiny saucepan, toss the soy sauce, mirin, sugar, and water together. Set it over medium heat and stir until that sugar totally disappears. Let it just simmer for two minutes until it thickens *slightly*. Then, take your rested katsu and slice it against the grain into nice strips. Time for assembly: scoop your cooked rice into two bowls, lay those beautiful sliced pork pieces right on top, and then drizzle that shiny Katsu sauce generously over everything. Serve those perfect Japanese Katsu Bowls right away!
Tips for Making the Best Japanese Katsu Bowls
So, you’ve got the basic steps down, which is fantastic! But if you want to stop making *good* Katsu and start making *spectacular* Katsu Bowls, you need to focus on a couple of tiny details. These little expert moves are what turn this meal into something you’ll crave week after week. Mastering the frying and knowing how to tweak that sauce really makes all the difference in these simple Japanese Katsu Bowls.
When I first started, my katsu was okay, but sometimes it was soggy after five minutes. Not anymore! I learned that the way you handle the oil and the finished product is just as important as what you put in the breading station. If you stick to these tips, you’ll see a huge difference. For another technique that focuses on building great crusts, check out how they handle their breading over on this schnitzel recipe—it’s got some great science behind it!
Panko Tips for Maximum Crispiness
The biggest mistake people make is treating the panko like regular breadcrumbs. You have to treat them rough! When you dredge the pork, press that panko onto the meat with conviction, like you’re trying to weld it on. It needs a good, firm grip on that egg wash. Also, when the pork comes out of the oil, you absolutely cannot put it directly onto paper towels. I know everyone does this, but those towels trap steam, and steam equals sogginess. You need a wire rack—any rack—set over a baking sheet so the air can circulate all around that glorious crust while it drains and rests. That simple move keeps the bottom crispy!
Sauce Adjustments for Your Japanese Katsu Bowls
The base sauce recipe is great, but what if you like things a little brighter? You can totally customize it! If you find the sauce is a little too sweet for your liking once you taste it, don’t sweat it. A tiny splash—just half a teaspoon—of unseasoned rice vinegar stirred in at the end can cut through the richness beautifully and add a lovely tang. Or, if you want a deeper caramel note, use a splash less water and maybe a tiny pinch more brown sugar next time (if you adapted that from the pound cake recipe, ha!). Keep tasting as you simmer; that’s how you make it yours!
Variations and Serving Suggestions for Japanese Katsu Bowls
The beauty of the Katsu Bowl is how infinitely customizable it is! While pork (Tonkatsu) is the classic ruler of the roost, you can seriously switch things up depending on what you have leftover or what you’re craving. You might have seen other great bowls out there, like this flavorful Greek Chicken Bowl; think along those lines when adding your twists!
This recipe is designed to be a perfect, simple base. Once you master the pork, you can start experimenting wildly with the toppings to keep things fresh. Don’t be afraid to try something new when building your next bowl!
Protein Swaps for Your Katsu Bowls
If pork isn’t your thing, chicken is an incredibly easy substitute. Just use boneless, skinless chicken breasts instead of chops—we call that Torikatsu! Pound it thin just like the pork to ensure it fries quickly and evenly. For my vegetarian friends, pressing extra-firm tofu really well and using the exact same breading technique works wonders. The Panko loves the tofu, and the savory sauce pairs perfectly with it.
Toppings to Complete Your Japanese Katsu Bowls
This is where you really personalize it! A drizzle of creamy Kewpie mayonnaise right over the top of the sauce adds such a lovely richness and tang. I also love sprinkling on some toasted sesame seeds right at the very end for a little nutty crunch. And if you want a little pickled zing to cut through the fat—try adding a few slivers of pickled ginger. That little pink jewel on top makes the whole presentation pop!
Storage and Reheating Japanese Katsu Bowls
Okay, I have to be honest with you about leftovers. If you’re like me, you want that Panko crust to shatter when you eat it, and that only happens right off the rack! Once you put fried stuff in the fridge, especially under sauce, it loses its snap. So, when storing your Japanese Katsu Bowls, it’s best to keep the components separate if you can.
If you want to save your leftovers for lunch the next day, definitely keep the sliced pork katsu separate from your warm rice and the sauce container. If you dump the sauce over the pork while it’s still in the container, you’re guaranteed a soggy situation. If you packed it all together, well, just enjoy it as a softer, saucier comfort meal!
But if you want to bring that crunch back—and I highly recommend trying—you need to reheat the pork the smart way. Forget the microwave, unless you like chewy pork! The microwave just steam-cooks everything and turns that beautiful crust into rubber.
Bringing Back the Crunch
Your best friends here are your oven or your air fryer. If you’re using an oven, preheat it to about 375°F (190°C). Lay those slices of cold pork katsu out on a baking sheet, maybe even putting them on a small wire rack if you have one like we discussed earlier for draining! Pop them in for about 8 to 10 minutes, just until they feel hot all the way through and you notice the crust has crisped back up. That’s the key—hot and dry!
The air fryer is even faster; 350°F (175°C) for maybe 5 minutes should do the trick. You might even get them as crispy as the day you made them! If you’re looking for other great ways to handle leftovers or make-ahead crispy foods, you can check out some tips on reheating similar items over here.
When you’re ready to eat your reheated pork, just warm up your rice, drizzle on some fresh sauce, and top it with the crispy slices. It’s almost as good as fresh, I promise!
Frequently Asked Questions About Japanese Katsu Bowls
I always get so many questions after people try this recipe because it seems too easy to be this good! People usually ask me about cooking methods or what the terms mean, which makes total sense when you’re diving into a new type of cuisine. Don’t hesitate to ask anything; I remember when I first started fiddling with Panko versus regular breadcrumbs, I thought I was going crazy!
If you need more general meal ideas after you’ve mastered this—maybe you’re looking to use up some more veggies—you can see what I’m making over at this stir-fry recipe. But for now, let’s tackle your Katsu Bowl questions!
Can I bake the pork instead of frying for my Japanese Katsu Bowls?
Yes, you absolutely can bake the pork if you’re avoiding deep frying, but I have to warn you—it just won’t be the same! Frying is what sets the Panko into that thick, shattering, crispy crust. When you bake it, even if you use cooking spray, it tends to get a little flatter and often dries out slightly before the crust really browns up properly. If you must bake, I highly recommend using an air fryer set to about 400°F (200°C) and flipping them halfway through. It achieves the best imitation of that deep-fried texture!
What is the difference between Katsu and Tonkatsu?
This is a great question, and it comes up a lot because you see both terms floating around menus! Basically, “Katsu” is just the shortened Japanese cuisine term for a deep-fried cutlet—it can be made from chicken, beef, or pork. If you see “Tonkatsu,” that means it’s specifically a pork cutlet Katsu. Since we are using pork chops in our Japanese Katsu Bowls recipe, we are technically making pork Tonkatsu! Easy, right?
What kind of rice is best for Japanese Katsu Bowls?
For the absolute best experience, you must grab some short-grain white rice. Think about what you usually get when you order sushi or a standard Japanese meal—it’s that slightly sticky rice that clings together. That stickiness is crucial because it gives your bowl the structure it needs to hold up the crispy pork, the sauce, and any optional toppings without everything sliding off. Long-grain rice, like Basmati, is too fluffy and dry for these bowls; it just won’t hold its shape!
Nutritional Estimates for Japanese Katsu Bowls
Now, I know some of you are keeping track, and some of you just want to enjoy that crispy pork without worrying! But just to keep things transparent, I wanted to share the nutritional breakdown for a single serving of these amazing Japanese Katsu Bowls. Remember, this is based on using the exact measurements in the recipe—pork chops, the sauce ingredients, the rice, without adding extra mayonnaise or tons of shredded cabbage.
Because we are deep-frying the pork, the fat content is certainly higher than a simple grilled meal, but that’s the trade-off for that phenomenal crunch! I always find it easiest to look at the numbers after I’ve already enjoyed the meal. If you’re tracking things closely, you can definitely adjust by baking the pork or using less sugar in the sauce, but trust me, the full version is worth it once in a while!
Here are the estimated numbers per bowl, based on the recipe yield of two servings:
- Calories: 650
- Total Fat: 25g (with 5g being Saturated Fat)
- Protein: 35g
- Carbohydrates: 70g
- Fiber: 2g
- Sodium: 850mg
Take all those numbers with a tiny pinch of salt, though! These figures are just estimates based on standard ingredients. If you use leaner pork or switch to brown rice, those numbers will definitely shift. But for a hearty, satisfying meal that comes together in 30 minutes, I think these estimates for our Japanese Katsu Bowls are pretty reasonable!
Share Your Simple Japanese Katsu Bowls Creation
And that’s it! You’ve done it! You’ve made the most satisfying, quickest, and genuinely delicious Japanese Katsu Bowls right in your own kitchen. I really, truly hope you loved how easy this was. Honestly, sharing great food is half the fun, so please don’t keep this little triumph to yourself!
I live for hearing about how your meals turned out. Did the Panko get super crunchy? Did you have to fight off your family members who wanted to steal a katsu slice before it made it into the bowl? Tell me everything! Drop a comment right below this section and let me know what you thought. A quick rating lets me know I should keep developing fast, flavorful Asian meals like this one.
If you snap a picture of your perfect, sauce-drizzled bowls, please tag me on social media! I always love seeing your creations. It makes my day to know my busy-night favorite is now part of your rotation! If you ever need to reach out directly about the recipe or have super specific questions, you can always shoot me a message using the contact form. Enjoy that fantastic meal!
Print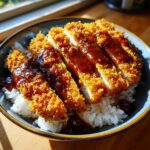
Simple Japanese Katsu Bowl
- Total Time: 30 min
- Yield: 2 servings 1x
- Diet: Low Fat
Description
A straightforward recipe for a Japanese Katsu Bowl featuring crispy fried pork cutlets over rice with a savory sauce.
Ingredients
- 2 boneless pork chops, about 1/2 inch thick
- 1/2 cup all-purpose flour
- 2 large eggs, beaten
- 1 cup panko breadcrumbs
- Vegetable oil for frying
- 2 cups cooked short-grain white rice
- For Sauce: 1/4 cup soy sauce
- For Sauce: 1/4 cup mirin
- For Sauce: 2 tablespoons sugar
- For Sauce: 1/4 cup water
- Optional: Thinly sliced cabbage for serving
Instructions
- Pound the pork chops to an even 1/4 inch thickness. Season lightly with salt and pepper.
- Set up a breading station: one shallow dish with flour, one with beaten eggs, and one with panko breadcrumbs.
- Dredge each pork chop first in flour, shaking off excess. Dip into the egg, letting excess drip off. Coat thoroughly in panko. Press the crumbs onto the meat.
- Heat about 1 inch of vegetable oil in a deep skillet to 350°F (175°C).
- Carefully place the breaded pork chops into the hot oil. Fry for 3 to 4 minutes per side until golden brown and cooked through (internal temperature reaches 145°F or 63°C).
- Remove the pork and place on a wire rack to drain excess oil. Let rest for 5 minutes.
- While the pork rests, prepare the sauce: Combine soy sauce, mirin, sugar, and water in a small saucepan. Bring to a simmer over medium heat, stirring until the sugar dissolves. Cook for 2 minutes until slightly thickened.
- Slice the cooked pork cutlets against the grain into strips.
- Divide the cooked rice into two bowls. Arrange the sliced katsu over the rice.
- Spoon the prepared sauce generously over the pork and rice. Serve immediately, optionally with shredded cabbage on the side.
Notes
- You can shallow fry the pork if deep frying is not preferred, adjusting cooking time as needed.
- For a quicker meal, use pre-cooked rice.
- Prep Time: 15 min
- Cook Time: 15 min
- Category: Dinner
- Method: Frying
- Cuisine: Japanese
Nutrition
- Serving Size: 1 bowl
- Calories: 650
- Sugar: 15
- Sodium: 850
- Fat: 25
- Saturated Fat: 5
- Unsaturated Fat: 20
- Trans Fat: 0
- Carbohydrates: 70
- Fiber: 2
- Protein: 35
- Cholesterol: 110
Keywords: Japanese, Katsu, Tonkatsu, Pork Cutlet, Rice Bowl, Asian Dinner