
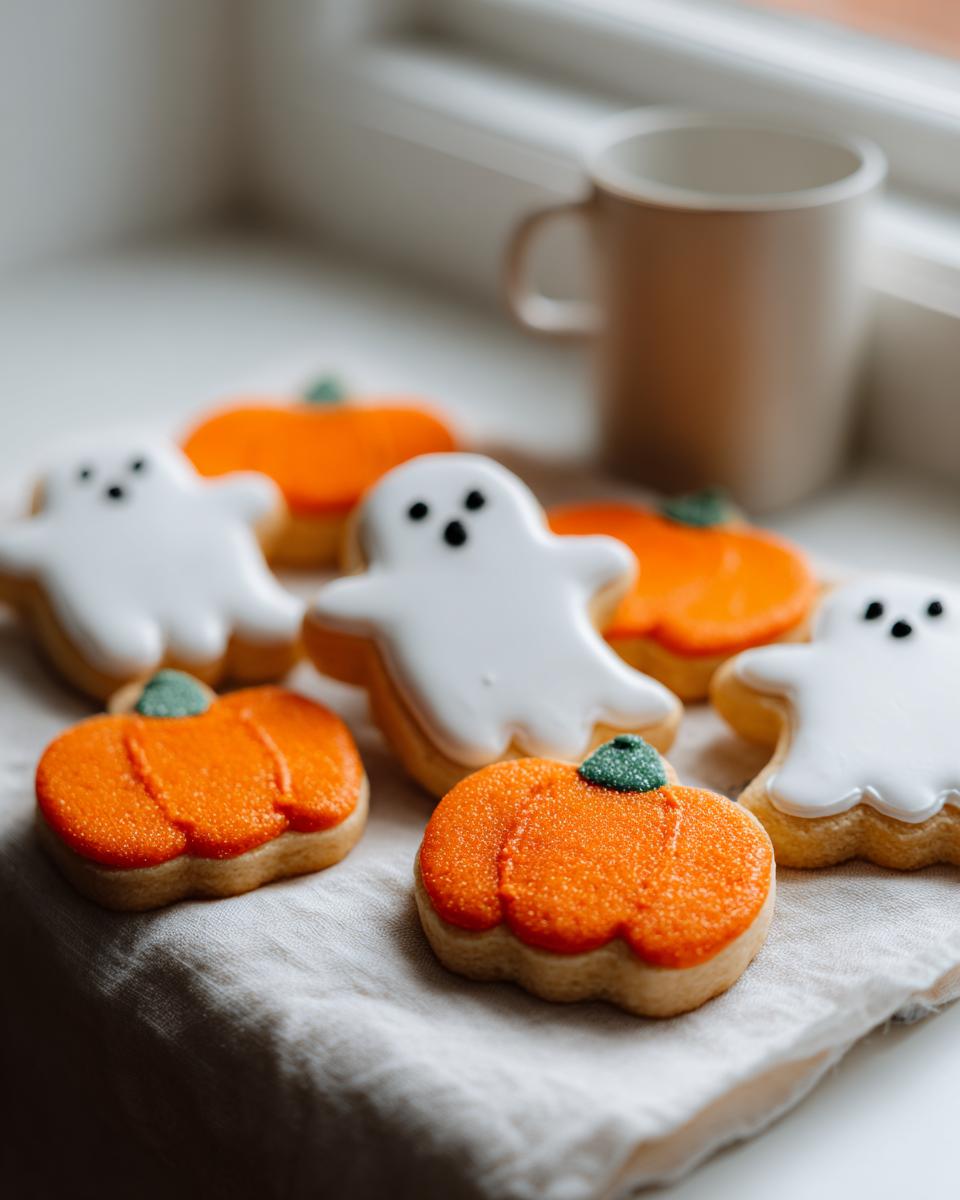
Oh, I just love when the weather starts getting crisp and pumpkin spice is *everywhere*! For me, the real joy of fall isn’t just the cozy sweaters; it’s getting the kitchen ready for holiday baking projects. And what’s more fun in October than making gorgeous, spooky treats? Forget those complicated cut-outs that crack the minute you look at them wrong. My absolute favorite way to kick off spooky season is with this tried-and-true base recipe for Halloween Decorated Cookies. These aren’t fancy, gourmet things—they are classic, sturdy sugar cookies that hold their shape perfectly, making them the ideal canvas for all that vibrant royal icing fun. Trust me, once you master this dough, you’ll be making these every single year!
Why You Will Master These Halloween Decorated Cookies
Seriously, you don’t need to be a professional baker to nail these cookies. I’ve made dozens of batches, and they come out perfect every time, even when everything else in the kitchen is going wrong! These are foolproof, which is exactly what you need when you’re focusing all your energy on making tiny ghosts and bats out of icing.
- They Don’t Spread! This is the number one rule for any decorated cookie. Because the dough chills perfectly and the ingredients are balanced, these hold their sharp, cute shapes right up until they come out of the oven. If you want perfect pumpkin edges, this is your dough.
- The Texture is Just Right: They bake up sturdy enough to handle thick layers of icing, but they aren’t rock hard. They have that perfect, slightly tender bite that screams ‘classic’ sugar cookie.
- Minimal Chill Time Required: While chilling *always* helps with shape, this dough firms up relatively quickly. An hour in the fridge and you’re ready to roll! No waiting around all day for the dough to be workable.
- Baking Consistency is Reliable: This base recipe has been tested so many times—it loves a 350 degree oven and tells you exactly when it’s done by the slight golden color on the edges. No guesswork here, promise!
- They Store Perfectly: You can bake the cookie bases days ahead of time and keep them flat in an airtight container. They stay fresh and ready whenever you decide to tackle the fun (and messy!) part: the decorating.

Essential Ingredients for Perfect Halloween Decorated Cookies
When you’re aiming for a cookie that won’t spread and can handle a thick coat of ghost icing, you simply can’t skimp on the quality or precision of your ingredients. This recipe is built on simple, pantry-stable items, but how you treat them matters! For the best flavor, make sure you are using good quality vanilla extract—it really boosts that buttery base flavor before the spices (if you add any!) take over. We need things exact here so the dough bakes flat and stays put.
If you’d like to see a deeper dive into the cookie base itself, I’ve written all about why I love this specific sugar cookie recipe! But for today’s Halloween projects, here is exactly what you need to gather before you even turn the mixer on:
For the Sugar Cookie Base
- 3 cups all-purpose flour (make sure it’s properly spooned and leveled!)
- 1 teaspoon baking powder
- 1/2 teaspoon salt
- 1 cup unsalted butter, softened (make sure it’s truly softened, not melted!)
- 1 1/2 cups granulated sugar
- 1 large egg
- 1 teaspoon vanilla extract
For the Royal Icing
This is where the magic happens! You need the components for stiff and flood icing, so gather these few things. I strongly recommend investing in a high-quality meringue powder because it helps your icing dry hard and shiny without cracking everywhere—plus, it’s much safer than raw egg whites!
- Royal icing ingredients (just powdered sugar, meringue powder, and water for now)
Step-by-Step Instructions for Your Halloween Decorated Cookies
Okay, now that we have all our supplies laid out—seriously, get organized before you start mixing; it saves so much headache later!—it’s time to make the dough. This is where things get classic and comforting. Follow these steps exactly, especially where I tell you to stop mixing, because overworking the dough is the quick way to tough, sad cookies.
Mixing the Halloween Decorated Cookies Dough
- First things first, get your dry ingredients acquainted! Whisk together the flour, baking powder, and salt in a bowl. Set that aside. Don’t skip the whisk, it helps break up any flour clumps, which is vital!
- Now for the fun part! In your stand mixer (or a big bowl with a hand mixer), cream the softened butter and the granulated sugar together until they look light, creamy, and fluffy. It should take several minutes. We’re building air here!
- Beat in your single large egg and that lovely vanilla extract. Just mix until everything is incorporated and smooth again.
- Time to bring the dry mixture into the wet one. Add the flour mixture gradually, mixing *only* until the streaks of flour just disappear. I mean it! As soon as you can’t see any more white powder, stop the mixer. If you keep going, you develop gluten, and those cookies will turn into little hockey pucks.
Chilling and Cutting the Cookie Shapes
You absolutely cannot skip this step. The dough needs to rest and firm up so it doesn’t magically turn into blobs in the oven. You’ll want to wrap that dough tightly in plastic wrap—I usually divide mine into two discs, it makes rolling easier later—and pop it in the fridge. It needs at least **1 hour** chilling time.
When your hour is up, preheat your oven to **350 degrees F (175 degrees C)**. Make sure you line those baking sheets with parchment paper. Got scraps of dough left over while cutting out your monsters and ghosts? Just gather that dough, quickly mash it back into a ball, wrap it, and put it back in the fridge for 15 minutes while the first batch bakes. Keeping the scrap dough cold is another secret to great shape retention—you can check out some other handy tips on dough handling over here if you’re curious about substitutions!
Baking and Cooling Your Halloween Decorated Cookies
Roll that beautifully chilled dough out slowly and carefully to about **1/4 inch thickness**. Use your favorite Halloween cookie cutters and place them onto your prepared sheets. Don’t crowd them; give them some space to breathe!
Bake those little cuties for **8 to 10 minutes**. Keep an eye on them! They are done when the edges just start looking lightly golden brown. As soon as they come out, move them right over to a wire rack. They *must* cool completely before you even think about touching them with icing. If they are still even slightly warm, the icing slides right off, and you’ll have a sticky, colorful mess!
Decorating with Royal Icing
Once the cookies are stone cold, you can pull out your prepared royal icing. Remember what I said about consistency? This is where you use it! You need your **stiff consistency** icing first. Make little spiderweb details or pipe the outlines of your pumpkins or cats with this stiff icing. Let that outline dry for about 15 minutes so it creates a nice little dam wall.
Then, thin out a separate batch of icing—that’s your **flooding consistency**—until it flows smoothly off a spoon and settles back into itself in about 10 seconds. Carefully fill in the outlines you just made. Once they look perfectly smooth, they need time for that icing to dry completely hard. Depending on how thick you went, this can take anywhere from 6 to 12 hours. Seriously, make these the night before you want to serve them!
Tips for Success When Making Halloween Decorated Cookies
Even with a great recipe, sometimes these decorated cookies can give you a little trouble, especially around Halloween because we tend to rush the drying process. I’ve made every mistake in the book, so let me save you some frustration! The goal here is that perfect texture—not crumbly, not chewy, just right for decorating.
My biggest early mistake was trying to flood the cookies right after outlining. I thought I was saving time, but the outline icing wasn’t dry enough, so my flooding icing just melted right into it, leaving this ugly, messy puddle instead of a crisp line. Now? I walk away. I seriously walk out of the kitchen for 15 minutes after I outline my shapes. That short break is crucial for letting that gelatin set up.
Here are a few other game-changers that always ensure my Halloween Decorated Cookies turn out looking professional:
- Keep Your Butter Cold When Rolling: While the dough needs to be soft enough to mix, once it’s chilled and you start rolling, work quickly! If the dough gets too warm while you are cutting out your ghosts and bats, it starts to soften, and guess what happens in the oven? Spreading! If a section of dough gets sticky, immediately put that whole cut-out sheet back in the freezer for 5 minutes while you finish the rest.
- Sift Your Powdered Sugar (Again!): People often skip sifting the powdered sugar for royal icing because it’s already ground up, right? Wrong! Sifting removes tiny lumps that will clog your piping tips instantly, and nothing throws off your flow faster than having to stop every 30 seconds to clear a tip. If you’re using a new bag of powdered sugar, sift it twice.
- Use Room Temperature Water for Icing: When mixing your royal icing, the temperature of the water matters more than you’d think for structure. I always use room temperature water—never cold, never warm. When the water temperature is just right, the meringue powder activates perfectly, leading to a much more stable and smooth flood consistency. For more on achieving that perfect fluffiness overall, I always recommend reading up on how to get amazing fluff consistency in your bases. It really carries over into the icing, too!
- Don’t Over-Bake by a Single Second: Since these cookies are meant to be decorated, you want them pale, not darkly golden. If you bake them until the edges are dark brown, they will be too firm and almost crunchy by the time the icing dries. Aim for edges that are just barely kissed by color—remember, they’ll look set once they cool on that wire rack. If you need extra tips on soft results, check out this great article on keeping baked goods soft.
Ingredient Notes and Substitutions for Halloween Decorated Cookies
I always get questions about swapping things out in this recipe, especially since it’s meant to be so reliable! Look, the cookie base is sturdy, but the main area people get worried about is the royal icing. That’s understandable! We aren’t dealing with a simple buttercream here; we need structure to hold up those spooky designs.
Let’s talk about the icing first, because that’s often where people prefer a substitute. If you’re making traditional royal icing, you generally use egg whites, right? Meringue powder is my go-to because, honestly, it makes life easier and it’s safer when you aren’t cooking the whites. Meringue powder is essentially dried, stabilized egg whites plus cornstarch and stabilizers, which is exactly what gives the icing that brilliant, hard, shiny finish. If you use raw egg whites instead of meringue powder, you MUST treat them carefully, perhaps even using a blowtorch quickly on the icing (which is risky!), or simply know that the dried texture won’t be quite as durable.
Now, what about butter substitutes? I know everyone likes to try margarine or vegetable shortening sometimes, especially for big batches of Halloween Decorated Cookies. My advice is this: Butter is non-negotiable in the cookie dough part. Butter has a unique melting point and flavor profile that contributes directly to how the cookie bakes and holds its shape. Substituting it with margarine often leads to cookies that are too soft or that spread out before they set because the fat content isn’t working the same way during baking.
If you absolutely must substitute the butter for dietary reasons, I’d suggest using a high-quality vegetable shortening that is 1:1 in measurement, but you will lose some of that wonderful buttery flavor. Just know that I’ve never tested it extensively, and I can’t guarantee the shape retention will be quite as perfect as when I use real, creamy, softened butter!
For the sugar, please stick to granulated sugar in the dough. Dark brown sugar is fantastic for warmth, but for a pale canvas that shows off bright orange and green icing, you need that neutral base that white sugar provides.
Storage and Reheating for Your Halloween Decorated Cookies
This is the final hurdle, and honestly, one of the most important if you want those beautiful ghost faces to stay perfect until October 31st! Once you’ve let your royal icing dry completely—and I mean *completely* dry, usually overnight is best for thick flood layers—you need to handle storage carefully. Remember, that icing is delicate once fully set!
The rule of thumb, straight from my recipe notes, is to store your finished Halloween Decorated Cookies in a single layer inside an airtight container. If you go stacking them, the icing from the top cookie can stick to the bottom of the one above, and that’s a disaster! If you absolutely must stack them (and I often do, because, well, I bake too many), you need to place a little square of wax paper or parchment between each layer. Make sure the container seals tightly to keep the humidity out.
Now, the big question I always get: Can you put them in the fridge? My answer is a strong, resounding NO. Do not put decorated cookies in the refrigerator! When you take cold cookies out into a warmer, humid room, condensation forms on the icing surface. That moisture makes your beautiful, hard royal icing turn soft, sticky, and sometimes even weep color. Keep them on the counter, in a cool, dark place. If you need to clean up before you put them away, I actually have a great post on how to whip up some gentle homemade cleaning sprays—you’ll feel much better getting the counters ready for showtime!
And reheating? Forget about it! We baked these cookies until they were just set so they wouldn’t be tough. Warming them up again will bring out moisture and make them floppy. These cookies are meant to be enjoyed at room temperature, looking spooky and delicious!
Serving Suggestions for Halloween Decorated Cookies
So, you’ve successfully made through the baking and the decorating marathon, and now you have a beautiful platter of ghosts, moons, and maybe a few grumpy black cats staring back at you! Congratulations! The best part about these Halloween Decorated Cookies isn’t just eating them—it’s how you show them off. Presentation really matters when it comes to holiday treats, and sugar cookies make fantastic centerpieces.
My favorite way to pull these out for a party is definitely presentation-focused. Forget piling them onto a plain plate! I usually grab one of those dark, slate-colored serving trays I have. I’ll line the tray with some decorative brown or black paper shred—the kind that looks a bit like wood shavings—and arrange the cookies so the patterns pop against the dark background. It gives everything a nice, eerie, rustic feel.
If you’re having a grown-up gathering, these cookies pair perfectly with a spicy, warm beverage. Think about serving them alongside mugs of hot apple cider that’s been spiced up with cloves and cinnamon sticks. The soft spice of the cider just complements the simple vanilla and sugar of the cookie base so nicely.
For the kids (or the kids at heart!), grouping them with some dark chocolate elements makes everything feel richer and spookier. I’ll scatter a few dark chocolate covered pretzels or some fudge squares around the platter. The intense dark color contrasts beautifully with the bright royal icing colors you worked so hard to achieve.
If you’re looking for a wonderful, non-alcoholic drink to serve alongside your spooky spread, check out this incredibly easy recipe for a Hocus Pocus Halloween Punch! It uses spooky colors, too, so it matches your cookie theme perfectly. Honestly, once you set these beautiful Halloween Decorated Cookies out, they won’t last long, so make sure you snag the prettiest one for yourself first!
Frequently Asked Questions About Halloween Decorated Cookies
If you’ve made it this far, you’re practically a pro at making these cookies! But sometimes, even with the best steps, things don’t go exactly to plan. Don’t sweat it! Decorating is messy, and baking relies on tricky chemistry. Here are the top three things that always trip people up when they are creating their amazing Halloween Decorated Cookies.
Why do my sugar cookies spread while baking?
This is the absolute bane of any cookie decorator’s existence! Nine times out of ten, spreading happens for two reasons, and both boil down to temperature or mixing. First, if your butter was too warm or soft when you creamed it with the sugar, you introduced too much air and softened the structure before baking. Second, the dough absolutely must be chilled! If you roll out warm dough, the butter melts too fast in the oven before the structure sets, and boom—you get sad, flat circles instead of cute ghosts. Always err on the side of chilling the dough longer than you think you need to!
How long does the royal icing on Halloween Decorated Cookies need to dry?
Oh, drying time! If I had a dollar for every time I tried to rush this, I could probably buy a brand new set of piping tips! Royal icing drying is all about humidity. In a perfectly dry, cool room, you might be able to touch the surface in 4 to 6 hours. However, if you live somewhere muggy—like I do in the summer—it could easily take 10 or even 12 hours for a nicely flooded cookie to dry hard enough that it won’t smudge when you pack it. You want to wait until the surface is totally hard and doesn’t give at all when you press it gently. If you rush this, you end up ruining the whole batch, which is why I always bake the day before I plan to decorate!
Can I use store-bought icing for these decorated cookies?
You *can*, but honestly, I wouldn’t recommend it for these specific Halloween Decorated Cookies if you want that professional, smooth finish. Store-bought tubes of icing are almost always soft consistency. They are fine for scribbling a quick message on a gingerbread man, but they just don’t have the staying power or structure of homemade royal icing that uses meringue powder. You won’t be able to outline and flood successfully, and the icing won’t dry hard or shiny enough to stack or package them well. Sometimes, the quickest way forward is to make the icing yourself—it’s just powdered sugar, water, and meringue powder! It’s totally worth making your own so the decoration lasts, especially if you’re making them for gifts.
If your icing keeps breaking down even when you follow the recipe, maybe you’ve made the mistake I wrote about here! It always comes down to something simple, though, so don’t give up on making these gorgeous cookies.
Share Your Halloween Decorated Cookies Creations
Phew! You did it! You managed to conquer the dough, master the flood icing, and now you have a fantastic batch of spooky, sugary masterpieces ready to go. I truly hope you had fun watching the colors come together and carving out those perfect little cookie shapes. Honestly, there’s nothing better than stepping back after all that work and seeing a tray full of little edible Halloween characters!
Now, listen to me—I want to see what you made! Don’t just eat these wonderful Halloween Decorated Cookies in secret. I need to know if you went classic orange and black, or if you tried some neon green or purple for a wild Frankenstein look. Head over to my social media channels and tag me in your photos! Let me see your best piping work; I’m always looking for new ways to decorate ghosts!
And if you loved this simple sugar cookie base as much as I do, please, please leave a rating right here on the recipe page! Your feedback helps everyone else feel confident tackling their own holiday baking projects. Knowing that this reliable recipe helped bring some sweet frights to your table means the world to me. If you’re still looking for more seasonal fun, you can definitely check out my other favorite Halloween cookies ideas for your next baking adventure!
Print
Simple Halloween Decorated Cookies
- Total Time: 1 hour 40 min
- Yield: 2 dozen 1x
- Diet: Vegetarian
Description
A basic recipe for sugar cookies decorated with royal icing for Halloween.
Ingredients
- 3 cups all-purpose flour
- 1 teaspoon baking powder
- 1/2 teaspoon salt
- 1 cup unsalted butter, softened
- 1 1/2 cups granulated sugar
- 1 large egg
- 1 teaspoon vanilla extract
- Royal icing ingredients (powdered sugar, meringue powder, water)
Instructions
- Whisk together flour, baking powder, and salt in a bowl.
- In a separate bowl, cream the butter and sugar until light and fluffy.
- Beat in the egg and vanilla extract.
- Gradually add the dry ingredients to the wet ingredients, mixing until just combined.
- Wrap the dough and chill for at least 1 hour.
- Preheat your oven to 350 degrees F (175 degrees C). Line baking sheets with parchment paper.
- Roll out the chilled dough to 1/4 inch thickness. Cut into desired Halloween shapes.
- Bake for 8 to 10 minutes, or until edges are lightly golden. Cool completely on a wire rack.
- Prepare royal icing using your preferred method and colors.
- Once cookies are cool, decorate them with the prepared icing. Let the icing dry completely before storing or serving.
Notes
- For best results, use a stiff consistency royal icing for outlining and a thinner consistency for flooding the cookie centers.
- Store decorated cookies in an airtight container at room temperature.
- Prep Time: 30 min
- Cook Time: 10 min
- Category: Dessert
- Method: Baking
- Cuisine: American
Nutrition
- Serving Size: 1 cookie
- Calories: 180
- Sugar: 18g
- Sodium: 75mg
- Fat: 9g
- Saturated Fat: 5g
- Unsaturated Fat: 4g
- Trans Fat: 0g
- Carbohydrates: 24g
- Fiber: 0g
- Protein: 2g
- Cholesterol: 25mg
Keywords: Halloween, cookies, sugar cookies, decorated cookies, royal icing, fall baking