
Okay, listen up! The absolute best part of the holidays isn’t the costumes or the decorating—it’s what happens to all that leftover candy! I mean, who wants a giant bowl of leftover Snickers and M&Ms just sitting around? Not me! That’s why, as soon as the pumpkin buckets are empty, I’m pulling out my big mixing bowl because we’re making bars. Seriously, these are the easiest, fudgiest, most over-the-top decadent dessert you will ever make, and they require almost zero brainpower.
This recipe, which I now lovingly call my annual mess-making tradition, is purely about turning that sugar haul into something spectacular with minimal fuss. Forget complicated cookie cutouts; we’re slamming everything into one pan! Mixing up these Halloween Candy Cookie Bars became a non-negotiable event after the kids came home with enough peanut butter cups to last until Easter. Trust me, once you try taking your favorite chopped chocolate bars and mixing them into a soft, buttery dough, you’ll never look at that candy pile the same way again.

Why You Need These Halloween Candy Cookie Bars
Honestly, if you’re looking for baking that gets you maximum reward for minimum effort, this is it. I don’t have time for fussy cooling racks or tiny parchment circles in November, and I bet you don’t either! These cookie bars are the perfect solution for that post-Halloween sugar rush without the post-baking exhaustion.
Here’s why this recipe jumps to the top of my must-bake list:
- They bake up perfectly golden in under 30 minutes—it’s speedy magic!
- Cleanup is a dream because it’s truly a one-pan wonder. You just grease and go!
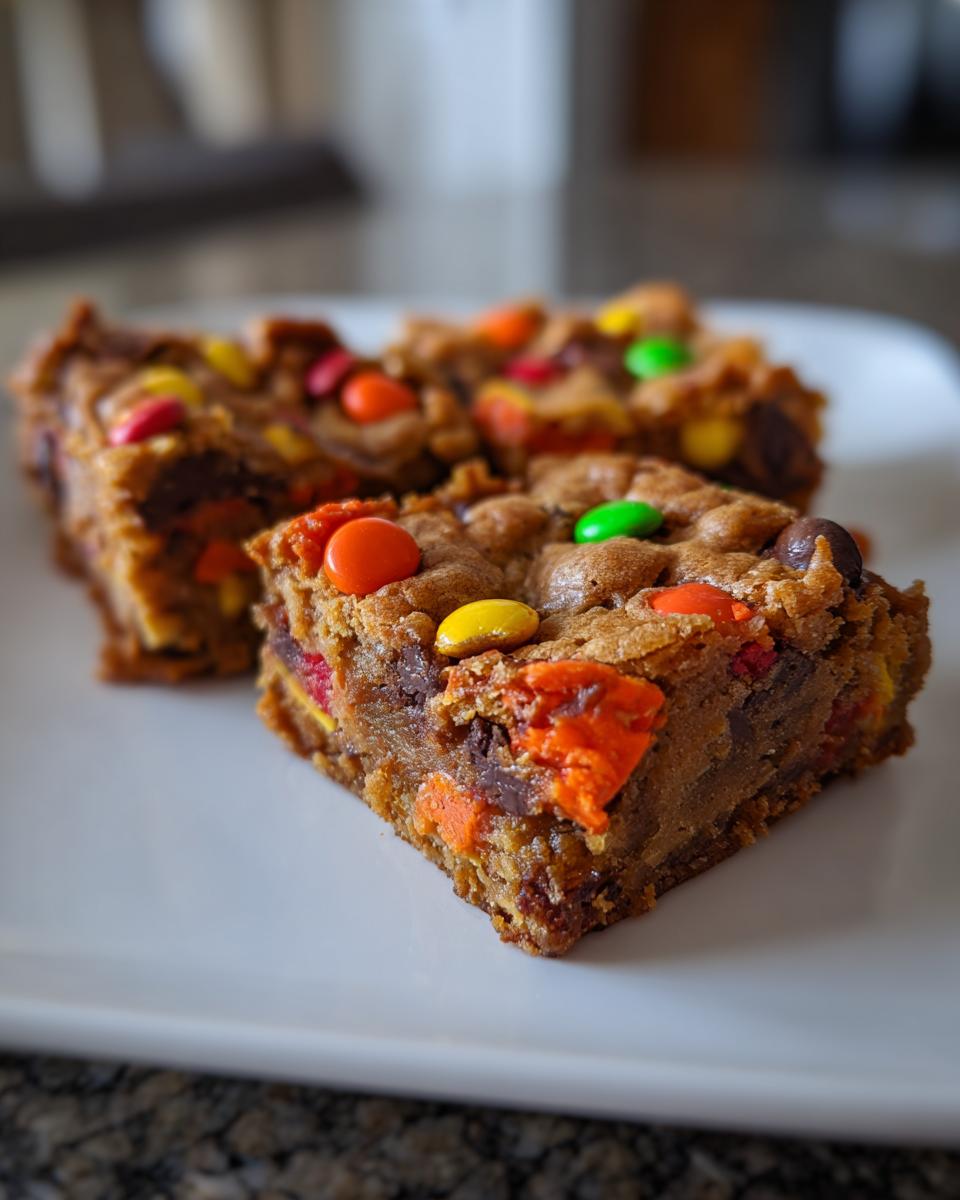
- The candy payoff is huge! Every bite is chewy, buttery, and absolutely jammed with your favorite mix-ins. You can see how decadent they are even before you take a bite, kind of like other amazing cookie bar recipes I love.
This recipe is designed specifically to handle a massive amount of chocolate, caramel, and peanut butter candies, so you’re not wasting a single bit of your haul.
Gathering Ingredients for Your Halloween Candy Cookie Bars
Okay, the best part about this recipe? It uses standard pantry staples as the base, so you’re mostly just adding the fun stuff! We need the usual cookie foundation, but the butter needs to be properly softened—not melted, just soft enough to mash with your finger easily. That’s crucial for creaming!
You’ll need one cup of that soft butter. Then we bring in the sugars: one cup of regular white sugar and one cup of packed brown sugar. That brown sugar is what keeps these bars from tasting flat—it gives them that beautiful caramel depth, similar to what I love in my favorite ham glaze, actually!
Grab two large eggs and a good splash of vanilla extract—don’t skimp on the vanilla, it truly makes a difference. For the dry side, you’ll whisk together three cups of all-purpose flour, one teaspoon of baking soda (for just a little lift), and half a teaspoon of salt to balance everything out.
Now for the star: two cups of *mixed chopped Halloween candy*. This is where you get creative! Snickers, Reese’s cups, caramels, even those little chocolate bars—chop them into bite-sized chunks. If you use things like hard peppermint candies, they might melt too much, so stick to soft chocolates, chews, and peanut butter candies. That two-cup measurement is just a guide; throw in more if you think your family can handle it! Just follow these amounts exactly, and these bars will turn out perfectly chewy every time.
Essential Equipment for Perfect Halloween Candy Cookie Bars
Honestly, you don’t need any fancy gadgets for this recipe, which is why I love it for busy weeknights!
First things first: you must have a sturdy mixing bowl. I prefer using my big ceramic one when I make the wet ingredients because I can really beat the butter and sugar without worrying about anything splashing out everywhere. If you have an electric mixer—handheld or stand—it’s fantastic for creaming the butter properly, but if your arm is strong, a wooden spoon will totally work for the initial steps.
Next, look for that 9×13 inch baking pan. This is key! If you use something smaller, your bars will be super thick and might not cook all the way through in the allotted time. You definitely need that large surface area. Grab your measuring cups and spoons, of course, and make sure you have a whisk for combining those dry ingredients separately. A rubber spatula is a must-have for scraping down the sides of the bowl and folding in that glorious candy at the end. That’s really it! Simple tools for a super sweet payoff.
Step-by-Step Instructions for Making Halloween Candy Cookie Bars
Getting these bars into the oven is ridiculously straightforward—I promise! Even if you’re rushing home from work while the trick-or-treaters are still ringing the doorbell, you can knock this out in fifteen minutes flat. Think of the payoff!
- First things first, let’s get that oven warmed up! Set your oven temperature to 350 degrees F (175 degrees C). While it preheats, take that 9×13 inch pan, and grease it until it’s shiny, then lightly dust it with flour. This is your insurance policy against sticking later!
- Now, grab your softened butter (remember, soft, not melty!) and dump it into your large mixing bowl along with the granulated sugar and that beautiful brown sugar. You want to cream these together until they look light and fluffy. I usually beat this mixture until I can’t see any more defined sugar granules clinging to the butter. This initial step is important for incorporating air, kind of like the crucial beginning of any good dense cake.
- Next, beat in your two large eggs, but do it one at a time. Add the first one, mix until it disappears, then add the second. Follow that up with your vanilla extract. Keep mixing gently. We want smooth, but once the eggs go in, don’t go crazy beating it! Overmixing the wet ingredients after the eggs are added can sometimes lead to a cakey texture instead of a chewy bar.
- In a separate bowl—yes, another bowl, but only a small one!—whisk together your flour, baking soda, and salt. Mixing the dry stuff separately ensures the baking soda is evenly distributed so you don’t end up with random salty/bready pockets.
- Time to combine! Gradually add those dry ingredients—your flour mixture—into your wet ingredients. Mix on low speed or fold carefully with a spatula until the flour *just* disappears. Seriously, stop mixing the second you don’t see white streaks anymore. This prevents gluten development, which keeps the bars nice and tender, much like the best chocolate chip cookie recipes always instruct.
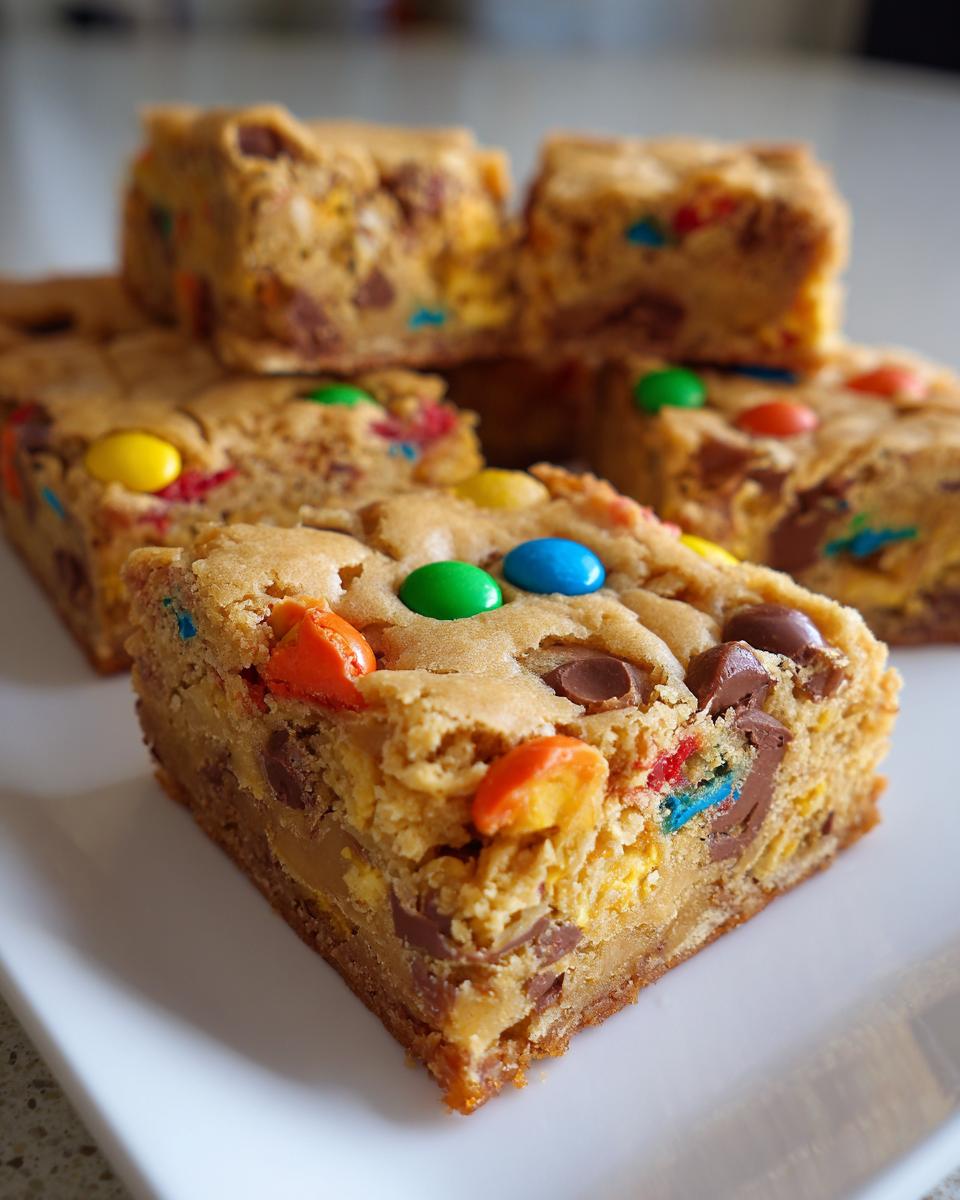
- Now for the fun part! Take your two cups of mixed, chopped Halloween candy and gently fold it right into the dough. Use your spatula and make sure those little chocolate pockets are evenly distributed throughout the batter—you want candy in every single bite, right?
- Scrape all that amazing dough into your prepared 9×13 pan. Use the spatula or the back of a spoon to press it down until it’s an even layer across the entire surface. Don’t leave one side thin and one side thick!
- Slide that pan into the 350-degree oven for 25 to 30 minutes. You’re looking for edges that are just starting to turn golden brown. The middle might still look a tiny bit soft, but that’s okay!
- This last step is the hardest but the most important part for easy cutting. Let the bars cool completely in the pan. If you try to slice them while they’re warm, the melted candy acts like glue, and you’ll get messy goo instead of neat squares. Wait until they are totally cool—patience pays off, I promise!
Pro Tips for the Best Halloween Candy Cookie Bars
I’ve made these bars so many times that I have a few little secrets up my sleeve to make sure they are absolutely perfect every single time. It’s not just about throwing candy in a bowl, you know!
First, let’s talk about cutting. If you try to slice these bars while they are even warm, the melted chocolate and caramel will just pull right out, making a huge sticky mess. My go-to trick—and the one my kids always groan about, but secretly love when they get the clean slice—is chilling them. I learned this trick from dealing with gooey cookie doughs, and it works wonders here. After the bars have cooled completely on the counter, pop the whole pan into the fridge for about 30 minutes before slicing. They firm up just enough for a really clean cut!
Next, think about your candy choices! You can honestly use any leftover candy, but some hold up better to the heat than others. If you toss in big chunks of hard, brittle toffee or peppermint candies, they can sometimes get too sharp or melt away entirely. My favorites are things that already have a good base, like chopped-up Kit Kats, Reese’s cups, or even Milky Way bars. The peanut butter and chocolate bits stay moist and melty but don’t totally dissolve into the dough, giving you that perfect texture combo.
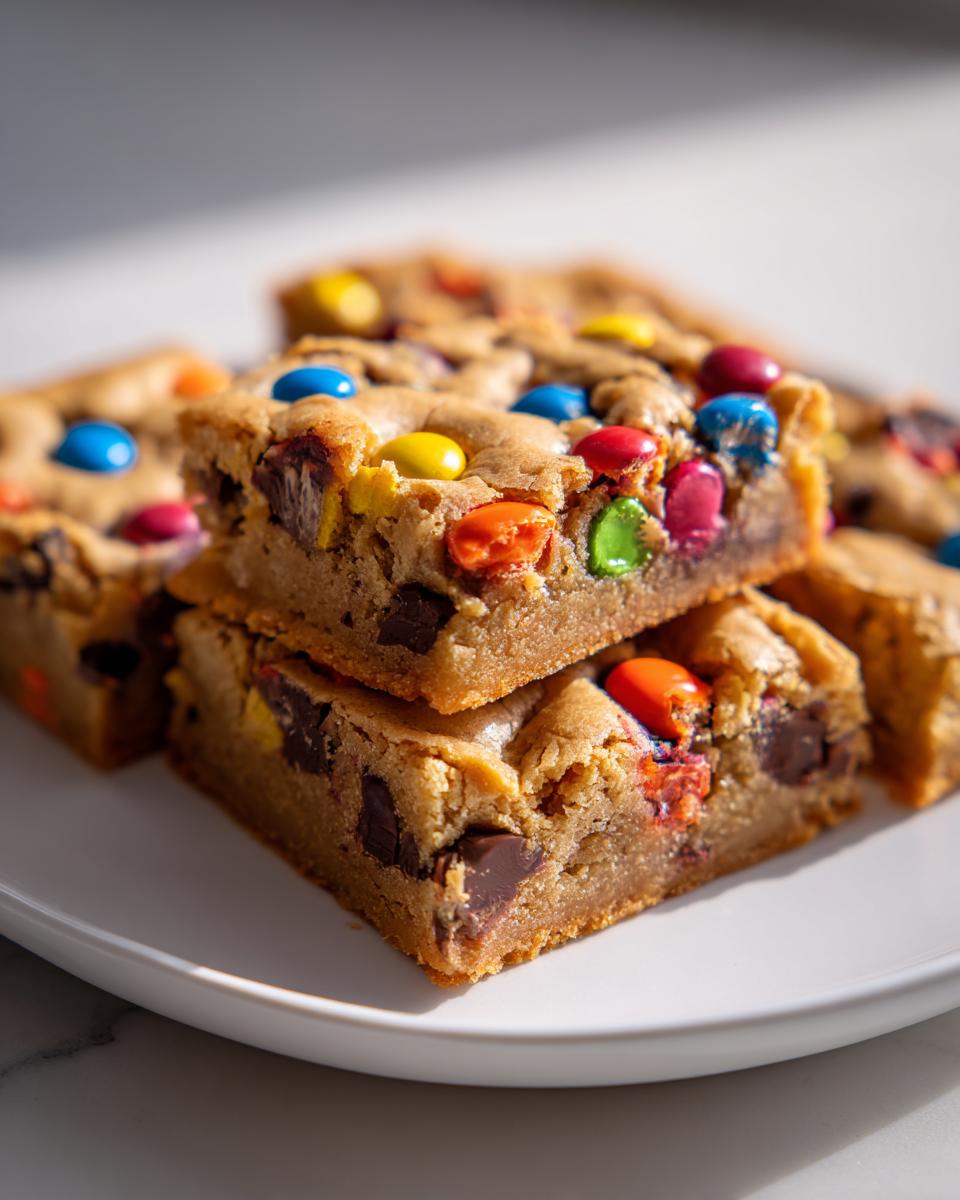
Finally, remember that the sweetness level is already high because we are using candy. Don’t feel tempted to increase the sugar in the base dough. The combination of the one cup white sugar and one cup brown sugar in the dough recipe is balanced perfectly to handle that massive candy load without making the bars unbearably sweet. They bake up beautifully golden and chewy, and that caramel flavor from the brown sugar really complements the chocolate candies.
Storage and Reheating Your Halloween Candy Cookie Bars
So, you managed to cut them neatly? Congratulations! Now you have this giant pan of incredible, rich bars, and you’re probably wondering how you stop everyone from eating them all in one sitting. Don’t worry, storing these is super easy, but you do need to treat them right so those centers stay chewy and don’t get stale.
For short-term enjoyment—let’s say the next 3 to 4 days—keeping them on the counter is totally fine. You just need an airtight container. I usually line the bottom with a piece of parchment paper first, then stack the bars in a single layer if possible. If you have to stack them, put another sheet of parchment between the layers. Keeping them covered traps any residual moisture from the candy, keeping them soft. I keep mine in the pantry where it’s cool, away from direct stove heat or sunlight.
If you know you won’t get to them within four days, or if your kitchen runs on the hot side, I highly recommend the fridge. Pop them into that airtight container, maybe even wrap the whole container tightly with plastic wrap just to be safe. In the refrigerator, they stay fresh for easily a week, maybe even ten days. My only warning about the fridge is that the dough part can get a little firm, so if you pull one out to eat, let it sit on the counter for about ten minutes before biting into it. It warms up just enough to bring back that soft chewiness.
Now, if you’re like me and you baked a double batch because you know your neighbors will beg for some next week, you can absolutely freeze these! This is a lifesaver. Make sure they are completely cut and totally cooled first. Wrap individual bars—or stacks of two or three, if you’re feeling generous—tightly in plastic wrap first to prevent freezer burn. Then, toss those wrapped packages into a heavy-duty freezer bag. These keep perfectly for two to three months. When you want one, just unwrap it, let it thaw on the counter for an hour, and it tastes like it was baked fresh that morning with all those gooey candy pockets still intact!
Serving Suggestions for Halloween Candy Cookie Bars
After all that baking and cooling, we deserve a perfect pairing, right? These Halloween Candy Cookie Bars are incredibly rich—we’re talking butter, sugar, and a whole lot of chocolate jammed in there. So, you need something simple to cut through that sweetness, or something warm to dip into!
First and foremost, nothing—and I mean *nothing*—beats a glass of cold milk when you’re eating something this decadent. It just washes down that dense, chocolatey chew perfectly. It’s simple, nostalgic, and always hits the spot after a long day of sorting through candy wrappers.
If you’re enjoying these in the afternoon or need a little grown-up pick-me-up, a strong cup of hot coffee is amazing alongside these bars. The bitterness of the coffee is the perfect counterpoint to all that caramel and peanut butter goodness. I sometimes even make a little treat for myself, maybe pairing it with something fruity, like a nice tart pink beverage I whipped up earlier in the week, just to balance things out!
But—and this is my favorite way to serve them to company—if you warm one up for just ten seconds in the microwave, it gets that center totally gooey again. Top that warm bar with a small scoop of vanilla bean ice cream. The contrast between the warm, melted candy and the cold cream is just heavenly. It turns a simple cookie bar into a full-blown dessert experience!
Frequently Asked Questions About Halloween Candy Cookie Bars
I get so many questions when I post pictures of these bars because everyone wants to know how to make them perfectly! I’ve collected the most common things readers ask me about over the years, so hopefully, this clears everything up before you even start mixing!
Can I use hard candies like Jolly Ranchers or peppermints in the cookie bars?
That’s a tricky one, and honestly, I advise against it unless you love a super brittle surprise! Hard candies melt differently than chocolates or caramels when you’re baking at 350 degrees F. They tend to turn into almost pure liquid sugar that spreads out, and when they cool, they can get really sharp and hard—so you might end up with solid little glass shards in your bite. Stick to soft, chewy, or chocolate-based candies for the best results in these Halloween Candy Cookie Bars. If you want to try them, chop them up *super* fine first, but I still prefer sticking to my list of favorite desserts that use softer ingredients, like many other treats!
What is the very best pan size to use for these bars?
The recipe is truly calibrated for a standard 9×13 inch baking pan. This size gives you the perfect dough thickness—about an inch deep—which allows the bars to bake through in that 25 to 30 minute window without burning the edges or staying raw in the middle. If you use a 9×9 pan, the bars will be nearly two inches thick, and you’ll definitely need to double the baking time, maybe even more, which increases the chance of the candy burning on the bottom. Stick to 9×13 for the best texture!
If I don’t have enough candy, can I substitute with chocolate chips?
You absolutely can! If your Halloween haul was surprisingly small, the base dough is basically a fantastic, huge chocolate chip cookie dough anyway. Just substitute the chopped candy evenly with good quality semi-sweet or milk chocolate chips. However, you lose a little bit of that fun, layered texture that the different shapes and fillings provide. If you use chips, I always suggest pulsing them in the food processor just once or twice; you don’t want powder, but you want them broken up slightly so they meld better with the dough before you spread it in the pan.
How long do these Halloween Candy Cookie Bars stay fresh?
Because this is such a high-fat, high-sugar cookie bar, it stays wonderfully fresh! Kept stored in an airtight container at cool room temperature, they are usually fantastic for about four days. If you are patient and use the chilling tip I shared earlier, they might even last five days and still be wonderfully soft. If you need to keep them longer, the freezer is your best friend; they keep beautifully frozen for up to three months!
Estimated Nutritional Information for Halloween Candy Cookie Bars
Look, I’m going to be totally honest with you here, because that’s how we do things in my kitchen: these Halloween Candy Cookie Bars are NOT diet food! They are an end-of-October celebration, and they are packed with all the good stuff—butter, sugar, and leftover candy goodness.
Because we are crumbling in chocolate bars that often contain nuts, caramel, and a lot of various fats, these numbers are just educated guesses based on adding up all the standard ingredients before we even sprinkle in the random, delicious candy remnants. You need to take these figures with a big grain of salt, especially since the actual nutrition changes depending on whether you use Snickers or just plain M&Ms!
This breakdown is *per bar*, assuming you get 24 relatively even squares out of your 9×13 pan. If you cut them smaller—which I’ve been known to do when I’m trying to save some for later—these numbers will look better!
Here are the general estimates based on the standard recipe structure:
- Serving Size: 1 bar
- Calories: 250
- Sugar: 25 grams (Yes, that’s high! It’s Halloween, remember?)
- Fat: 14 grams total
- Saturated Fat: 8 grams (That’s the butter and the chocolate doing work!)
- Unsaturated Fat: 6 grams
- Trans Fat: 0 grams (We aren’t using any processed shortening, thank goodness!)
- Carbohydrates: 30 grams
- Fiber: 1 gram
- Protein: 3 grams
- Cholesterol: 40 milligrams
Remember, this is just a guideline! If you decide to load yours up with extra peanut butter cups, those numbers are going to shoot up in the fat and calorie department. But who cares when it tastes this good?! Enjoy them responsibly—or just don’t worry about it until November 1st!
Print
Halloween Candy Cookie Bars
- Total Time: 45 min
- Yield: 24 bars 1x
- Diet: Vegetarian
Description
Simple cookie bars loaded with chopped Halloween candy.
Ingredients
- 1 cup unsalted butter, softened
- 1 cup granulated sugar
- 1 cup packed brown sugar
- 2 large eggs
- 1 tablespoon vanilla extract
- 3 cups all-purpose flour
- 1 teaspoon baking soda
- 1/2 teaspoon salt
- 2 cups mixed chopped Halloween candy
Instructions
- Preheat your oven to 350 degrees F (175 degrees C). Grease and flour a 9×13 inch baking pan.
- In a large bowl, cream together the softened butter, granulated sugar, and brown sugar until smooth.
- Beat in the eggs one at a time, then stir in the vanilla extract.
- In a separate bowl, whisk together the flour, baking soda, and salt.
- Gradually add the dry ingredients to the wet ingredients, mixing until just combined.
- Fold in the chopped Halloween candy.
- Spread the dough evenly into the prepared baking pan.
- Bake for 25 to 30 minutes, or until the edges are golden brown.
- Let the bars cool completely in the pan before cutting into squares.
Notes
- Use any leftover Halloween candy you have on hand.
- For easier cutting, chill the cooled bars for 30 minutes before slicing.
- Prep Time: 15 min
- Cook Time: 30 min
- Category: Dessert
- Method: Baking
- Cuisine: American
Nutrition
- Serving Size: 1 bar
- Calories: 250
- Sugar: 25
- Sodium: 120
- Fat: 14
- Saturated Fat: 8
- Unsaturated Fat: 6
- Trans Fat: 0
- Carbohydrates: 30
- Fiber: 1
- Protein: 3
- Cholesterol: 40
Keywords: Halloween, candy, cookie bars, dessert, easy bake