
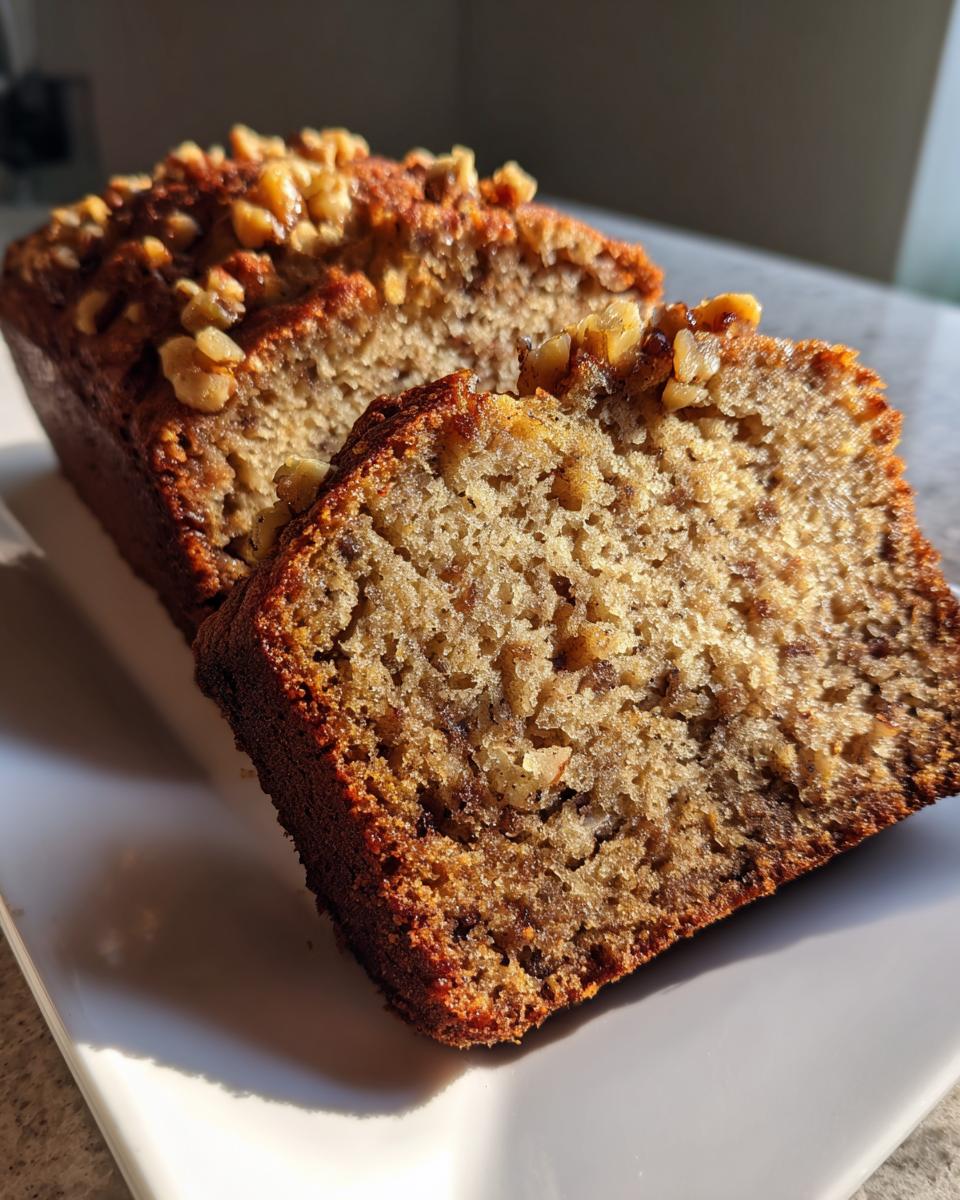
There’s nothing quite like the smell of something perfect baking on the counter, right? It just instantly makes the whole house feel cozy and safe. If you’re looking for that perfect, cozy bake, you’ve found it. Forget those dry, crumbly loaves you sometimes end up with—this is the real deal. This is my absolute favorite, can’t-be-beat recipe for **Grandma Banana Nut Bread**.
It’s funny how one recipe can mean so much. This loaf is pure comfort for me. My Grandma baked this every time someone had a big test or needed cheering up. It uses such simple ingredients, but the method—oh, the method ensures it stays unbelievably moist without any weird tricks. Trust me, once you master this easy technique, you’ll never look back. I promise you, this recipe for banana nut bread is the one you’ll be passing down!
If you’re looking for tips on keeping bread super moist generally, I actually wrote a whole thing about that you might find helpful right here.
Gathering Your Ingredients for Grandma Banana Nut Bread
Okay, let’s look at what we need. Honestly, the payoff from these simple things is enormous! Because this bread is so straightforward, the quality of your input really shows in the final taste. You absolutely must be sure you’ve got those bananas sitting on your counter looking borderline gross—I mean, super spotty and brown. Those are the ones that give you the best natural sweetness and moisture for **Grandma Banana Nut Bread**.
Here’s the simple list. Grab everything before you start mixing! Make sure that butter has been sitting out long enough to be truly soft, not melty:
- Three bananas, mashed up really well. No big chunks allowed!
- Half a cup of good, unsalted butter that has been purposely softened.
- Three-quarters of a cup of plain white sugar.
- Two large eggs, ready to go.
- One teaspoon of vanilla extract—use the good stuff if you have it!
- A cup and a half of regular all-purpose flour.
- One teaspoon of baking soda for the rise.
- Half a teaspoon of salt to balance everything out.
- Half a cup of nuts, either walnuts or pecans, chopped up nicely.
If you wanted to check out a little trick for keeping things extra moist in general, I’ve got a great resource about zucchini bread that might inspire you next time! You can check out that secret moist trick over here.
Essential Equipment for Perfect Grandma Banana Nut Bread
Having the right tools ready means you won’t have to scramble halfway through mixing, which always leads to over-mixing, and we certainly don’t want that! For this classic loaf, you don’t need fancy gadgets, just the basics for a good bake.
You’ll need a sturdy large bowl for mushing the bananas and mixing the wet ingredients. A separate, medium-sized bowl is perfect for just whisking those dry things together. Most importantly, grab a standard 9×5 inch loaf pan. Don’t forget your mixing spoon or, if you’re feeling lazy like I sometimes am, your electric mixer!
Step-by-Step Instructions for Grandma Banana Nut Bread
Alright, here is where the magic happens! Don’t be intimidated by the steps; they are written this way to ensure your bread is light, fluffy, and never sinks in the middle. Following this order is key to getting that incredibly soft crumb that makes Grandma’s recipes famous. We’re moving logically from prep to mix to bake, ensuring everything is perfect before it hits the oven.
Preparing the Pan and Oven
First things first, we need heat! Get your oven warming up to 350 degrees F, which is 175 degrees C if you use metric. While that’s heating, take your 9×5 inch loaf pan and give it a good grease. I mean really coat the bottom and sides with butter or spray. Then, dust it lightly with flour, tapping out any excess. This double-protection step is essential so your beautiful loaf comes right out later. You can even look up how to make a real homemade pan release if you want extra insurance—I’ve seen great advice on that elsewhere.
Mixing the Wet Ingredients for Grandma Banana Nut Bread
Next, grab those sad, spotty bananas and mash them thoroughly in your largest bowl. We want mush, not chunky bits! Once they’re smooth, it’s time to cream. Beat that softened butter right into the mashed bananas until they look like they are thoroughly introduced to one another. Then, you’ll drop in those two eggs, beating one in completely before adding the next one. Finish this wet batch by stirring in your teaspoon of vanilla extract. Just mix until it’s smooth and creamy.
Combining Wet and Dry Components
Time for the dry team! In that separate medium bowl, whisk together your flour, baking soda, and salt. Whisking is important here because it helps distribute the leavening agents evenly. Now, listen closely, because this is the big one: gradually add the flour mixture into your banana goo. Mix these two together slowly, adding just enough until you see the flour streaks disappear. That’s it! Stop mixing! Do not go one second further. If you overmix here, you develop gluten, and instead of fluffy **Grandma Banana Nut Bread**, you get tough bread. Seriously, that warning—”Do not overmix”—is the gospel truth for quick breads.
Once you’ve just combined them, gently fold in those chopped walnuts or pecans. Be gentle! Just a few turns with the spatula until they are tucked evenly into the batter. If you want to make this loaf even richer, I have another fantastic technique for amazing flavor you can read about here.

Baking and Cooling Your Grandma Banana Nut Bread
Pour that lovely batter straight into your prepared pan and smooth the top slightly. Pop it into your preheated 350-degree oven for about 50 to 60 minutes. Obviously, all ovens are a bit different, so you must test for doneness around the 50-minute mark. Slide a wooden skewer or a thin knife right into the center. If it comes out clean or with just a few moist crumbs stuck to it, you’re golden! If it’s wet, give it five more minutes and check again.
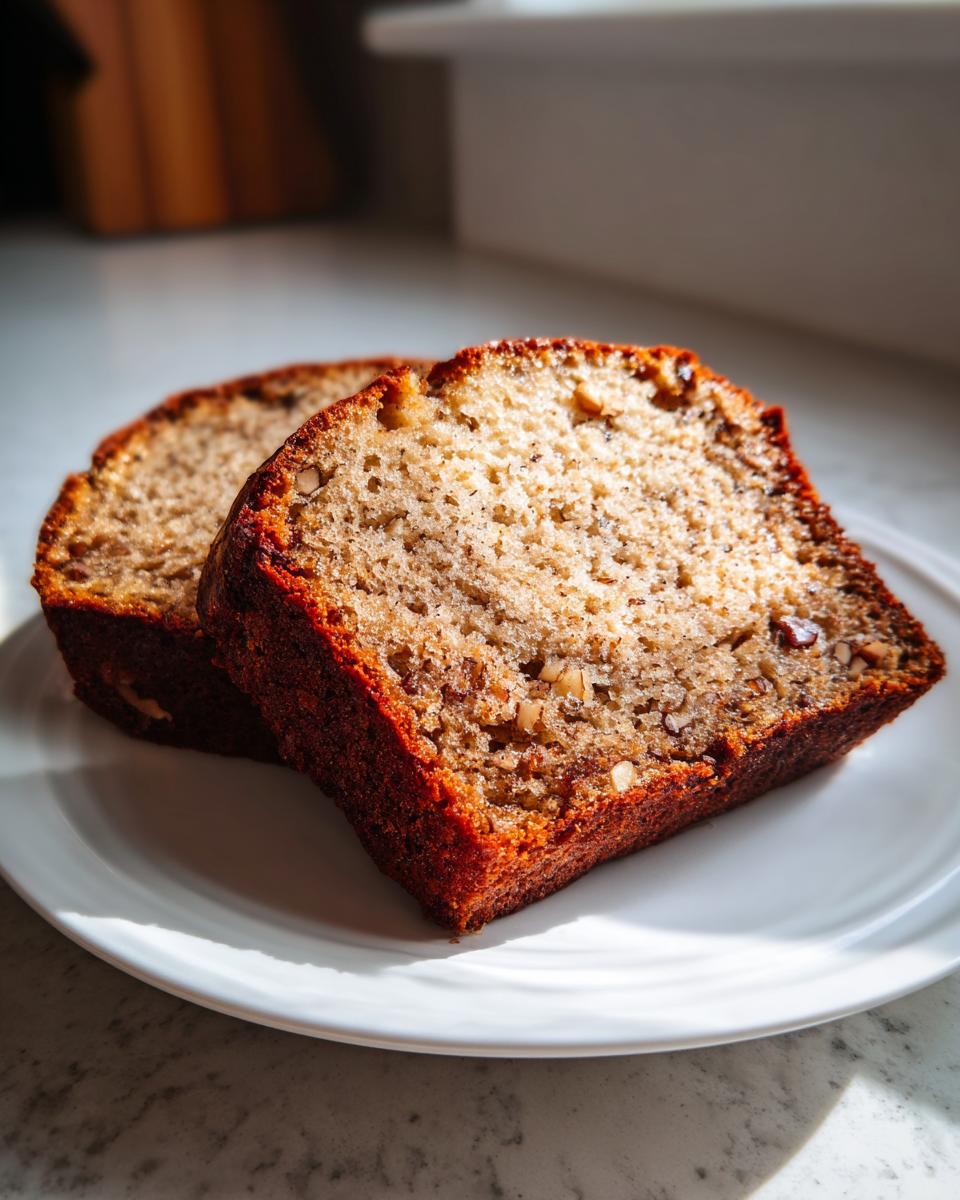
The cooling process is just as important as the mixing! Let the bread sit patiently in that hot pan for a full 10 minutes. This lets the structure set up completely. After ten minutes, carefully flip the loaf out onto a wire cooling rack. Don’t try to slice it hot, or it will get gummy on you. Let it cool completely before slicing if you can manage to wait—though a warm slice is tempting!
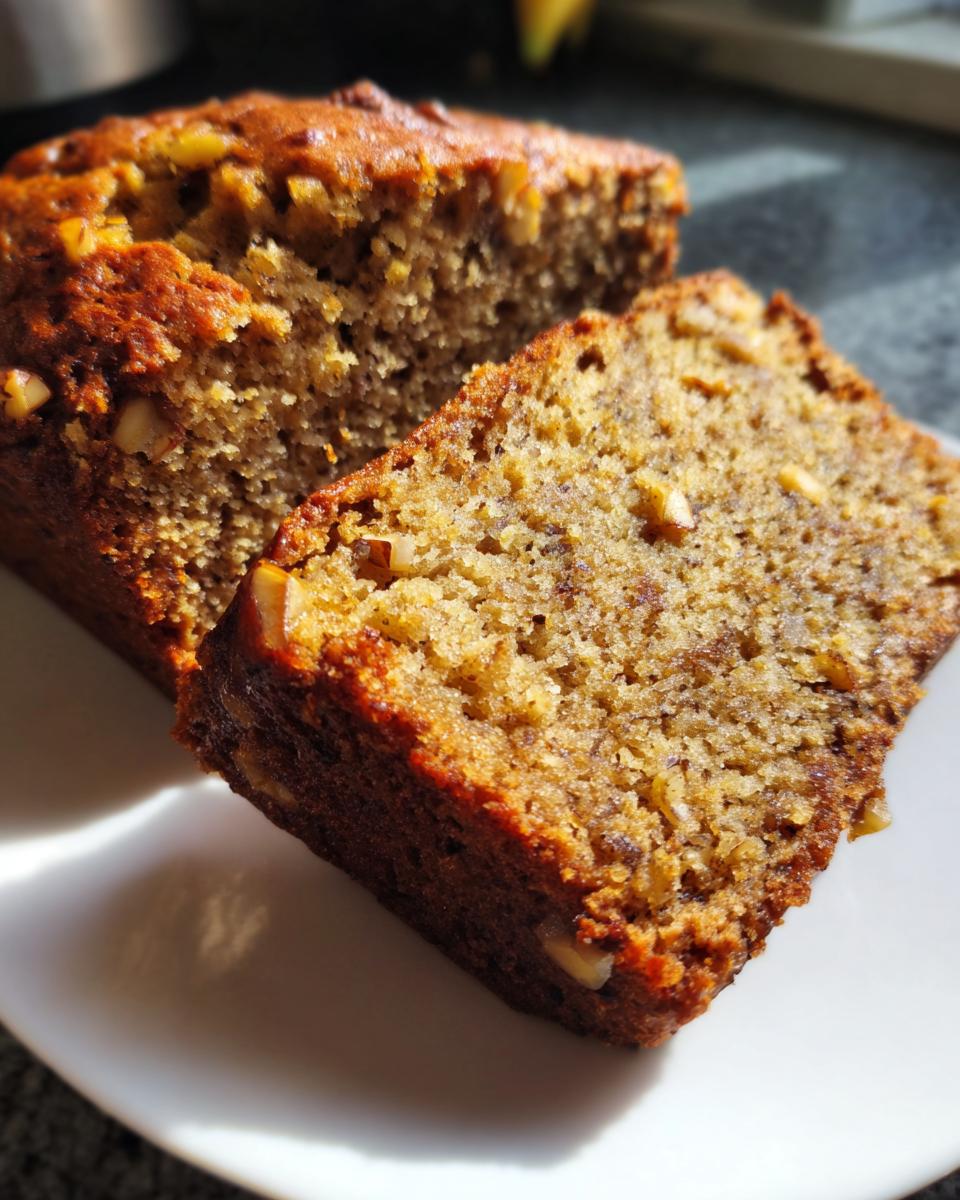
Tips for the Best Grandma Banana Nut Bread Texture
Getting that perfect, melt-in-your-mouth texture is all about respecting the bananas, honestly. This is where Grandma always said you can’t cheat! You absolutely must use bananas that are deeply spotted, almost black. When they are that ripe, their starches have converted fully to sugar, which gives you incredible depth of flavor and heaps of moisture.
Also, don’t stress if you only have pecans instead of walnuts—that’s perfectly fine! My grandmother often swapped them depending on what was on sale. Pecans just yield a slightly richer, more buttery note to the finished loaf. If you want even deeper insights into keeping your quick breads super soft, I found this article on zucchini bread tricks that might help you out in the future; you can read about it here!
Remember that rule about not overmixing the flour? That is the number one killer of moisture retention. Stop mixing the second those white streaks disappear! That little bit of care makes a huge difference between standard bread and truly *Grandma’s* bread.
Variations on Classic Grandma Banana Nut Bread
Now that you’ve mastered the classic loaf, you might be itching to shake things up a little, and that’s fun! This recipe is so sturdy that it handles additions like a champ. My favorite little twist, especially if I know I won’t eat the whole loaf right away, is tossing in about half a cup of semi-sweet chocolate chips along with the nuts. Wow, that makes it decadent!
You can also introduce some warmth. Try adding just half a teaspoon of ground cinnamon or a pinch of nutmeg along with your dry ingredients. It really complements the banana flavor beautifully. If you feel like abandoning the loaf pan entirely because you need bread much faster, just use a 9-inch square pan instead. You’ll bake it for less time—about 35 to 40 minutes—but make sure you grease that square pan really well!
For something completely different but still delicious, you could try a different kind of fruit bread. I recently made a wonderful tea bread that had raspberries and almonds which was fantastic; you can find guidance on that recipe if you’re feeling adventurous.
Storing Leftover Grandma Banana Nut Bread
Nobody wants this bread to go stale, but sometimes you just can’t finish it in one sitting—even if you try really hard! The best place for leftover **Grandma Banana Nut Bread** is on the counter, wrapped tightly. Pop that cooled loaf into a good airtight container or wrap it securely in plastic wrap.
It should keep beautifully at room temperature for about three or four days. Don’t chill it unless you absolutely have to, because the fridge tends to dry out quick breads faster. If you do end up needing to keep it longer, freezing slices works great. Just wrap them individually. When you want a slice later, microwave it for about 15 seconds—that steam brings the moisture right back!
Frequently Asked Questions About Grandma Banana Nut Bread
Can I use frozen bananas instead of fresh ripe ones?
Yes, you absolutely can use frozen bananas! This actually works out perfectly for getting those ultra-ripe bananas without waiting for them to brown on your counter. Just make sure you thaw them completely before using them, and then drain off any excess liquid they release in the thawing process. That liquid is mostly water, and we want the banana solids for moisture and flavor, not extra water!
What if I don’t have walnuts on hand? Can I skip the nuts altogether?
You can totally swap the nuts out! I mentioned pecans earlier, which work beautifully and give a slightly richer taste. If you don’t have any nuts at all, you can certainly leave them out. Just know that the nuts add a nice textural contrast to the soft bread. If you leave them out, be extra careful not to overmix the batter when you add the flour!
How can I make this Grandma Banana Nut Bread even sweeter?
This recipe is balanced a certain way, but I get wanting to bump up the sweetness sometimes! Since the sugars are set to work with the molasses in the butter, you can’t just toss in a ton more white sugar because it messes with the ratios. A much better trick is to glaze it! Once the bread is totally cool, drizzle a simple glaze over the top. You can thin out a little bit of cream cheese frosting, or just mix powdered sugar with a teaspoon of milk and a touch of vanilla. That sweet topping satisfies any extra craving!
My bread sunk right in the middle. What happened?
Oh, that’s the saddest thing! It almost always comes down to one of two things. Either you opened the oven door too many times while it was baking, letting all that heat escape and causing the middle to collapse, or you used baking soda that was old and no longer active. If your baking soda is older than six months, it’s worth replacing it to make sure your quick bread rises properly!
If you want to read a good refresher on general baking troubleshooting, I found some helpful tips about moist loaves that might explain what went wrong right here.
Estimated Nutritional Snapshot for Grandma Banana Nut Bread
Now, I know Grandma wasn’t exactly tracking calories when she was whipping up these loaves for us, but I understand that a lot of you like to see what’s in your treats! So, I took a rough look at the ingredients and pulled together an estimate for a single slice. Remember, this bread tastes so good, you might find yourself sneaking a second slice despite the numbers!
Treat this list as a fun guide rather than a strict rulebook. Because we all use different kinds of butter and the exact size of our bananas varies, these numbers are just a general idea of what you’re getting when you enjoy a piece of this amazing **Grandma Banana Nut Bread**.
- Serving Size: One slice
- Calories: Around 250
- Sugar: About 18 grams (Those bananas really add natural sweetness!)
- Fat: Roughly 12 grams
- Protein: About 4 grams
- Carbohydrates: Approximately 35 grams
This is what I’d call a wonderful, comforting treat! If you use pecans, the fat content might shift slightly compared to walnuts. If you skip the nuts entirely, you might see fewer calories. It’s all relative, but it proves that simple, homemade baking can still fit nicely into your day!
Sharing Your Homemade Grandma Banana Nut Bread
Well, that’s it! You’ve got the secret to the best, most comforting **Grandma Banana Nut Bread** fresh out of your oven. I truly hope it made your house smell amazing. Now, I don’t want to bake alone over here! Please jump down and leave a star rating if you loved it.
Tell me in the comments how it turned out for you and share any little twists you added. If you snapped a picture, I’d love to see it! You can reach out through my contact page if you need anything.
Print
Grandma’s Banana Nut Bread
- Total Time: 70 min
- Yield: 1 loaf 1x
- Diet: Vegetarian
Description
A simple recipe for moist and flavorful banana nut bread, following a traditional method.
Ingredients
- 3 ripe bananas, mashed
- 1/2 cup unsalted butter, softened
- 3/4 cup granulated sugar
- 2 large eggs
- 1 teaspoon vanilla extract
- 1 1/2 cups all-purpose flour
- 1 teaspoon baking soda
- 1/2 teaspoon salt
- 1/2 cup chopped walnuts or pecans
Instructions
- Preheat your oven to 350 degrees F (175 degrees C). Grease and flour a standard 9×5 inch loaf pan.
- In a large bowl, mash the bananas well.
- Beat the softened butter and sugar into the mashed bananas until combined.
- Beat in the eggs one at a time, then stir in the vanilla extract.
- In a separate medium bowl, whisk together the flour, baking soda, and salt.
- Gradually add the dry ingredients to the wet ingredients, mixing just until combined. Do not overmix.
- Fold in the chopped nuts.
- Pour the batter into the prepared loaf pan.
- Bake for 50 to 60 minutes, or until a wooden skewer inserted into the center comes out clean.
- Let the bread cool in the pan for 10 minutes before turning it out onto a wire rack to cool completely.
Notes
- For a richer flavor, use very ripe, spotty bananas.
- You can substitute pecans for walnuts if you prefer.
- If you do not have a loaf pan, you can bake this batter in a 9-inch square pan for about 35-40 minutes.
- Prep Time: 15 min
- Cook Time: 55 min
- Category: Dessert
- Method: Baking
- Cuisine: American
Nutrition
- Serving Size: 1 slice
- Calories: 250
- Sugar: 18g
- Sodium: 250mg
- Fat: 12g
- Saturated Fat: 4g
- Unsaturated Fat: 8g
- Trans Fat: 0g
- Carbohydrates: 35g
- Fiber: 2g
- Protein: 4g
- Cholesterol: 45mg
Keywords: banana bread, nut bread, quick bread, banana cake, sweet bread