
When that crisp autumn air finally hits, you know it’s time to ditch the light summer treats and dive headfirst into warm spices and comforting textures. Forget those heavy, dry cookies you sometimes get this time of year! I’ve finally perfected my recipe for the softest, cake-like sandwiches you can imagine: Apple Cider Whoopie Pies. Seriously, these things melt the second they hit your mouth! What makes them truly special is that incredible filling—a perfectly spiced cream cheese frosting that sings with cinnamon and nutmeg alongside that concentrated apple flavor. I’ve been working on mastering the cider reduction for years, and trust me, once you nail that step, you’ve got a recipe for life!
Why You Will Love These Apple Cider Whoopie Pies
Honestly, why wouldn’t you love these? I make these every year the second I see the first leaf drop. They are just pure comfort in cookie form. If you’re looking for a sign to bake something perfectly autumnal, this is it!
- They capture true fall flavor! The concentrated apple cider gives you that deep, warm essence without needing hours of peeling and sautéing apples first.
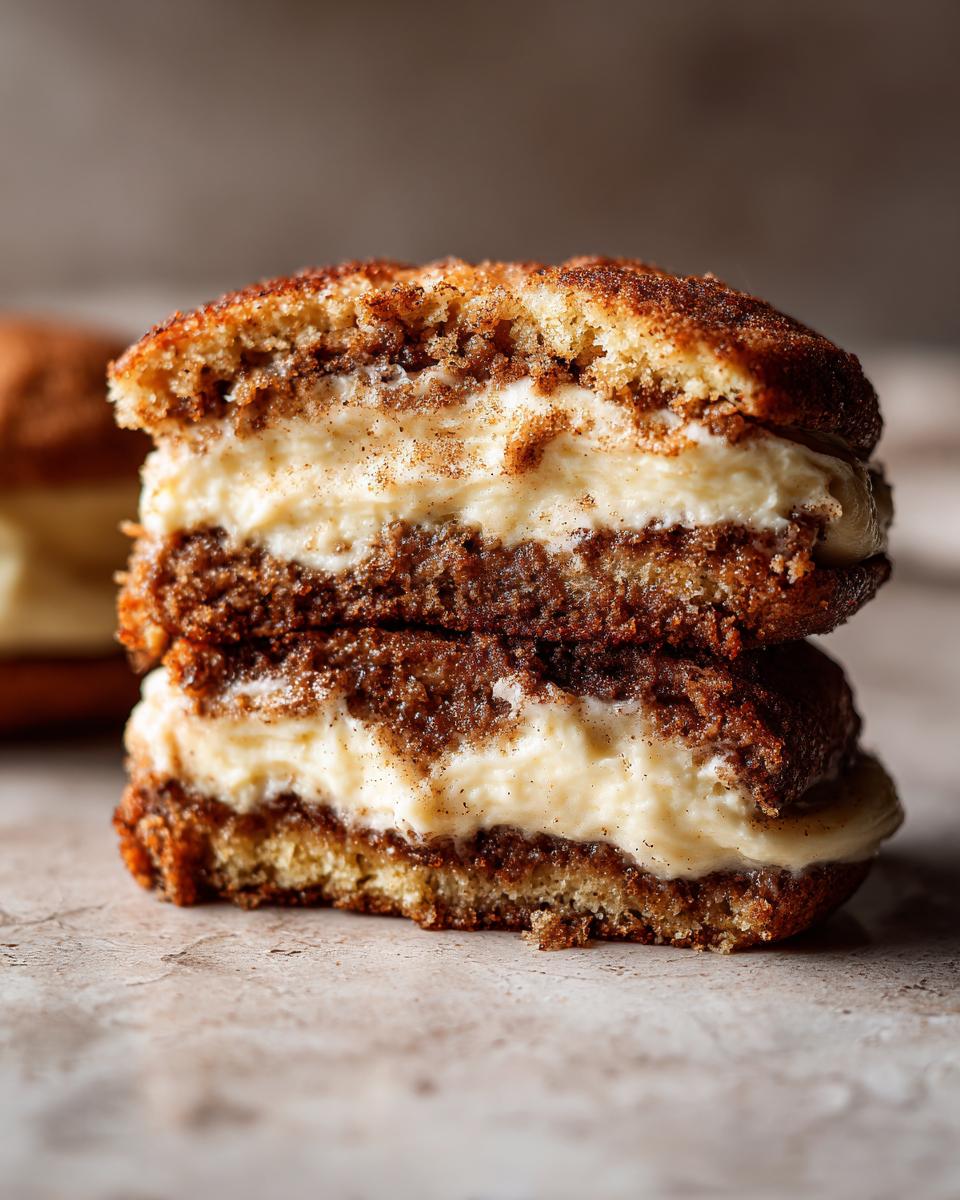
- The texture is genuinely cake-like. These aren’t tough sandwich cookies; they’re unbelievably soft and pillowy, just like perfect mini layer cakes.
- Assembly is such a breeze. Once the cakes are cool, you just whip up the filling, spread it thick, and you’re done. Perfect for quick dessert making!
- That filling, oh my goodness. The cream cheese frosting has the perfect tang to cut through the sweetness of the spiced cake. It’s heavenly.
- They freeze beautifully! Pop them in an airtight container, and you have ready-to-go fall dessert surprise whenever you need one.
When I need a fast, impressive dessert for a fall potluck, these apple cider whoopie pies are always the first thing I reach for. You’re going to be everyone’s favorite baker, I promise!

Essential Ingredients for Perfect Apple Cider Whoopie Pies
Okay, let’s talk ingredients. Getting the right feel for these apple cider whoopie pies means having everything measured properly before you even preheat the oven. I always lay everything out—I call it my mise en place, even though I’m just using spoons and bowls! The secret to that intense apple flavor is definitely concentrating the cider, but the base of the cake needs the right dry stuff too.
For the Apple Cider Whoopie Pies Cakes
This is where we build our spiced, tender cake. Remember, the apple cider has to be reduced first! Pay attention to that measurement.
- 1 3/4 cups all-purpose flour
- 1 teaspoon baking soda
- 1/2 teaspoon ground cinnamon
- 1/4 teaspoon ground nutmeg
- 1/4 teaspoon ground allspice
- 1/2 teaspoon salt
- 1/2 cup unsalted butter, softened
- 1 cup packed light brown sugar (packed is key for that molasses note!)
- 1 large egg
- 1 teaspoon vanilla extract
- 1/2 cup apple cider, reduced to 1/4 cup (Don’t skip the reduction!)
For the Spiced Cream Cheese Frosting
This filling needs to be super smooth so it spreads beautifully without tearing the delicate cakes. That means your dairy components absolutely cannot be cold, or things get clumpy fast.
- 4 ounces cream cheese, softened
- 1/4 cup unsalted butter, softened
- 2 cups powdered sugar
- 1/2 teaspoon ground cinnamon
See? Simple stuff, really. But when you combine that rich, spiced cake with that tangy, buttery cream cheese frosting? Wow. That’s why these are my go-to fall dessert.
Expert Tips for Reducing Apple Cider for Apple Cider Whoopie Pies
Now listen up, because this next part is the absolute make-or-break moment for these apple cider whoopie pies. You can’t just dump 1/2 cup of regular apple cider into the batter, or these cakes will turn into sad, wet pancakes. We need to concentrate that lovely fall flavor!
Why reduce it? Well, regular cider is mostly water, and all that extra liquid messes with the structure our flour and baking soda are trying to build. By simmering it down, we intensify the sweet, spiced apple notes while evaporating the excess water. This ensures you get maximum flavor impact without sacrificing that cake-like chewiness.
It’s actually super easy. Grab a small saucepan—I mean, really small, like a saucepan you use for melting butter. Pour in your half cup of cider and set it over medium heat. You just let it simmer gently. Watch it closely; it goes fast! You’re looking for it to bubble down until only 1/4 cup remains. This usually takes about 10 to 15 minutes, depending on your stove. Don’t let it boil dry, or you’ll have sticky caramel instead of reduced cider!
Once you hit that 1/4 cup mark, pull it right off the heat immediately. You have to let it cool completely before adding it to your batter later, otherwise, you’ll melt all that beautifully creamed butter. Seriously, pop it in the fridge for 10 minutes if you’re impatient! If you want to read more about different ways to use apple cider in drinks, I found this handy guide on making cider vinegar drinks, but for these spiced cookies, reduction is king!
Step-by-Step Instructions to Make Apple Cider Whoopie Pies
Alright, let’s get baking! This process is so satisfying because you can almost smell the fall spices the moment you start mixing the dry stuff. We’re going to work in two clear stages: making the little cakes, and then whipping up that incredible frosting. Don’t cheat the cooling time, though; that’s crucial for perfect assembly later on. If you’ve ever made a lovely layer cake, the method feels familiar—I even referenced the steps in my guide for a classic homestyle yellow cake to make sure the texture was spot on here!
Preparing the Cake Batter
First things first: get that oven preheated to 350 degrees F and line those baking sheets with parchment paper. No sticking allowed! In one bowl, whisk together all your dry baking powder, salt, and those lovely spices. Now, for the wet stuff: grab your biggest bowl and cream that softened butter and brown sugar until it’s truly light and fluffy—we’re whipping air into this thing! Beat in your egg and vanilla until they vanish. Here comes the critical part: alternate adding the dry ingredients and your *cooled, reduced* apple cider. Add a third of the dry, mix just until it barely comes together, then add half the cider, mix lightly, then another third of the dry, the rest of the cider, and finish with the last of the dry. Stop mixing the second you stop seeing streaks of flour. Overmixing these will kill that cakey softness!
Baking and Cooling the Cakes
Once your batter is smooth and perfectly mixed, drop rounded tablespoon-sized mounds onto your prepared sheets, giving them about two inches of space to spread out, because they will puff slightly. Pop them into the 350-degree oven for just 10 to 12 minutes. You’re looking for them to spring back ever so slightly when you gently touch the top, and a toothpick inserted in the center needs to come out perfectly clean. Don’t take them out too soon! Let them sit right on that hot baking sheet for about 5 minutes—this helps them firm up just enough so they don’t completely collapse. Then, gently transfer those warm cakes onto a wire rack to cool completely before you even *think* about frosting them. Seriously, if they are warm, the filling will turn into a melted mess!
Making the Spiced Cream Cheese Filling
While those apple cider cakes cool down, we make the star: the filling! Make sure that cream cheese and the second portion of butter are perfectly softened—room temperature is essential here. Beat them together until they are totally smooth and look like pale whipped clouds. Now, start adding the powdered sugar, maybe a half cup at a time, beating slowly until it’s incorporated. Once it’s all in, beat it on medium-high speed! We want this filling to be light and fluffy, not dense. Finally, whip in that extra half teaspoon of cinnamon right at the end. Taste it, adjust if you want more spice, and prepare to fall in love!
Assembling Your Apple Cider Whoopie Pies
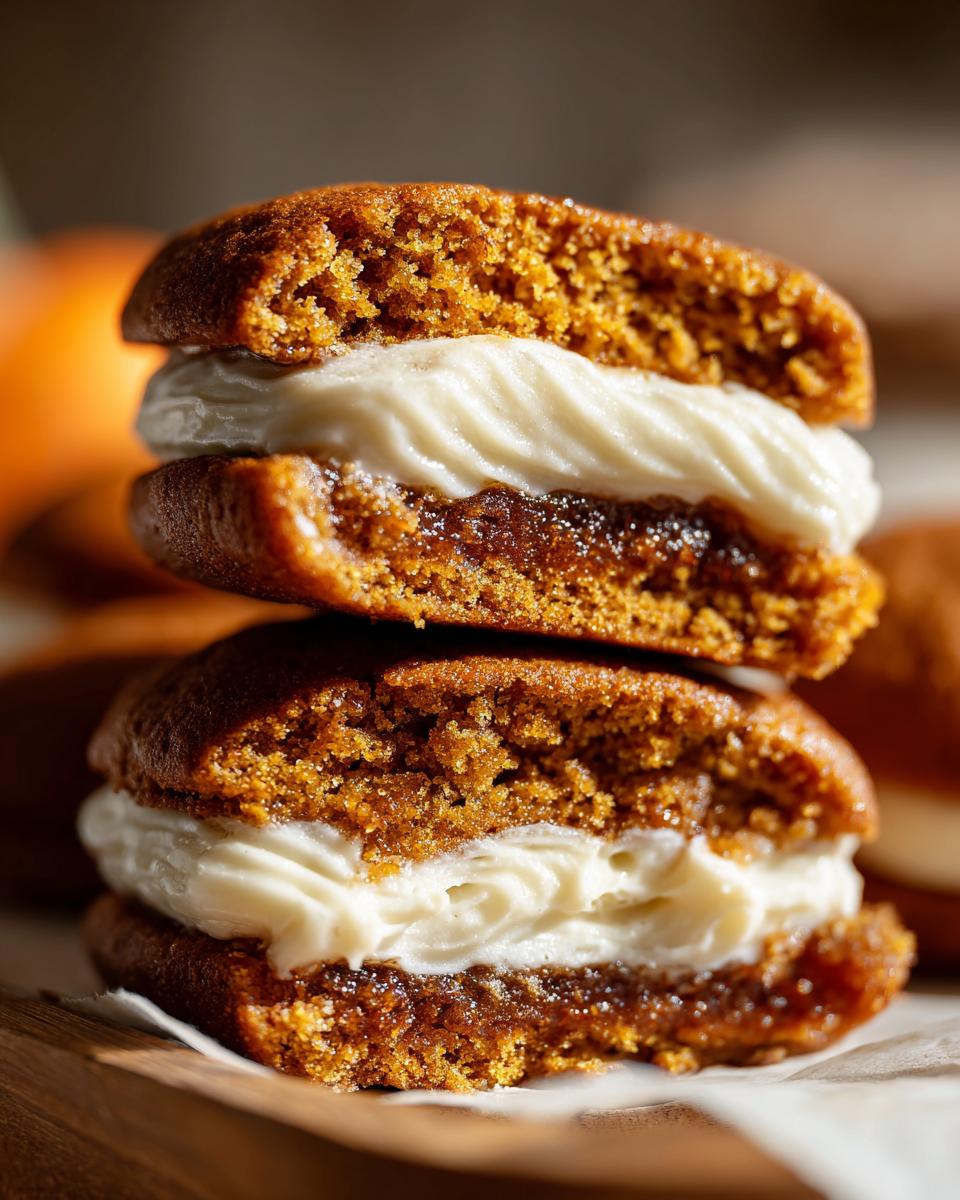
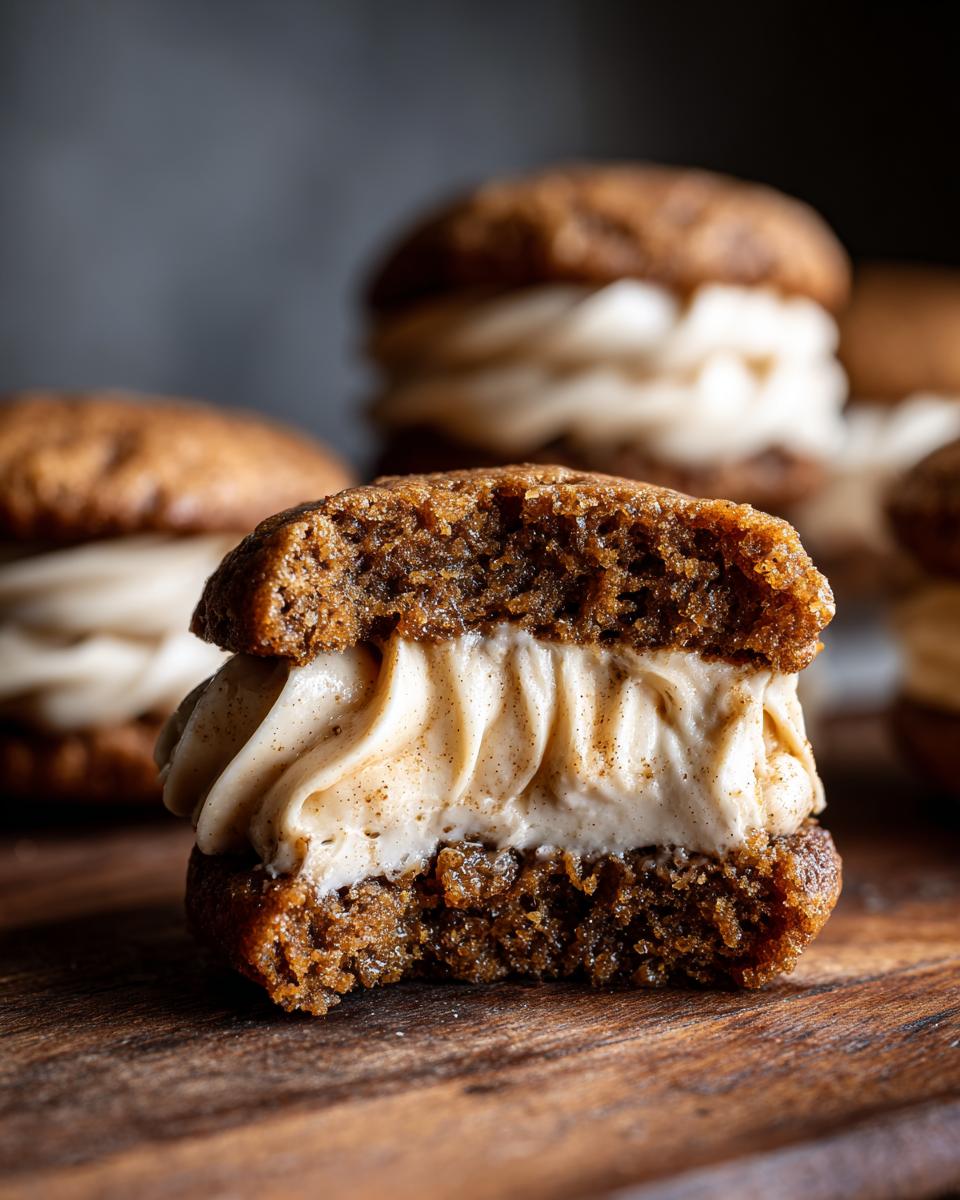
This is where the magic becomes tangible! Take one completely cooled cake bottom and place it flat-side up. Scoop a generous cloud of that gorgeous spiced cream cheese filling onto that flat surface. I like to use a table knife or an offset spatula to spread it nearly edge-to-edge, making sure it’s a thick layer because that’s the reward! Then, take your second cake, place it flat-side down on top of the filling, and gently press down until the filling just peeks out the sides. And voilà! You have a perfect, soft, delightful apple cider whoopie pie. They look so inviting, don’t they?
Tips for Success When Making Apple Cider Whoopie Pies
I’ve totally messed up batches of these apple cider whoopie pies before, mostly by rushing! You need to treat these cakes gently because they rely on that perfect balance of moisture from the cider and air from the creaming. Follow these few pointers, and you’ll never have a sad, flat whoopie pie again.
First, and I can’t stress this enough: room temperature ingredients are non-negotiable for both the cake’s butter and the filling’s cream cheese and butter. If your butter is cold, it won’t properly cream with the brown sugar, meaning you won’t get those crucial air bubbles needed for a fluffy cake. For the filling, cold cream cheese results in horrible little lumps that will never smooth out, no matter how long you run the mixer!
Secondly, watch that mixing bowl like a hawk when combining the dry and wet ingredients. Remember how I mentioned alternating? You must mix only until *just* combined. If you keep mixing after everything is incorporated, you develop too much gluten, and suddenly, those soft, cakey cookies turn into tough hockey pucks. You want the batter to look slightly shaggy when you stop.
Third, a great little trick to ensure your cake tops are consistently beautiful is to use that parchment paper, but also scoop consistently. I keep a small cookie scoop just for these, ensuring every drop is the same size. This means they all bake evenly, and when you go to sandwich them later, you won’t have one tiny top trying to balance on a giant bottom. If you’re ever tempted to skip the parchment, maybe check out my thoughts on cake hacks, but for these homemade apple cider treats, parchment is your best friend for an easy release!
Finally, make sure you are using packed light brown sugar. The measurement line in the recipe assumes you are pressing that sugar down into the cup. If you just spoon it in loosely, you’ll end up with too much sugar relative to the flour, often leading to cakes that spread too thin before they have a chance to set up properly in the oven.
Ingredient Notes and Substitutions for Apple Cider Whoopie Pies
I always hear from folks who panic when they get to the reduced apple cider step. I totally get it—sometimes you just want to stir and bake! But please, please try to reduce that cider. It’s worth the ten minutes of simmering because that concentrated flavor is the heart of these apple cider whoopie pies.
Now, if you absolutely cannot reduce it, I have a slight, desperate trick. You could try mixing regular apple juice with a tiny splash of apple cider vinegar—maybe 1/8 teaspoon—just to boost the tartness that the boiling process normally brings out. It won’t be the same, though; that deep, cooked apple flavor is just hard to mimic! But hey, if necessity calls, we make do!
When it comes to the cream cheese, this is another spot where quality really matters, especially since we’re using it for a pipeable filling. You’ll notice I just said ‘cream cheese,’ but I truly mean the full-fat block style. Don’t go grabbing the low-fat tubs or the whipped spreadable kind in a plastic tub. Those versions have extra water and stabilizers that make your filling watery and runny almost immediately. Stick to a full-fat block brand—whichever one you usually trust for cheesecakes works perfectly here. The texture relies on that high fat content to hold up against the butter and sugar!
For the spices, if you’re short on allspice or nutmeg, usually keeping the cinnamon front and center and slightly boosting the nutmeg (or just using cinnamon/nutmeg only) will still give you that classic fall dessert profile. But honestly, that blend of three spices is what wakes up the apple flavor, so try to keep them all in the mix if you can!
Storage and Reheating Instructions for Apple Cider Whoopie Pies
So you made a giant batch of these incredible apple cider whoopie pies—good for you! Now, we have to talk about keeping them delicious. Since we are using that rich, glorious cream cheese frosting, keeping them on the counter isn’t generally the smart move, especially if your kitchen runs warm. Cream cheese frosting just prefers the cold for structure, you know?
For short-term storage, like if you plan on eating them over the next day or so, you can keep them in an airtight container on the counter, provided your house is cool, maybe 68 degrees F or lower. But honestly, I always go straight to the fridge, just to be safe. Pop them into a container or on a plate covered tightly with plastic wrap. They firm up a bit in the cold, which makes them easier to handle anyway!
Here is the official word from my kitchen notes: you can comfortably store these assembled whoopie pies in an airtight container in the refrigerator for up to 3 days. The cakes stay surprisingly moist thanks to that reduced cider, and the filling stays perfectly piped!
If you need to store them longer than three days, freezing is the way to go! I usually freeze them *unfilled*. Once the cakes are totally cooled, wrap each cake layer tightly in plastic wrap, and then pop them all into a freezer-safe bag. They last great this way for about two months. When you want to bake up a quick batch of these spiced cookies, just bring the cakes out to thaw on the counter while you whip up a fresh batch of that amazing spiced cream cheese filling. Trust me, fresh filling makes all the difference!
When you take the assembled pies out of the fridge, let them sit on the counter for about 15 to 20 minutes before serving. That little bit of warming time softens the cake back up just enough so you get that incredible tender bite we worked so hard for!
Frequently Asked Questions About Apple Cider Whoopie Pies
Whenever I post pictures of these babies, the questions start rolling in! It’s natural—you want to make sure you get that perfect soft texture, especially when dealing with a specific ingredient like reduced apple cider. Here are the top things folks always ask me about making these delicious spiced cookies!
Can I make the cake part of the Apple Cider Whoopie Pies ahead of time?
Yes, you absolutely can, and I recommend it if you want to spread out the work! The cakes themselves are actually better made a day ahead. Once they are completely cool, wrap each cake individually in plastic wrap and keep them in an airtight container at room temperature, or even in the fridge if your house is warm. They stay wonderfully moist for a couple of days! Just wait to fill them until you are ready to serve. Once you sandwich them with that cream cheese frosting, the moisture starts transferring, and they get a little too delicate to handle well if they sit too long before eating.
What makes these spiced cookies taste so distinctly like fall?
It’s truly a combination of two big things we focus on in this recipe. First, it’s that concentrated apple cider. Boiling down the liquid removes water and toasts the natural sugars in the cider, giving you deep, almost caramelized apple flavor instead of just ‘apple flavored.’ Second, we use a triple-threat spice blend: cinnamon, nutmeg, *and* allspice. That small amount of allspice provides that classic, earthy warmth reminiscent of cider donuts and really anchors the entire fall dessert experience. That combination is what sets these apart from a standard pumpkin treat!
Is the cream cheese frosting too sweet for this fall dessert?
That is a fantastic question, especially since there is a whole cup of butter and two cups of powdered sugar in there! While yes, it is technically sweet, the reason I love using cream cheese frosting specifically with the apple cider cake is the necessary tanginess the cheese brings. The lactic acid in the cream cheese cuts right through the richness of the butter and prevents the whole sandwich from tasting flat or overwhelmingly sugary. If you want to lean into the tang even more, try grating a tiny bit of fresh lemon zest right into the frosting—it really brightens everything up, though Grandma never did that, bless her heart!
If you’re looking for more inspiring ways to use apples in baking, I found a sweet little guide on making extra soft apple cookies that you might enjoy!
Estimated Nutritional Information for Apple Cider Whoopie Pies
Look, I’m not a dietitian, I’m a cook who knows how to make things taste amazing! These apple cider whoopie pies are definitely a treat, not an everyday snack, so keep that in mind when you look at the numbers. I always tell people they look richer than they are, but sugar counts are still sugar counts, right?
The figures below are my best estimates based on the ingredients listed in the recipe, specifically for one sandwich cookie serving size. Just remember, if you use a different brand of cream cheese or adjust the amount of brown sugar, these numbers will shift a little. I always use the same name-brand butter and sugar, so my results are consistent, but yours might vary!
- Serving Size: 1 whoopie pie
- Calories: 350
- Sugar: 40g
- Sodium: 200mg
- Fat: 18g
- Saturated Fat: 10g
- Unsaturated Fat: 8g
- Trans Fat: 0g
- Carbohydrates: 45g
- Fiber: 1g
- Protein: 4g
- Cholesterol: 50mg
So there you have it! A perfectly delicious fall indulgence coming in around 350 calories per piece. If you’re worried about the sugar, just remember that you can always reduce the powdered sugar slightly in the filling—it won’t hurt the texture too much, and it cuts down on that sweetness significantly. Enjoy these amazing apple cider whoopie pies!
Print
Apple Cider Whoopie Pies
- Total Time: 37 min
- Yield: 12 sandwich cookies 1x
- Diet: Vegetarian
Description
Soft, cake-like cookies filled with a spiced cream cheese frosting.
Ingredients
- 1 3/4 cups all-purpose flour
- 1 teaspoon baking soda
- 1/2 teaspoon ground cinnamon
- 1/4 teaspoon ground nutmeg
- 1/4 teaspoon ground allspice
- 1/2 teaspoon salt
- 1/2 cup unsalted butter, softened
- 1 cup packed light brown sugar
- 1 large egg
- 1 teaspoon vanilla extract
- 1/2 cup apple cider, reduced to 1/4 cup
- 4 ounces cream cheese, softened
- 1/4 cup unsalted butter, softened
- 2 cups powdered sugar
- 1/2 teaspoon ground cinnamon
Instructions
- Preheat your oven to 350 degrees F. Line baking sheets with parchment paper.
- In a medium bowl, whisk together the flour, baking soda, cinnamon, nutmeg, allspice, and salt. Set aside.
- In a large bowl, cream together the 1/2 cup butter and brown sugar until light and fluffy. Beat in the egg and vanilla extract.
- Slowly mix the dry ingredients into the wet ingredients, alternating with the reduced apple cider, mixing until just combined. Do not overmix.
- Drop rounded tablespoons of batter onto the prepared baking sheets, spacing them about 2 inches apart.
- Bake for 10 to 12 minutes, or until a toothpick inserted into the center comes out clean. Let the cakes cool on the baking sheets for 5 minutes before transferring them to a wire rack to cool completely.
- To make the filling, beat the cream cheese and 1/4 cup butter until smooth. Gradually beat in the powdered sugar and 1/2 teaspoon cinnamon until the frosting is light and fluffy.
- To assemble, spread a generous amount of filling onto the flat side of one cooled cake. Top with another cake, flat side down, to form a sandwich.
Notes
- Reduce the apple cider by simmering 1/2 cup cider in a small saucepan over medium heat until it reduces to 1/4 cup. Let it cool before using.
- You can store the assembled whoopie pies in an airtight container in the refrigerator for up to 3 days.
- Prep Time: 25 min
- Cook Time: 12 min
- Category: Dessert
- Method: Baking
- Cuisine: American
Nutrition
- Serving Size: 1 whoopie pie
- Calories: 350
- Sugar: 40
- Sodium: 200
- Fat: 18
- Saturated Fat: 10
- Unsaturated Fat: 8
- Trans Fat: 0
- Carbohydrates: 45
- Fiber: 1
- Protein: 4
- Cholesterol: 50
Keywords: apple cider, whoopie pies, spiced cookies, cream cheese frosting, fall dessert