
Okay, listen up, because if you’re like me, you want your Halloween baking to be fun, spooky, and not take three days to assemble! I used to think making themed desserts meant fiddly fondant work, but I cracked the code on these little gems. Forget plain cookies; we are making edible witch cauldrons! These little **Cauldron Cookie Cups** are the cutest things you’ll ever bake, and seriously, they use a super simple cookie base. I am so excited for you to try this recipe because it transforms butter, sugar, and a little bit of green gel into the star of any spooky party in under an hour. It’s beginner-friendly magic, I promise!
Why You Will Love These Cauldron Cookie Cups
I’m telling you, when these come out of the oven, everyone stops talking just to look at them! They are the perfect blend of spooky aesthetic and easy-to-eat deliciousness. Trust me, these are going to be your new favorite thing to bake when autumn rolls around. If you need more spooky inspiration after these, check out my main collection of Halloween cookies recipes!
-
Perfectly Themed for Halloween
These aren’t just cookies; they are miniature, edible witch pots! The green base and the black frosting filling instantly say ‘Halloween.’ They look like they took hours, but really, it’s all down to how you press the dough into the tin, which is shockingly easy to master.
-
Simple Dough, Big Impact
The base cookie is just your standard, reliable sugar cookie dough—no weird ingredients or complicated steps to worry about. It holds its shape beautifully in the mini muffin tin, which is exactly what we need for this specific shape. It bakes up buttery and tender, which is honestly the best foundation for any filling.
- They Bake Up So Fast!
Because we’re using a mini muffin tin, these are lightning quick. They bake in about 10 minutes flat! That means you can whip up a huge batch for a party without spending the entire day chained to the oven. Quick baking time means less chance for me to eat all the raw dough, haha!
- Perfectly Portioned Fun
They are bite-sized! Or maybe two-bite-sized—don’t judge me. Since they are little cups, they are perfect for setting out on a platter at a school party or just sneaking one after the kids go to bed. No messy slicing required, you just grab an entire cauldron.
Essential Ingredients for Perfect Cauldron Cookie Cups
You probably have most of this in your pantry already, which makes this recipe even better! The key here is using gel food coloring for that amazing, vibrant green. Liquid drops just won’t give you the intense color we need to make these truly pop like spooky magic potions. If you are planning ahead, make sure your butter is seriously softened!
For the Green Cookie Base
This is the backbone of our little pots. We need that robust cookie structure to hold up everything we pour in later. Make sure you grab the good stuff!
- 1 cup unsalted butter, softened until it’s gorgeous and pliable
- 1 cup granulated sugar
- 1 large egg
- 1 teaspoon vanilla extract
- 2 1/2 cups all-purpose flour
- 1/2 teaspoon baking soda
- 1/4 teaspoon salt
- Green food coloring gel (and I mean the gel kind, trust me!)
For Decorating the Cauldron Cookie Cups
This is where we turn our green cookie molds into actual spooky cauldrons ready for bubbling filling. If you think you want to add those cute little handles later on, make sure you have a small round piping tip ready—it makes the handle look so authentic!
- Black frosting (store-bought is perfect so you save time!)
- Orange sprinkles (the only acceptable kind for Halloween!)
Step-by-Step Instructions for Cauldron Cookie Cups
Alright, apron on! This is where the magic actually happens, and honestly, it’s faster than you think. When mixing cookies, I always prefer the stand mixer for the creaming stage, but if you only have hand beaters, crank that thing up and get ready for some arm action. Don’t worry about overmixing when we get to the dry stuff; we only mix until it just comes together. If you want tips on using easier doughs, check out my guide on cake mix cookies—but for these sturdy cups, starting from scratch is worth it!
Preparing the Cauldron Cookie Dough
First thing’s first: get that oven hot—350 degrees Fahrenheit—and make sure your mini muffin tin is properly greased. You don’t want a stuck cauldron on your hands!
We start by creaming the butter and sugar until it’s really light and fluffy—that introduces the necessary air. Then, beat in your egg and vanilla. In a separate bowl, whisk your flour, baking soda, and salt. Now, add the dry stuff to the wet stuff, mixing slowly until you just see the last streaks of flour disappear. Don’t keep going!
This is the fun part: divide that dough right in half. Take one half and mix in that green food coloring gel until you get a wicked, deep green shade. Leave the other half its normal, buttery color for contrast!
Shaping and Baking the Cauldron Cookie Cups
Grab a small amount of dough—you can mix small pieces of green and plain dough together for a cool, marbled effect, or just stick to one color. Flatten your dough ball slightly and carefully press it down into the greased mini muffin cup. You need to press it up the sides so you create a little well in the middle, just like a real pot. It needs a thin wall, but don’t puncture the bottom!
Bake these little wonders for about 10 to 12 minutes. You want the edges just set. Pull them out and let them hang out in the tin for about five minutes. Patience here is key—they are fragile right out of the oven! After five minutes, gently move them to a wire rack to cool completely before you try to fill them.
Finishing Your Cauldron Cookie Cups
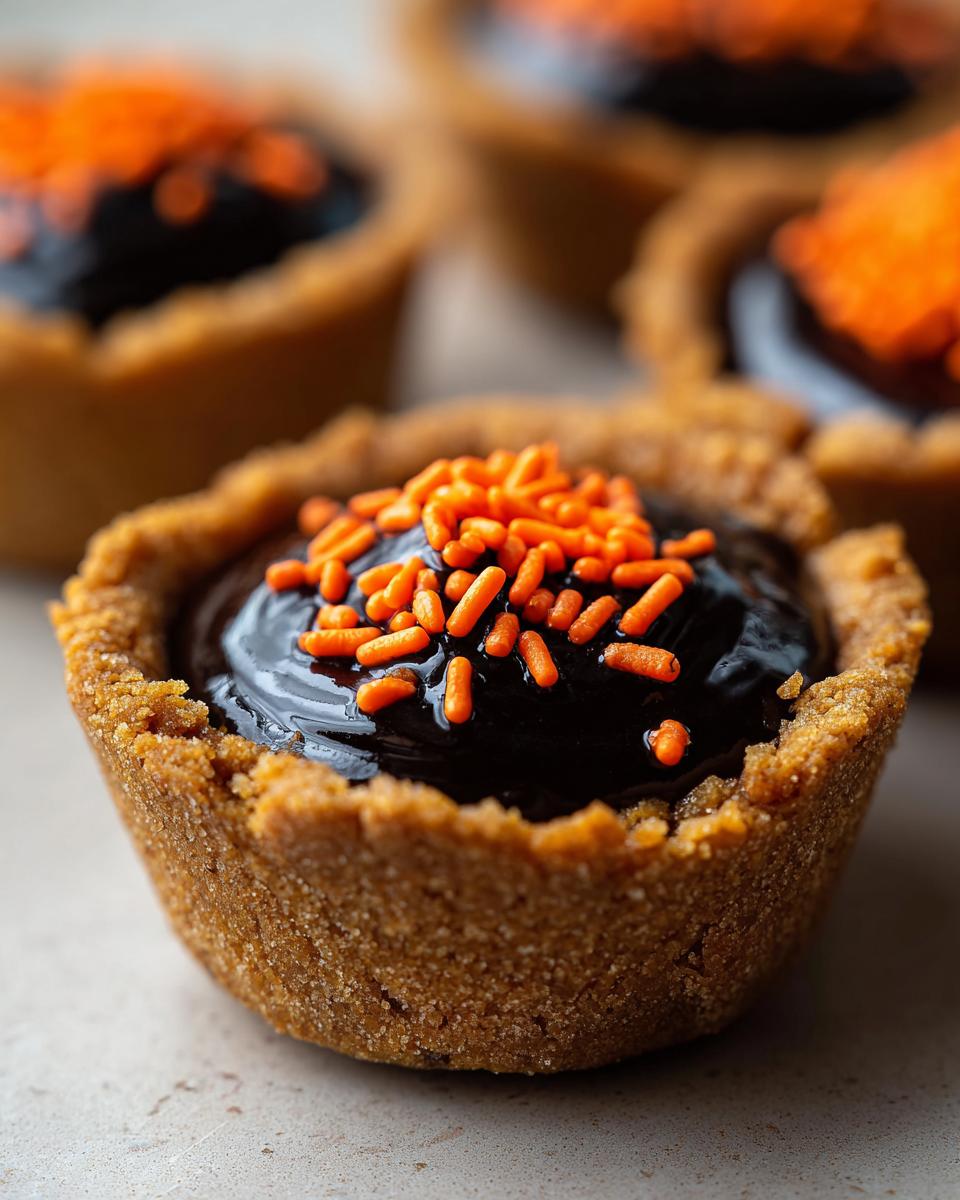
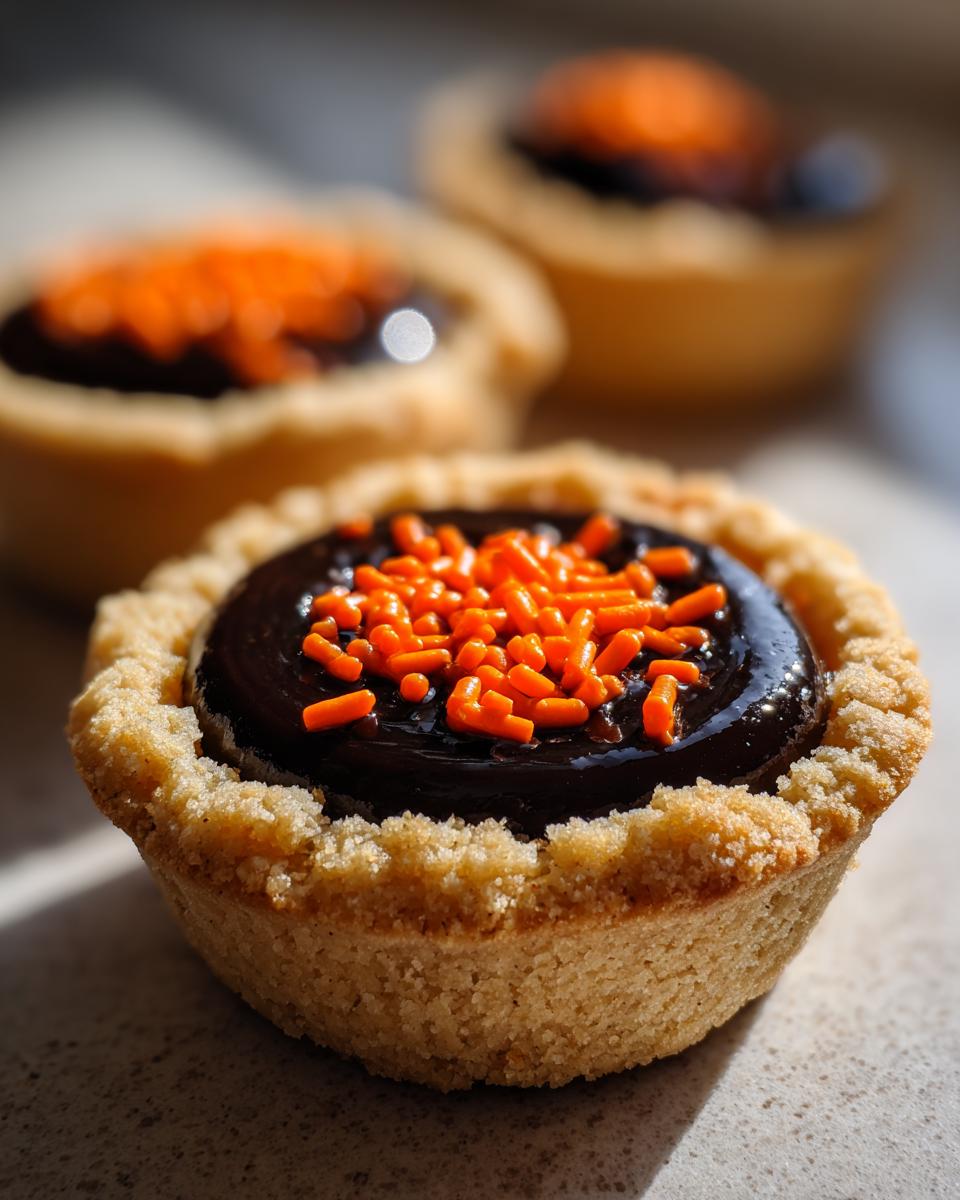
Once they are totally cool—and I mean cool, or your black frosting will melt into soup—it’s time to decorate! Scoop a generous dollop of that black frosting right into the well you made in the center. This is our bubbling brew!
Finish by sprinkling a little dash of orange sprinkles over the frosting. This adds that perfect pop of Halloween color. If you want to get fancy, grab that small round piping tip and pipe a tiny arch on the side of the cup using the extra black frosting. That little loop looks exactly like the handle of a witch’s cauldron. See? Easy magic!

Tips for Making the Best Cauldron Cookie Cups
We want these Cauldron Cookie Cups to look just right for our spooky spread, right? A perfect cup needs the right shape and the right ominous color. Even though the dough is simple, a few little tricks elevate these from ‘cute’ to ‘absolutely perfect for a coven meeting.’ If you want to explore other fun cookie shapes that hold up well, I have some great ideas in my chocolate chip tahini cookie guide, as the structure principles are similar!
Achieving the Perfect Cauldron Shape
When you press the dough into the mini muffin tin, don’t be shy, but be gentle! You absolutely need that well in the middle to hold the black frosting, but if you press too hard, you’ll thin out the bottom, and then you get a broken cauldron mid-party—nightmare fuel!
After you’ve pressed the dough up the sides, take a small spoon or, honestly, just your clean thumb (make sure your hands are washed, obviously!), and gently press down into the exact center. This deepens the well without thinning the outer edges. You’re basically shaping the bowl of the cauldron while you bake. It takes seconds, but it makes the final filled cup look so much more defined.
Coloring the Dough Deep Green
I cannot stress this enough: if you use liquid food coloring, you’ll end up with a pale, sickly green that looks sad, not magical. You need a good quality **gel food coloring**. Gel concentrates the color without adding extra liquid that messes with your dough structure. Dip a toothpick into the gel jar and mix that into one half of your dough. You might need two or three dips to get that deep, vibrant forest green, which is what makes it look truly witchy. Remember, we want potion green, not toothpaste green!
If you’re feeling extra whimsical, try the mottled effect! Take small, random chunks of the green dough and small chunks of the plain dough and gently pinch them together just once or twice before pressing them into the tin. When they bake, the colors swirl slightly, making it look like the dough itself caught some magical residue. It’s totally optional, but I love the dimension it adds!

Ingredient Notes and Substitutions for Cauldron Cookie Cups
So, life sometimes happens, and maybe you ran out of black frosting, or maybe you just prefer chocolate—I get it! Don’t let a missing ingredient stop you from making these Cauldron Cookie Cups. While the standard recipe calls for that nice, firm black frosting because it holds the orange sprinkles perfectly, there are a couple of ways you can totally pivot and still end up with an amazing little potion pot.
Frosting vs. Chocolate Filling
The black frosting generally gives you the best structural support for holding the sprinkles on top, and you can pipe a cute little handle easily since it stays put at room temperature. It’s soft, fudgy, and handles the classic look best.
However, if you want to swap it out for melted chocolate, you totally can! This is a great choice if you want the filling to set up firmer, especially if you plan on stacking these cookies or transporting them somewhere warm. You’ll just need some good quality semi-sweet or dark chocolate chips. Melt them slowly, maybe with just a teaspoon of coconut oil (that helps them stay a bit softer, almost like a ganache). Stir it until it’s super smooth.
Application changes a bit here. If you use melted chocolate, you need to work faster! Fill those cooled cookie wells about two-thirds full right after melting. Then, gently top with your orange sprinkles before the chocolate begins to harden. The texture will be fudgier and less creamy than the frosting version, so decide what kind of ‘potion’ texture you prefer for your spooky sweets!
Serving Suggestions for Your Cauldron Cookie Cups
Once these little beauties are finished—green base, black filling, orange sparks—they need the right stage to shine! Since they’re such a fun, self-contained dessert, they are amazing just sitting alone on a platter, but I always like to go a little extra for Halloween. I sometimes arrange them on a slate serving tray dusted lightly with powdered sugar to look like a spooky frost right before guests arrive.
They pair perfectly with anything creamy or decadent. Try serving them alongside a mug of warm apple cider, or if you’re hosting an adult gathering, they are divine next to a strong, dark coffee. For more ideas on what to serve alongside your spooky treats, check out my full collection of desserts options!
Storage and Reheating for Cauldron Cookie Cups
These little monsters are best made the day of your party, honestly, because who wants a soggy cauldron? But if you must make them ahead, you have a little wiggle room. Store your finished **Cauldron Cookie Cups** in a single layer inside an airtight container.
Keep them right there on the counter at room temperature for up to two days. The cookie won’t go bad, but the frosting might start to get a little too soft if your kitchen is warm. I never bother reheating them; they are perfect just as they are, cool and ready to go!
Frequently Asked Questions About Cauldron Cookie Cups
I know when I’m baking something new, especially for a holiday, I always have a million little questions running through my head. You want them to look just right, and sometimes the shape confuses me! Here are the things I always get asked about making these spooky little **Cauldron Cookie Cups** perfect every time. If you’re looking for even more fun ideas, definitely explore my Halloween cookies recipes section!
Can I make the cookie dough for these Cauldron Cookie Cups ahead of time?
Oh yes, you totally can! I often do this when I have a busy week. You can mix both the plain and the green doughs, wrap each color tightly in plastic wrap separately, and pop them in the fridge. They’ll keep beautifully for about three days. When you’re ready to bake, just take the dough out about 20 minutes before you plan to start shaping so it softens up just enough to press into those little muffin cups without cracking on you. That way, all you do on party day is scoop and bake!
What is the best way to get the mini muffin tin to release the cookie cups?
This is critical because a broken cauldron is just a sad pile of crumbs! Forget just spraying the tin lightly; that won’t cut it for sugar cookies that need to hold a shape. You have to be thorough. I use a nice thick layer of baking spray that contains flour in it—you know, the one that looks slightly cloudy? If you don’t have that, take softened butter and use a pastry brush to really work it into every corner and crease of that mini muffin pan. Then, hit it lightly with a dusting of flour and tap out the excess. That double treatment ensures they pop right out after the initial 5-minute cooling period. Don’t skip this step!
Can I use different colored frosting for these Halloween cookies?
Absolutely! The black frosting is my go-to because it looks like dark sludge bubbling up, but you have so many fun options depending on what spooky vibe you’re going for. If you want a more toxic look, switch the black for a stark, electric purple frosting! Or, if you want to make them look like they are filled with candy instead of a potion, you can use bright orange frosting and top it with purple or green sprinkles instead of orange.
The only thing I suggest avoiding is using white frosting unless you plan on adding dark food coloring to it yourself. The visual contrast between the green cookie and the dark filling is what really sells the cauldron look for these **Halloween cookies**.
Share Your Cauldron Cookie Cups Creations
Now, listen, that’s *my* version of the **Cauldron Cookie Cups**, but the real fun starts when you take them and make them your own! I seriously want to see what kind of spooky magic you stir up in your own kitchen. Did you add edible glitter? Did you make a purple potion?
Don’t be shy! When you’re done baking, please come back here and leave me a rating—five stars if you loved them, one star if you accidentally turned your kitchen into a swamp. Tell me how they turned out in the comments below! I read every single one, I really do.
And the best part? Snap a picture! Tag me on social media so I can see your beautiful, menacingly delicious **Halloween cookies**! You can reach out to me directly via my contact page if you have specific questions or just want to share a photo privately. Happy haunting, and happy baking!
Print
Cauldron Cookie Cups
- Total Time: 37 min
- Yield: 24 cups 1x
- Diet: Vegetarian
Description
Small, edible cookie cups shaped like cauldrons, perfect for Halloween treats.
Ingredients
- 1 cup unsalted butter, softened
- 1 cup granulated sugar
- 1 large egg
- 1 teaspoon vanilla extract
- 2 1/2 cups all-purpose flour
- 1/2 teaspoon baking soda
- 1/4 teaspoon salt
- Green food coloring gel
- Black frosting
- Orange sprinkles
Instructions
- Preheat your oven to 350 degrees Fahrenheit. Grease a mini muffin tin.
- In a large bowl, cream together the butter and sugar until light and fluffy.
- Beat in the egg and vanilla extract.
- In a separate bowl, whisk together the flour, baking soda, and salt. Gradually add the dry ingredients to the wet ingredients, mixing until just combined.
- Divide the dough in half. Add green food coloring gel to one half until a deep green color is achieved. Leave the other half plain.
- Roll small portions of the dough into balls. Flatten each ball slightly and press it into the mini muffin tin cups, forming a small well in the center to resemble a cauldron shape. You can mix green and plain dough for a mottled effect.
- Bake for 10 to 12 minutes, or until the edges are set.
- Remove from the oven and let cool in the tin for 5 minutes before carefully transferring them to a wire rack to cool completely.
- Once cool, fill the center well of each cookie cup with black frosting.
- Top the frosting with orange sprinkles.
Notes
- Use a small round piping tip to create a handle shape on the side of the cookie cup with black frosting, if desired.
- You can use melted chocolate instead of black frosting for a firmer filling.
- Prep Time: 25 min
- Cook Time: 12 min
- Category: Dessert
- Method: Baking
- Cuisine: American
Nutrition
- Serving Size: 1 cookie cup
- Calories: 180
- Sugar: 15
- Sodium: 80
- Fat: 9
- Saturated Fat: 5
- Unsaturated Fat: 4
- Trans Fat: 0
- Carbohydrates: 24
- Fiber: 1
- Protein: 2
- Cholesterol: 30
Keywords: cauldron cookies, Halloween cookies, cookie cups, green cookies, baked dessert