
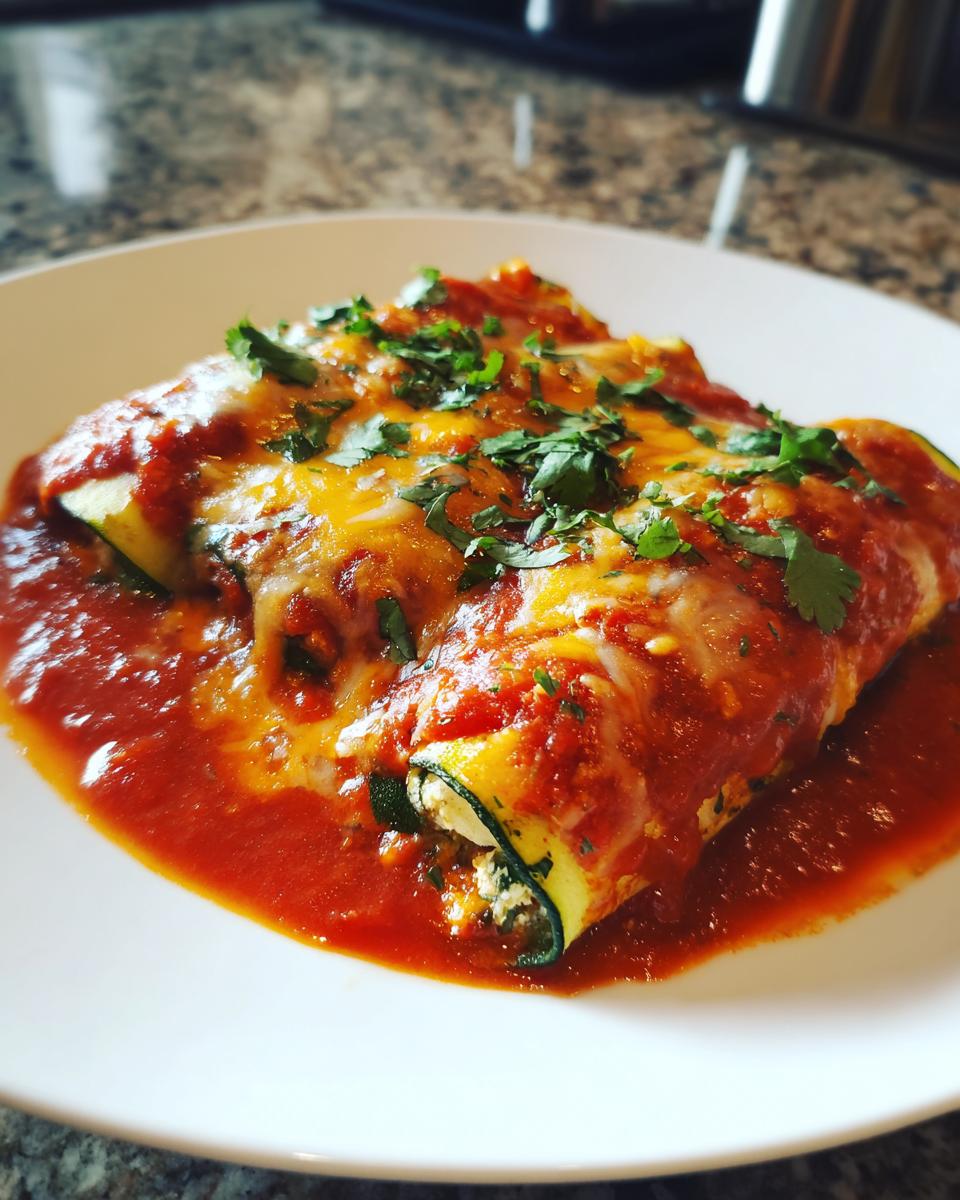
Oh my gosh, you guys! I live for Mexican comfort food, but sometimes I just can’t handle the carb load from the tortillas, you know? I spent ages trying to find a dish that tasted like a real weeknight fiesta but kept me feeling light. And folks, I finally cracked the code! We are making these incredibly easy, baked Zucchini Enchiladas, and trust me, you won’t even miss the corn or flour wrappers one bit. The absolute secret sauce here—literally—is getting those zucchini strips thin enough. If you get that slicing technique right, they soften up perfectly in the oven and hold all that filling beautifully. It took a few tries, but I’ve nailed the perfect pliant slice for you!
Why You Will Love These Zucchini Enchiladas
You’re going to be obsessed with these, seriously. They hit every craving without the heavy feeling afterward. Here is the quick reason why they have earned a permanent spot on my menu:
- They’re happily low carb and completely gluten-free—real comfort food guilt-free!
- Assembly is super fast; we’re talking less than 20 minutes of actual busy work.
- That tangy enchilada sauce melts right into the tender zucchini. Delicious!
- Perfect for getting extra veggies into dinner without anyone complaining.
- They bake up beautifully, turning dinner into a bubbly, cheesy celebration.
I mean, what’s not to love? Let’s get right into the ingredients so you can start slicing!
Essential Ingredients for Perfect Zucchini Enchiladas
Okay, this recipe keeps the ingredient list refreshingly short, which is always a win in my book. We’re relying on quality here, not complicated amounts of stuff!
First up, you need about three medium zucchini. These are the stars, so you want them firm and fresh. You’ll slice these lengthwise into those paper-thin strips—aiming for about 1/8 inch. Don’t use the zucchini you tossed in flour for fritters; these need to be clean and ready to roll! For the filling, I usually grab about a cup of leftover shredded chicken, but mixing in black beans works like a dream for a vegetarian twist. Trust me on this one.
Next, we need a cup of your favorite enchilada sauce—red or green works, whatever you prefer! Then comes the cheese: one cup of Monterey Jack, shredded nicely. Don’t skip the fresh bits either; you want a quarter cup each of chopped onion and fresh cilantro for that bright pop of flavor right before baking. If you want to see my trick for super crispy zucchini snacks that use similar fresh ingredients, check out my easy zucchini fritters recipe, though these enchiladas are definitely the main event!
Equipment Needed for Making Zucchini Enchiladas
You don’t need a ton of fancy gadgets for these zucchini enchiladas, but there is one tool I simply won’t do without when making them. If you manage to make these without one of these, you’ve got serious knife skills, but I cheat a little!
The most important item is a really good slicing tool. You absolutely need to get those zucchini strips uniform and paper-thin—my go-to is my trusty mandoline slicer. If those strips are too thick, they’ll crack when you try to roll them around the filling, and nobody wants a broken enchilada!
Other than that, you just need standard kitchen items:
- A good sharp knife and cutting board (for the onions and cilantro).
- A standard 9×13 inch baking dish (grease this up well!).
- A pastry brush or silicone brush for oiling the zucchini slices.
- A mixing bowl for tossing maybe a few of your ingredients.
Honestly, if you have a mandoline, this whole process speeds up like crazy. If you’re interested in another recipe where slicing matters just as much for texture, I have a great one for baked parmesan zucchini that uses similar preparation techniques!
Step-by-Step Instructions for Baking Zucchini Enchiladas
Getting your zucchini sliced right is the foundation of success here, so we are going to take our time on the prep work. Don’t rush this part, because pliable zucchini means perfectly rolled, beautiful enchiladas! While you are prepping, go ahead and preheat your oven to 375 degrees F (190 degrees C) and make sure you very lightly grease that baking dish. A little oil or cooking spray is all you need to keep things from sticking.
Preparing the Zucchini Strips for Zucchini Enchiladas
This is where the mandoline really shines, folks! Slice your zucchini lengthwise into strips that are about 1/8 inch thick. I know I keep saying it, but this thinness is crucial so they roll up without snapping. Once they are sliced, quickly brush both sides of the strips with just a tablespoon of olive oil. Now, here is a major pro-tip: if your zucchini seems a little stiff or starts tearing when you try to bend it, quickly blanch those strips! Drop them into boiling water for just 30 seconds, then pull them out and pat them completely dry. This makes them super flexible, which is essential for rolling up those lovely Zucchini Enchiladas. You can find another great way to treat zucchini in my baked parmesan zucchini recipe, showing off how versatile this summer squash is!
Assembling and Saucing the Zucchini Enchiladas
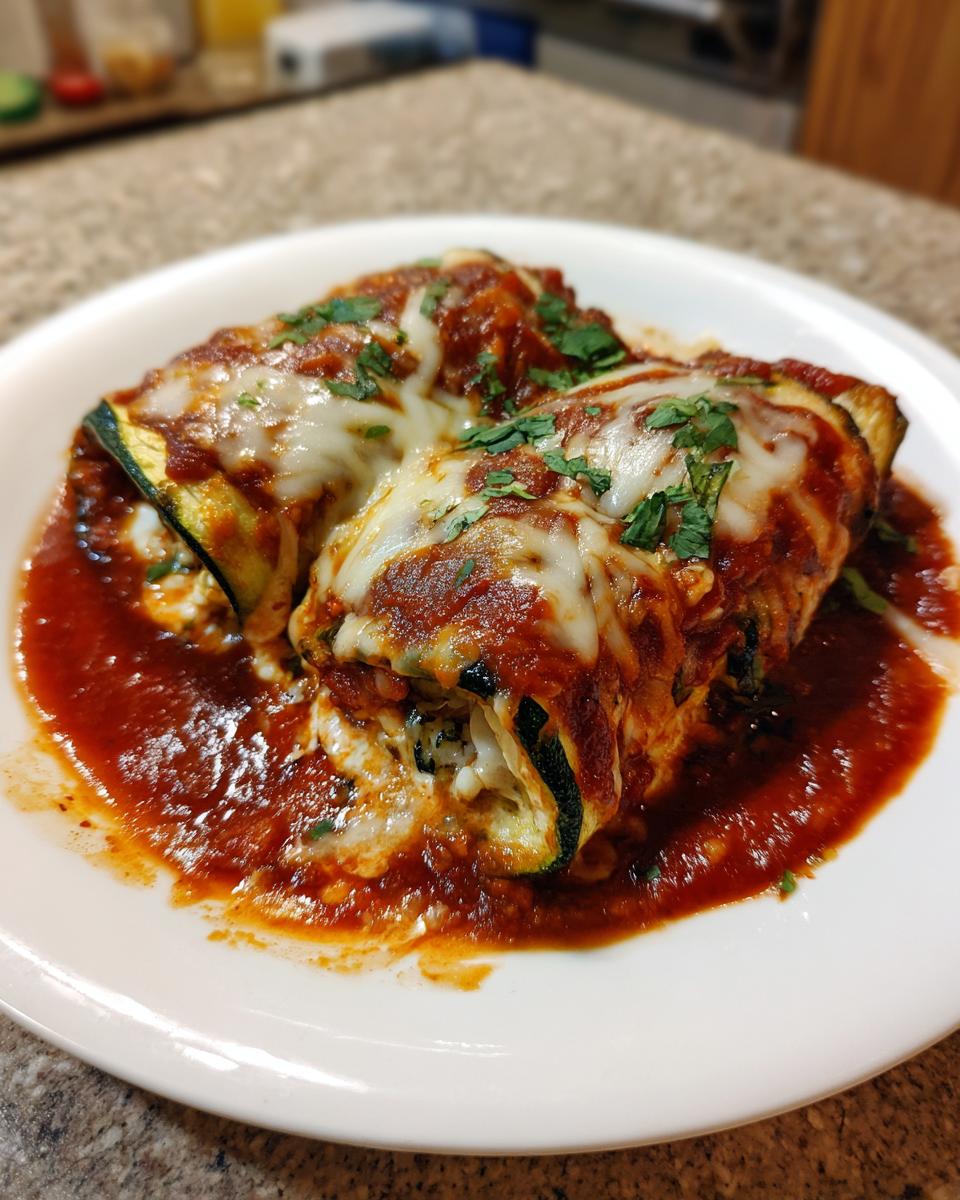
Time to build these babies! Start by spreading a very thin layer of your enchilada sauce—just enough to coat the bottom of the dish and keep things moist. Take one prepped zucchini strip. Place a small spoonful of your filling—remember that cooked chicken or beans—near one end, and sprinkle a tiny pinch of that chopped onion right over the filling. Roll that strip up nice and tight, like a little burrito, and place it seam-side down in your prepared baking dish. Keep repeating this process until all your filling is tucked away inside those zucchini rolls. Once they are all snug, pour the rest of that leftover enchilada sauce evenly over the top. The nice part is the sauce soaks right in!

Baking and Garnishing Your Zucchini Enchiladas
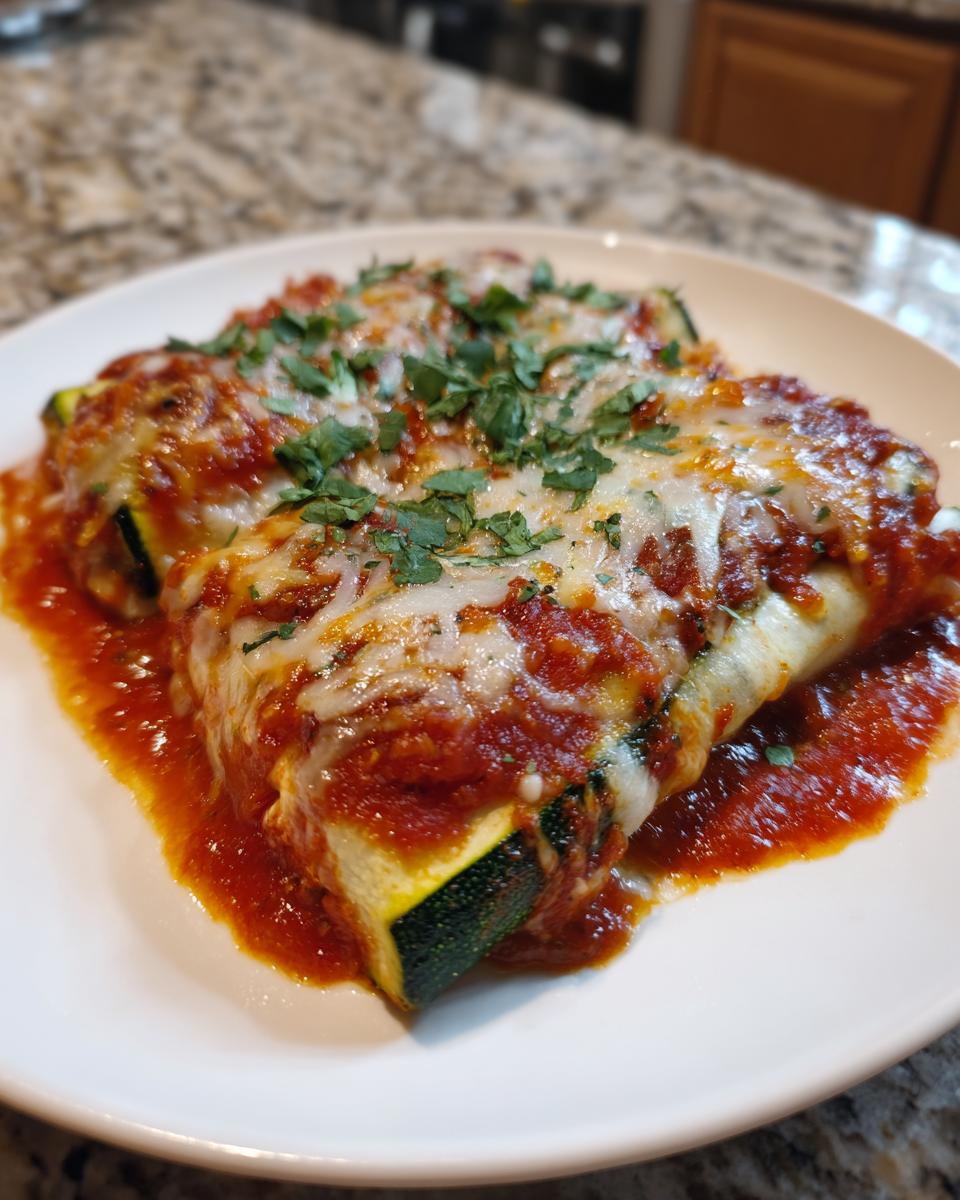
The grand finale is the cheese! Sprinkle that cup of Monterey Jack evenly over the sauced zucchini rolls. Now, pop them into the preheated oven. I bake mine for about 20 to 25 minutes. You are looking for two things: the cheese should be totally melted and bubbly, and the zucchini itself should be tender when you poke it with a fork. Once they come out looking gorgeous and sizzling, let them rest for just five minutes. Then, sprinkle generously with that fresh chopped cilantro. Serve them right away while they’re piping hot!
Tips for Making the Best Zucchini Enchiladas
We’ve covered the basics, but if you want your Zucchini Enchiladas to go from “good” to “I can’t believe this has no tortillas,” you need to pay attention to a few extra details. Zucchini is beautiful, but it’s also super watery, so moisture control is key! It’s all about managing that tender vegetable so it supports the filling rather than creating soup in your pan.
My first big tip is about drawing out that extra water *before* you even oil them. After slicing your zucchini strips, lay them out on a few paper towels (or a clean kitchen towel) and give them a light sprinkle of salt. Let them sit for about 10 minutes. The salt literally pulls the water right to the surface. Blot that moisture away really well before you brush them with oil. This makes them far more toothsome and much less likely to weep liquid into your dish while baking.
Second, think about your filling consistency. If you’re using chicken or beans, make sure it’s not swimming in extra liquid! If your shredded chicken is sitting in a watery broth, it will just make the final dish messy. I actually mix my cooked chicken directly with about a tablespoon of the enchilada sauce before rolling. That slight binding keeps the filling centered and stops it from just falling out the ends.
Finally, don’t skimp on the sauce quality. Since the sauce is coating everything—the zucchini, the filling, the cheese—it really defines the flavor profile of your Zucchini Enchiladas. If you use a really thin, bland sauce, the whole dish will taste flat. I recommend finding a sauce with some real depth—maybe even look for a really smoky chipotle blend if you like heat! It adds so much more complexity than the standard mild stuff. If you’re looking for other ways to incorporate zucchini into Tex-Mex flavors, you have to try my Tex-Mex Chicken and Zucchini Skillet sometime!
Ingredient Substitutions for Zucchini Enchiladas
One of the best things about keeping a recipe simple, like these zucchini enchiladas, is how easy it is to switch things up based on what you have in the fridge or what your family prefers. We don’t believe in sticking rigidly to a recipe when it comes to dinner; flexibility is key to home cooking!
First things first: let’s talk about making these vegetarian. If chicken isn’t your thing, or maybe you’ve run out, swap it out completely with beans. I personally love using black beans because they hold up really well to the rolling and baking process. Just remember to drain and rinse them well! You can also use a mix of chopped mushrooms and your favorite firm cheese, or even some crumbled, seasoned tofu if you want a plant-based powerhouse filling.
Next up is the sauce, which is such a personal choice, right? The recipe suggests red or green enchilada sauce, and honestly, both are fantastic. Red sauce is usually a bit richer and earthier, while green sauce—made with tomatillos—gives a nice, tangy brightness that cuts through the cheese. Use whichever one makes your mouth water more!
And for the cheese? Monterey Jack is perfect because it melts so smoothly, but don’t think you’re stuck there. Pepper Jack adds a nice little kick if you can handle the spice. If you are keeping things dairy-free, I’ve had great success with high-quality vegan cheddar shreds mixed with a little nutritional yeast for color. It melts a bit differently, but the flavor payoff is still there!
Serving Suggestions for Zucchini Enchiladas
Well, once those beautiful zucchini enchiladas come bubbling out of the oven, they deserve some equally fantastic sides to go alongside them! Since we skipped the heavy tortillas, we have room on the plate for some amazing, fresh, low-carb toppers and sides that really bring the whole Mexican flavor profile home. Don’t just serve them naked, people—dress them up!
The first thing I always grab is a big dollop of cool sour cream or Mexican crema right on top. You need that cool, creamy contrast to the hot, tangy sauce. If you want to make it a little extra, mix a squeeze of lime juice and some salt into that sour cream first. Heavenly!
Avocado is non-negotiable in my house. Whether you dice up a whole avocado and sprinkle it over the top, or if you make a quick guacamole, the rich, healthy fat just complements the spice perfectly. It’s the perfect balance to all that acidity from the sauce.
For something green and crunchy, skip the rice and beans, sadly, if you’re sticking strictly to low-carb! Instead, I highly recommend a crisp, fresh salad—something bright that cleanses the palate between bites of cheesy goodness. I often make a simplified version of my favorite salad because it works so well. If you want the recipe for a salad that’s loaded with flavor but still keeps things light, check out how I make my classic Cobb salad with ranch dressing; just skip the croutons, of course!
Finally, never underestimate the power of fresh toppings. Think beyond cilantro! Thinly sliced radishes give a fantastic peppery crunch, and a light sprinkle of crumbled Cotija cheese (if you aren’t worried about a little extra dairy) just elevates the entire dish. These sides make your **Zucchini Enchiladas** a truly complete meal!
Storage and Reheating Zucchini Enchiladas
So, what if you have glorious leftovers? Because these things just taste great the next day, too! You definitely don’t want to waste a single cheesy, sauce-soaked zucchini roll. Storing and reheating them correctly is the trick to keeping that tender texture we worked so hard to achieve.
The absolute best way to store any leftovers is to let them cool down just slightly after they come out of the oven. Don’t put them away steaming hot; let them come closer to room temperature for about 30 minutes first. Then, transfer them into an airtight container. I prefer glass containers because they don’t absorb odors, but any good sealable Tupperware works fine.
In the fridge, these zucchini enchiladas keep really well for about three to four days. They’ll soften up even more as they sit, but that’s the nature of having zucchini as the wrapper! Just make sure they are completely covered so they don’t dry out on top.
The Best Way to Reheat Zucchini Enchiladas
Okay, listen up: you can use the microwave, I won’t stop you if you’re in a massive rush, but I strongly, strongly advise against it for the best results. Microwaving tends to steam the zucchini wrapper, and it can get a little mushy or watery when it heats up that way. We don’t want mushy! We worked too hard slicing those things perfectly thin!
For truly excellent leftovers, the oven or even an air fryer is your best friend. Preheat your oven low, around 325 degrees F (160 degrees C). Place the desired amount of enchiladas in a baking dish, maybe adding just a tiny splash of extra sauce or water to the bottom of the dish—this creates a little steam bath that keeps them from drying out while reheating.
Cover the dish loosely with foil. I find that covering them prevents the cheese on top from burning before the center is warmed through. Pop them in for about 15 to 20 minutes. Check them after 15 minutes to see if they are hot all the way through. If you use an air fryer, just use medium heat for about 8 minutes, checking often. The result is the cheese melts perfectly, the sauce is hot, and the zucchini still has some integrity. Perfection!
Frequently Asked Questions About Zucchini Enchiladas
I get so many questions about these! It makes sense; using zucchini instead of tortillas feels like a magic trick, so naturally, people have questions about making sure these Zucchini Enchiladas turn out just right. Here are the things I hear most often from folks trying this recipe for the very first time!
Are Zucchini Enchiladas truly low carb?
Yes, they absolutely are! That’s the whole point, isn’t it? Traditional enchiladas are wrapped in tortillas, which brings a ton of carbohydrates to the plate. By replacing those tortillas with thinly sliced zucchini, we instantly slash the carbs significantly. You still get all the amazing flavor from the sauce, cheese, and filling, making this a fantastic low carb dinner solution that doesn’t feel like you’re missing out on anything at all.
How do I prevent my Zucchini Enchiladas from being watery?
Oh, wateriness! That’s the number one issue with cooking zucchini, but we talked about blanching, right? If you don’t want to bother with boiling water, here’s what you do instead: after you slice your strips, lay them out on paper towels across your counter. Sprinkle them with about half a teaspoon of kosher salt—don’t use table salt, it’s too harsh—and let them sit for 10 minutes. You will actually see little beads of water forming on the surface. Blot those beads up really well with another paper towel before you oil them and roll them up. That salting step is a lifesaver for keeping your final baked dish beautifully gluten free and not soupy!
Can I use pre-cooked chicken for these Zucchini Enchiladas?
Please, yes! I almost always use pre-cooked chicken, like rotisserie chicken leftover from dinner the night before, because who has time to cook chicken when you’re already making enchiladas? The recipe calls for shredded cooked chicken, so whatever way you get that chicken cooked and shredded is perfect. Just make sure that chicken isn’t sitting in a ton of extra broth or liquid before you toss it with your filling ingredients. We want flavor, not extra moisture in our yummy low carb wraps!
Print
Zucchini Enchiladas
- Total Time: 45 min
- Yield: 4 servings 1x
- Diet: Low Carb
Description
A recipe for baked enchiladas using thinly sliced zucchini instead of tortillas.
Ingredients
- 3 medium zucchini
- 1 tablespoon olive oil
- 1 cup shredded cooked chicken or beans
- 1 cup enchilada sauce (red or green)
- 1 cup shredded Monterey Jack cheese
- 1/4 cup chopped onion
- 1/4 cup chopped cilantro
Instructions
- Preheat your oven to 375 degrees F (190 degrees C). Lightly grease a baking dish.
- Slice the zucchini lengthwise into thin strips, about 1/8 inch thick. You may need a mandoline for uniform slices.
- Lightly brush the zucchini strips with olive oil.
- Spread a thin layer of enchilada sauce in the bottom of the prepared baking dish.
- Place a spoonful of filling (chicken or beans) near one end of a zucchini strip. Sprinkle with a small amount of onion.
- Roll the zucchini strip tightly around the filling. Place seam-side down in the baking dish. Repeat until all filling is used.
- Pour the remaining enchilada sauce over the rolled zucchini.
- Sprinkle the top evenly with shredded cheese.
- Bake for 20 to 25 minutes, or until the cheese is melted and bubbly and the zucchini is tender.
- Garnish with fresh cilantro before serving.
Notes
- If your zucchini strips tear easily, you can briefly blanch them in boiling water for 30 seconds to make them more pliable before rolling.
- Use black beans instead of chicken for a vegetarian option.
- Prep Time: 20 min
- Cook Time: 25 min
- Category: Dinner
- Method: Baking
- Cuisine: Mexican
Nutrition
- Serving Size: 1 serving
- Calories: 280
- Sugar: 5
- Sodium: 450
- Fat: 18
- Saturated Fat: 8
- Unsaturated Fat: 10
- Trans Fat: 0
- Carbohydrates: 12
- Fiber: 3
- Protein: 20
- Cholesterol: 60
Keywords: zucchini enchiladas, low carb, gluten free, chicken, vegetarian option, baked