
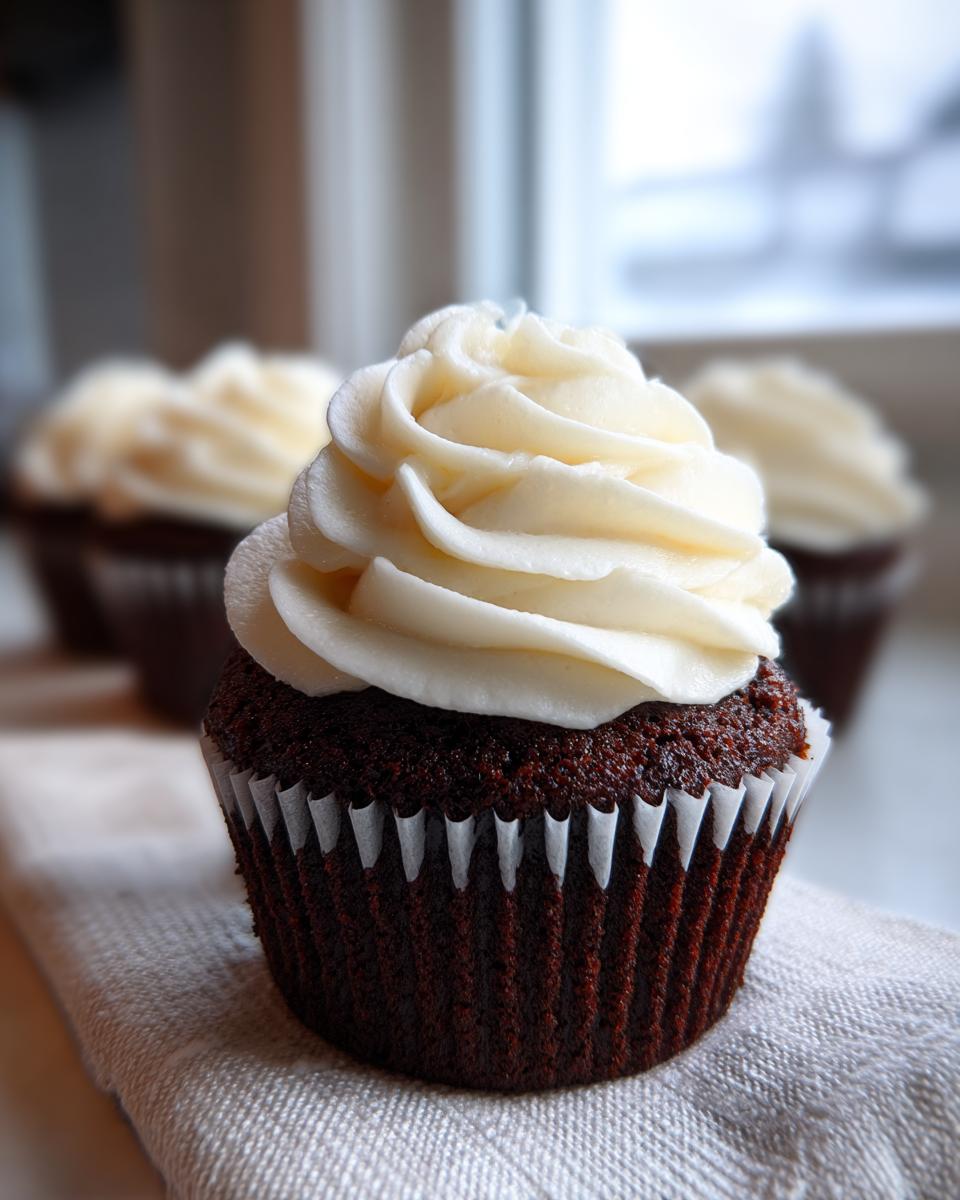
Oh, you know those desserts that look dramatic just sitting there? That’s exactly what happens when you pull these out of the oven. We’re talking about a color so intensely dark, it’s nearly black—that’s why they earn the name Black Velvet Cupcakes! I struggled for ages to get that deep, inky hue without making the cake taste bitter, but trust me, I finally nailed the secret to the moistest, richest dark chocolate cupcakes you will ever bake, all crowned with a bright, tangy cream cheese frosting that cuts right through the richness.
This isn’t just another chocolate cupcake recipe; this is *the* chocolate cupcake recipe. It’s the perfect marriage of deep cocoa flavor and that cooling, slightly tart frosting. When I first served these at a potluck, people actually gasped because they looked so fancy, but honestly, they come together faster than you think. You’re going to love how easy this transformation from pantry staples to show-stopping dessert is!

Why You Will Love These Black Velvet Cupcakes
I know you probably have a go-to chocolate cupcake, but you absolutely need to give these a try. They solve all the common problems people have with dark chocolate baking, and the pairing with the frosting is just *chef’s kiss*.
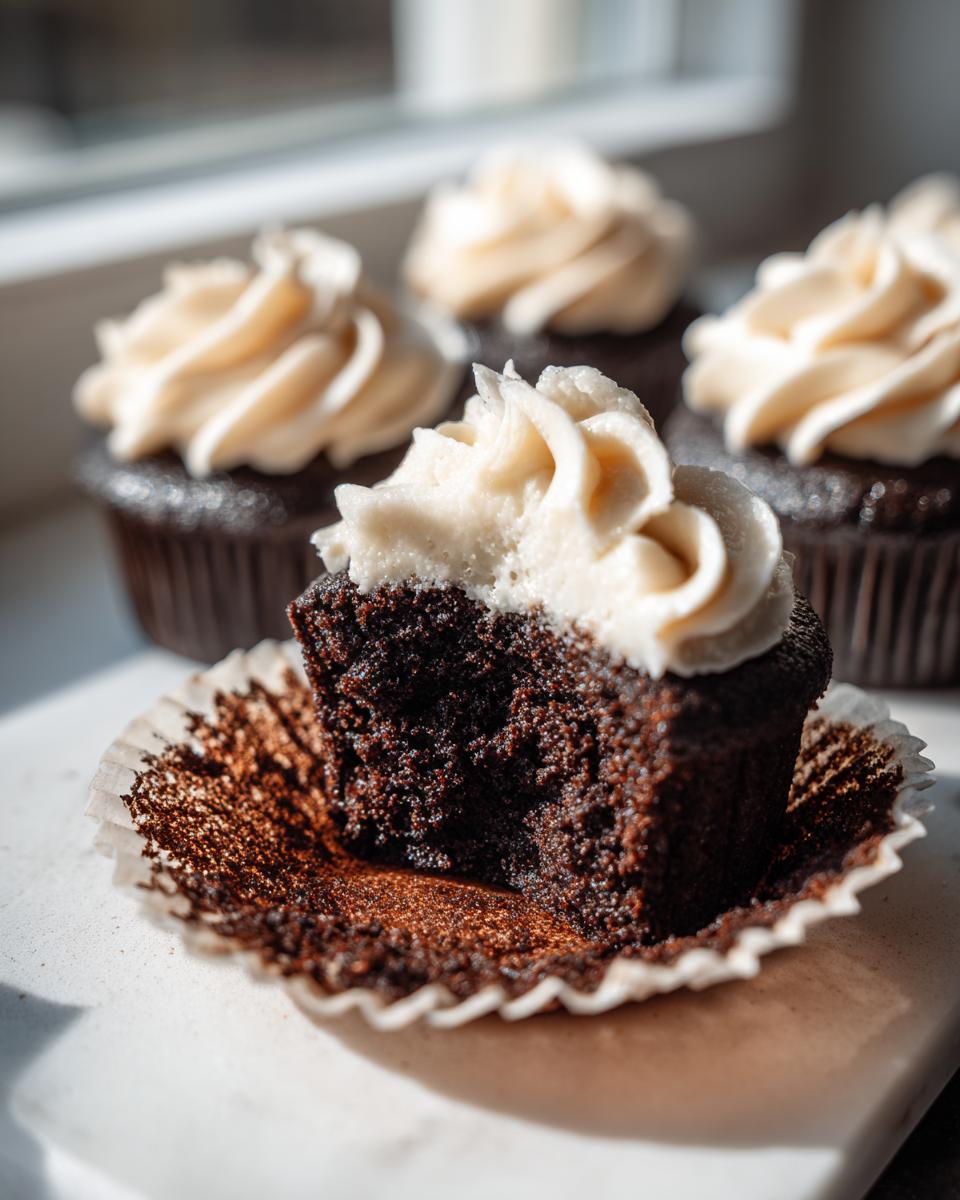
- You get incredible moisture! Thanks to the hot coffee trick, these cupcakes feel dense and rich instead of dry and crumbly.
- The ultimate flavor contrast is here: a deep, slightly bitter dark chocolate base that perfectly balances the sweet-and-tangy cream cheese frosting.
- They are shockingly fast! Seriously, from start to finish, you’re looking at less than an hour, making them perfect for a last-minute treat.
- Perfectly portioned: Baking them in standard liners means your serving size is already decided, and they look so professional!
If you end up loving how easy this cake is, you should check out my chocolate caramel toffee cake next week. It’s even richer!
Essential Ingredients for Perfect Black Velvet Cupcakes
Okay, listen up, because the ingredients aren’t just random—they are the blueprint for that incredible dark color and moisture. Don’t even think about swapping out the buttermilk or trying to use cold cream cheese; that’s where things go wrong fast! Make sure your dairy is at room temperature; it makes all the difference, especially with these dense chocolate cakes. If you want that true, deep flavor that makes these Black Velvet Cupcakes special, you have to use hot coffee instead of hot water. Don’t worry, they won’t taste like a latte, but that tiny bit of acid and bitterness in the coffee absolutely wakes up the cocoa powder!
If you’re feeling adventurous after mastering this recipe, you might want to look at my recipe for homestyle yellow cake, which is the complete opposite but just as comforting!
For the Dark Chocolate Cupcakes
Grab your biggest mixing bowls for this portion! Remember, the buttermilk needs to be room temperature so it doesn’t curdle the batter when it hits the butter mixture. Consistency is everything here.
- 1 3/4 cups all-purpose flour
- 3/4 cup unsweetened cocoa powder (Sift this if you can—you don’t want lumps!)
- 1 1/2 teaspoons baking soda
- 1 teaspoon baking powder
- 1 teaspoon salt
- 2 cups granulated sugar
- 1 cup unsalted butter, softened (Not melted, softened!)
- 2 large eggs
- 1 teaspoon vanilla extract
- 1 cup buttermilk, room temperature
- 1 cup hot water or hot brewed coffee (Coffee gets my vote every time!)
For the Cream Cheese Frosting
This frosting needs to be silky smooth, which means every single dairy product needs to be perfectly soft. If your cream cheese is cold, you’ll end up with little chunks that just won’t blend out, and nobody wants that on a velvety cake!
- 8 ounces cream cheese, softened
- 1/2 cup unsalted butter, softened
- 3 cups powdered sugar (Start with 2 1/2 and add more if needed!)
- 1 teaspoon vanilla extract
Step-by-Step Instructions for Black Velvet Cupcakes
This is the fun part! You’ll see how quickly these rich, dark beauties come together. Just remember my golden rule here: patience when mixing the first stages, and absolute speed when adding the flour so you don’t squash all the air we just whipped in.
If you’re looking for another quick win once these are done, check out my recipe for chocolate chip tahini cookies—they’re chewy and fantastic!
Preparing the Cake Batter for Black Velvet Cupcakes
First things first, get your oven warmed up to 350 degrees F (175 degrees C) and line your 12-cup tin with those paper liners. Now, in a medium bowl, whisk together all your dry things: the flour, that beautiful dark cocoa powder, baking soda, baking powder, and salt. Whisking is important here so you don’t have any hidden pockets of baking soda hiding later!
In a separate, large bowl—the bigger the better—you’re going to begin the creaming. Beat that softened butter and the sugar until it looks light and fluffy, almost pale yellow. Then, add your eggs one by one, mixing well after each one splashes in, followed by the vanilla. Now for the alternating dance: add the dry mix a bit at a time, switching with the buttermilk. Always start and end with the dry ingredients. Mix until *just combined*. Do not overmix! Once it’s almost mixed, pour in that hot water or coffee. The batter will look thin, almost soupy. Don’t panic! That’s exactly right for these dramatic Black Velvet Cupcakes.
Baking and Cooling the Black Velvet Cupcakes
Divide that thin batter evenly between your lined cups—try to fill them about two-thirds full, no more. Pop them into your preheated oven and set a timer for 18 minutes. They usually take between 18 to 22 minutes total. You’ll know they are done when a wooden pick poked right in the center comes out clean. Don’t leave them in too long, or you’ll lose that wonderful moisture!
Let them relax in the pan for a quick five minutes—no longer! Then, gently transfer them to a wire rack. They must be completely, totally cool before you even think about frosting them. If you try to frost them warm, you’ll just have a melted, sad mess sliding down the sides.

Making and Applying the Cream Cheese Frosting
While those beauties are chilling out, let’s whip up the topping. In a clean bowl, beat your softened cream cheese and softened butter together until you have a perfectly smooth base. You want zero lumps showing here! Gradually, and I mean slowly, add in that powdered sugar and the vanilla. Keep beating it until the whole thing is light, fluffy, and absolutely creamy.
Once your cupcakes are stone cold—I can’t stress that enough—it’s time to pipe or spread that gorgeous frosting right on top. I love using a spoon to just swirl it on top randomly; messy looks fancier sometimes, right?
Expert Tips for the Best Black Velvet Cupcakes Texture
I’ve made mistakes—believe me, I have—and those mistakes taught me the few non-negotiable rules for getting these Black Velvet Cupcakes texture just right. It’s all about how you handle the dry ingredients and that final liquid pour.
If you are looking for other ways to showcase dark chocolate, you absolutely must try my favorite chocolate cake recipe. It uses a slightly different technique but is just as moist!
First, let’s talk about the cocoa. Because natural cocoa powder can be surprisingly lumpy, you really need to sift it when you combine it with your flour, baking soda, and baking powder. If you don’t sift, you end up with these weird, dry pockets of intensely bitter chocolate in an otherwise perfect bite. Trust me on this one; sifting cocoa is instant authority in the kitchen!
The next big tip comes straight from my own learning curve: Do not, I repeat, do not overmix the batter once the flour goes in. When you alternate the dry mix with the buttermilk, you are developing just enough gluten to keep the structure, but any extra mixing after that point develops too much gluten, and you end up with dense, chewy cupcakes instead of tender, black velvet ones. Mix gently until the streaks almost disappear, and then stop!
Finally, the hot element! As I mentioned earlier, using that cup of hot water or, better yet, hot brewed coffee is essential. This hot liquid blooms the cocoa powder. Blooming is just a fancy word for waking up the flavor, but in reality, it dissolves the cocoa granules completely, giving you that superior depth of color and flavor noted in the recipe.
Variations on Black Velvet Cupcakes
While I absolutely stand by the original recipe—it’s nearly perfect, just as it is—baking is all about playing around, right? Once you’ve mastered the basic technique for these Black Velvet Cupcakes, you can start experimenting with slight tweaks to keep things exciting. I’ve played around with the batter and the frosting so you don’t have to guess!
If you really love the coffee flavor note that the hot coffee brings, you can take that way further by adding instant espresso powder! Or, if you want a beautiful spring twist, skip the dark chocolate theme for a second and try this recipe in my raspberry almond tea bread. But sticking with the chocolate theme, here are a few of my favorite adaptations:
- Double Down on Coffee Flavor: Add one teaspoon of instant espresso powder right into your dry ingredients when you whisk the flour and cocoa. This deepens that rich chocolate taste even more without making it taste specifically “coffee-y.” It just makes the chocolate taste *more* like itself!
- Fudgy Interior Boost: Feel free to fold in about half a cup of mini semi-sweet chocolate chips right at the very end, after the thin batter is mixed. Fold them in gently with a spatula—don’t use the mixer! These will melt slightly while baking and give you little pockets of gooey fudge inside the cake.
- Zesty Frosting Fun: If you want to lean into the tanginess of the cream cheese frosting, skip the vanilla in the frosting and instead add the zest of one small orange. The orange peel oils infuse beautifully with the cream cheese, giving you a brighter, fresher zing that contrasts lovely with the dark cake.
Serving Suggestions for Black Velvet Cupcakes
So, you’ve got these gorgeous, dark, deeply rich Black Velvet Cupcakes topped with their perfect swirl of bright, tangy frosting. How do you serve them? Honestly, they look fantastic completely naked on a simple white platter, but if you want to create a real moment, here are my favorite ways to present them.
Because the chocolate is so intense, you want pairings that either cut the richness or amplify the depth. I usually serve these when I’m making a big pot of coffee because they are the ultimate afternoon treat. If you’re having an evening party, try some dark drinks on the side. If you love coffee, you should look at my recipe for coffee cake recipe—it’s a cozy classic!
Since they are so dark, a little bit of bright color on top makes them pop on the dessert table. A few fresh raspberries or even a single, perfectly sliced strawberry nestled right next to the swirl of frosting just makes them look irresistible. The slight tartness of the berry is magical against the cream cheese tang.
For a more adult presentation, a tiny drizzle of good quality Irish Cream or maybe even a splash of dark rum reduced down slightly makes for an incredible (and decadent) topping just before serving. Keep it light, though; you don’t want to drown that beautiful frosting!
Storage and Reheating Instructions for Black Velvet Cupcakes
Because we are working with that delightful cream cheese frosting, we have to be a little more specific about storage than if we were just using a simple buttercream. Look, keeping these incredible Black Velvet Cupcakes fresh is easy, but neglecting them for too long is a crime against deep, dark chocolate!
The biggest rule here: if they are frosted, they need to go into the fridge. That cream cheese just isn’t stable at room temperature for long, especially if your kitchen runs warm. I usually cover them loosely with plastic wrap—make sure you don’t press the wrap directly onto the frosting, or you’ll ruin your beautiful swirls; just tent it loosely over the tin or plate.
When stored correctly in the refrigerator, these dark beauties will stay fantastic for about four days. Honestly, they often taste even better on day two once the flavors really get to know each other, but by day five, the cake starts to lose that just-baked tenderness, so try to finish them before then.
Now, here’s the critical part about serving them after cold storage: Never, ever serve a refrigerated cupcake straight from the fridge. Seriously, don’t do it! When they are cold, the cake hardens up slightly, and the fat in the frosting becomes stiff. You lose all that velvety richness we worked so hard to achieve.
So, before you set out your platter, take the container out of the fridge about 30 minutes to an hour before you plan to serve them. Let them sit on the counter, still covered loosely, and come back to room temperature. When they warm up just a touch, that cake softens right back up, and the frosting gets back to its creamy, melt-in-your-mouth texture. It’s like getting a fresh-baked cupcake all over again!
Frequently Asked Questions About Black Velvet Cupcakes
I figured you might have a few last-minute questions before diving into the rich darkness of these Black Velvet Cupcakes. Baking is rarely cut-and-dry, but I’ve tried to cover the main uncertainties right here based on what people always ask me!
If you find yourself loving the technique for making these so moist, you might want to bookmark my guide on the carrot cake recipe—moist and flavorful—because the moisture principles are really similar!
Can I make the Black Velvet Cupcakes batter ahead of time?
This is a tricky one, and I usually advise against it for these specific dark chocolate cupcakes. Because the recipe relies on that chemical reaction right away between the baking soda, buttermilk, and the hot liquid, the leavening action starts pretty quickly once everything is mixed. If you let the batter sit around for too long before baking, you might end up with flat or gummy cupcakes because the bubbles will have deflated prematurely. I say mix it, bake it, and eat it! It’s so fast anyway, you shouldn’t have any problem getting them in the oven right after mixing.
Why are my chocolate cupcakes not dark enough?
That’s the eternal question when baking anything truly dark brown! If your cupcakes are looking more medium-brown than dramatic black, it almost always comes down to the cocoa powder or the temperature of the liquid. Make sure you are using a good quality, unsweetened cocoa powder—some brands are naturally lighter than others. But the real boost comes from using that hot coffee. The heat actually “blooms” the cocoa, changing its chemical structure slightly, which really deepens the color and intensifies the chocolate flavor without adding any coffee taste to your final product.
What is the best way to get smooth cream cheese frosting?
This is all about temperature control, my friend. If you try to beat cold cream cheese and cold butter together, you’ll beat until your arm falls off and you’ll still end up with little hard lumps staring back at you. For perfect, silky smooth cream cheese frosting consistency, both your cream cheese and your butter need to be perfectly softened—you should be able to press your finger into them easily without much pressure. Beat those two ingredients together alone until they are completely uniform and fluffy before you start sprinkling in the powdered sugar. That initial smooth base is what matters most!
Estimated Nutritional Data for Black Velvet Cupcakes
I always like to give a quick heads-up on the nutrition, just so you know what you’re getting into with these intensely rich Black Velvet Cupcakes! Remember, these are treats, not health food, but knowing the numbers can help when planning things out. I always say, if you’re going to splurge on dessert, make sure it’s unbelievably delicious, and these certainly qualify!
The numbers below are estimates, and they can change depending on exactly which brand of butter or cocoa you use, but this gives you a fantastic general idea of what one incredible cupcake contains. Since we aren’t skimping on the butter or the cream cheese frosting, the fat content is definitely there, but oh my goodness, is it worth it!
If you still have room for another decadent bake after these, you might want to look up my recipe for easy banana bread—moist loaf. It’s comforting and surprisingly simple!
- Serving Size: 1 cupcake
- Calories: 450
- Sugar: 45g
- Fat: 25g (Includes 15g Saturated Fat)
- Carbohydrates: 55g
- Protein: 5g
- Sodium: 300mg
Just keep in mind that this breakdown assumes you are using one standard 12-cup liner amount factored by the stated yield. Enjoy every single bite!
Print
Black Velvet Cupcakes
- Total Time: 45 min
- Yield: 12 cupcakes 1x
- Diet: Vegetarian
Description
Rich, dark chocolate cupcakes topped with a simple cream cheese frosting.
Ingredients
- 1 3/4 cups all-purpose flour
- 3/4 cup unsweetened cocoa powder
- 1 1/2 teaspoons baking soda
- 1 teaspoon baking powder
- 1 teaspoon salt
- 2 cups granulated sugar
- 1 cup unsalted butter, softened
- 2 large eggs
- 1 teaspoon vanilla extract
- 1 cup buttermilk
- 1 cup hot water or hot brewed coffee
- 8 ounces cream cheese, softened
- 1/2 cup unsalted butter, softened
- 3 cups powdered sugar
- 1 teaspoon vanilla extract
Instructions
- Preheat your oven to 350 degrees F (175 degrees C). Line a 12-cup muffin tin with paper liners.
- In a medium bowl, whisk together the flour, cocoa powder, baking soda, baking powder, and salt. Set aside.
- In a large bowl, beat the softened butter and granulated sugar until light and fluffy.
- Beat in the eggs one at a time, mixing well after each addition. Stir in the vanilla extract.
- Gradually add the dry ingredients to the wet ingredients, alternating with the buttermilk, beginning and ending with the dry ingredients. Mix until just combined.
- Carefully stir in the hot water or coffee until the batter is smooth. The batter will be thin.
- Divide the batter evenly among the prepared muffin cups, filling each about two-thirds full.
- Bake for 18 to 22 minutes, or until a wooden pick inserted into the center comes out clean. Let the cupcakes cool in the pan for 5 minutes before transferring them to a wire rack to cool completely.
- To make the frosting, beat the cream cheese and butter together until smooth. Gradually add the powdered sugar and vanilla extract, beating until light and creamy.
- Once the cupcakes are completely cool, frost them with the cream cheese frosting.
Notes
- Using hot coffee instead of hot water deepens the chocolate flavor.
- Do not overmix the batter once the flour is added.
- For best results, use room temperature ingredients for the frosting.
- Prep Time: 25 min
- Cook Time: 20 min
- Category: Dessert
- Method: Baking
- Cuisine: American
Nutrition
- Serving Size: 1 cupcake
- Calories: 450
- Sugar: 45
- Sodium: 300
- Fat: 25
- Saturated Fat: 15
- Unsaturated Fat: 10
- Trans Fat: 0.5
- Carbohydrates: 55
- Fiber: 2
- Protein: 5
- Cholesterol: 75
Keywords: black velvet cupcakes, chocolate cupcakes, cream cheese frosting, dark chocolate recipe