
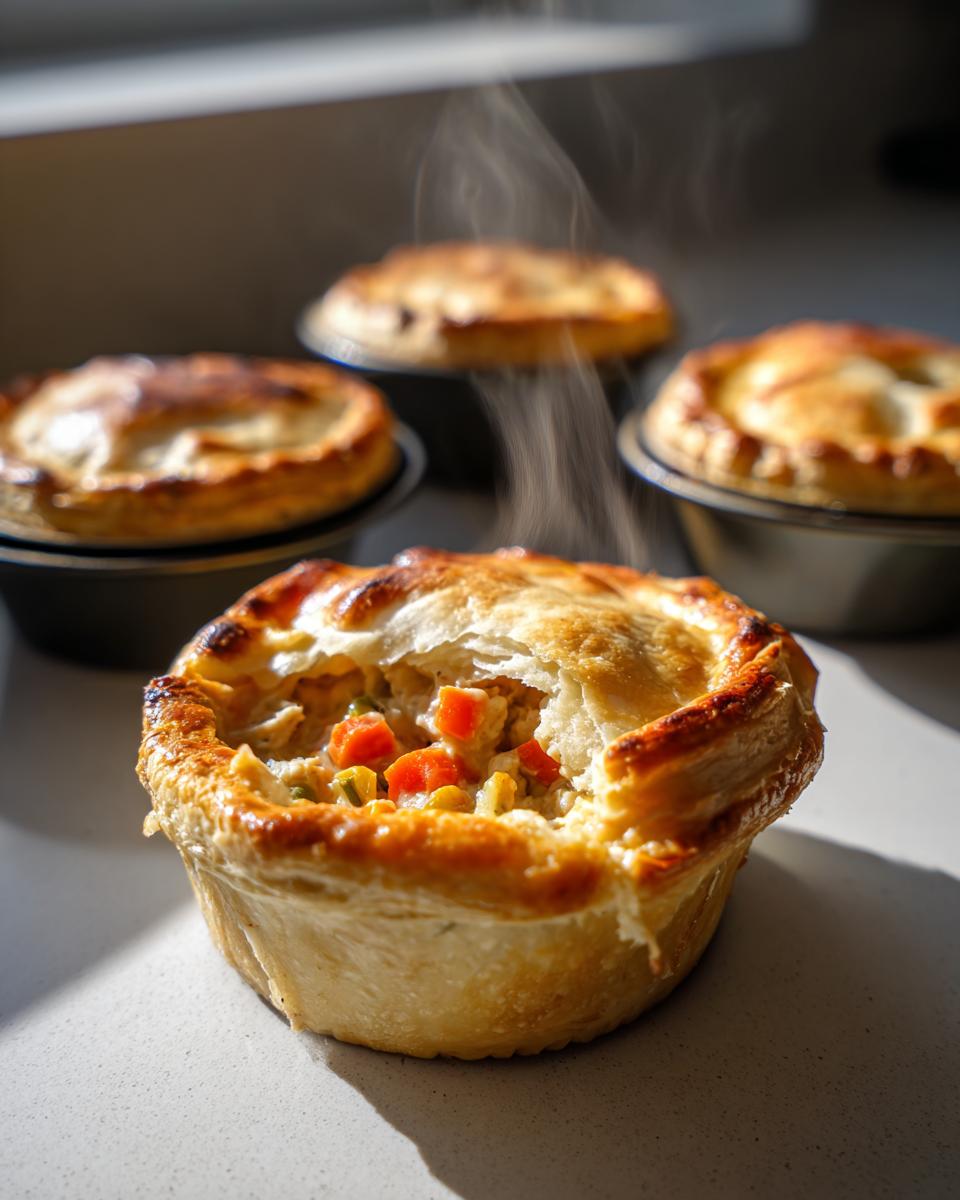
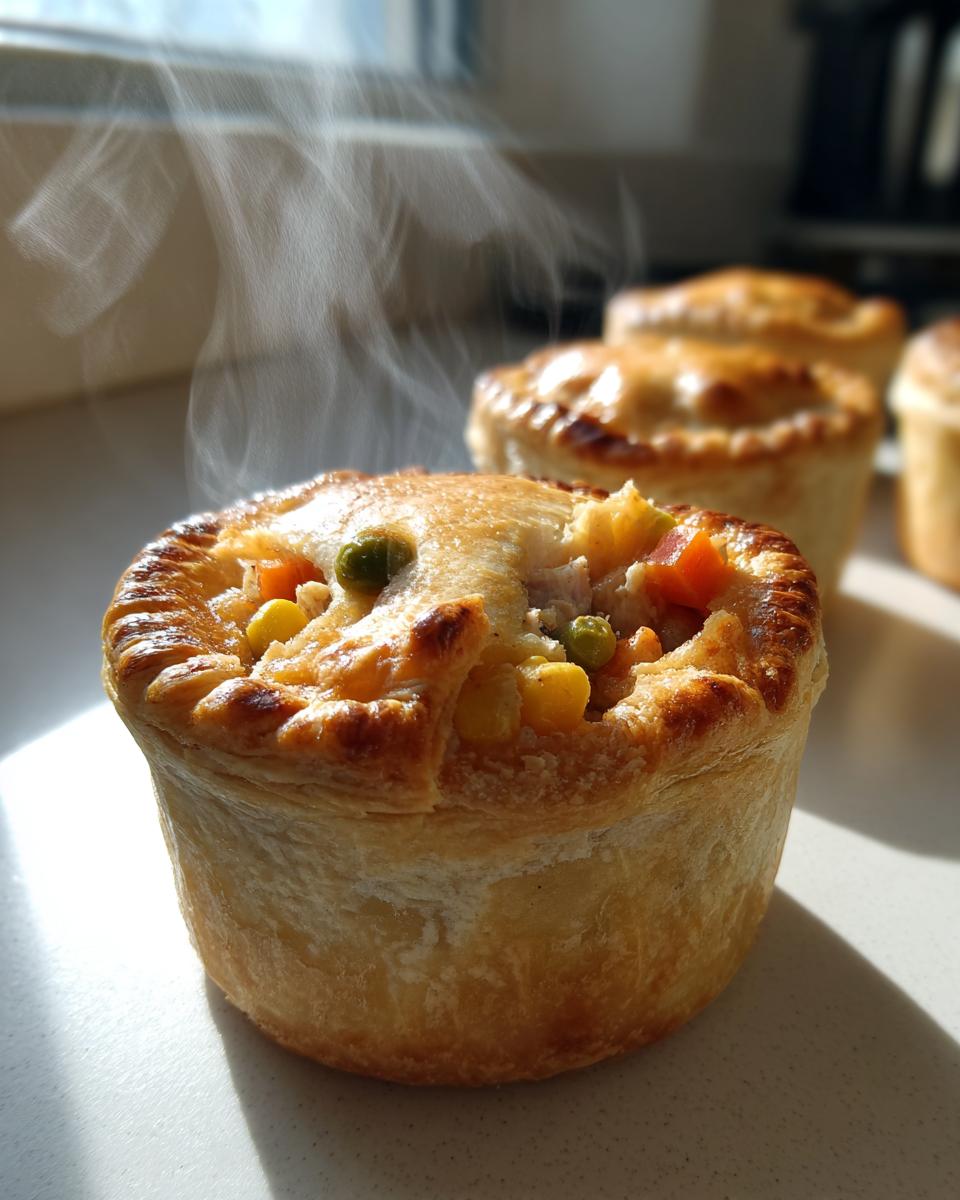
Oh, you know those nights! The ones where you just crave something warm, creamy, and wrapped in flaky pastry? That’s why I turned my classic, massive pot pie recipe—the one that takes up half the oven—into something much cuter and way easier to serve. I’m telling you, these **Turkey Pot Mini Pies** are the absolute dream when you’ve got leftover Thanksgiving or holiday turkey staring you down. Forget dry leftovers! We’re turning that perfectly seasoned bird into individual servings of pure, golden-brown comfort.
I’ve made turkey pot pies since college, trying every trick to keep the crust from getting soggy underneath. The secret is all in the individual format; the heat distributes so much better! These little bundles pack all the creamy, veggie-loaded filling you adore, but now you have perfect portion control. You just grab one, two, or maybe three—no judgment here—and you’re set!
Why You Will Love These Turkey Pot Mini Pies
Okay, let’s talk specifics. Why mess with a good traditional pot pie? Because these little guys are game-changers, trust me. They solve so many problems I used to run into when making the big version. You’ll want to bookmark this one right now:
- They are truly single-serving masterpieces! That means perfect portion control, and zero messy serving attempts at the table. Plus, everyone gets an equal amount of crispy edge crust.
- They use up those precious turkey leftovers beautifully. Instead of a sad sandwich, you get a warm, savory hug in pastry form. Who wouldn’t want that?
- Faster cooking time! Since they are small, they bake up in about 20 minutes. That means cozy dinner tonight, not waiting forever for a massive pie to cook through.
- No Soggy Bottom Alert! I swear, by baking them in a muffin tin, the crust stays crispier all around. It’s a total texture win. If you want to check out another great mini pie idea, I saw this fun mini turkey cranberry pie recipe that sounds amazing for the holidays, too.
- Freezer Friendly! You can totally make a double batch—fill them up, freeze them raw, and then bake whenever you need a super-fast dinner later on. It’s like having emergency comfort food on standby.
Essential Ingredients for Perfect Turkey Pot Mini Pies
When it comes to these little gems, keeping the filling super creamy while keeping the crust flaky is the whole game. Honestly, you probably have most of this stuff already lingering in your fridge or freezer. I always double-check my ingredient list because sliding in too much broth or forgetting a touch of milk is what turns a perfect sauce into sad soup!
Here is exactly what you need to get that rich flavor. If you’re whipping up the filling separately, you might want to check out this guide on how to make simple flatbreads because sometimes you just need bread, right? But for these pies, stick to the crust below!
For the Filling (The Heart of the Pie):
- We need 2 cups of cooked turkey, and it has to be diced! Make sure those pieces are bite-sized—not giant chunks. Leftovers are perfect here, just make sure they aren’t swimming in gravy already.
- The veggies! A full 1 cup of mixed frozen veggies—think peas, carrots, and corn. No need to thaw these little guys; they go right from the freezer into the hot pan.
- About 1/2 cup of chopped onion. You want this nice and soft before you do anything else.
- The seasoning is simple because we want the turkey flavor to shine: 1/2 teaspoon of salt and just 1/4 teaspoon of black pepper. Don’t overdo the salt if your leftover turkey was already seasoned heavily!
For the Sauce Base (Making it Luxurious):
- Start with 1/4 cup of butter. Don’t try to cut corners here; real butter flavor is essential for that classic pot pie taste.
- Whisk in 1/4 cup of all-purpose flour. This creates our thickening agent, the roux, so measure this carefully!
- Next, 1 cup of chicken broth. This is where the liquid comes from, so use a good quality one if you have it.
- And finally, 1/2 cup of milk. Whole milk is ideal, but whatever you have on hand usually works just fine for this creamy sauce.
For the Crust (The Outer Hug):
- This is the easy part! Grab one package of refrigerated pie crusts—that’s 14.1 ounces, which gives you two complete crusts total.
- You’ll need the top circles and the bottom circles, so you’re aiming for 24 total cutouts from those two sheets.
- And lastly, 1 egg, beaten up really well. This is just for the egg wash we brush on top to make them shiny and beautiful!
Step-by-Step Instructions for Making Turkey Pot Mini Pies
Alright, this is where the magic happens! Don’t let the multiple steps scare you; we are just building layers of flavor here, kind of like making a really great soup base before you turn it into something amazing. I swear, putting this filling together is easier than trying to cut a single slice from a giant pie. Just keep your whisk handy, and we’ll be golden! If you struggle with messy doughs, remember how I mentioned using some parchment paper when I talk about making homemade dough release? You can check out that trick here: it works wonders for sticky situations!
Preparing the Muffin Tin and Sautéing Aromatics
First thing’s first: get that oven yelling at 400 degrees Fahrenheit. While it’s warming up, grab your 12-cup muffin tin and grease it really well. I usually use a puff of cooking spray, but stick a tiny bit of soft butter in each cup if you have time.
Next, move over to the stove. Melt that butter in a medium saucepan over medium heat. Once it’s shimmering, throw in your half-cup of chopped onion. You want these onions to sweat until they are soft and basically translucent—this takes about 5 minutes. Don’t rush this part! Soft onions equal sweet sauce, and crunchy onions equal sad pie filling. Patience here is flavor gold!
Creating the Creamy Sauce Base for Turkey Pot Mini Pies
Okay, now that the onions are happy, sprinkle in your flour—that’s the 1/4 cup—and whisk constantly for exactly one minute. You’re cooking out that raw flour taste, which is super important. It’s going to look like wet sand, which is exactly what we want.
This next part requires serious whisking focus, so pay attention! Slowly, slowly, start adding the chicken broth and then the milk. If you pour it all in at once, you get lumps bigger than marbles. Whisk constantly while adding the liquid slowly until everything smooths out and starts bubbling gently. It thickens up fast, so keep stirring until it looks like a nice, thick coating sauce.
Once it’s smooth, turn the heat down a bit. Stir in your diced turkey, those frozen veggies (don’t thaw them first!), the salt, and the pepper. Let this mixture heat through completely—maybe 3 or 4 minutes—so the filling is piping hot before it goes into the pastry. Hot filling means less chance of a soggy bottom later!

Assembling and Sealing Your Turkey Pot Mini Pies
Time for the dough! Unroll those refrigerated pie crusts. We need 12 bottoms and 12 tops, so you’ll want to use a 4-inch round cutter. Cut out your 12 bottom circles and gently press those into the greased muffin cups. Don’t stretch the dough; just ease it into place. If a circle tears while you’re working it—oops!—just grab a scrap from the dough you cut and patch it up. Nobody will ever see it under that glorious filling!
Fill each cup about two-thirds of the way full with that hot turkey mixture. Don’t overstuff them, or they won’t seal right. Now, take your top circles and gently lay them over the filling.
The sealing is crucial for drama and holding heat: use a fork and press firmly around the edges where the top and bottom crusts meet. This crimps them shut! When you’re done crimping, take a tiny little knife and cut just one small slit right in the center of the top crust of every pie. This is the vent—it lets steam escape so your crust doesn’t explode!
Finally, beat that single egg until it’s totally uniform, grab a pastry brush, and lightly paint the tops of all 12 pies. That egg wash is what gives you that beautiful, shiny, golden-brown finish when they come out of the oven.
Baking and Cooling the Turkey Pot Mini Pies
Get your filled tins into that 400-degree oven. They need to bake for about 20 to 25 minutes. Set a timer for 20 minutes, because you’re looking for that perfect visual cue: the crusts should be gorgeously golden brown all over.
When the timer goes off, pull them out. Now for the hardest part: letting them sit! Leave the pies in the muffin tin for 5 minutes. This solidifies the sauce slightly and helps them hold their shape when you try to lift one out. Use a small offset spatula or butter knife very carefully around the edges to release them, and then let them cool a bit more on a wire rack before diving in. That hot, creamy filling stays lava-like for a while!
Tips for Success When Making Turkey Pot Mini Pies
Listen, I’ve made enough pot pies to wallpaper my kitchen, and I’ve learned a few things the hard way—mostly involving crusts that decided to fall apart in a puddle of creamy sauce. But don’t worry, I’ve condensed those mistakes into just a few foolproof tips so you get perfect results every single time. These little tricks really elevate the final product from “good dinner” to “why didn’t I think of that?”
First, let’s talk about the turkey itself. If you used a beautifully seasoned roast bird for the filling, you are already ahead of the game! If you are digging through old leftovers, just make sure you aren’t incorporating any overly watery gravy. That’s a major culprit for a soggy bottom! If you want to be sure your next roast turkey is as juicy as possible, you absolutely MUST check out my guide on how to get the best roast turkey—juicy secret included. That technique makes all the difference for leftovers!
My number one technique for crispy bottoms involves the muffin tin temperature. Make sure your muffin tin is properly greased, yes, but also make sure it’s *room temperature* before you press the bottom crusts in. If you put cold dough into a very cold tin, the dough doesn’t have a chance to bond properly with the fat, and it tends to stick or bake unevenly.
You also have to be firm but gentle when cutting out your circles! I use a slightly larger cutter for the bottom crusts than I use for the tops—maybe a 4.5-inch for the bottom and a 4-inch for the top. Press the bottom one in gently, making sure the dough comes all the way up the side walls of the cup. Then, when you put the top on, you can easily crimp the edges together because you have that extra dough lip from the bottom piece sticking up slightly.
And finally, the dreaded egg wash. Don’t skip it! Brush it on generously over the entire surface of the top dough circle, making sure to get some right down into the crimped edges. That egg not only makes them golden, but it seals those edges beautifully tight, locking all that savory steam inside until you release it with that little steam vent we cut!
Ingredient Notes and Substitutions for Turkey Pot Mini Pies
I always get questions about what to do if I didn’t plan ahead and have pre-cooked turkey or if I’m out of regular pie dough. Don’t panic! This recipe is super flexible, which is why I love it so much for weeknights. The beauty of a pot pie is that it’s meant to be a pantry-cleaner, not a rigid culinary experience. We can swap things around, and it still comes out tasting like home.
The first note in my instructions reminds everyone that this is the ultimate leftover recipe, especially if you’ve had a big holiday dinner. If your turkey is already drenched in gravy—maybe you made too much of that delicious gravy—you might want to cut back on the broth and milk in the sauce just a touch. Too much pre-existing liquid will make our sauce too thin, which is a nightmare in a mini pie!
Now, let’s talk crust, because that’s where one of my favorite quick swaps comes in. The recipe calls for standard refrigerated pie crusts, which is super convenient. But what if you want something even flakier, maybe a little richer? You can absolutely use puff pastry sheets instead!
If you use puff pastry, you’ll need to cut the circles slightly larger because puff pastry expands dramatically when it bakes—usually about 50% more than refrigerated pastry.
- For the bottom: Instead of an aggressive press into the muffin tin, just gently line the cup so the pastry sits loosely against the sides.
- For the top: The puff pastry top gets so airy and delicate; it’s fantastic! Just make sure you still cut a steam vent in the top.
If you’re curious about making flatbreads from scratch sometime, maybe just for scooping up the extra filling that might escape, I have a great basic recipe right here. But for these pies, the good quality refrigerated crust or puff pastry is my go-to!
As for the veggies, if peas and carrots aren’t your jam, try using mushrooms you sautéed first, or maybe some chopped celery cooked right along with the onions until they are very soft. The key is always to cook down any fresh vegetables well so they don’t release too much water and steam up the crust while the little pies are baking!
Serving Suggestions for Turkey Pot Mini Pies
These Turkey Pot Mini Pies, with their rich, creamy filling encased in that flaky, golden crust, are honestly a meal all by themselves. I mean, you could stop right there, and everyone would be perfectly happy, I promise! But sometimes, you just need that little something extra on the side to round out the plate, right? Since the filling is so savory and comforting, what we really need are sides that bring brightness and a little bit of clean contrast.
I try to keep the sides really simple for these, because who has the energy to make three complicated dishes after tackling pastry? Here are my top three go-to pairings that make this dinner feel complete without taking hours to prepare:
A Light, Tangy Salad
You need acid to cut through all that butter and cream sauce! My absolute favorite is a simple green salad dressed with a sharp vinaigrette. Think mixed spring greens, maybe some thinly sliced radish or cucumber, and a lemon-dijon dressing. It just cleanses the palate between bites of that hearty pie filling. If you want something a little more substantial but still fresh, I adore a big, crunchy salad. I actually just made a huge bowl of an incredible salad recently that I shared the recipe for; you should absolutely check out how to make a best Cobb salad with ranch dressing if you’re feeling ambitious, though maybe skip the ranch for the creamy pies and stick to vinaigrette!
Steamed or Roasted Green Vegetables
If you’re eating these in the dead of winter, you want something warm on the side, but it still needs to be green! Steaming broccoli or green beans is fast and retains all their nutrient goodness. If you roast them with a tiny bit of garlic powder and olive oil, you get a little char, which is nice. Just make sure you don’t overcook them; we want them tender-crisp, not mushy!
Quick Roasted Root Vegetables
If green vegetables aren’t going over well (hello, picky eaters!), my backup is always roasted root vegetables that take almost no fuss. Toss some chunks of sweet potato or maybe even some parsnips with a little bit of thyme and roast them on a sheet pan right alongside the pies for the last 15 minutes of baking time. Their slight natural sweetness is just lovely alongside the salty, savory turkey filling. It keeps the whole plate warm and comforting, which is honestly what this meal is all about!

Storage and Reheating Turkey Pot Mini Pies
So you made a double batch—good job! These Turkey Pot Mini Pies travel better in the fridge than virtually any other dish I know. But the real question is: how do we reheat them without turning that beautiful, golden crust into a sweaty, sad mess? That’s the battle we always fight with anything wrapped in pastry, isn’t it?
Here’s my definitive guide for keeping these delicious little parcels perfect for later.
Refrigerating Leftover Pies
If you’re planning to eat them in the next couple of days, storing them in the fridge is the way to go. Let the pies cool down completely on the counter first—this is important! If you put hot food into an airtight container, you trap steam, and steam equals soggy pastry. Once they are totally cool, place them in a zip-top bag or an airtight container. They should keep nicely in the refrigerator for about 3 to 4 days. Honestly, they rarely last that long in my house, but the timeline is good to know!
The Best Way to Reheat for Maximum Crispness
Forget the microwave, seriously. The microwave is the enemy of flaky pastry. It heats the filling beautifully but turns the crust into something chewy and sad, like wet cardboard. We want crispness back!
The oven is your saving grace here. Preheat it to a modest 350 degrees Fahrenheit. Don’t crank it up too high, or the crust will burn before the cold filling heats up. Place the cooled mini pies directly onto a baking sheet—no need to grease anything. Bake them for about 12 to 15 minutes.
My little trick? Right around the 10-minute mark, I quickly pull the tray out, and if the tops look a little pale, I brush them lightly with a tiny bit of milk or another quick egg wash flick, then slide them back in to finish baking until the filling is bubbling hot inside. That little boost gets the top nice and brown again!
Freezing Turkey Pot Mini Pies for Later
If you want to save them for a real emergency dinner—say, the first night the kids are home sick from school—you need to freeze them unbaked. This keeps the pastry fresher than freezing a cooked pie.
Here’s the sequence: Prepare the pies completely—fill them, seal them, add the steam vent, and even brush with the egg wash! Then, arrange them on a baking sheet lined with parchment paper. Place the whole sheet in the freezer until the pies are rock solid—about 2 hours. Once they’re frozen hard, transfer them into a heavy-duty freezer bag, taking care not to stack them so they don’t smash.
When you’re ready to eat them, just pull the desired number out of the bag, place them on a baking sheet, and put them straight into the oven (no need to thaw!). Increase the baking time slightly, maybe up to 30 or 35 minutes, watching closely until the crust is golden and the filling is piping hot all the way through.
Frequently Asked Questions About Turkey Pot Mini Pies
I get so many messages after I post a recipe like this, and usually the questions are about making things easier or fitting the recipe somehow into a busy schedule! That’s totally fair; we all need ways to get comfort food on the table faster sometimes. Here are some of the most common things people ask me when tackling these savory little hand pies.
Can I make the filling for these Turkey Pot Mini Pies ahead of time?
Yes, you absolutely can, and I highly recommend it if you’re planning a busy day! Preparing the filling ahead of time is a huge time-saver. Simply make the entire filling mixture—the creamy sauce, the turkey, the veggies—and let it cool completely. Store it in an airtight container in the fridge for up to two days. When you’re ready to bake, just roll out your pastry, line your muffin tins, fill them with the cold mixture, top them, seal them, and bake as directed. You might need to add about 5 extra minutes to the baking time since the filling is starting out cold, but generally, it works perfectly!
What is the best way to freeze Turkey Pot Mini Pies?
Freezing is fantastic for having instant dinner ready, but you have to freeze them *before* you bake them—that’s the golden rule for any pastry! If you freeze them already baked, the pastry gets weird and dry when you reheat it later. So, assemble the mini pies completely, crimp those edges tight, cut your steam vents, and brush on that egg wash just like the recipe says.
Then, arrange them on a parchment-lined baking sheet and pop the whole thing into the freezer until they are solid as a rock! Once frozen through, transfer them to a heavy-duty freezer bag. When you decide it’s time for dinner, pull them out and bake them directly from frozen at 350°F for about 30–35 minutes. If you are starting from frozen, you skip the preheating brush step, which saves time!
If you’re looking for other creative ways to use up poultry leftovers that aren’t necessarily in pastry, I love adapting things into pasta dishes. You should check out this rich chicken pot pie pasta recipe sometime; it’s fantastic!
Share Your Turkey Pot Mini Pies Experience
Now that you have the secrets to making these perfectly flaky, creamy, little marvels, I really, really want to know how they turned out for you! Did you manage to keep your sauce lump-free? Did your crimping technique hold up under pressure?
Take a picture of your golden-brown beauties and tag me! Seriously, seeing your creations is seriously the best part of running this silly little blog. If you made any changes—maybe you snagged some puff pastry or used smoked turkey—please drop a comment below and let the rest of the gang know. Your feedback helps everyone bake better next time. Happy savory pie making!
Print
Turkey Pot Mini Pies
- Total Time: 45 min
- Yield: 6 servings (2 mini pies each) 1x
- Diet: Low Fat
Description
Small, individual savory pies filled with turkey and vegetables in a creamy sauce, topped with pastry.
Ingredients
- 2 cups cooked turkey, diced
- 1 cup mixed frozen vegetables (peas, carrots, corn)
- 1/2 cup chopped onion
- 1/4 cup butter
- 1/4 cup all-purpose flour
- 1 cup chicken broth
- 1/2 cup milk
- 1/2 teaspoon salt
- 1/4 teaspoon black pepper
- 1 package (14.1 ounces) refrigerated pie crusts (2 crusts total)
- 1 egg, beaten (for egg wash)
Instructions
- Preheat your oven to 400 degrees Fahrenheit. Lightly grease a standard 12-cup muffin tin.
- In a medium saucepan, melt the butter over medium heat. Add the onion and cook until soft, about 5 minutes.
- Whisk in the flour and cook for 1 minute, stirring constantly.
- Gradually whisk in the chicken broth and milk until the mixture thickens into a sauce.
- Stir in the cooked turkey, frozen vegetables, salt, and pepper. Cook until heated through.
- Unroll the pie crusts. Use a 4-inch round cutter to cut out 12 circles for the bottoms of the pies and 12 circles for the tops. You may need to reroll scraps.
- Press the bottom crust circles into the bottom of the muffin cups. Fill each cup about two-thirds full with the turkey mixture.
- Place a top crust circle over the filling in each cup. Crimp the edges with a fork to seal. Cut a small slit in the top of each pie to allow steam to escape.
- Brush the tops lightly with the beaten egg.
- Bake for 20 to 25 minutes, or until the crusts are golden brown.
- Let the pies cool in the muffin tin for 5 minutes before carefully removing them.
Notes
- You can use leftover roasted turkey for this recipe.
- If you prefer a richer sauce, substitute heavy cream for the milk.
- Prep Time: 20 min
- Cook Time: 25 min
- Category: Dinner
- Method: Baking
- Cuisine: American
Nutrition
- Serving Size: 2 mini pies
- Calories: 350
- Sugar: 3
- Sodium: 450
- Fat: 18
- Saturated Fat: 8
- Unsaturated Fat: 10
- Trans Fat: 0
- Carbohydrates: 28
- Fiber: 2
- Protein: 18
- Cholesterol: 60
Keywords: turkey pot pies, mini pies, savory pies, turkey leftovers, comfort food, baked pies