
Oh, you have GOT to try this! There’s just something so instantly comforting and impressive about a rustic tart, right? Like you spent hours fussing over flaky pastry, but guess what? YOU DIDN’T! When I first tried to make a galette years ago, I ended up having a messy, flour-everywhere battle trying to roll out homemade dough. Total disaster.
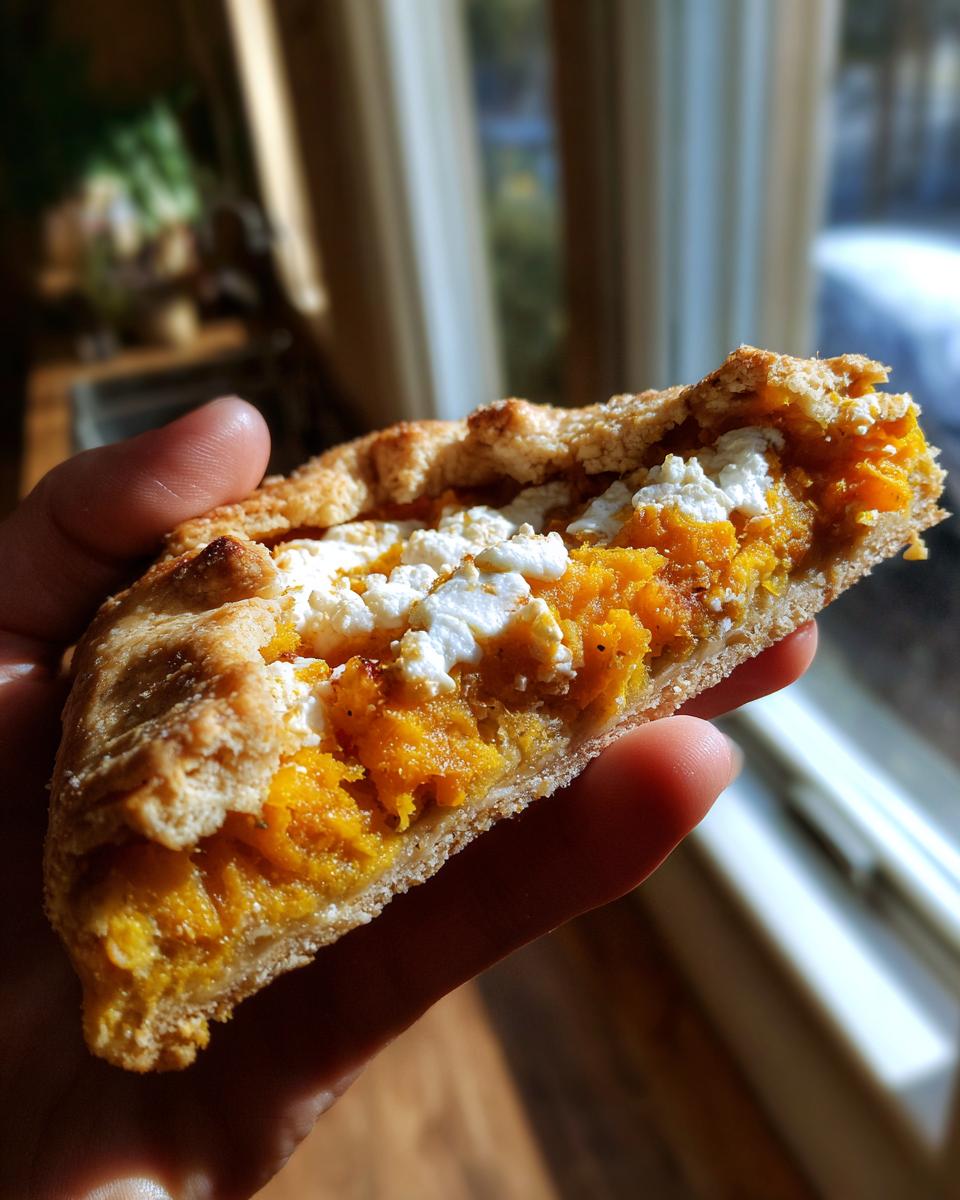
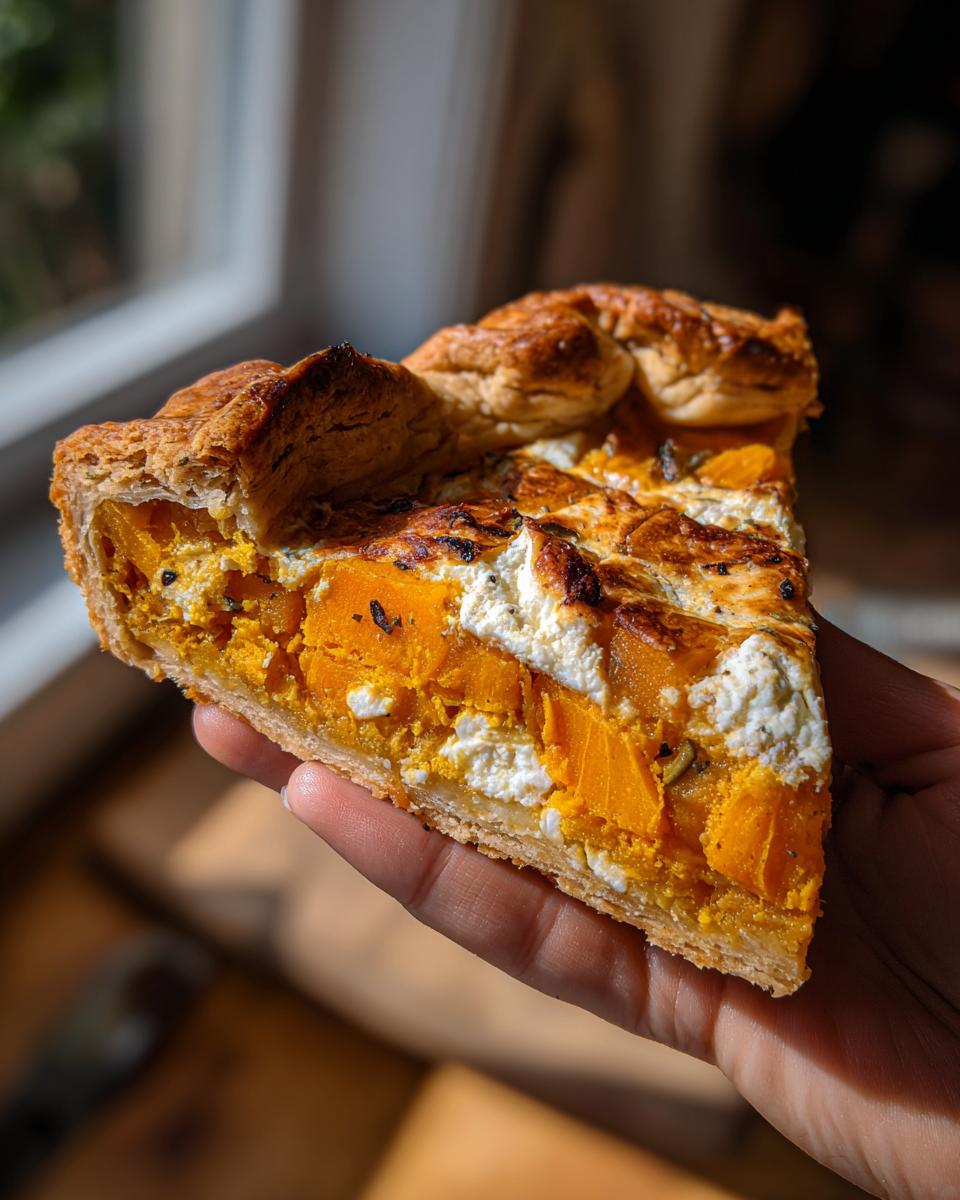
Now, I’ve wised up. This Butternut Squash Galette is my go-to for autumn dinners because it delivers all that gorgeous, caramelized flavor without making you break a sweat. We’re talking about roasted sweet squash, tangy goat cheese, and edges of store-bought pastry folded over like a hug. It’s honestly the easiest way to feel like a French baker when you only have forty minutes to get dinner on the table. Trust me on this one; it’s magical!
Why This Butternut Squash Galette Recipe Works So Well
Honestly, the magic in this recipe is that it feels fancy but hides real-life shortcuts. It’s what I whip up when I want something impressive but don’t have the patience for fussy layering. You get great texture and amazing flavor in under an hour, which is a total win in my book.
- It uses ready-made pie crust – which, let’s be real, is a lifesaver! No more flour cloud in the kitchen.
- The squash only needs a quick roast, not hours of slow cooking.
- It freezes beautifully, so you can prep a few for later!
Speed and Simplicity of the Butternut Squash Galette
We rely heavily on convenience here. Using a pre-made crust cuts the work in half immediately. Plus, since the squash is diced small, it roasts super fast. You’re mostly just doing prep while the oven does the heavy lifting. This makes it a genuinely weeknight-friendly Butternut Squash Galette, I promise.
Flavor Combination in the Butternut Squash Galette
Oh, the flavor! It’s that perfect marriage of savory and slightly sweet. Roasting the squash concentrates its natural sugars, and when you hit that with the salty tang of goat cheese? Wow. It’s earthy, savory, and utterly addictive. The best part of this Butternut Squash Galette is how those two main flavors play together.

Gathering Ingredients for Your Butternut Squash Galette
Okay, let’s talk about what you need. Since this is a very streamlined recipe, the quality of these few ingredients really shines through. Don’t try to skimp here! You need one sheet of that ready-made pie crust – whatever brand you usually grab will work just fine for this Butternut Squash Galette.
For the filling, grab one small butternut squash. Peel it and dice it into small, manageable chunks for even roasting. Then, you’ll need two tablespoons of olive oil to coat everything, half a teaspoon of salt, and a nice pinch of black pepper. The star flavor comes from about a quarter cup of that creamy, tangy goat cheese sprinkled right over the top.
Ingredient Notes and Substitutions for the Butternut Squash Galette
I know not everyone loves the bite of goat cheese, so if that’s you, please don’t panic! You can absolutely swap it out for crumbled feta cheese. Feta gives you a similar salty punch. Or, if you want something a bit milder, a sharp, aged white cheddar melts beautifully into the squash in this Butternut Squash Galette.
Here’s a little trick I learned: before you even roast the squash, mix in a tiny pinch of dried thyme. It pairs incredibly well with the sweetness of the squash. This simple addition makes the whole Butternut Squash Galette smell like an actual autumn feast while it’s baking.
Essential Equipment for Making a Butternut Squash Galette
You don’t need a specialized tart pan or a fancy springform for this! That’s one of the delights of the galette—it’s supposed to look rustic, so your equipment list stays wonderfully short. Good equipment makes even simple baking easier, and you probably have most of this stuff already kicking around your kitchen.
First things first, you absolutely need a sturdy baking sheet. Since we are roasting the squash separately first, and then baking the whole tart on the same sheet, make sure it’s large enough to give the edges of the pastry room to puff up.
- Parchment Paper: This is non-negotiable! It stops the pastry from sticking to the pan during the initial roast and again when the butter melts during the final bake. It makes cleanup a breeze, too.
- A Sharp Knife and Cutting Board: You need to peel that squash and dice it evenly. You want those little cubes to roast at the same rate, so a decent knife helps with consistent sizing.
- Mixing Bowls: You’ll need one small bowl—just a regular one—to toss the squash with the oil and seasonings before roasting.
- Pastry Brush: Necessary for applying that beautiful, shiny egg wash to the crust edges. If you don’t have one, you can use a wadded-up paper towel, but a dedicated brush is cleaner!
- Measuring Cups and Spoons: Accuracy matters, even in rustic French cooking! Especially for the oil and the seasoning measurements in your Butternut Squash Galette.
That’s it! No rolling pins, no extra pie dishes needed. Just the basics, and you’ll have a perfectly golden, gorgeous savory tart ready to go. Isn’t that why we love making a Butternut Squash Galette?
Step-by-Step Instructions for the Butternut Squash Galette
Alright, this is where we put it all together! Even though we are using store-bought pastry, the technique of roasting the filling first makes a huge difference in the final texture of our Butternut Squash Galette. We’re going to walk through this slowly so you nail that perfect crisp crust and tender filling every time.
Preparing and Roasting the Butternut Squash
First things first, get that oven hot! We need it set to 400 degrees F (200 degrees C). While it’s heating up, let’s tackle those cubes of squash. Take your diced butternut squash and toss it really well in a bowl with the olive oil, salt, and pepper. Make sure every little piece is coated; that oil helps them get nicely caramelized instead of steamy. If you want more ideas on prepping your squash, check out this guide on simple roasted butternut squash recipes.
Spread that seasoned squash out on your parchment-lined baking sheet. Don’t let the pieces pile up! They need space to breathe so they roast. We slide this into the oven for about 15 minutes. The goal here isn’t to cook them completely, but to get them *slightly tender*. This step pre-cooks them so they don’t steam the delicate pastry later on. Once they feel just soft when you poke them with a fork, take them out and let them cool down for just a few minutes while you prep the crust.
Assembling the Rustic Butternut Squash Galette
Once your squash has cooled a bit, grab that sheet of ready-made pie crust and unroll it right onto a second piece of parchment paper on a baking sheet—or just use the one you roasted the squash on if it fits okay! Spread that roasted squash evenly across the middle section of the crust. Here’s the rule: leave a good two-inch border all the way around.
Now, sprinkle your crumbled goat cheese right over that layer of squash. This is the fun, messy part! Start gently folding the edges of the pastry up and over the filling. Don’t worry if it looks messy; that’s the charm of a galette! Just keep folding, overlapping the dough until you have a beautiful, free-form border holding everything in.
Finally, take that beaten egg and brush it lovingly all over the folded-up crust edges. This egg wash is what gives you that gorgeous, shiny, deep golden-brown finish that makes this Butternut Squash Galette look like it came from a fancy bakery!

Baking and Cooling the Butternut Squash Galette
Back into that 400-degree oven it goes! You’re looking for about 25 to 30 minutes here. Keep an eye on it—you want the crust to be deeply golden brown and flaky, and you want to see the cheese looking melted and bubbly. The smell alone is heavenly, honestly!
Now, here is a step that takes real willpower, but you have to do it: let the Butternut Squash Galette cool on the pan for a full 10 minutes before you even think about slicing it. If you cut it too soon, all those beautiful juices will run out, and you’ll lose some of the structural integrity. Ten minutes allows everything to set up perfectly!
Tips for Success When Making Your Butternut Squash Galette
Even though this recipe is super simple, there are a couple of little insider tricks I’ve picked up over the years that can take your Butternut Squash Galette from good to absolutely unforgettable. Don’t skip these tweaks; they really make a difference between a nice tart and a *great* tart!
First, pay attention to how small you dice that squash. Remember, we are roasting it before it hits the oven for the final bake. If your cubes are too big—think 1-inch chunks—they won’t get tender enough in that initial 15 minutes. I aim for half-inch cubes. This ensures they are perfectly soft inside and slightly caramelized on the edges when they meet that pastry, giving you a much better texture contrast.
Second, if you’re using freezer crust, make sure you let it thaw just enough so it rolls out without cracking, but keep it cold! If the pastry gets too warm while you’re assembling, the butter melts before it hits the oven, and you lose all that beautiful flakiness we are aiming for. I usually let my crust sit out for maybe 15 minutes while the squash is roasting, but any longer and I stick it back in the fridge for 10 minutes. Cold crust equals flaky crust, period.
Finally, try letting the assembled galette sit in the fridge for about 15 minutes *before* you brush it with the egg wash and bake it. This seems counterintuitive, but chilling the pastry one last time really helps the edges hold their shape during that initial burst of heat in the oven. It prevents the gorgeous folds from slumping down, giving you a taller, more impressive-looking savory pastry.
Serving Suggestions for Your Butternut Squash Galette
So, you’ve baked this beautiful, rustic savory tart, and now it’s steaming slightly on the cooling rack. What do you pair it with? Since this Butternut Squash Galette has such lovely earthy flavors from the squash and that cheese tang, you want sides that offer freshness without overpowering it! It’s hearty enough to be the main event, especially for lunch or a lighter dinner.
My absolute favorite way to serve it is alongside something bright and green. A simple side salad cuts through the richness of the pastry and the cheese so nicely. I usually whip up a dressing that’s sharp and vinegary—maybe a lemon vinaigrette or even a light herby ranch dressing if I’m feeling something a bit creamier. You can find my favorite quick salad recipe here if you need inspiration!
If you want to lean into the savory elegance, though, you need balsamic glaze. Buy a good quality balsamic vinegar and reduce it on the stove until it’s thick and syrupy, or buy it pre-made if you’re sticking to the ‘easy’ theme we love here. Just a delicate drizzle over the top of each slice just before serving adds this amazing sweet-sour complexity. It makes the whole Butternut Squash Galette feel gourmet. Seriously, try it once; you won’t go back!
Storage and Reheating Instructions for Leftover Butternut Squash Galette
This is a happy problem to have, isn’t it? Leftover savory tart! I try to make sure we have leftovers of this Butternut Squash Galette because, frankly, it tastes just as good the next day, maybe even better once the flavors have really settled together. But how you store and reheat it makes all the difference!
If you have any Butternut Squash Galette left—and I hope you do!—you need to store it properly to keep that pastry from getting soggy. Don’t just toss it in a plastic container right away! First, let the slices cool completely to room temperature. Once they are totally cool, you can place them in an airtight container. I usually put a paper towel on the bottom of the container first, just to absorb any lingering moisture that might soften the bottom crust.
Stored correctly in the fridge, this savory tart will keep well for about three to four days. If you try to eat it cold straight from the fridge, the pastry can be a little firm, but that brings us to reheating.
The Best Way to Reheat Your Butternut Squash Galette
Never, ever, ever use the microwave if you want that crust to be salvaged! The microwave turns pastry into sad, chewy rubber. We need to bring back that lovely crispness we worked so hard for in the first step of roasting the squash!
The absolute best way to bring your slices of Butternut Squash Galette back to life is in the oven. Preheat your oven—or even a toaster oven, which works fantastic for just one or two slices—to about 350 degrees F (175 degrees C). Place the slices directly onto a baking sheet lined with foil or parchment paper. Bake them for about 10 to 15 minutes. You are just waiting until the pastry is crisp when you press on it gently and the goat cheese is warm and soft.
If you are in a huge rush, the air fryer is a decent backup, but keep the temperature a little lower—around 325 degrees F—for maybe 5 to 7 minutes. Watching those edges crisp up again makes me so happy. It’s like getting a fresh-baked treat without any of the work!
Frequently Asked Questions About Butternut Squash Galette
I know we covered a lot of ground here, from roasting the squash to achieving that perfect rustic fold. But before you run off to conquer your kitchen, here are a few quick questions I always seem to get about making this wonderful Butternut Squash Galette. It’s good to know all the little details when you’re dealing with pastry!
Can I make the Butternut Squash Galette ahead of time?
You absolutely can, and in fact, I recommend doing some prep early! You can dice and roast the butternut squash up to a day ahead of time, just keep it stored tightly covered in the fridge. As for assembling the whole Butternut Squash Galette, I wouldn’t recommend letting it sit assembled for more than an hour before baking, especially if your kitchen is warm. The moisture from the squash will start to seep into that easy pastry, and we risk a soggy bottom, which is the enemy of any good tart!
What cheese pairs well with this Butternut Squash Galette if I don’t like goat cheese?
That’s a great question! While the tanginess of goat cheese is what I love most in this vegetarian tart, there are tons of options if you want a different profile. If you prefer something milder and meltier, Gruyère is just divine here; it adds a nutty note that complements the squash beautifully. Or, if you want something sharper that stands up to the roasting process, a really good, sharp white cheddar—one that’s aged well—will give you that necessary salty counterpoint instead of the standard soft creaminess.
Just remember, whatever cheese you pick, you want it crumbled or coarsely shredded so it melts evenly over the filling and keeps that rustic appearance we are going for in this Butternut Squash Galette!
Nutritional Snapshot of This Butternut Squash Galette
Now, I’m going to be upfront with you—because I believe in complete transparency when you’re talking family recipes—this isn’t exactly a health food, but wow, is it comforting! Because we are using a store-bought pie crust which definitely brings fat and sodium to the party, these numbers are just estimates based on the specific ingredients I listed for our easy Butternut Squash Galette.
I’m calculating this breakdown for one generous slice, which assumes you get a pretty good amount of squash and cheese in that piece. If you use a lighter pastry or skip the cheese, those numbers will shift, but this gives you a solid baseline for what you’re eating with this savory tart!
Here’s what the general numbers look like for one serving:
- Calories: Around 280 (That’s pretty good for a main dish that tastes this rich!)
- Total Fat: About 18 grams. Remember, a lot of that is delicious pastry fat, but it also includes the olive oil we use.
- Carbohydrates: Roughly 25 grams, mainly coming from the squash itself.
- Protein: We get a nice little boost here, sitting around 8 grams, thanks mostly to that savory goat cheese.
- Fiber: A solid 4 grams! That’s the butternut squash doing its healthy work.
- Sodium: This comes in around 350mg, mostly from the salt we add and the pastry itself.
I always say, if you’re eating something this delicious, you should know what’s in it, but don’t stress too much! These figures are estimates, folks. The most important thing is that you enjoyed every single bite of your easy, rustic Butternut Squash Galette, and now you know exactly how to make it again next time autumn rolls around!
Print
Simple Butternut Squash Galette
- Total Time: 55 min
- Yield: 6 servings 1x
- Diet: Vegetarian
Description
A straightforward recipe for a rustic, free-form tart featuring roasted butternut squash.
Ingredients
- 1 sheet ready-made pie crust
- 1 small butternut squash, peeled and diced
- 2 tablespoons olive oil
- 1/2 teaspoon salt
- 1/4 teaspoon black pepper
- 1/4 cup crumbled goat cheese
- 1 egg, beaten (for egg wash)
Instructions
- Preheat your oven to 400 degrees F (200 degrees C).
- Toss the diced butternut squash with olive oil, salt, and pepper on a baking sheet.
- Roast the squash for 15 minutes until slightly tender. Remove from oven and let cool slightly.
- Unroll the pie crust onto a baking sheet lined with parchment paper.
- Spread the roasted squash evenly over the center of the crust, leaving a 2-inch border.
- Sprinkle the goat cheese over the squash.
- Fold the edges of the crust up and over the filling to create a rustic border.
- Brush the folded crust edges with the beaten egg wash.
- Bake for 25 to 30 minutes, or until the crust is golden brown.
- Let cool for 10 minutes before slicing.
Notes
- You can substitute feta cheese for goat cheese if desired.
- For extra flavor, add a pinch of dried thyme to the squash before roasting.
- Prep Time: 15 min
- Cook Time: 40 min
- Category: Main Dish
- Method: Baking
- Cuisine: American
Nutrition
- Serving Size: 1 slice
- Calories: 280
- Sugar: 6
- Sodium: 350
- Fat: 18
- Saturated Fat: 7
- Unsaturated Fat: 11
- Trans Fat: 0
- Carbohydrates: 25
- Fiber: 4
- Protein: 8
- Cholesterol: 35
Keywords: butternut squash, galette, rustic tart, goat cheese, easy pastry