
Oh my goodness, if you need a snack that’s an absolute showstopper but barely takes any effort, you *have* to try this. Movie nights and themed parties just got a whole lot better because I’ve landed on the easiest, most vibrant batch of Hocus Pocus Popcorn ever! Forget boring butter; we’re talking sweet, salty, and perfectly crunchy coated kernels that look like they took hours.
I make this every single year when my favorite spooky movie comes on. Seriously, the candy coating sets up beautifully, and you can dye it any color you want to match your event. It’s dangerously addictive, and the best part? It’s so much simpler than true caramel corn. Trust me, this coated popcorn will be the first thing gone at any gathering!

Why You’ll Love This Hocus Pocus Popcorn Recipe
I’m telling you, this recipe is my go-to when I need wow factor fast. It hits that perfect spot between crunchy, sweet, and salty. You get such a satisfying texture that your guests will immediately ask for the recipe—and you get to tell them it was ridiculously simple!
- It’s genuinely fast! You can whip up a huge batch before the first movie even starts.
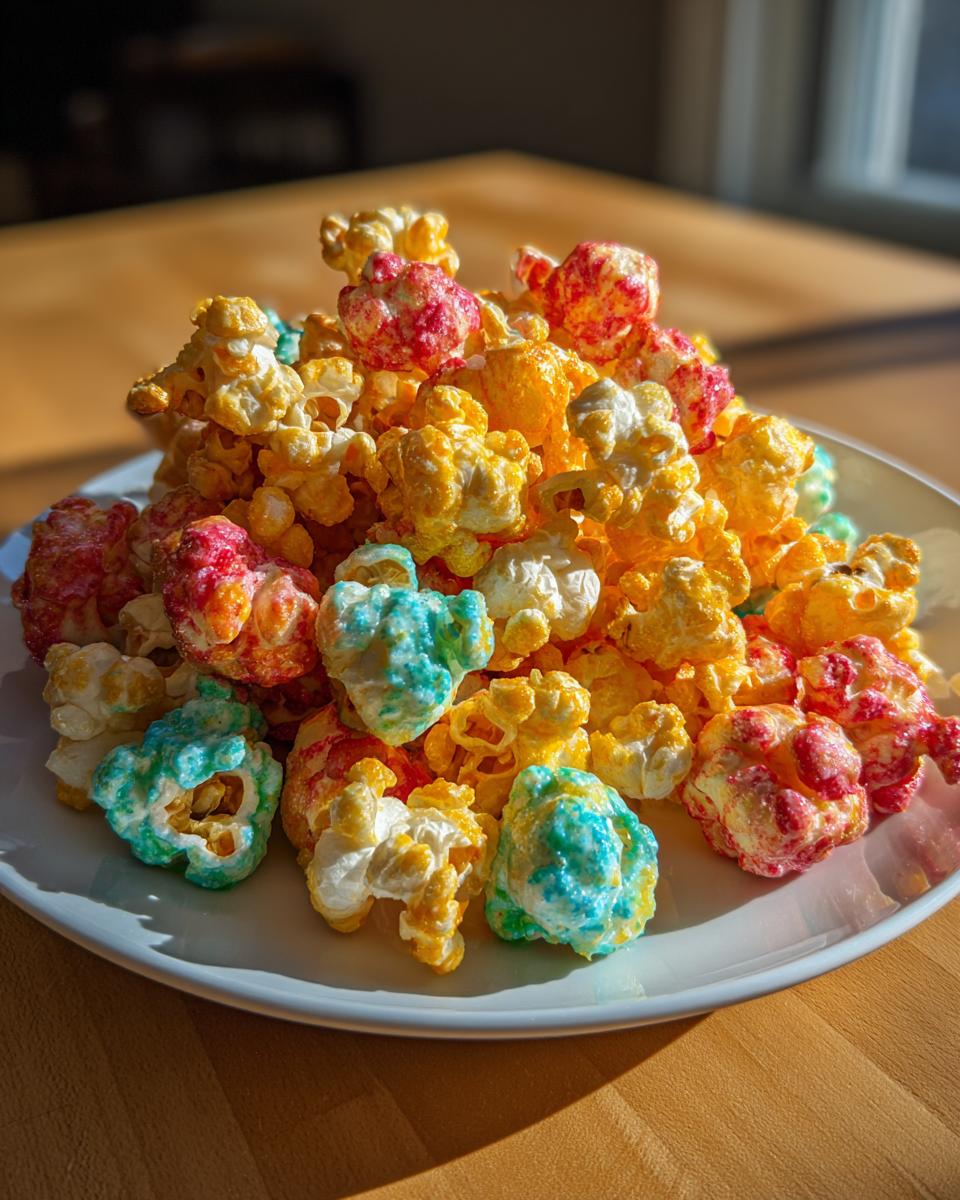
- The color possibilities are endless—bright purple, neon green—it looks amazing on a snack table.
- That perfect sweet coating has just a hint of saltiness so you don’t get overwhelmed by the sugar.
If you love quick treats, you’ll want to check out my list of killer quick and easy snacks for busy days too!
Quick Prep and Cook Times
You seriously can’t beat these numbers. From start to finish, this whole process takes about 30 minutes total. The prep time is only 10 minutes because we’re just measuring things out and popping the corn. Then, it’s only 20 minutes in the oven to set that glorious coating. It’s faster than ordering delivery!
Perfect for Themed Parties and Movie Nights
This is where the **Hocus Pocus Popcorn** truly shines! If you use gel food coloring, you can get these crazy vibrant shades. I whipped up a batch of deep orange and purple last week for a viewing party, and it just looked magical. It’s way more festive than plain popcorn, and it travels well, making it perfect for potlucks or handing out at parties.
Essential Ingredients for Hocus Pocus Popcorn
Gathering your ingredients is the first part of the fun, though honestly, it’s mostly pantry staples! This recipe isn’t fussy, but the precision around the temperature and the exact additions are what make it work, not stick, and not taste overly sweet. You’ll be surprised how quickly you can measure everything out.
Here’s what you need to pull together your **Hocus Pocus Popcorn** coating:
- But first, you need 6 cups of popped popcorn—make sure it’s fresh and crunchy!
- 1/2 cup granulated sugar
- 1/4 cup light corn syrup—this is key for that chewy texture, don’t skip it!
- 1/4 cup butter—I always use good quality salted butter here, which helps me later on flavor.
- 1/2 teaspoon salt
- 1/2 teaspoon vanilla extract—since the vanilla flavor really shines through once it’s baked, use a real vanilla extract, not imitation if you can help it. It just gives a warmer taste.
- 1/4 teaspoon baking soda. This is super important; it helps aerate the coating so it sets up crisp!
- Food coloring (optional, but highly recommended for the “Hocus Pocus” effect!)
Ingredient Notes and Substitutions
Okay, let’s talk about the fun stuff and little tweaks. If you want to add a touch of warm spice—which I highly recommend, especially if you’re making this around fall—just toss a tiny pinch of cinnamon in with the sugar mixture. It adds such a lovely depth!
Now, about that butter and salt situation: I usually use salted butter because I love the salt contrast in the final product. If you use salted butter, you might want to cut the added salt down to just 1/4 teaspoon instead of the full 1/2 teaspoon listed. If you only have unsalted butter on hand, definitely use the full 1/2 teaspoon of added salt.
And of course, the coloring! If you want that bright, vibrant look without muddying the flavor, use gel food coloring instead of liquid drops. A little bit goes a long way toward getting those spooky Halloween colors!
Step-by-Step Instructions for Hocus Pocus Popcorn
Okay, get your big mixing bowl ready, because we’re moving fast once that sugar syrup is done! Unlike a lot of baking, this is very hands-on for about five minutes, and then the oven does the hard work. Before you even touch the saucepan, make sure your baking sheet is lined with parchment paper. This saves you so much cleanup later, I promise!
If you’re looking for snacks that come together even faster than this, you can sneak a peek at some amazing 15-min sweet snacks I put together. But for this coated popcorn, precision on the temperature is everything!
Preparing the Caramel Coating
First step is combining the sugar, corn syrup, butter, and salt in a medium saucepan. Put this over medium heat and stir just until everything dissolves—we don’t want any grainy bits, right? Once it looks smooth, stop stirring completely! Now, you need to let it boil until it hits exactly 250 degrees Fahrenheit on your candy thermometer. That 250°Mark is where your coating will set up perfectly crispy later. Trust me, if you go under, it stays sticky; if you go over, it burns fast!
The second it hits 250°F, pull the whole thing off the heat immediately. Now, quickly stir in your vanilla extract. When you add the baking soda, the whole mixture is going to foam up like crazy. Don’t panic, that’s exactly what it’s supposed to do! It means the air pockets are forming.
Coating and Baking the Hocus Pocus Popcorn
This is the moment of truth! If you’re using food coloring, stir that in right now while it’s still foamy and hot—get those spooky colors mixed in quick. You have to work fast here. Pour that shimmering, hot coating all over your 6 cups of popped popcorn sitting in a huge bowl. You need to toss it immediately and thoroughly so every kernel gets some love. If you hesitate, it starts setting up!
Once it’s coated, spread that **Hocus Pocus Popcorn** out onto your prepared baking sheet. Make sure it’s in a single, even layer; we want heat to hit everything equally. Then, it goes into the 250°F oven. Here’s the trick: bake it for 15 minutes, but set a timer to stir it every 5 minutes. This prevents burning and ensures maximum crispiness. When those 15 minutes are up, take it out and let it cool completely on the pan before you dare break apart those glorious clusters!

Tips for Perfect Hocus Pocus Popcorn Texture
Nobody wants a bowl of sticky, chewy popcorn when they were hoping for that beautiful crunch, right? This is where most people mess up coated popcorn, but don’t worry, I’ve learned the hard way how to avoid that gooey disaster. Achieving that perfect crisp isn’t about luck; it’s all about controlling the temperature and making sure you don’t rush the final step. This coated popcorn is all about that satisfying snap!
If you want crispiness in your life, you’ll want to check out my tips for one secret for crispy pan-banging cookies; the underlying principle of temperature control is exactly the same!
Avoiding Sticky Hocus Pocus Popcorn
The number one reason this Hocus Pocus Popcorn ends up soft is not letting that sugar syrup reach the absolute correct temperature. You absolutely have to hit that 250°F mark, which is known in candy making as the hard-ball stage. Once you hit that temperature, the syrup crystallizes correctly as it cools, giving you that hard shell.
If your kitchen is humid—like, pouring rain outside humid—you might have to cook the syrup for an extra minute or two to drive off that extra moisture. Humidity is the enemy of crisp coatings! Also, remember the baking soda? That little bit of leavening agent is crucial because it creates tiny air bubbles inside the coating as it foams. Those bubbles help dry out the mixture perfectly during that 15-minute bake time. Don’t skip it, or you’ll end up with syrup glue instead of fun, crunchy snack!
Serving Suggestions for Hocus Pocus Popcorn
So you’ve got this glorious, crunchy, brightly colored popcorn—now what do you do with it? Honestly, you could just stand over the cooling sheet and eat the whole batch yourself, but I try to show a little restraint!
Because this **Hocus Pocus Popcorn** is so colorful, presentation is half the fun. I love lining clear glass jars with cellophane and tying a bright ribbon around the top. It makes great party favors, especially if you’re sticking to a specific color theme, like fluorescent green for a monster mash.
For a full themed setup, you absolutely need to pair this with a punch! I recently made a batch to go with my special Hocus Pocus Halloween Punch recipe (it’s fantastic, by the way), and it was perfect. The sweet crunch of the popcorn balances the tartness of the punch so well.
Don’t forget you can use it as a topping, too! Sprinkle a few clusters over ice cream when you’re serving a simple vanilla. Or, if you’re making brownies or cupcakes, crush it slightly and use it as a wild, colorful sprinkle replacement across the top of the frosting. It adds texture and a fun, unexpected sweetness that kids absolutely adore!
Storage and Reheating Hocus Pocus Popcorn
The great news about this **Hocus Pocus Popcorn** is that once it’s totally cooled, it’s actually quite shelf-stable! That’s the benefit of properly cooked sugar syrup—it seals everything in and makes it last.
The one very important rule here is air; that’s your sworn enemy once you’ve achieved perfect crunch. Once you’ve broken apart all the clusters and confirmed they are completely cool to the touch, you need to get them into an airtight container right away. Room temperature storage is perfect; don’t try to stick this in the fridge!
If you put coated popcorn in the refrigerator or freezer, you’re inviting catastrophe. All that trapped moisture will seep into the sugar coating, and you’ll wake up the next morning to a giant, sticky block of sweet popcorn cement. Sad times!

Now, about reheating: try not to. Because of that high sugar content, reheating coated popcorn usually causes the sugar to melt slightly, which just makes it soft and sticky again, even if you bake it briefly. This snack is meant to be enjoyed fresh and crunchy at room temperature. If you stored it properly in a sealed container, it should stay perfectly snappy for several days!
Variations on Hocus Pocus Popcorn Flavor
While the basic recipe for **Hocus Pocus Popcorn** is a certified winner, part of the fun in home cooking is making something truly your own, right? Once you master the temperature for that coating, you can start having a blast with mix-ins and flavor extracts. It takes just a tiny bit of extra effort and suddenly you have a whole new snack!
I love experimenting with spices, especially when the weather gets cool. I think the salty-sweet combination pairs so well with warmer flavors that aren’t typically associated with popcorn. If you enjoy playing around with those fall spices, you’ve got to see my recipe for Caramel Pecan Carrot Heaven Cake Bliss—it uses a similar principle of balancing sweet and spice!
Here are a few ways I change things up:
- Extract Swaps: Instead of pure vanilla extract, try using almond extract! It adds a richer, almost marzipan-like note that is totally surprising when paired with the salt. You only need about 1/4 teaspoon, since almond is pretty potent. A little maple extract works wonders too if you want to lean into that caramelized flavor.
- Spice It Up: We mentioned cinnamon earlier, but don’t stop there! A pinch of nutmeg or even a tiny shake of cardamom mixed in with the baking soda gives this popcorn a sophisticated, warm flavor that’s amazing. You can even add a tiny dash of cayenne pepper if you want a fun sweet-heat kicking in at the end—I call that my ‘Witch’s Brew’ version.
- Mix-Ins are Mandatory: If you are going to add things like nuts or small candies, you have to time it right! Don’t put them in the hot sugar mixture; they’ll melt or burn. Instead, toss your chopped peanuts, small pretzel pieces (for extra saltiness!), or even tiny M&Ms *after* you’ve coated the popcorn but *before* you spread it on the baking sheet. The hot coating acts like glue to hold everything together as it cools down.
Just remember that if you add heavier mix-ins like nuts, you might need to bake the coated popcorn for one or two minutes longer, just to ensure the coating fully dries around the extra bulk. But honestly, these little tweaks keep my family excited about **Hocus Pocus Popcorn** all year long!
Frequently Asked Questions About Hocus Pocus Popcorn
I get the same few questions every time someone tries this **Hocus Pocus Popcorn** for the first time, and they almost always come down to time-saving or temperature issues. Since this recipe walks that perfect line between soft and crunchy, getting the technique just right is everything!
If you’re looking for more quick fixes after you finish this batch, be sure to check out my list of amazing 15-min sweet snacks. And for more festive fun, these Halloween cookies are always a hit!
Can I skip the 15-minute baking step?
Oh, I really wouldn’t recommend it, especially if you want truly crispy, coated popcorn! The baking step isn’t about actually cooking anything new; it’s all about setting that candy coating completely and drying out any residual moisture from the baking soda reaction. If you skip it and just let it cool on the sheet, you’ll end up with popcorn that’s slightly sticky or soft about an hour later. The oven blast ensures that satisfying snap when you bite into it!
Can I use pre-popped microwave popcorn?
Technically, yes, you can! If you’re in a real pinch, grab a bag of plain, unsalted microwave popcorn. However, you need to be super careful about two things. First, don’t use butter-flavored popcorn—that extra fat messes up the coating chemistry! Second, you must make sure the popcorn you use is absolutely fresh and dry. If it’s sitting around in the bag, the coating won’t stick as well because the popcorn itself might be too soft. I always prefer air-popped if possible, because it’s drier!
What if I don’t have a candy thermometer?
This is the toughest hurdle for achieving perfect **coated popcorn**. If you absolutely cannot use a thermometer, you have to rely on the ‘hard-ball’ test, but it’s tricky! Once the syrup is boiling steadily, take a half teaspoon of the hot liquid and drop it into a bowl of ice-cold water. If it forms a very firm, hard ball that doesn’t squash easily when you poke it, you’re probably close to 250°F. If it’s squishy, keep cooking! If it dissolves instantly, you need more time. It takes practice, but the temperature is really the secret weapon here, so I highly suggest investing in a cheap thermometer!
Why did my coating foam up so much?
That big dramatic foam is the baking soda doing its job! When you mix baking soda (a base) with the hot acidic syrup, you get a chemical reaction that releases carbon dioxide gas. This gas gets trapped in the thick, buttery sugar, creating those millions of tiny air pockets we talked about earlier. It should foam up dramatically right after you take it off the heat and stir in the vanilla and baking soda. If it barely foamed at all, that often means your temperature wasn’t hot enough when you removed it from the burner.
Nutritional Estimates for Hocus Pocus Popcorn
I always feel a little guilty when I look at the numbers after making a big batch of this **Hocus Pocus Popcorn**, but hey, it’s a treat, not an everyday snack! Since we’re using a full cup of sugar and butter to coat everything, the numbers definitely reflect that delicious decadence.
I ran the calculations based on my standard recipe, but remember, these are just estimates because ingredients vary. If you use less corn syrup or skip the food coloring, your numbers might shift slightly. But just so you have a good idea of what you’re diving into, here’s the breakdown per standard 1-cup serving size:
- Calories: About 150
- Sugar: That’s the biggest chunk at roughly 18g
- Total Fat: Around 7g
- Sodium: About 120mg (This changes a lot depending on how salty your butter is!)
- Carbohydrates: Around 22g
It’s worth noting that even though it’s high in sugar, you still get a decent amount of bulk from the popcorn itself. And since fat is primarily coming from the butter, we avoid the trans fats completely, which is always a win in my book! Just enjoy it responsibly—and maybe have a glass of water with your next handful!
Print
Hocus Pocus Popcorn
- Total Time: 30 min
- Yield: 6 servings 1x
- Diet: Vegetarian
Description
A simple recipe for sweet and slightly salty popcorn with a colorful coating.
Ingredients
- 6 cups popped popcorn
- 1/2 cup granulated sugar
- 1/4 cup light corn syrup
- 1/4 cup butter
- 1/2 teaspoon salt
- 1/2 teaspoon vanilla extract
- 1/4 teaspoon baking soda
- Food coloring (optional)
Instructions
- Line a baking sheet with parchment paper.
- In a medium saucepan, combine sugar, corn syrup, butter, and salt.
- Cook over medium heat, stirring until sugar dissolves.
- Bring the mixture to a boil without stirring. Cook until it reaches 250 degrees Fahrenheit on a candy thermometer.
- Remove from heat. Stir in vanilla extract and baking soda. The mixture will foam.
- If using food coloring, stir it in now.
- Pour the coating over the popped popcorn in a large bowl. Toss quickly to coat evenly.
- Spread the coated popcorn onto the prepared baking sheet in a single layer.
- Bake at 250 degrees Fahrenheit for 15 minutes, stirring every 5 minutes.
- Cool completely before breaking apart.
Notes
- For extra flavor, you can add a pinch of cinnamon to the sugar mixture.
- Store cooled popcorn in an airtight container at room temperature.
- Prep Time: 10 min
- Cook Time: 20 min
- Category: Snack
- Method: Baking
- Cuisine: American
Nutrition
- Serving Size: 1 cup
- Calories: 150
- Sugar: 18g
- Sodium: 120mg
- Fat: 7g
- Saturated Fat: 4g
- Unsaturated Fat: 3g
- Trans Fat: 0g
- Carbohydrates: 22g
- Fiber: 1g
- Protein: 1g
- Cholesterol: 15mg
Keywords: Hocus Pocus Popcorn, sweet popcorn, coated popcorn, snack recipe, easy popcorn