
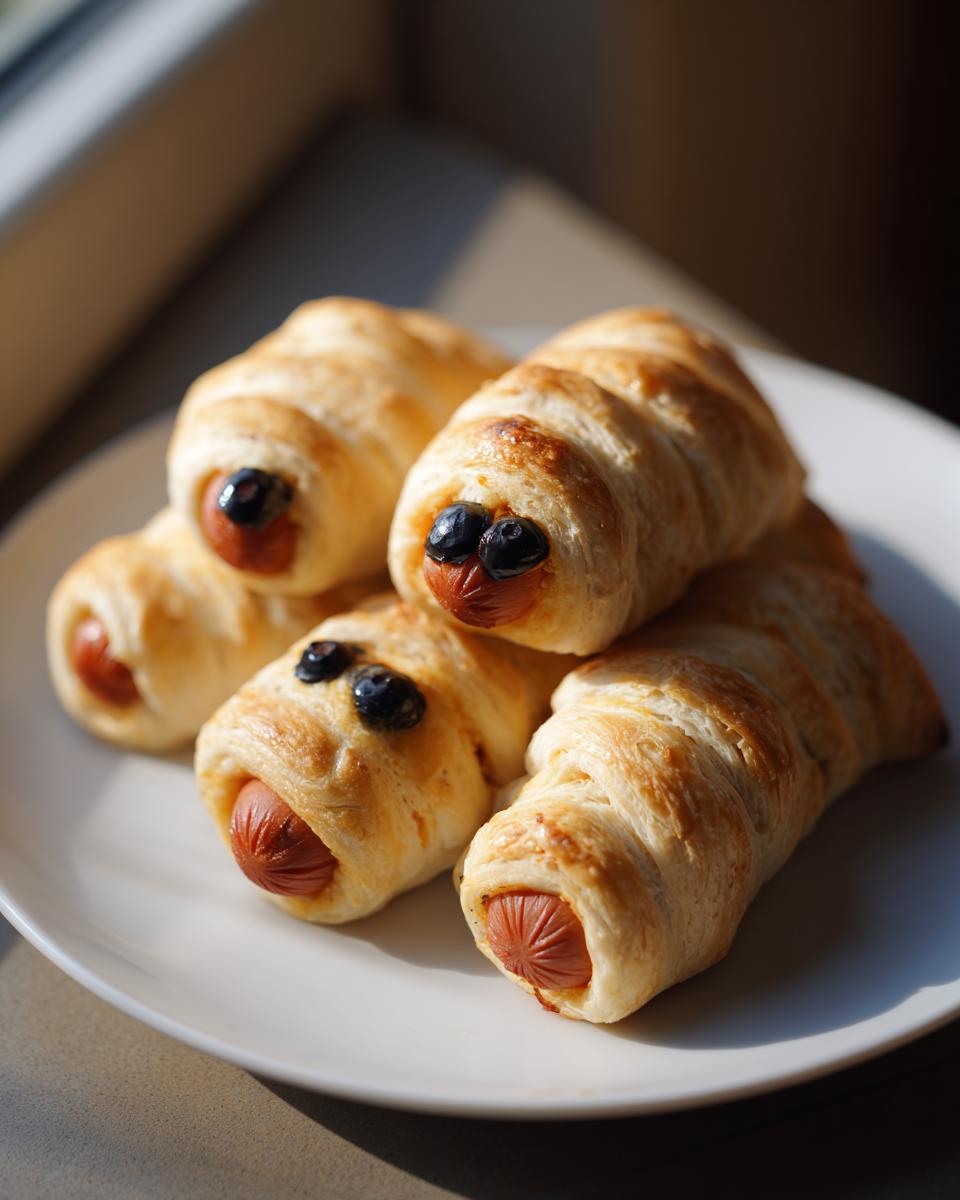
Halloween is my absolute favorite. I mean, who doesn’t love a good excuse to eat things that look slightly creepy but taste amazing? If you’re anything like me, you need snacks that come together faster than the kids can carve their pumpkins. And I finally nailed it—the absolute easiest, most ridiculously fun Halloween snack you will ever make. Seriously, forget complicated spreads; we are talking about the simplest, tastiest Mummy Dogs!
I used to stress so much about having enough spooky treats for the trick-or-treat crowd that shows up at our door. Now, I just grab two ingredients from the fridge, and boom—instant appetizer success. These things practically make themselves. They look like they took hours of fussy wrapping, but trust me, this is the foolproof way to get those perfect little dough bandages every single time. They are fantastic for casual gatherings or when you just need a silly dinner before the big costume parade.
Why You Will Love Making These Mummy Dogs
Honestly, I keep these in my back pocket all year round because they are just that good. But when October hits? They’re mandatory! Here’s why these little hot dog bundles will be your new go-to:
- They are unbelievably fast! With only about 10 minutes of prep time, you can have them wrapped and ready for the oven before you even finish setting out the napkins.
- Kids absolutely adore helping! My little ones jump at the chance to wrap the dough strips, making cleanup and prep way easier on me. It’s our favorite Halloween tradition now.
- That golden, flaky pastry shell around the salty hot dog? Perfection. They come out looking spooky but tasting completely irresistible.
- Minimal ingredients are needed. You literally only need two main things, and you probably have them right now in your fridge!
Essential Ingredients for Perfect Mummy Dogs
One of the biggest reasons I love this recipe so much is that it calls for almost nothing! Seriously, half the battle is just deciding what kind of hot dog to use. The dough is the star here, working overtime to look like ancient gauze.
When you go to the store, make absolutely sure you grab the refrigerated crescent roll dough. Don’t try to substitute actual pastry dough or anything fancy; the way the crescent dough rolls pull apart into those perfect ribbon strips is crucial for that mummy look you’re going for.
Here is the ultra-short list of what you need. Keep these on hand, and you can whip up these snacks anytime!
- Eight standard hot dogs. If you want tiny ones for a party, grab cocktail wieners instead, but you’ll need to adjust your baking time slightly!
- One package (8 ounces) of that wonderful, ready-to-go refrigerated crescent roll dough.
- Just one tablespoon of vegetable oil to lightly grease your pan—we don’t want any sticky mummy escapes!
- Two small black olives. This is the secret to the eyes! You will need to take these olives and slice them up into tiny little pieces so they look like creepy, peering pupils.
That’s it! If you look at those ingredients, you’ll see we don’t even need cheese or specialized sauces. Simple ingredients mean maximum spookiness with minimum fuss, which is exactly how I like my holiday cooking to go.
Step-by-Step Instructions to Create Your Mummy Dogs
Okay, this part is therapeutic, I swear. It’s like wrapping tiny gifts, only these gifts involve hot dogs and look delightfully eerie. We need to get that oven hot first so everything is ready when the wrapping is done. Preheat your oven right now to 375 degrees Fahrenheit. And listen, don’t forget to grab that baking sheet! A little preventative grease—that tiny bit of vegetable oil goes a long way, otherwise your mummies might stick!
This process is so straightforward, yet it’s easy to get distracted watching TV! Make sure you follow these steps in order for the best results. If you want my secret on how to make perfectly grilled hot dogs for next time, check out that guide, but for these mummies, baking is the way to go!
Preparing the Dough Strips for Your Mummy Dogs
First things first: handle that dough gently! Unroll your package of crescent rolls. You’ll see they are already separated into triangles, which is a small miracle of convenience, isn’t it? Peel those triangles apart. Now, here’s the trick for the best wrap effect: take your kitchen shears or a sharp knife and slice each triangle lengthwise. You need thin strips, about half an inch wide. This makes them flexible enough to crisscross nicely without ending up too bulky.
Wrapping Technique for the Best Mummy Dogs
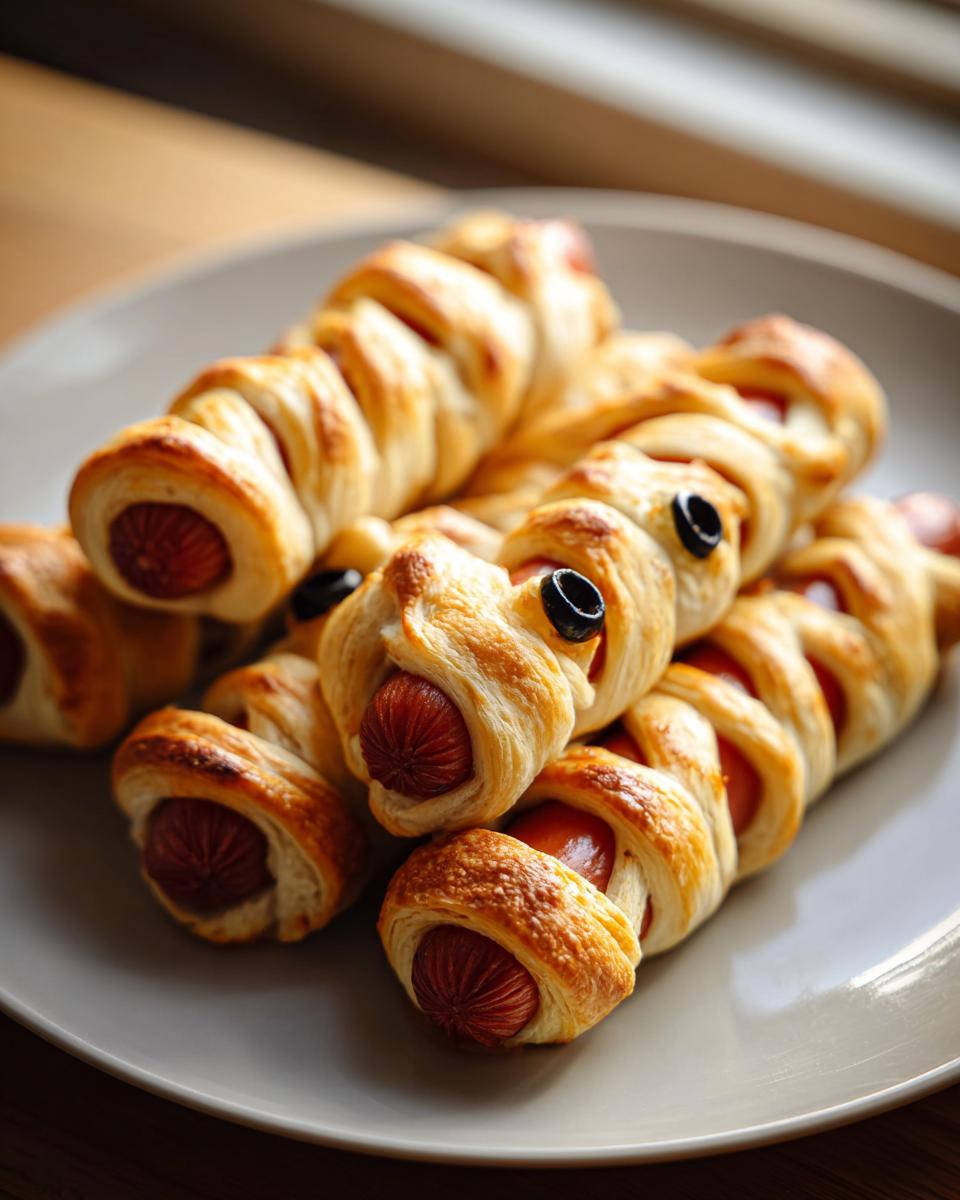
This is where the creativity comes in, but don’t overthink it! Take one hot dog and a dough strip. Start wrapping, but leave a little opening at the top end—that’s where the face is going to peek out. Don’t be too neat! I overlap the strips a little as I go around the hot dog to give it that authentic, slightly chaotic mummy look. If a strip breaks, just grab another one and overlap the end underneath the piece you are currently wrapping. The dough sticks to itself pretty easily.

Baking and Final Touches for Your Mummy Dogs
Once all eight of your little dough creatures are wrapped, place them neatly onto that greased baking sheet, making sure the face parts are facing up and looking silly. Pop them into the oven for about 12 to 15 minutes. You are looking for the pastry to be gorgeously golden brown. Don’t bake them longer than necessary, or the hot dogs inside get too hard.
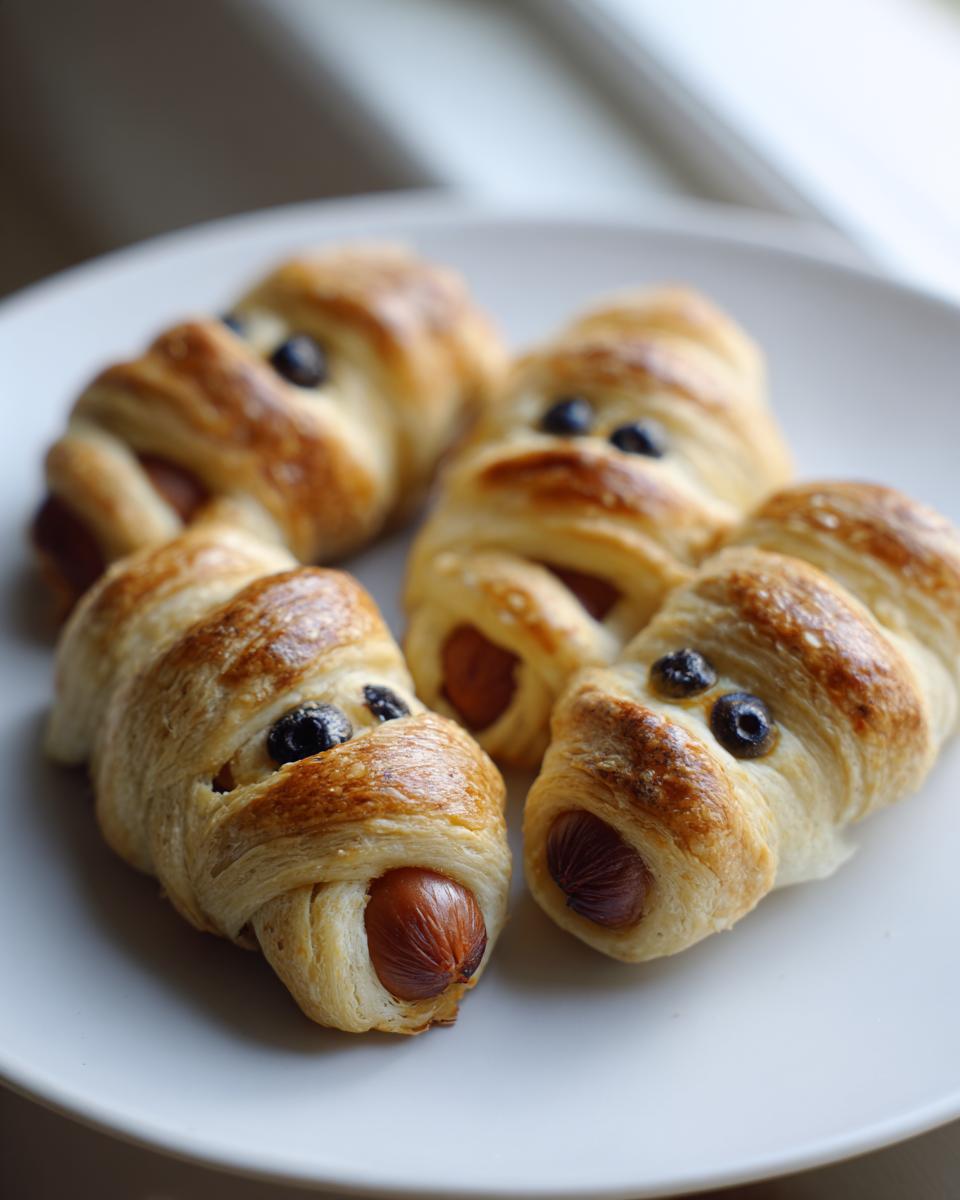
When they come out, let them cool for just two minutes—hot pastry burns hurt more than regular food burns, trust me! Now for the eyes. Take those tiny, pre-cut olive pieces and press them right into the dough where you left that little hole. Usually, the dough is still soft enough that they stick on their own. If you find they are falling off, don’t panic! Just mix a dot of ketchup or mustard with a tiny drop of water and use that as an edible glue. It works like a charm!
Tips for Making the Most Creative Mummy Dogs
So, you’ve mastered the basic mummy wrap—that’s great! But now we turn them from just “wrapped hot dogs” into something truly worthy of a snack table centerpiece. A little extra effort goes a massively long way here, and it’s all about the tiny details. My goal is always maximum visual impact for minimum extra cooking time.
First off, let’s talk about the dogs themselves. The recipe calls for standard hot dogs, which are great, but if you’re serving these at a cocktail party or want them to look even more adorable and slightly ancient, use cocktail sausages or ‘little smokies.’ You’ll have to cut your dough strips even thinner, but they bake up faster and look super precious!
If you want to spook them up even more, consider adding a little flavor accent *before* you bake. After you wrap the dough but before they hit the oven, brush the pastry lightly with an egg wash—just one egg beaten well. This gives them a gorgeous, deep golden sheen that makes them look even crisper when done.
Now, for the fun, messy bits! Once the Mummy Dogs come out of the oven and you’ve set the olive eyes, you can add some extra flair. I love to take a toothpick, dip it into some ketchup, and draw tiny little squiggly lines coming from the eye area—like little mummy scratches or maybe even ‘blood’ drips if you’re leaning into the spooky vibe. It’s completely optional, but it really sells the whole concept.
Another neat trick I saw once was using melted sharp cheddar—just a tiny bit—piped across the face area to look like bandages that melted a bit in the heat. You can get fancy with your dipping sauces, too, by tinting some of the accompanying ketchup green using a single drop of food coloring, making a ‘bog slime’ dip. For more eerie treats, you should definitely take a peek at how I make my Halloween Ghost Brownies; they use similar minimalist decoration tricks!
Serving Suggestions for Your Mummy Dogs
So your creepy, delicious little snacks are out of the oven, looking perfectly wrapped and ready to greet your guests. What do we serve with them? Well, since Mummy Dogs are such a straightforward, salty delight, they really shine when paired with some zesty dips!
Of course, the classics are always a winner. Keep small bowls of regular ketchup and yellow mustard nearby. But if you want to elevate the snack table just a touch, try whipping up a quick, savory dip. My absolute favorite for a party spread is my Buffalo Chicken Dip—it’s creamy, spicy, and contrasts beautifully with the mild pastry and hot dog.
If you’re keeping things simple, an easy crowd-pleaser is mixing ranch dressing with a tiny bit of smoked paprika for a slightly “earthy” color to match the spooky theme. They also vanish super fast when served alongside veggie sticks or a simple cheese plate. The key is to keep the sides easy, because let’s be real—everyone is going straight for the wrapped hot dogs first!
Storage and Reheating Instructions for Leftover Mummy Dogs
It’s a rare occurrence, but sometimes—just sometimes—we actually have leftovers! If by some miracle you managed to save a couple of these little guys, you want to treat them right so they taste almost as good the next day as they did fresh from the oven.
The most important thing to remember is how that gorgeous crescent dough behaves. Microwaves are the enemy of flaky crusts! They turn pastry instantly soft and almost chewy, and we absolutely do not want soggy mummy wraps.
For storage, it’s all about keeping the air out. Once the dogs have cooled completely, place any leftovers into an airtight container. Don’t try to keep them in the aluminum foil they baked on; that traps moisture right against the pastry. They should keep nicely in the fridge for about three days. I’ve never had mine last that long, mind you, but that’s the general rule!
When it’s time for round two, you have to bring that crispiness back. My number one recommendation is using the oven or a toaster oven. Preheat it to about 350 degrees Fahrenheit—a little lower than baking the first time. Pop the leftover Mummy Dogs directly onto a clean baking sheet and let them warm up for about 5 to 8 minutes. You just want the pastry edges to crisp up again and the hot dog center to get warm.
If you are truly in a rush and you must use the microwave, I suggest doing it in very short bursts—maybe 10 seconds at a time—and then quickly popping them into a toaster oven for 2 minutes afterwards just to dry out that crust a bit. It’s a compromise, but hey, we do what we gotta do when we are hungry! Don’t forget to save your olive eyes; you might need to replace them if they get soft during reheating!
Frequently Asked Questions About Mummy Dogs
I get so many questions about these little guys, especially around Halloween when everyone is planning their party spreads! It makes total sense—you want to make sure your Mummy Dogs turn out perfect. I’ve gathered the most common things people ask me below. Hopefully, this clears up any worries you have about assembling these spooky snacks!
We have lots of great ideas for easy party food, too. If you are looking for more inspiration after finishing these, you can browse my full collection of favorite appetizers!
Can I make these Mummy Dogs ahead of time?
Yes, you absolutely can assemble them early, which is a lifesaver when you’re hosting! You can wrap the hot dogs with the dough strips and place them on the baking sheet just as the instructions say. However, you will need to cover the whole tray tightly with plastic wrap and stick it in the fridge. Let them chill for up to 24 hours. When you are ready to bake, take them out about 20 minutes before putting them in the oven so they aren’t freezing cold. Remember to bake them a little longer if they are straight from the fridge!
What can I use instead of crescent roll dough for Mummy Dogs?
This is the first question I always get! While the crescent dough is the easiest because of those convenient perforated strips, you aren’t stuck with it. My friend actually used puff pastry once, and it turned out beautifully flaky. Just remember that puff pastry is thicker, so you’ll need to cut those strips narrower, maybe even half an inch, and they might cook a little faster. You could also try strips of store-bought pizza dough, but those tend to bake up a bit chewier rather than light and flaky.
What are the best hot dogs to use for Mummy Dogs?
I always default to a standard, good-quality all-beef hot dog because they hold their shape well during baking. They fit perfectly with the standard size of crescent roll dough strips! But if you are making these for a gathering where people are grazing, definitely go for cocktail wieners or little smoked sausages—what some call ‘little dogs.’ They look ridiculously cute, and kids devour them. You’ll need to adjust your wrapping technique slightly because they are much shorter, and you’ll want to reduce that baking time by a few minutes.
Estimated Nutritional Information for Mummy Dogs
Now, I know we aren’t making these for a health kick—they are spooky party food, after all! But I always like to give you a general idea of what you’re looking at so you can plan the rest of the menu accordingly. Remember, these numbers are just estimates based on using standard-sized hot dogs and typical refrigerated crescent roll brands. Ingredient variability means your final count might shift a tiny bit!
When I tracked this recipe based on serving one hot dog wrapped in dough, here is what I typically see. It’s surprisingly low in sugar, which is a bonus, but certainly salty because, well, it’s a hot dog wrapped in butter dough!
- Serving Size: 1 hot dog
- Calories: 250
- Total Fat: 15g (with 5g of that being saturated fat, mostly from the pastry!)
- Carbohydrates: 18g
- Protein: 10g
- Sodium: A predictable 550mg (Hot dogs are salty, folks!)
- Fiber: 1g
Honestly, for a snack that takes 15 minutes to bake and brings so much joy to a Halloween party, I think that’s a pretty reasonable trade-off. Just make sure you have some water nearby since the sodium is on the higher side. Don’t sweat the small stuff when you’re having fun; just enjoy these amazing snacks!
Share Your Spooky Creations
Now that you’ve got the secrets to the flakiest, easiest Mummy Dogs this side of the Nile, I really, truly want to see what you come up with! Seriously, send me pictures! I love seeing how everyone puts their own spin on things, whether you decided to use spicy mustard for eyes or went wild with the cocktail sausages!
The best part of sharing these recipes with you all is hearing about your kitchen adventures. Did your kids nail the wrapping technique? Did they disappear before the party even started? Don’t be shy! Head down to the comments section below and tell me exactly how these turned out for you. Leave a rating—five stars if they made your Halloween party legendary!
If you shared your masterpieces over on Instagram or Facebook, please tag me! I’m always looking for new ideas, and seeing your creations inspires my next batch of spooky dishes. You can also always reach out directly if you have any lingering questions about dough thickness or eye placement; the contact page here is the perfect spot to drop me a line. Happy spooking, everyone!
Print
Simple Mummy Dogs
- Total Time: 25 min
- Yield: 8 servings 1x
- Diet: Low Fat
Description
A straightforward recipe for hot dogs wrapped in pastry to resemble mummies.
Ingredients
- 8 hot dogs
- 1 package (8 ounces) refrigerated crescent roll dough
- 1 tablespoon vegetable oil
- 2 small black olives, cut into small pieces for eyes
Instructions
- Preheat your oven to 375 degrees Fahrenheit. Lightly grease a baking sheet.
- Unroll the crescent roll dough and separate it into triangles. Cut each triangle lengthwise into thin strips, about 1/2 inch wide.
- Wrap a strip of dough around each hot dog, leaving a small space near one end for the face. Overlap the strips slightly to create a mummy wrap effect.
- Place the wrapped hot dogs on the prepared baking sheet.
- Bake for 12 to 15 minutes, or until the pastry is golden brown.
- Remove from the oven. Press two small pieces of black olive into the uncovered space on each hot dog to make eyes.
- Serve warm.
Notes
- You can use mustard or ketchup mixed with a drop of water as an edible glue for the olive eyes if they do not stick on their own.
- Use cocktail sausages for smaller mummy dogs.
- Prep Time: 10 min
- Cook Time: 15 min
- Category: Snack
- Method: Baking
- Cuisine: American
Nutrition
- Serving Size: 1 hot dog
- Calories: 250
- Sugar: 3
- Sodium: 550
- Fat: 15
- Saturated Fat: 5
- Unsaturated Fat: 10
- Trans Fat: 0
- Carbohydrates: 18
- Fiber: 1
- Protein: 10
- Cholesterol: 35
Keywords: Mummy Dogs, hot dogs, crescent rolls, Halloween snack, easy appetizer