
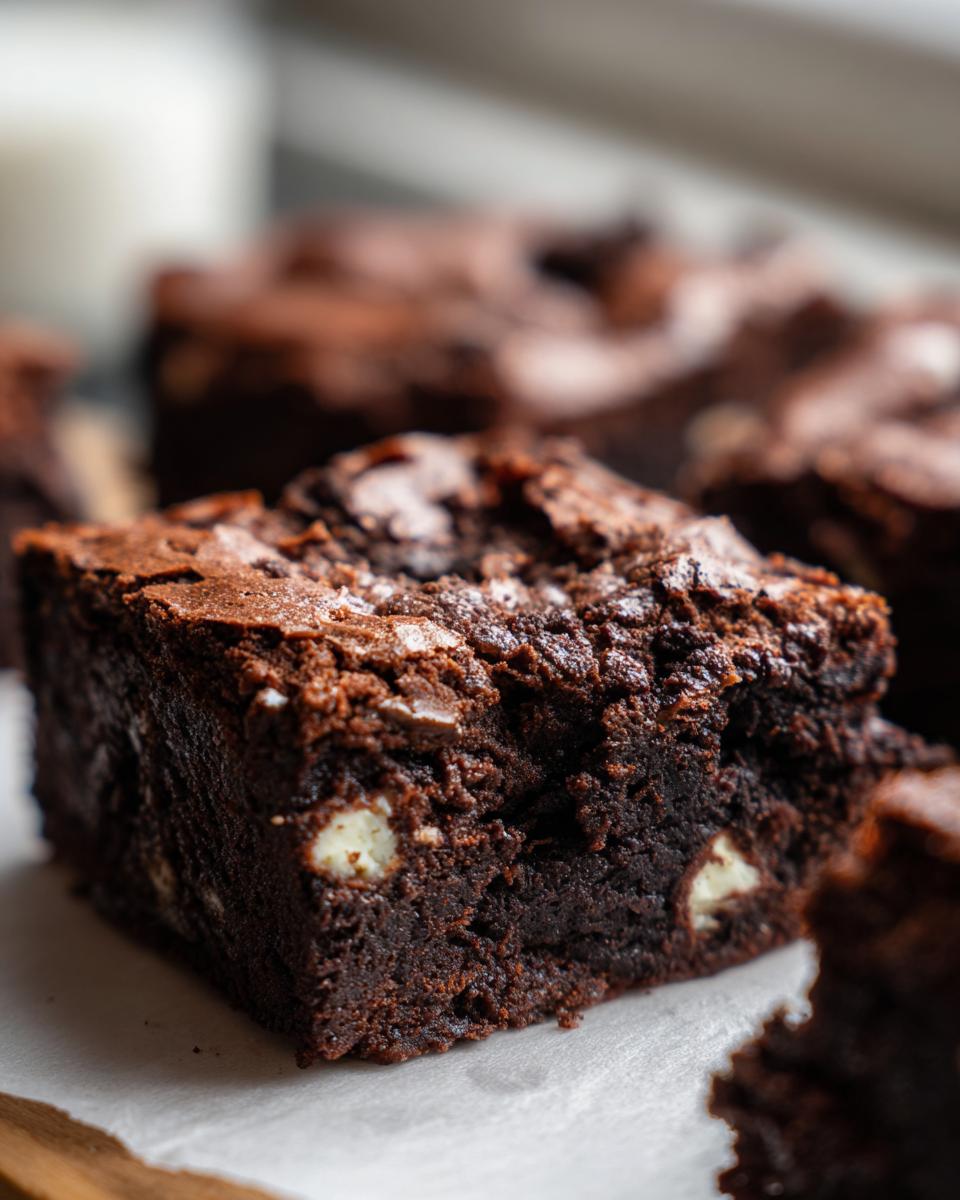
If you’re anything like me, sometimes you just need chocolate. And I mean *serious* chocolate—the kind that sticks to the roof of your mouth and makes you immediately forget whatever stress you walked into the kitchen with. Forget complicated layers or fussy frostings! That’s why I’m obsessed with what I call my **Oreo Boo Brownies**. They are exactly what they sound like: intensely rich, perfectly fudgy brownies scattered with crunchy, creamy Oreo pieces.

I’ve fiddled with brownie recipes for years, trying to crack that elusive perfect texture, and honestly, keeping it simple is usually the secret sauce. This particular recipe? It’s foolproof. I’ve made these for game days, last-minute dessert emergencies, and my own personal Tuesday night celebrations, and they come out spectacularly moist and chocolatey every single time. You get the deep cocoa flavor, the gooey chocolate chips, and that unmistakable Oreo crunch all in one go. Trust me, these **Oreo Boo Brownies** are about to become your new weeknight obsession. They whip up faster than delivery!
Why You Will Love These Oreo Boo Brownies
I know, I know, there are a million brownie recipes out there promising the world. But I stand by these every single time because they just *work* without drama. If you need that chocolate fix fast, these are your go-to. Here’s why they earned a permanent spot in my recipe binder:
- They Are Fudgy, Not Cakey: We achieved that perfect, dense, almost underbaked interior that melts in your mouth. If you hate dry brownies, this is your recipe! That rich cocoa powder helps keep things wonderfully dense.
- Prep Time is Lightning Fast: Seriously, you can mix everything up in about 15 minutes, tops. No fancy stand mixer required; just a bowl and a whisk, and you’re done before you know it.
- The Perfect Texture Combo: You get the smooth, decadent base contrasting beautifully with the crunch and cream filling from those roughly chopped Oreos scattered throughout. It’s a party in every bite.
- Incredibly Forgiving: Because we don’t fuss with complicated steps, even a brand-new baker can nail these. They are the definition of high-reward, low-effort baking, making them perfect for weeknights.
Honestly, the pure texture payoff for how little time you spend stirring? That’s the real win here. You won’t regret putting these together!
Essential Ingredients for Perfect Oreo Boo Brownies
Okay, listen up, because the beauty of these **Oreo Boo Brownies** is that we are using super straightforward pantry staples. There’s no weird buttermilk or specialty flour here—just the good stuff that guarantees a rich, deep chocolate flavor. When you gather these things, just remember that the quality of your cocoa powder really matters because it’s the star!
I always lay everything out before I start mixing; it keeps me from forgetting something crucial, like that little pinch of salt which totally wakes up the chocolate flavor.
- 1 cup unsalted butter, melted (No soft butter here! Melting it helps achieve that dense, fudgy structure, unlike creaming.)
- 2 cups granulated sugar
- 4 large eggs
- 1 teaspoon vanilla extract
- 3/4 cup unsweetened cocoa powder (Trust me on this one—use a good quality one!)
- 1 cup all-purpose flour
- 1/2 teaspoon salt
- 1 cup semi-sweet chocolate chips (Because more chocolate never hurt anyone.)
And, of course, the star of the show: 12 Oreo cookies, which you’ll want to roughly chop. Don’t crush them into dust! We need those chunky bits for texture. If you want to see how I handle other decadent chocolate bakes, check out my recipe for epic homemade Starbucks double chocolate brownies, which uses a somewhat similar fudgy base, but these Oreos take it over the top!
Step-by-Step Instructions for Making Oreo Boo Brownies
Getting these **Oreo Boo Brownies** right isn’t about complicated timing; it’s about mixing things in the right order and, most importantly, stopping exactly when you should. I follow these steps almost like clockwork, and they never fail me. If you’ve ever accidentally made cakey brownies when you wanted fudgy ones, I’m betting you overworked the gluten—we are avoiding that trap today!
Always make sure your ingredients, especially those eggs, aren’t ice cold straight from the fridge. A slightly warmer approach helps them incorporate better into the melted butter base. For more inspiration on balancing textures, you can look at my process for chocolate-covered strawberry brownies, where texture control is just as important!
Preparing the Pan and Oven
First things first, get that oven warmed up! You want to preheat your oven to 350 degrees Fahrenheit right away. While it heats up, grab a 9×13 inch baking pan. Give it a good grease and flour coating. If you skip this, you’ll be crying later when you try to get those beautiful, fudgy squares out!
Mixing the Wet and Dry Components for Oreo Boo Brownies
In your big bowl, start by mixing that melted butter with the sugar until they look happy together. Next, beat in your four eggs, one by one, ensuring each one is mixed in before adding the next. Stir in the vanilla extract. Now, switch gears! In a separate bowl, whisk together the cocoa powder, flour, and salt. This keeps everything lump-free. Gradually add those dry ingredients into the wet mixture. The golden rule here? Mix until just combined. Stop stirring the second you don’t see streaks of dry flour remaining. Toss in the chocolate chips and fold gently—that’s how we keep them super fudgy!
Layering and Baking Your Oreo Boo Brownies
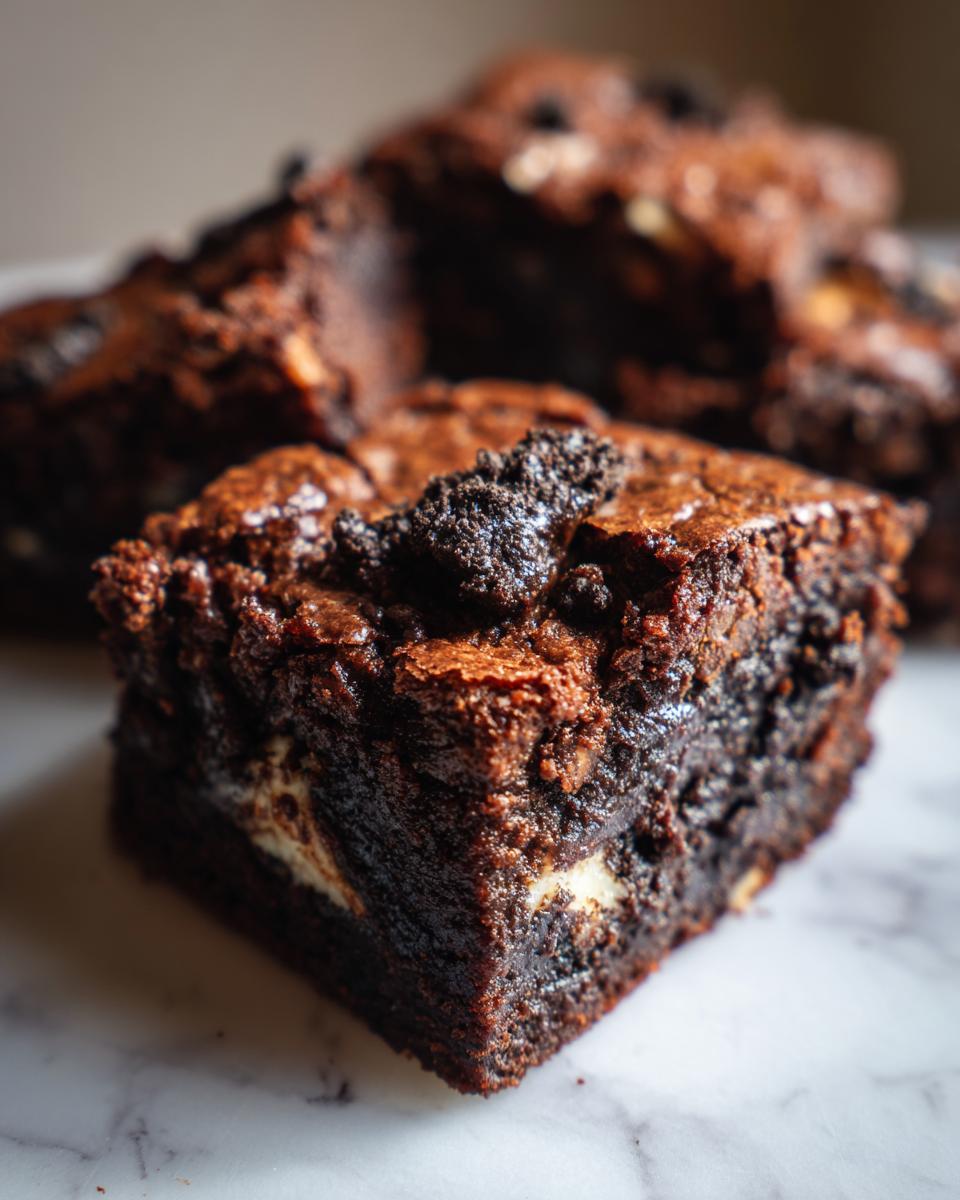
Now for the fun part! Spread about half of your rich chocolate batter into that prepared pan. Take half of your roughly chopped Oreos and sprinkle them right over this first layer. Then, dollop the remaining batter over the top, spreading it carefully so you don’t mix up the layers too much. Finish with the rest of those crunchy Oreos sprinkled all over the top surface. Bake this beauty for 25 to 30 minutes. You’re looking for that perfect sweet spot: when you insert a toothpick near the center, it should come out with moist crumbs attached—not wet batter, but definitely not dry! Patience is vital here; cooling completely makes cutting these so much smoother.
Tips for Achieving the Best Oreo Boo Brownies Texture
Texture is everything when it comes to brownies, isn’t it? These **Oreo Boo Brownies** are meant to be decadently fudgy—none of that cakey business allowed in my kitchen! Since we are relying on melted butter and that careful layering technique, a few extra points of wisdom can really ensure you nail that gooey center every single time. I’ve learned these tricks through much trial and delicious error over the years!
If you loved the concept of using vegetables to boost moisture in a rich chocolate bake, you absolutely have to check out my recipe for fudgy zucchini brownies; it proves that a little extra moisture is your best friend in baking.
Here are the non-negotiable steps for that perfect texture:
- Embrace the Underbake (Slightly!): This is probably the biggest secret for fudgy brownies versus cakey ones. Don’t wait until that toothpick comes out perfectly clean! When it looks like it has moist crumbs clinging to it—like sticky little bits of chocolate heaven—pull them out immediately. Residual heat will finish cooking them as they cool.
- Do Not Overmix: I mentioned this before, but it bears repeating, especially after you add the flour mixture. Overmixing develops gluten, and gluten makes things tough and cakey. Mix only until the streaks disappear. That little bit of mixing you do while folding in the chips and Oreos is almost your final mix, so treat it gently.
- The Mandatory Cool Down: Resist the urge! When the brownies come out of the oven, they are structurally unstable. If you try to cut them hot, they will instantly cave in on themselves, and your perfect layers will blend into a gooey, messy pile (which tastes fine, but doesn’t look good for serving!). Let them cool completely in the 9×13 pan at room temperature. This allows the sugars and fats to reset, giving you those clean, satisfying squares later.
- Storing for Peak Fudginess: Keep them stored in an airtight container at room temperature. The fat content naturally keeps them moist for days. If you chill them, they firm up too much; room temperature is best for that soft, chewy bite!
Follow these guidelines, and you won’t just have good brownies; you’ll have spectacular, melt-in-your-mouth **Oreo Boo Brownies**!
Ingredient Notes and Substitutions for Oreo Boo Brownies
I get asked all the time if you can swap things out, especially when it comes to the cookies! Since these are called **Oreo Boo Brownies**, I usually stick to the original sandwich cookie, but frankly, you have some wiggle room here if you want to experiment or if you just have a different flavor lurking in your pantry. The structure of the recipe is so sturdy because of that melted butter base that it handles a little variation like a champ.
The recipe really sings when the chocolate is deep and the cookies offer that recognizable crunch. But let’s talk specifics!
- Oreo Flavor Swaps: If you have Golden Oreos, go for it! Or maybe you love the Mint flavor? That adds a cool little twist against the rich dark cocoa in the brownie. Even the seasonal flavors work wonderfully, but remember that the cream filling adds a bit of sugar and fat, so the bake time might require you to check a minute or two earlier. Don’t feel guilty about using what you have on hand—that’s what makes home baking fun!
- Butter Substitutions: This recipe specifically calls for melted butter, and that’s because the amount of saturated fat contributes heavily to the fudgy texture rather than a cakey one. I have not tested swaps like coconut oil extensively, but if you absolutely must substitute the butter, use an equal amount of a high-quality vegetable oil. Margarine can work in a pinch, but I find it often leads to a slightly greasier mouthfeel sometimes, so go with your gut if you decide to stray from real butter.
- The Chocolate Chips: We folded in semi-sweet chips mainly for those little pockets of melted goodness inside the brownie—they give you that extra satisfying pull when you bite in. You can totally use milk chocolate chips if you prefer a sweeter experience, or even dark chocolate chips if you want to deepen that intense cocoa flavor even further. Don’t skip them, please! They nestle perfectly between the brownie layers.
Ultimately, the core of these **Oreo Boo Brownies** relies on not overmixing the batter (which we covered!), but the cookies are definitely adaptable to your personal taste. Don’t be afraid to try a different cookie wrapper next time!
Serving Suggestions for Your Oreo Boo Brownies
Once these **Oreo Boo Brownies** have cooled completely—and I know that’s the hardest part—it’s time to decide how you’re going to serve them up! Because they are so rich and satisfying on their own, you don’t need much fluff, but a little something extra just elevates them into a showstopper dessert.
My absolute favorite way, especially if I’m having a friend over for a spontaneous treat, is right out of the pan, maybe warm them up for just ten seconds in the microwave. That slight warmth makes the chocolate chips inside go wonderfully soft again. If you’re looking for something speedy that hits that warm chocolate spot, I always recommend my 5-minute bliss recipe for a quick chocolate mug cake, but for these brownies, we’re going classic presentation.
Here are my go-to ways to serve up these incredible squares:
- The Classic Scoop: You simply cannot go wrong pairing rich, dark brownies with vanilla bean ice cream. The cold temperature contrasts perfectly with the chewiness of the brownie, and that melted cream acts like a little extra drizzle.
- A Tall Glass of Milk: This is non-negotiable for me sometimes! A big glass of cold milk is the perfect counterpoint to the intense sweetness and chocolate saturation of the Oreo layer. It cleanses the palate between those big bites.
- The Coffee Companion: If you’re serving these after dinner, a hot cup of black coffee or dark roast espresso cuts through the richness beautifully. The bitterness of the coffee really makes the sweetness of the Oreos pop!
- A Simple Dusting: If you truly want to keep the focus on the texture, just dust the top gently with a little extra powdered sugar right before serving. It gives a lovely visual contrast to the dark, craggy Oreo tops.
However you choose to present them, just make sure you have a sharp knife (that’s why cooling them is so important!) and plenty of napkins nearby. These tend to be a little messy, but that’s how you know they’re good!
Storage and Reheating Instructions for Oreo Boo Brownies
Okay, let’s talk about what happens after the initial excitement wears off—because trust me, you’ll want leftovers of these **Oreo Boo Brownies**. The good news is that because they are so wonderfully fudgy and dense, they actually keep really well! We aren’t dealing with a delicate layered cake here that sweats or dries out quickly.
The absolute key to keeping that perfect gooey texture dialed in after day one is controlling the environment. You want to avoid making them hard, and chilling them too much does exactly that!
- Airtight is Everything: Once the brownies have cooled down completely—and I mean completely; don’t even think about putting them away warm—slip them into an airtight container. If they are already cut, placing parchment paper or wax paper between the layers prevents them from sticking together, which is super helpful when you go to grab a square later.
- Room Temperature Rule: Store these beauties at room temperature. Seriously, skip the fridge unless your kitchen is baking hot for some reason! The fats in the butter and the cream filling of the Oreos stay softer and chewier when kept out of the cold. They should be good for about 4 to 5 days this way.
Now, if you’ve been saving those squares for a couple of days, or if you just prefer that extra soft pull, reheating is your friend. You only need a *tiny* blast of heat to refresh that fantastic texture.
To reheat a single square of your **Oreo Boo Brownies**, take the piece you want and pop it in the microwave for about 8 to 10 seconds. That’s it! Any longer and you risk melting the chocolate chips into an oil slick. That quick zap warms the fats just enough, making the whole brownie feel like it just came out of the oven. It’s pure indulgence, and honestly, it tastes nearly as good as the first slice!
Frequently Asked Questions About Oreo Boo Brownies
I always get emails after people try this recipe asking little details, which is the best! It means people are excited to bake them, and that just makes my day. I’ve tried to cover everything below, but if you have another question, feel free to drop a comment. If you’re looking for seasonal spin ideas on chocolate squares, I have a whole section dedicated to fun ideas for Christmas brownies recipe that might give you ideas!
Can I make Oreo Boo Brownies without chocolate chips?
Oh, absolutely, you can skip them if you want! But let me tell you why I put them in there. The chocolate chips aren’t structural at all—they aren’t holding anything together. They are purely there for those glorious, gooey pockets of melted chocolate that pull apart when you lift a piece. If you leave them out, you’ll still get amazing, fudgy **Oreo Boo Brownies** thanks to the melted butter and cocoa base, but you just miss out on those little rewards inside the crumb. So, if you skip them, consider adding an extra quarter cup of crushed Oreos instead for more texture!
What is the best way to cut clean squares of Oreo Boo Brownies?
This is the trickiest part of dealing with any fudgy baked good, isn’t it? You pull them out of the oven all excited, let them sit for five minutes, and then you try to slice them, and suddenly you’ve got a crumbly disaster. The single most important thing you can do for clean squares is patience. You absolutely must let them cool completely in that 9×13 pan. I seriously mean all the way down—at least two hours on the counter is the minimum. If you are in a rush, pop the entire pan (covered tightly with plastic wrap) into the fridge for an hour. The cold firms up the fats, allowing a really sharp, hot knife to glide right through without dragging the soft center out.

How do I know when they are done baking?
This is where we separate the fudgy fans from the cakey crew! Don’t rely on the toothpick coming out totally clean; that means they’re overbaked for this style of brownie. You want to pull them out when the toothpick inserted near the center comes out with moist crumbs clinging to it. Those crumbs should look dark and slightly glossy with chocolate, not wet batter. If you see dry, light crumbs, they are already past the perfect point. Trust your sight over the timer!
Can these be made ahead of time?
Yes, and frankly, they are often better the next day! Because the flavors have time to meld together, that chocolate richness deepens overnight. Once they are totally cooled, seal them up tight in that airtight container and leave them out on the counter. They hold up beautifully for several days, making them perfect for parties where you want to prep everything the day before!
Estimated Nutritional Snapshot for Oreo Boo Brownies
Now, I always tell people not to worry too much about the numbers when you’re dealing with chocolate, Oreos, and pure decadence, but I know some of you like to peek behind the curtain! Since these **Oreo Boo Brownies** are truly rich, they pack a punch, but they are cut into 16 solid servings, which helps keep things reasonable for a small treat.
Remember, these figures are just estimates based on a standard recipe breakdown; the exact amount of butter absorbed or how thick you slice your squares can change things up slightly. But for the average piece, here is what you are looking at:
- Serving Size: 1 brownie square
- Calories: Around 280 calories
- Fat: 16g (With 9g of that being saturated fat, because hello, butter and cookies!)
- Carbohydrates: 33g
- Sugar: 30g (Yes, that’s high, but wow, is it worth it!)
- Protein: 3g
- Sodium: 150mg
Look, these aren’t health bars, they are *dessert*, folks! They are perfect for satisfying that intense craving, and since the recipe is so simple, you know exactly what went into them. Enjoy responsibly, and maybe pair one with a big glass of cold milk to help balance out the sugar!
Print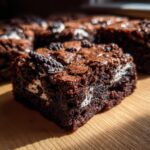
Oreo Boo Brownies
- Total Time: 45 min
- Yield: 16 servings 1x
- Diet: Vegetarian
Description
Rich chocolate brownies topped with crushed Oreo cookies for a simple, sweet treat.
Ingredients
- 1 cup unsalted butter, melted
- 2 cups granulated sugar
- 4 large eggs
- 1 teaspoon vanilla extract
- 3/4 cup unsweetened cocoa powder
- 1 cup all-purpose flour
- 1/2 teaspoon salt
- 1 cup semi-sweet chocolate chips
- 12 Oreo cookies, roughly chopped
Instructions
- Preheat your oven to 350 degrees Fahrenheit. Grease and flour a 9×13 inch baking pan.
- In a large bowl, mix the melted butter and sugar until combined.
- Beat in the eggs one at a time, then stir in the vanilla extract.
- In a separate bowl, whisk together the cocoa powder, flour, and salt.
- Gradually add the dry ingredients to the wet ingredients, mixing until just combined. Do not overmix.
- Fold in the chocolate chips.
- Spread half of the batter into the prepared pan. Sprinkle half of the chopped Oreos over the batter.
- Spread the remaining batter over the top, and sprinkle with the remaining Oreos.
- Bake for 25 to 30 minutes, or until a toothpick inserted near the center comes out with moist crumbs attached.
- Let the brownies cool completely in the pan before cutting into squares.
Notes
- For fudgier brownies, slightly underbake them.
- You can use any flavor of Oreo cookie you prefer.
- Store cooled brownies in an airtight container at room temperature.
- Prep Time: 15 min
- Cook Time: 30 min
- Category: Dessert
- Method: Baking
- Cuisine: American
Nutrition
- Serving Size: 1 brownie square
- Calories: 280
- Sugar: 30
- Sodium: 150
- Fat: 16
- Saturated Fat: 9
- Unsaturated Fat: 7
- Trans Fat: 0
- Carbohydrates: 33
- Fiber: 1
- Protein: 3
- Cholesterol: 60
Keywords: Oreo brownies, chocolate dessert, easy brownies, baked goods, cookie brownies