
Oh, the minute those first chilly breezes hit, my brain immediately switches into holiday baking mode, and honestly, nothing screams ‘fun’ louder than Halloween treats! Forget complicated molds or fancy piping bags; when I want maximum impact with minimum fuss during the spooky season, I turn straight to my tried-and-true layered bar recipes. I’ve spent years perfecting these kinds of dense, satisfying squares for every gathering, and trust me, my absolute favorite go-to is the ultimate fusion dessert: the Halloween Brookies.
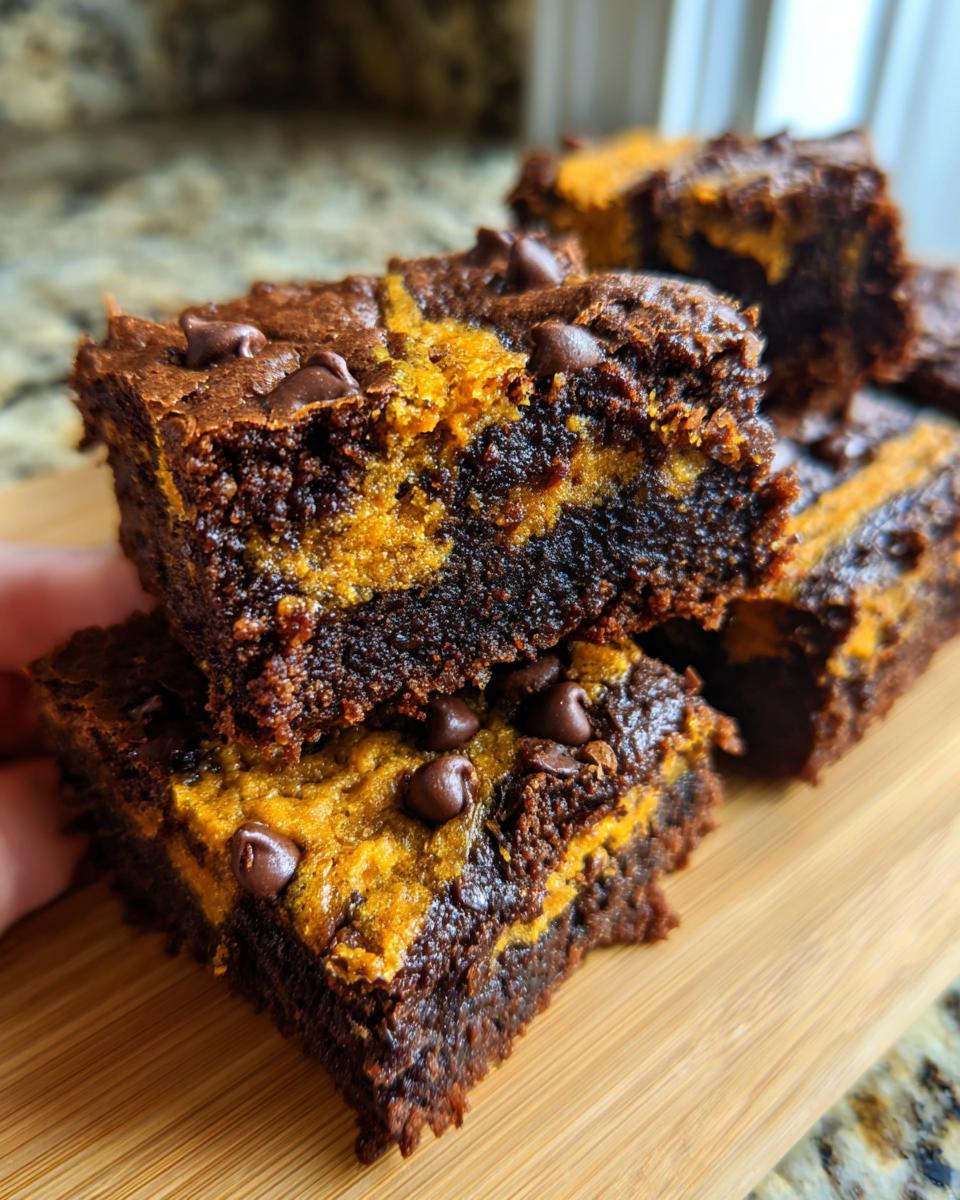
It’s exactly what it sounds like, only better—you get the fudgy, rich depth of a perfect brownie base married right underneath a chewy, classic chocolate chip cookie top. It’s decadent, it’s easy to transport to parties, and it satisfies both my chocolate cravings at once. If you’ve ever struggled choosing between making brownies or cookies, this recipe solves all your seasonal problems in one perfect 9×13 pan.
Why You Need These Halloween Brookies
Seriously, why choose one dessert when you can have the best of two worlds swirling together in one pan? These are guaranteed to be the star of your Halloween spread! I just love how satisfying they are to make, especially when you’re busy getting costumes ready.
- It’s the ultimate textural experience: rich, fudgy brownie meets chewy, soft cookie.
- They hold up beautifully, making them perfect for setting out on a dessert table.
- They are totally adaptable for fun holiday themes!
The Perfect Two-in-One Dessert
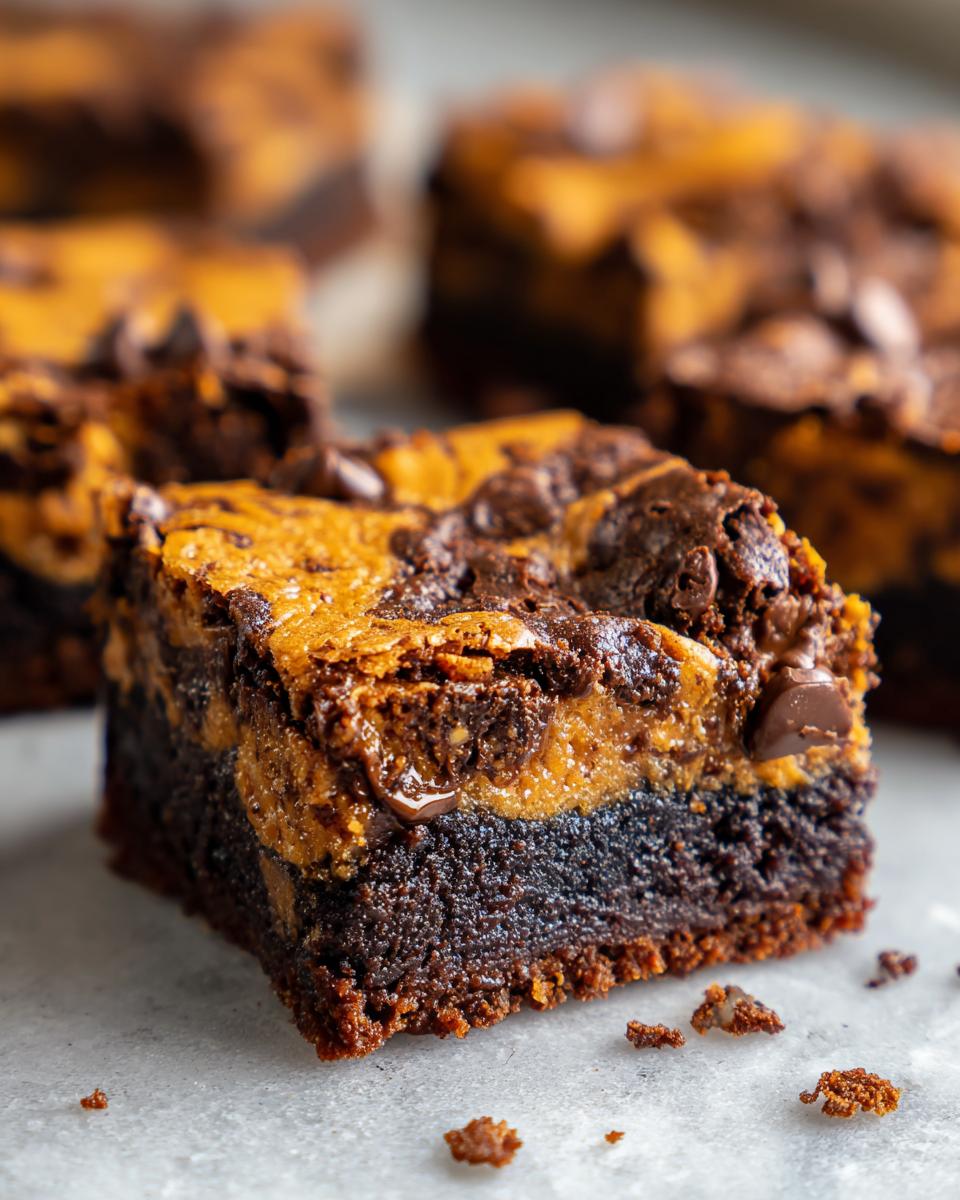
A good brownie is dense and gooey, right? But sometimes you want that classic, slightly crisp edge you only get from a chocolate chip cookie. By combining them, we get a bar that’s wonderfully sturdy but still manages to be totally decadent in every single bite. It’s texture heaven!

Festive Fun with Halloween Brookies
This is where the spooky theme comes in! If you take the extra two minutes to divide the cookie dough and mix in some orange and black food coloring, you get these amazing, marbled pops of color peeking through the top layer. These Halloween Brookies look fantastic next to candy corn! It’s such a simple step that elevates the whole dessert game.
Essential Ingredients for Perfect Halloween Brookies
Okay, listen up, because the reason these bars work so well is that we tackle the two layers completely separately before they even meet in the pan. Don’t try to rush this part or combine ingredients; keeping them distinct ensures you get that perfect brownie density under that chewy cookie top. Having everything measured out beforehand makes assembly practically mindless!
For the Brownie Layer
This is your rich, dark foundation, so quality really matters here, especially the cocoa powder. Remember, we need this butter nice and soft!
- 1 cup (2 sticks) unsalted butter, softened
- 1 cup granulated sugar
- 2 large eggs
- 1 teaspoon vanilla extract
- 1 cup all-purpose flour
- 1/2 cup unsweetened cocoa powder
- 1/2 teaspoon baking soda
- 1/4 teaspoon salt
- 1 cup chocolate chips
For the Cookie Layer and Decoration
The cookie layer brings in that lovely brown sugar depth and a bit of chewiness. For this part, you need that butter fully melted—it changes the texture completely compared to the brownie base. And don’t forget the optional color!
- 1 cup packed brown sugar
- 1/2 cup unsalted butter, melted
- 1 large egg
- 1 teaspoon vanilla extract
- 1 1/2 cups all-purpose flour
- 1 teaspoon baking soda
- 1/2 teaspoon salt
- 1/2 cup chocolate chips (the remainder!)
- Orange and black food coloring (optional)
Step-by-Step Instructions for Your Halloween Brookies
We’ve got all our ingredients lined up, which means it’s time for the fun part! Making these chocolate chip tahini cookies-adjacent layers into a stunning brookie takes a little patience, but trust me, the payoff is huge. Just follow these steps closely, and you’ll have the best Halloween Brookies ever.
Pan Preparation and Brownie Batter Assembly
First things first, get that oven screaming hot! Preheat your oven to 350°F (175°C). Then, you need to properly prep your 9×13 inch baking pan. I always grease mine well and then line it completely with parchment paper, making sure to leave a nice overhang on the sides. That overhang is your handle for lifting the whole delicious slab out later—don’t skip it!
Now we tackle the brownie part. Grab a medium bowl and whisk together your softened butter, granulated sugar, the two eggs, and your vanilla extract until everything looks nice and smooth. In a separate bowl, whisk your dry ingredients for the brownie: the flour, cocoa powder, baking soda, and salt. Gradually fold those dry ingredients into the wet mixture. The key here is to mix until it’s *just combined*. Stop stirring as soon as you don’t see any flour streaks left. Overmixing brownies makes them tough, and nobody wants a tough brookie!
Finally, stir in that first cup of chocolate chips. This batter will be thick, which is good! It’s what gives us that amazing, fudgy brownie base.
Creating the Cookie Dough Base for Halloween Brookies
Step four is easy: Spread that thick brownie batter evenly right into your prepared pan. Try to make the top as flat as you can before moving on. Now, we switch gears entirely and make the cookie dough!
In a completely different bowl—yeah, we need clean separation here—beat the melted butter and brown sugar together until they look creamy. Mix in the other egg and the vanilla extract. Just like with the brownie, whisk your dry cookie ingredients (flour, baking soda, salt) separately, and then gradually mix them into the wet cookie ingredients. Again, mix until it’s *just* combined. Fold in the remaining half cup of chocolate chips.
Coloring and Layering the Halloween Brookies
This is the signature spooky step! If you’re going for the full festive look, divide that cookie dough right in half. Add your orange color to one pile and your black color to the other, mixing each until the color is uniform throughout that half. You now have your contrasting doughs ready to go!
Drop spoonfuls of the cookie dough—alternating orange and black if you want that really loud Halloween effect—randomly all over the top of the brownie layer. Don’t try to spread it out perfectly! Once the dough is dolloped on, take a knife, or maybe a skewer, and gently swirl it down just a little bit into the brownie layer. You want marbled ribbons, not a fully mixed batter. Keep the swirls gentle so you still have distinct cookie patches on top.
Baking Time and Cooling for Clean Cuts
Time to bake these beauties! Pop the pan into that 350°F oven for about 30 to 35 minutes. You’re aiming for moist crumbs attached to your toothpick when you test the center—not wet batter, but not bone dry either. If you overbake these, all that rich fudginess we worked for will vanish!
The most important step, which I always break myself, is cooling. You have to, have to let these Halloween Brookies cool completely in the pan before you even *think* about lifting them out. If you cut them warm, they’ll crumble into a glorious, messy puddle. Cooling completely ensures those beautiful, clean squares we talked about. Patience is your friend here!
Expert Tips for Perfect Halloween Brookies
Look, just because this recipe is easy doesn’t mean we can cut corners, right? When you’re layering two different batters, a few small tweaks can turn your bars from good to absolutely legendary. Since we’re working with separate textures, making sure each layer sings its own flavor note is key to a truly great result. I learned these little tricks the hard way years ago when my first batch turned into a sticky swamp!
Selecting Quality Cocoa Powder
For the brownie layer, the cocoa powder you choose is everything. Don’t just grab the first can you see! If you use natural, unsweetened cocoa, your brownies will rely on the baking soda in your recipe for lift. This usually results in a slightly lighter, more traditional cakey brownie texture, which honestly pairs great with the cookie layer.
However, if you happen to have Dutch-process cocoa—that darker, smoother variety—use it! Dutch-process cocoa is milder and richer, and it gives you that deep, fudgy, almost smoky chocolate flavor that screams ‘gourmet brownie.’ It actually reacts differently with the leavening, so you’ll still get the fudgy center, but with a darker color. I highly recommend trying Dutch-process if you can find it. For more chocolate inspiration, you might want to check out my recipe for chocolate caramel toffee cake if you’re having a chocolate craving!
Achieving the Best Marbled Effect
The marbling is what makes these look so impressive, but it’s so easy to accidentally mix everything together! When you’re dropping dollops of the orange and black cookie dough onto the brownie, leave plenty of space between them. They’ll spread a little while baking, but not much.

When you go in with your knife for the gentle swirl, think about sweeping motions rather than plunging deep down. You only want to drag the top edge of the cookie dough about halfway into the brownie batter. If you cut too deep, you instantly start mixing the flavors and removing that distinct line between the two layers. Be light-handed! You want the knife to just kiss the surface of the brownie layer while it drags the color through the cookie dough. That slight marble effect is way more interesting visually than a uniform brown top.
Variations on Your Favorite Halloween Brookies
Honestly, once you nail the basic structure of these bars, you can go wild! These Halloween Brookies are such a great canvas for adding little personal touches. It’s fun to twist the classic combination just slightly depending on what mood you’re in, or what fun salty/sweet cravings pop up. I never make them exactly the same way twice!
Swapping Chocolate Chips
While milk chocolate chips are great, they aren’t the only chips allowed in the house! If you’re making these for a crowd that leans toward intense dark chocolate, feel free to swap out some or all of the chips in both layers for something dark or bittersweet. It really amps up that fudgy brownie factor.
On the other end of the spectrum, I absolutely *love* adding butterscotch chips to the cookie layer, especially if I’m doing the orange coloring. The butterscotch melts with that sugary orange hue and gives this beautiful, almost caramel-like flavor swirl. It’s a game-changer, trust me! If you want to see how I handle layering chocolate differently for another holiday, you should definitely check out my recipe for Christmas brownies recipe.
Decorating Your Halloween Brookies
You’ve baked them, they’ve cooled (the hard part!), and now it’s time for the final festive flourish. While the built-in orange and black coloring is fun, you can always add more pizzazz right before or right after baking. If you want a little crunch on top, toss some festive sprinkles over the cookie dough *before* you pop them in the oven. Orange jimmies, black sanding sugar, or even tiny bats will adhere perfectly!
For a post-bake drizzle, wait until the bars are totally cool. You can melt down a little extra white chocolate and color some black, then just drizzle it haphazardly across the top of the entire slab. This really makes those colorful swirls underneath pop, making your Halloween Brookies look like they came straight from a professional bakery. It’s so easy, and it makes them look extra spooky!
Storing and Serving Your Halloween Brookies
Alright, you’ve successfully navigated the cooling period (yay!), and now you’ve got this magnificent, massive slab of chocolatey perfection sitting on your counter. How do we keep these glorious Halloween Brookies tasting fresh until they are all gone? Because let’s be real, they won’t last long, but preservation is key if you’re making them for a party spread over a couple of days!
How to Keep Halloween Brookies Fresh
Because these bars contain both brownie and cookie elements, they are actually pretty hardy! For short-term storage, say if you’re serving them over the weekend, just leaving them covered at room temperature is perfectly fine. Make sure you use an airtight container—seriously, don’t just slap foil over the pan—because these tend to dry out if exposed to open air.
If you need them to last longer, say up to a week, move them into the fridge. Layer the squares between sheets of parchment paper inside a sealed container. The cooler temperature keeps the brownie layer extra fudgy, which I personally love! I’ve never needed to freeze these, but if you had a major baking marathon and ended up with too many, you absolutely can freeze them. Cut them into individual squares first, wrap each one tightly in plastic wrap, and then tuck those wrapped squares into a freezer-safe bag. They should be good for about two months this way.
Serving Suggestions for Your Halloween Brookies
While I stand by the fact that a room-temperature brookie is fantastic on its own, sometimes you want to dress them up just a little bit, especially if you’re serving them for dessert after dinner instead of just as a party snack. They are incredibly rich, so a little goes a long way!
My favorite way to serve these is slightly warmed up—just pop a square in the microwave for about 10 or 15 seconds. When they’re warm, that chocolate melts just a bit more, and it smells divine! Pair that warm square with a scoop of really good vanilla bean ice cream. The temperature contrast is just heavenly. If you’re serving them during the day, a hot cup of black coffee or strong espresso cuts right through the sweetness of these Halloween Brookies beautifully. Enjoy every last gooey bite!
Quick Answers About Making Halloween Brookies
Whenever I post a layered bar recipe, I always get a flood of questions about timing and texture—mostly because people are terrified of messing up that perfect balance between the cookie and the brownie. Don’t worry about it! These Halloween Brookies are pretty resilient, but sometimes you need that quick fix or confirmation that your results are normal. Let’s dive into the most common troubleshooting scenarios I hear about!
Can I make these Halloween Brookies ahead of time?
Yes! And I highly recommend it, honestly. These bars actually taste better the next day once the flavors have had a chance to really marry together. You can absolutely bake them a day or even two before your party. Just make sure they are completely cooled, cut them into squares, and store them tightly sealed in an airtight container at room temperature. If you’re storing them longer than 48 hours, think about putting them in the fridge, but pull them out about 30 minutes before serving for the best texture!
My brownie layer seems dry. What went wrong?
That’s the worst moment when you bite into a brookie and expect fudgy goodness but get something closer to cake. Usually, if the brownie base is dry, it comes down to one of two things: overmixing or overbaking. Did you mix the dry ingredients into the wet too much? Remember, we want ‘just combined’ for brownies, not smooth! Overmixing develops gluten, and gluten means tough, dry textures. The other culprit is baking time—pull them out when that toothpick still has moist crumbs attached, not when it comes out clean. Those last few minutes in the oven are where the moisture goes to die!
Can I freeze these brownie cookie bars?
Absolutely, these freeze like a dream! If you plan on freezing them, I find it’s best to cut them into individual squares *before* wrapping. That way, you can pull out exactly how many you need for dessert later. Wrap each square tightly in plastic wrap first, maybe even add a little layer of foil over that if you’re storing them for longer than a month. When you’re ready for them, just thaw them on the counter for a couple of hours, or give them a quick flash in the microwave. They hold up so well!
If you’re interested in other make-ahead chocolate bakes, check out this cake mix cookies recipe for some fast ideas!
Estimated Nutritional Information for Halloween Brookies
Okay, I know we aren’t exactly baking these bars for their health benefits—they are rich, decadent, and perfect for a holiday treat—but sometimes you just need to know the ballpark figures, right? I always include this section so you have a general idea of what you’re stepping into before you grab that second square! Please remember, these numbers are just estimates. The exact amount of fat or sugar can totally change based on the brand of cocoa powder you use or if you decide to add extra candy on top!
Based on a standard serving size of one square, here is what my estimates look like for these amazing chocolatey bars:
- Serving Size: 1 square
- Calories: 250
- Sugar: 25g (Yep, pretty sweet, that’s the fun part!)
- Sodium: 100mg
- Fat: 14g
- Saturated Fat: 8g
- Unsaturated Fat: 6g
- Trans Fat: 0g
- Carbohydrates: 32g
- Fiber: 1g
- Protein: 3g
- Cholesterol: 40mg
Just looking at the sugar, I can tell you these are definitely a special occasion dessert! Keep that in mind when you’re cutting them up for a crowd. They are super satisfying, so one square really does go a long way, especially after a big Halloween dinner!
Share Your Spooky Baking Creations
Wow, we made it to the end! I really hope you love these Halloween Brookies as much as my family does. Seriously, baking is always better when you can share the results, and I get such a kick out of seeing how you all make these bars your own. Whether you kept the black and orange cookie dough or went totally rogue with sprinkles, I want to see the magic!
When you take that first bite—that perfect mashup of fudgy brownie and chewy cookie—please come back and let me know what you thought! A quick star rating at the top of the page lets me know if my family secrets are working for you, too. If you snapped a picture of your glorious, messy, wonderful slab, please tag me over on social media! I love seeing your baked goods, especially when they look as fun and festive as these bars do.
If you’re looking for even more holiday baking inspiration, you might want to check out my recipe for Halloween ghost brownies—they’re a little simpler but just as spooky! Happy baking, and have a frightfully delicious Halloween!
Print
Halloween Brookies
- Total Time: 55 min
- Yield: 24 servings 1x
- Diet: Vegetarian
Description
A combination of brownies and chocolate chip cookies baked together, perfect for Halloween.
Ingredients
- 1 cup (2 sticks) unsalted butter, softened
- 1 cup granulated sugar
- 2 large eggs
- 1 teaspoon vanilla extract
- 1 cup all-purpose flour
- 1/2 cup unsweetened cocoa powder
- 1/2 teaspoon baking soda
- 1/4 teaspoon salt
- 1 cup chocolate chips
- 1 cup packed brown sugar
- 1/2 cup unsalted butter, melted
- 1 large egg
- 1 teaspoon vanilla extract
- 1 1/2 cups all-purpose flour
- 1 teaspoon baking soda
- 1/2 teaspoon salt
- 1/2 cup chocolate chips
- Orange and black food coloring (optional)
Instructions
- Preheat your oven to 350°F (175°C). Grease and line a 9×13 inch baking pan with parchment paper, leaving an overhang on the sides.
- Prepare the brownie layer: In a medium bowl, whisk together the softened butter, granulated sugar, eggs, and vanilla extract until smooth.
- In a separate bowl, mix the flour, cocoa powder, baking soda, and salt. Gradually add the dry ingredients to the wet ingredients, mixing until just combined. Stir in 1 cup of chocolate chips.
- Spread the brownie batter evenly into the prepared pan.
- Prepare the cookie layer: In another bowl, beat the melted butter and brown sugar until creamy. Beat in the egg and vanilla extract.
- In a separate bowl, whisk together the flour, baking soda, and salt. Gradually add the dry ingredients to the wet ingredients, mixing until just combined. Stir in the remaining 1/2 cup of chocolate chips.
- If using food coloring, divide the cookie dough in half. Add orange food coloring to one half and black food coloring to the other half. Mix until the colors are uniform.
- Drop spoonfuls of the cookie dough (alternating colors if desired) randomly over the brownie layer. You can gently swirl the cookie dough into the brownie layer with a knife for a marbled effect.
- Bake for 30 to 35 minutes, or until a toothpick inserted near the center comes out with moist crumbs attached.
- Let the brookies cool completely in the pan before lifting out using the parchment paper overhang and cutting into squares.
Notes
- For a richer chocolate flavor, use high-quality cocoa powder.
- You can add orange or black sprinkles on top before baking for extra Halloween decoration.
- Cooling completely before cutting results in cleaner squares.
- Prep Time: 20 min
- Cook Time: 35 min
- Category: Dessert
- Method: Baking
- Cuisine: American
Nutrition
- Serving Size: 1 square
- Calories: 250
- Sugar: 25g
- Sodium: 100mg
- Fat: 14g
- Saturated Fat: 8g
- Unsaturated Fat: 6g
- Trans Fat: 0g
- Carbohydrates: 32g
- Fiber: 1g
- Protein: 3g
- Cholesterol: 40mg
Keywords: Halloween, brookies, brownie cookie bars, chocolate dessert, baked bars