
Halloween baking can sometimes feel overwhelming, right? We all want something festive, but who has the energy for complex recipes when the spooky fun is calling? Trust me, after years of trying to whip up last-minute holiday treats, I found my lifesaver: these incredible, ridiculously easy Witch Hat Brownies. Seriously, these things are magic in a pan! They use a totally straightforward, fudgy brownie base, and the decorating takes maybe ten minutes tops. They look fantastically festive, but they taste like pure chocolate heaven. If you need a quick win for a school party or just want a fun activity, these are absolutely what you need in your life.
Why You Will Love These Witch Hat Brownies
I’m not kidding when I say these brownies are my go-to when I need something impressive *fast*. They hit that perfect sweet spot where effort meets amazing results. You’re going to want to make a double batch, I guarantee it!
- So Fast, It’s Almost Cheating: Seriously, the batter comes together in about fifteen minutes flat. You mix, you pour, you bake. No fancy techniques needed, which means less time stressing and more time carving pumpkins!
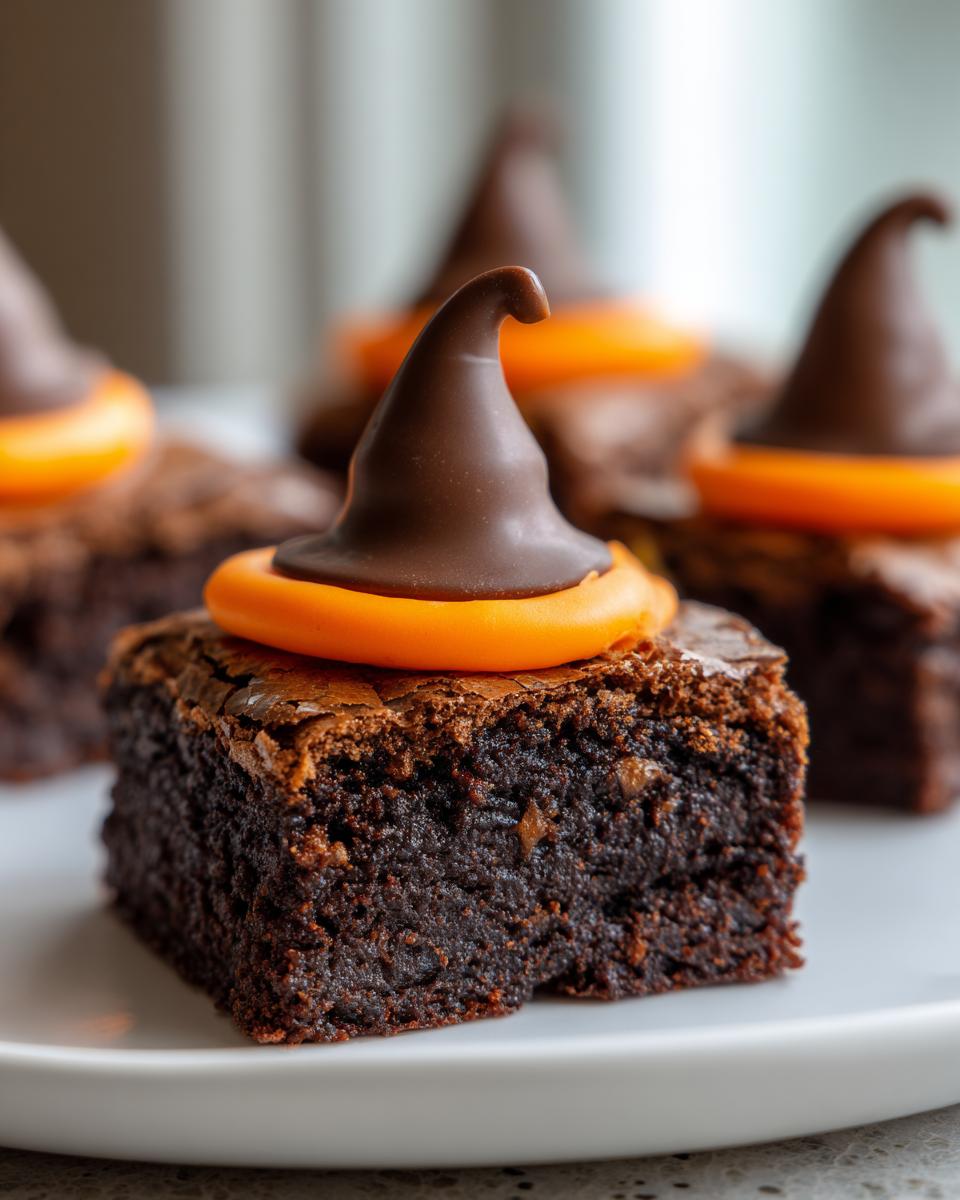
- Instant Halloween Charm: The transformation from a simple square brownie to a spooky Witch Hat Brownie with just a Hershey’s Kiss is unbelievable. Kids absolutely light up when they see them, and the small orange ribbon detail is just the cherry on top.
- Kid-Approved Decorating Station: This is my favorite part. Once the base is cool, you set out the Kisses and orange gel, and let the little monsters take over! They love affixing the hat tips and drawing the bands. It’s practically a holiday activity masquerading as dessert prep.
- Ultimate Fudgy Base: Forget cakey brownies—we’re making fudgy ones here! The simplicity of the base means every bite is rich, dense, and melts in your mouth before you even get to the chocolate hat on top.
- Minimal Ingredient Chaos: Everything you need for the base is probably already in your pantry *right now*. No weird specialty flours or extracts needed for this batch, which makes emergency baking calls so much easier.
Essential Ingredients for Perfect Witch Hat Brownies
Okay, let’s talk supplies. The beauty of these Witch Hat Brownies is that they rely on simple pantry staples. You don’t need a huge shopping trip for this one, which is perfect for when inspiration strikes at 7 PM the night before the party! We break it into two smaller lists—the rich base and the adorable topping.
For the Fudgy Brownie Base
This is standard, no-fail brownie equipment. Make sure your butter is melted completely, but don’t let it get hot—just melted is perfect.
- 1 cup all-purpose flour
- 1 cup granulated sugar
- 1/2 cup unsweetened cocoa powder
- 1/4 teaspoon baking powder
- 1/4 teaspoon salt
- 1/2 cup unsalted butter, melted
- 2 large eggs
- 1 teaspoon vanilla extract
- 1 cup semi-sweet chocolate chips
For the Witch Hat Topping
This is where the fun happens! The topping is what turns a simple chocolate square into a proper spooky character. The orange gel band really seals the deal on these Witch Hat Brownies. Don’t skimp on the cocoa powder; it gives the base that deep, dark color we want.
- 1 package (12 ounces) Hershey’s Kisses (these are the hat tips!)
- 1 tube orange decorating gel or icing (for the hat band)
Step-by-Step Instructions for Making Witch Hat Brownies
When you get down to the actual mixing process, you’ll see just how quick this is. Remember, we’re aiming for fudgy, tender centers here, not tough, cakey bricks! Following these steps precisely guarantees that delicious, rich texture, especially when we get to the combining stage. If you’ve ever made Christmas brownies, you’ll recognize some of these crucial steps for getting that perfect crumb!
Preparing the Brownie Batter
First things first, get that oven warmed up! This ensures your brownies start baking right away and prevents them from collapsing later. Nobody wants a half-baked slump in the middle of spooky season!
- Preheat your oven to 350 degrees Fahrenheit. Don’t forget to generously grease and flour that 8×8 inch baking pan.
- Grab a big bowl and whisk together all your dry buddies: the flour, the sugar, the cocoa powder, the baking powder, and the salt. Whisk them really well so everything is evenly distributed—that’s key!
- Now, pour in your wet ingredients: the melted butter, the two eggs, and that lovely splash of vanilla extract. Mix it all until it’s *just* combined. Listen to me on this: Do not overmix! Overmixing develops gluten and that’s how we end up with tough brownies. Stop mixing the second you don’t see streaks of dry flour anymore.
- Gently fold in those semi-sweet chocolate chips. A rubber spatula works best for folding here so you don’t deflate all the air you just worked to incorporate.
Baking and Cooling the Brownies
The baking itself is short, but the cooling time is where you need patience. It makes or breaks the decoration phase, trust me on this one!
- Spread your beautiful, thick batter evenly into that prepared 8×8 pan. Make sure it’s nice and level.
- Bake it for 25 to 30 minutes. You are looking for a toothpick inserted near the center to come out with moist crumbs clinging to it. If the toothpick is totally clean, they’re probably overdone!
- Once they look done, pull them out! Let the brownies cool completely in that pan while sitting on a wire rack. This is the *most* important bit for decoration; warm brownies and chocolate Kisses do not mix well—the Kisses start looking greasy and sad, not pointy and cute.

Assembling the Witch Hat Brownies Decoration
Once they are completely cool—and I mean totally cool, maybe even chill them for 15 minutes if your kitchen is hot—it’s time for the transformation into Witch Hat Brownies!
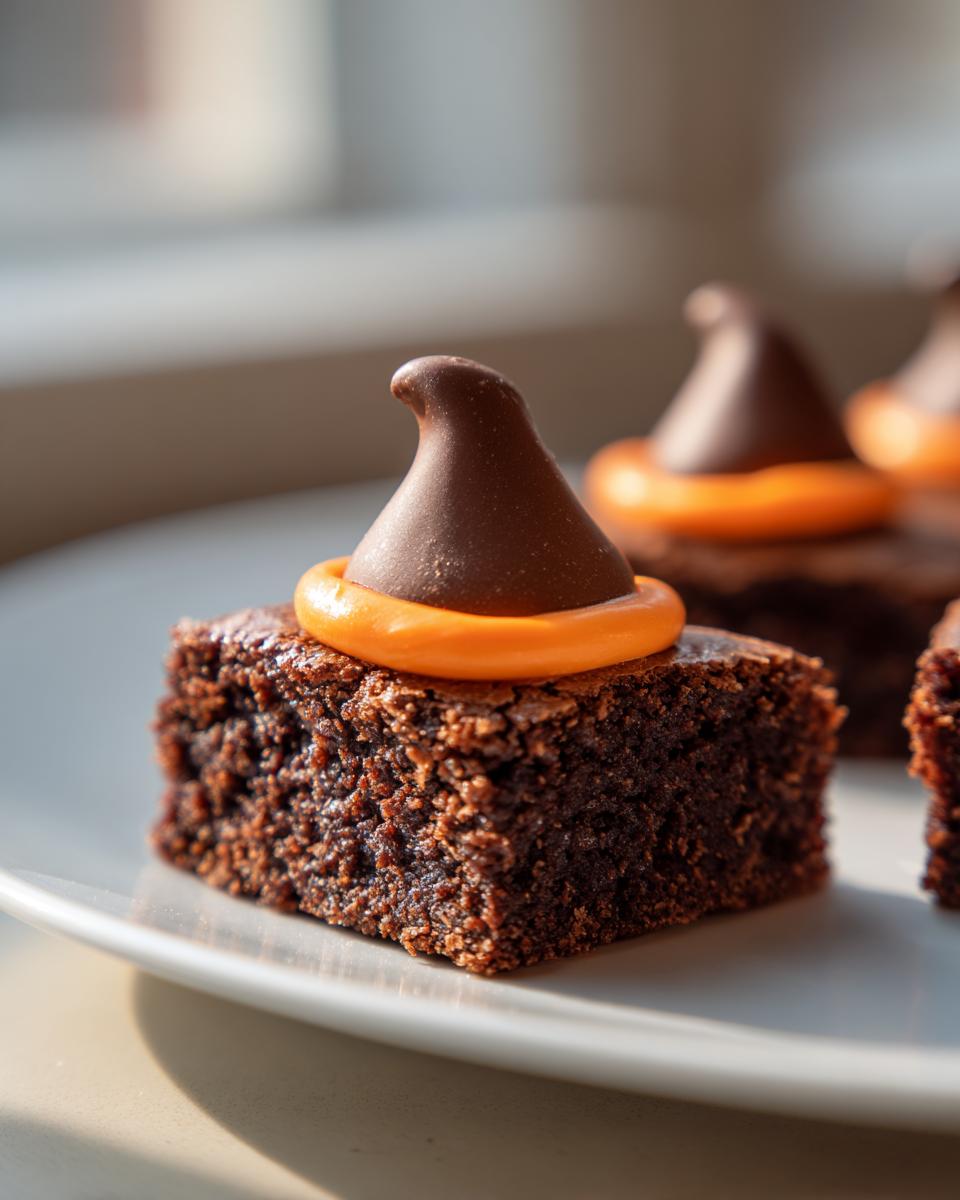
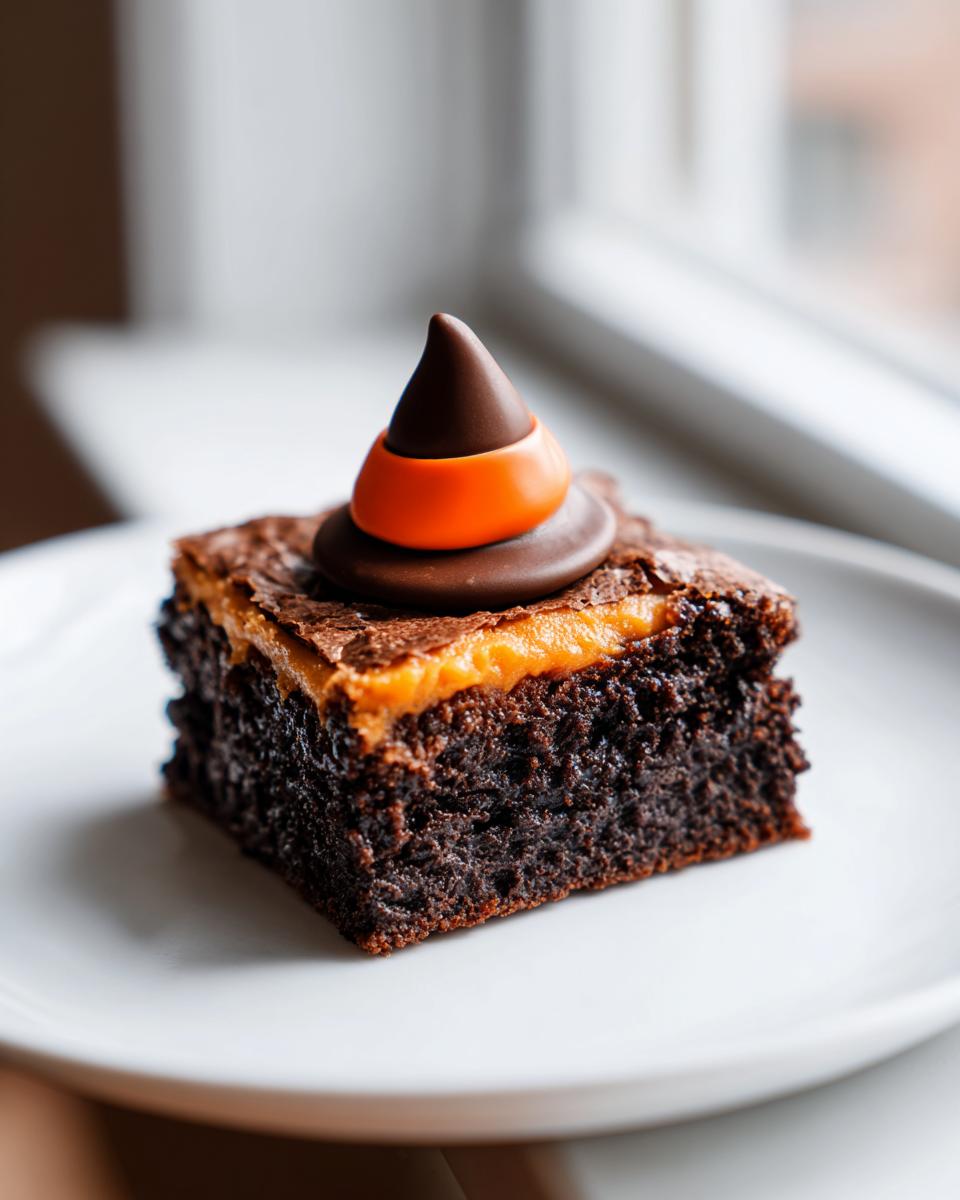
- Cut the cooled slab into squares (or you can cut them before cooling, whatever makes you happy!). Gently press one chocolate Kiss onto the center of each brownie square. Make sure the flat bottom is attached firmly to the brownie so the pointy top sticks straight up like a proper hat tip.
- Now for the tiny detail that makes all the difference! Take that tube of orange decorating gel and carefully draw a small band right around the base of the chocolate Kiss, right where it meets the top surface of the brownie. That little band of orange color really sells the whole pointy witch hat look!
Tips for Perfect Witch Hat Brownies Every Time
I’ve made enough batches of these to know a few little tricks that take them from good to absolutely stunning. Since these are one-bowl wonders, we don’t have a lot of technique to focus on, which means we focus on timing! These little tips are borrowed from my general experience whipping up quick chocolate treats, kind of like how I approach making chocolate chip tahini cookies—small adjustments make a huge difference!
First up, let’s talk texture. If you are a die-hard fan of that super rich, almost under-baked texture that just melts when you bite it, listen carefully. The recipe says 25 to 30 minutes, but for that truly fudgy experience, you might want to pull them out closer to the 25-minute mark. Just make sure that toothpick has moist crumbs, not wet batter. If you like them more set, definitely push it closer to 30 minutes.
And remember what I said about cooling? It’s non-negotiable for the decoration phase! If you try to stick a chocolate Kiss onto a warm brownie, you’re basically asking for trouble. That Kiss will start to melt at the base, and when you lift your hand away, you’ll have a slumped, sad-looking chocolate blob instead of a jaunty witch hat. If you’re in a hurry, pop the entire pan into the fridge for about 20 minutes after it cools on the counter for a bit. That cold snap firms everything up beautifully, making cutting neat squares easy.
Also, don’t put the orange decorating gel on too thick! A little goes a very long way. You just need a thin, neat line around the base to mimic the ribbon. If you glob it on, it tends to spread out as it sits, and you lose that crisp, defined look we’re going for. Think of it as painting a tiny masterpiece on top of your already perfect brownie!
Ingredient Notes and Substitution Ideas for Witch Hat Brownies
When dealing with something as simple and classic as a brownie, the quality of your core ingredients really shines through! Since these Witch Hat Brownies are mostly about that deep chocolate flavor, we really want to make sure we’re using the right stuff. I always tell people, if you’re going to mess with a basic recipe, make sure you’re messing with the flavor carriers, like the chocolate and the fat.
Let’s talk cocoa powder first. You absolutely must use unsweetened cocoa powder here, not hot cocoa mix! That mix has way too much sugar and stabilizers, and it will completely throw off the balance of your dry ingredients. I prefer Dutch-process cocoa if I have it on hand, just because it gives a darker color and a smoother, less acidic chocolate flavor, which is perfect for a fudgy brownie base. If you don’t have that, standard unsweetened works just fine, but keep an eye on the color; you want it nice and dark!
What about the butter? The recipe calls for melted unsalted butter. Stick with that! Salted butter can sometimes make the final product just a tiny bit too aggressively salty when paired with the standard cocoa powder. If you only have salted butter, skip adding the extra salt to the dry mix, but melted unsalted is always my preference here.
Now for the fun part: the chocolate chips! We listed semi-sweet, but you have options. Dark chocolate chips are wonderful if you like a less sweet brownie that contrasts really well with the milk chocolate Kiss on top. Milk chocolate chips will make the whole thing softer and sweeter overall. If you happen to have some chopped-up baking chocolate bars lying around, that’s even better than chips—it melts more evenly into the batter, creating those gorgeous fudgy pockets. You know, speaking of rich flavor, if you want another inspiration for next time, checking out my recipe for moist banana bread will show you how small ingredient swaps totally change the outcome.
Finally, for the decorative elements, if you cannot find that orange decorating gel, don’t panic! You can make your own vibrant orange icing. Just mix a small amount of powdered sugar with a drop or two of milk or lemon juice and then add a tiny drop of food coloring until you hit that perfect Halloween orange. You just need enough contrast to define that hat band so your Witch Hat Brownies look sharp!
Storage and Make-Ahead for Your Witch Hat Brownies
I know how it is—sometimes you bake for a party that’s three days away, or maybe you just want to enjoy your beautiful Witch Hat Brownies over the whole week. The great news is that these hold up really well! Because the base is so fudgy and rich, they stay moist longer than a lot of other baked goods. But we have to be smart about how we store them, especially once we add those cute little chocolate hats.
The main rule for keeping your Witch Hat Brownies fresh is keeping air away from them. You need a good airtight container. If you stack them, you absolutely must put a layer of wax paper or parchment paper between the layers. Trust me, chocolate melts onto chocolate like crazy if they are touching directly, and you’ll end up with a giant, sticky, single brownie block instead of individual treats!
Can you make them ahead? Yes! I usually bake the brownie base a full day before the event. Once they are completely cooled, I seal them up in that airtight container and leave them on the counter. They are perfectly fine at room temperature for two, maybe even three days. They actually taste even better on day two, I think—the fudge factor really settles in!
Now, here’s the big caveat: decorate *only* when you plan to serve them, or at most, a few hours before. If you decorate them too early, two things can happen. First, the orange gel can start to bleed or look a little tacky depending on humidity. Second, the chocolate Kisses can sometimes sweat a little bit if the temperature fluctuates in your storage area. For the prettiest presentation, ice them the morning of your Halloween party. If you’re looking for other make-ahead recipes that store well, you absolutely have to check out my recipe for pumpkin cream cheese swirl bread; that one is fantastic for prepping ahead of time!
If by some miracle you have leftovers after Halloween, you can actually freeze them! Just make sure they are completely undecorated, cut into squares, and tightly wrapped in plastic wrap before going into a freezer bag. They’ll be good for about a month, and they thaw out perfectly on the counter!
Serving Suggestions for Witch Hat Brownies
Okay, so you’ve made these glorious, perfectly adorned Witch Hat Brownies, and now you need to decide how to present them! While they are perfectly wonderful just sitting on a platter all by themselves—let’s be real, they are basically perfect chocolate squares—I always love pairing them with something simple to cut through all that rich, fudgy goodness. This makes them feel more like a special dessert presentation rather than just a quick snack.
The absolute classic pairing, and you know I can’t steer you wrong here, is a scoop of good, high-quality vanilla ice cream. The contrast between the cold, creamy vanilla and the slightly room-temperature brownie is just heavenly. When the chocolate starts to melt just a tiny bit from the warmth of the brownie, it creates its own little sauce right there on the plate! It brings me back to my childhood birthday parties; it always tasted wonderful alongside a slice of my mom’s classic homestyle yellow cake.
If you’re serving these at a party or setting up a dessert buffet, milk is non-negotiable for me. A tall glass of cold milk next to a Witch Hat Brownie is pure nostalgia. It cleanses the palate between bites and just feels so right with that deep cocoa flavor. Seriously, don’t knock it until you’ve tried it!
For something a little more adult, or maybe just a lighter contrast, try serving them alongside fresh raspberries or strawberries. The tartness of the berries works magic against the sweetness of the chocolate base and the milk chocolate Kiss on top. It adds a pop of color if you want something different than just the orange gel detail!
You don’t need a complicated glaze or dusting when they already have their hat on, so keep the accompaniments simple and let the craftsmanship of your spooky top shine!
Frequently Asked Questions About Witch Hat Brownies
It happens! When you make something super fun like these Witch Hat Brownies, people always have a few little questions bubbling up. I’ve gathered the ones I hear most often and tried to answer them right quick so you can get back to your baking!
Can I use different candies instead of Hershey’s Kisses for the hat tip?
That’s a great question for substitutions! While the Hershey’s Kiss is the traditional choice because of that perfect conical shape, you could certainly try other candies if you’re in a bind. The key is finding something pointy or pyramid-shaped that adheres well when the brownie is cool. You might try a different brand of chocolate kisses, or maybe even those little chocolate thins if you gently stick a small triangle of dark chocolate on top of a standard frosting dollop to create the point. Just remember, if you use something that isn’t solid chocolate all the way through, it might melt differently when pressed onto the brownie base!
How do I get clean squares when cutting the Witch Hat Brownies?
Oh, the bane of every baker’s existence: messy cuts! I cannot stress this enough, but clean, crisp squares are 100% dependent on the cooling time. You need those brownies to be stone-cold, almost firm to the touch. If you cut them while they are even slightly warm, you’re just going to drag the center across the pan, and forget about lifting a clean piece out! My biggest trick, especially if I’m in a rush, is to chill them in the fridge for about 20 minutes once they’ve cooled slightly on the counter. Then, take a large, sharp knife—a long chef’s knife works best—and wipe the blade clean with a hot, damp cloth between *every single cut*. That wipe-and-cut method is what keeps the blade clean and prevents those messy streaks across your beautiful chocolate surface.
Also, if you make these when you’re feeling inspired but aren’t ready to serve them yet, wait to decorate! Cutting the clean squares (as addressed in my main tips) before you put the decorative elements on makes the whole process much easier. If you’re looking for other tips on getting clean cuts on baked goods, I share similar techniques for when I make my zucchini fritters, believe it or not!
Will the chocolate Kisses melt onto the brownie during baking?
No, absolutely not! And this is crucial: you only add the chocolate Kisses *after* the brownies have completely cooled down. You bake the plain brownie batter, let it cool until it’s room temperature, and *then* you gently press the Kiss on top. If you put the Kisses in before baking, they will definitely melt into a puddle of sad, formless chocolate goo, and you’ll just end up with sad, flat-topped chocolate squares, not proper Witch Hat Brownies. Patience during the cooling stage is your best friend here!
Can I make these ahead of time for a party?
Yes, you totally can! As I mentioned in the storage section, bake the base entirely, let it cool, and store it covered in an airtight container on the counter for up to two days. You can even cut the squares beforehand. Just wait until the day you plan to serve them, or maybe the night before at the latest, to add the chocolate Kisses and the orange gel bands. Keeping the decoration process for the end ensures everything stays looking fresh and crisp!
Nutritional Snapshot for These Festive Treats
Okay, real talk time. We are making rich, fudgy, chocolatey Witch Hat Brownies here, so these aren’t exactly a health food, and that’s perfectly fine for Halloween! But sometimes it’s good to just see the numbers, right? I pulled up the estimates so you can get a general idea of what you’re looking at per serving. Remember, these are just guideposts—if you use super dark chocolate or slightly different butter amounts, these numbers will shift a bit!
I always find that when I’m making a recipe designed for pure indulgence, like this one, I feel better knowing the estimate. If you’re ever comparing this to, say, a healthier zucchini version—like my banana bread with zucchini—the numbers swing wildly, but sometimes you just need that pure chocolate fix! Think of these estimates as a friendly warning that you might want to have a glass of water ready.
Here’s the estimated breakdown for one single brownie square:
- Serving Size: 1 brownie
- Calories: 220
- Fat: 12g (with 7g being saturated fat—that’s the butter doing its job!)
- Sugar: 25g (That’s the combo of the sugar in the base and the chocolate Kiss!)
- Carbohydrates: 28g
- Protein: 3g
- Sodium: 85mg
And just a little heads up: these numbers assume you’re making 16 squares and using the ingredients exactly as listed. If you cut them into smaller pieces, the numbers drop proportionally, which is a great stealth strategy if you have a lot of people coming over!
Print
Witch Hat Brownies
- Total Time: 45 min
- Yield: 16 brownies 1x
- Diet: Vegetarian
Description
Simple brownies topped with a chocolate kiss to resemble a witch’s hat.
Ingredients
- 1 cup all-purpose flour
- 1 cup granulated sugar
- 1/2 cup unsweetened cocoa powder
- 1/4 teaspoon baking powder
- 1/4 teaspoon salt
- 1/2 cup unsalted butter, melted
- 2 large eggs
- 1 teaspoon vanilla extract
- 1 cup semi-sweet chocolate chips
- 1 package (12 ounces) Hershey’s Kisses
- 1 tube orange decorating gel or icing
Instructions
- Preheat your oven to 350 degrees Fahrenheit. Grease and flour an 8×8 inch baking pan.
- In a large bowl, whisk together flour, sugar, cocoa powder, baking powder, and salt.
- Add melted butter, eggs, and vanilla extract to the dry ingredients. Mix until just combined. Do not overmix.
- Stir in the chocolate chips.
- Spread the batter evenly into the prepared baking pan.
- Bake for 25 to 30 minutes, or until a toothpick inserted near the center comes out with moist crumbs attached.
- Let the brownies cool completely in the pan on a wire rack.
- Once cool, gently press one chocolate kiss onto the center of each brownie square to form the hat tip.
- Use the orange decorating gel to draw a small band around the base of the chocolate kiss where it meets the brownie surface.
Notes
- You can cut the brownies into squares before adding the chocolate kisses.
- If you prefer a fudgier texture, reduce the baking time by 3 to 5 minutes.
- Prep Time: 15 min
- Cook Time: 30 min
- Category: Dessert
- Method: Baking
- Cuisine: American
Nutrition
- Serving Size: 1 brownie
- Calories: 220
- Sugar: 25
- Sodium: 85
- Fat: 12
- Saturated Fat: 7
- Unsaturated Fat: 5
- Trans Fat: 0
- Carbohydrates: 28
- Fiber: 1
- Protein: 3
- Cholesterol: 30
Keywords: witch hat brownies, chocolate, Halloween dessert, easy brownies, Hershey's Kisses