
There’s just something about a treat that knows how to make an entrance, right? Forget those sad, tiny cookies that disappear in one sniff. We’re talking about serious dessert real estate here! I’m obsessed with giant, over-the-top sweets, and nothing gets the table talking like my jumbo Monster Sandwich Cookies.
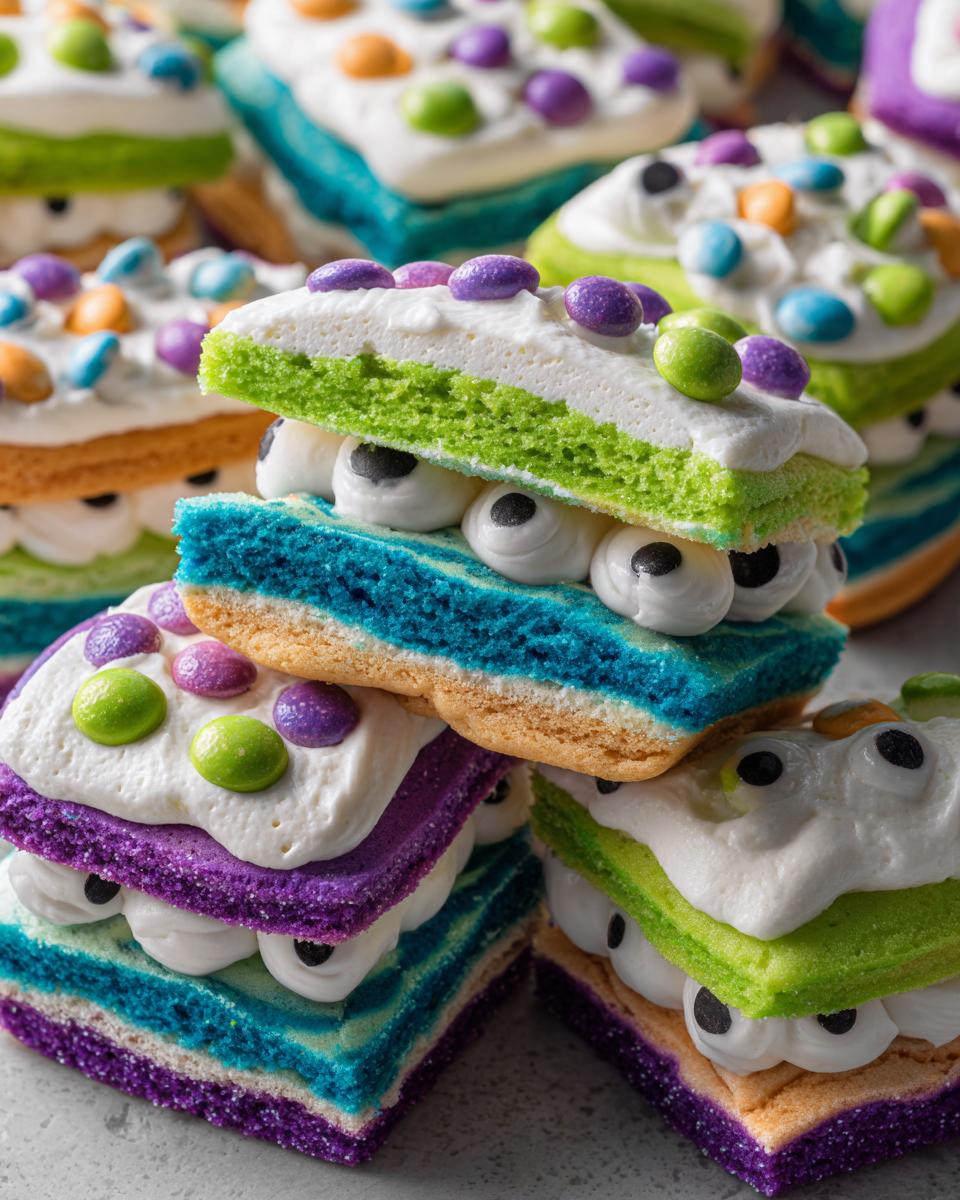
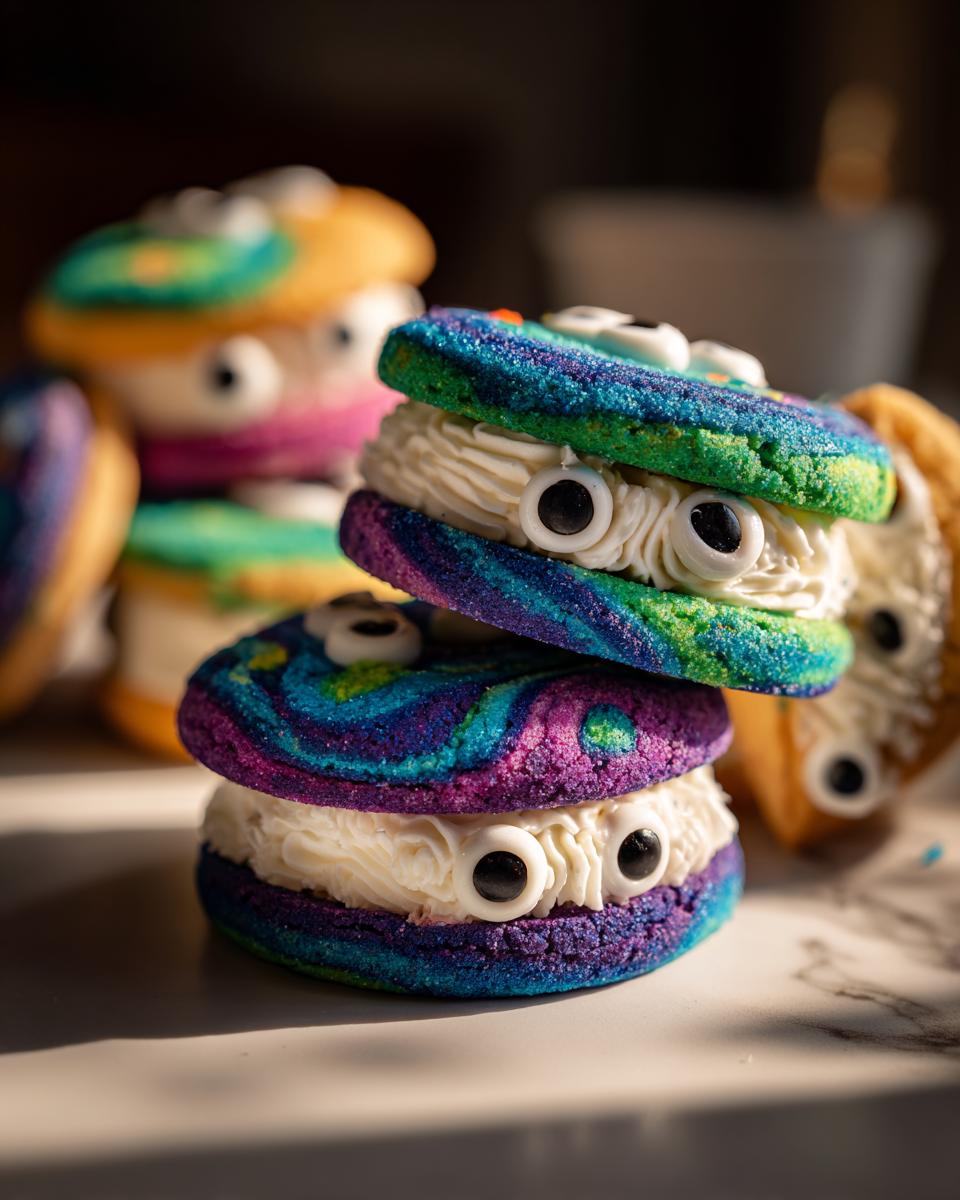
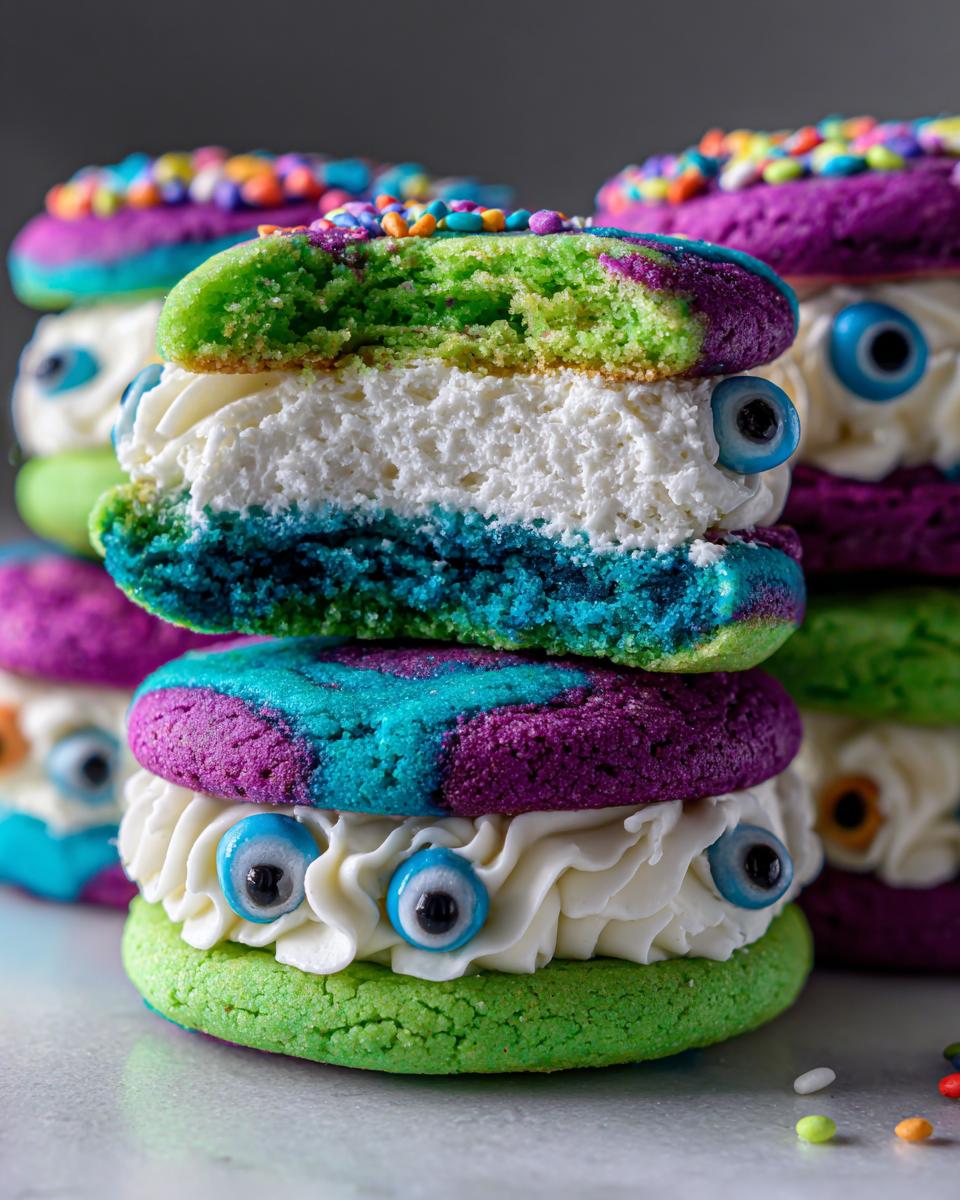
These aren’t just cookies; they are colorful, two-layer creations packed full of fluffy, bright buttercream. When I first made these for a neighborhood cookout last summer, people seriously thought I’d bought them from a fancy bakery. They are surprisingly simple, even though they look like they took all day. Trust me, watching these three colors—green, blue, and purple—squish together with that creamy middle? Pure joy.

This article is where I spill all my secrets on how to get those cookies perfectly soft, how to make buttercream that doesn’t weep, and how to arrange those googly eyes so your monsters look charming, not terrifying. Get ready to bake some seriously impressive Monster Sandwich Cookies!
Why You Will Love These Monster Sandwich Cookies
If you need a centerpiece dessert that just screams FUN, look no further. These cookies hit all the right notes for an epic treat. I couldn’t wait to share why these became an instant hit at my house.
- They Are Giant and Satisfying: Seriously, these aren’t little tea cookies. They are substantial! You get a massive, soft bite of cookie, which means you really feel like you’ve treated yourself.
- The Color Explosion is Non-Stop: Who doesn’t love bright, wild colors? Mixing up three dough balls—green, blue, and purple—ensures every cookie is unique and just begging to be photographed before you eat it.
- Perfect Texture Contrast: This is the best part. You get the tender, slightly chewy cookie base contrasting beautifully with that sweet, rich, unbelievably creamy buttercream filling. It’s a winning combination every single time.
- Easy to Assemble Once You Get the Hang of It: Even though they look fancy, the assembly process is quick once the cookies are cool. You basically just need two cookies and a big dollop of frosting. Easy peasy!
Gathering Ingredients for Your Monster Sandwich Cookies
Okay, let’s get these supplies ready! Making these colorful giants requires us to break things down into three parts: the cookie itself, the creamy filling (which is where the magic happens if you want that classic bakery taste), and the fun decorations. Don’t worry about substituting the butter here—it is crucial for that perfect texture, especially in the frosting! If you want to explore making a killer batch of frosting separately before we move on, check out this great guide on amazing favorite buttercream frosting recipe.
Everything needs to be measured out precisely so the bright colors mix evenly and the cookies bake up just right. When you get to the coloring, you really need to be generous to get that true monster hue!
For the Colorful Cookie Dough
- 1 cup unsalted butter, softened—this has to be soft, not melted, trust me!
- 1 cup granulated sugar
- 1 large egg
- 1 teaspoon vanilla extract
- 2 1/2 cups all-purpose flour
- 1 teaspoon baking soda
- 1/2 teaspoon salt
- Green food coloring (use gel if you have it, it’s stronger!)
- Blue food coloring
- Purple food coloring
For the Creamy Buttercream Filling
This filling is what turns two cookies into one magnificent sandwich. Make sure that butter is softened just like it was for the dough so you don’t end up with lumpy frosting—we want light and fluffy!
- 1 cup unsalted butter, softened
- 3 cups powdered sugar (sifted helps, but I rarely have the patience!)
- 1 teaspoon vanilla extract
- 2 tablespoons milk or cream (use cream if you like it extra rich!)
For Decoration
This is the easy part! The eyes bring them right to life.
- Assorted candy eyes (the ones that wiggle slightly are my absolute favorite)
Step-by-Step Instructions to Make Monster Sandwich Cookies
Now for the fun part! Making these cookies involves a bit of mixing, a fantastic color party, and then rolling them out. It moves pretty fast, so have everything nearby! We’re going from bowl to oven in no time, but remember, the cooling step is non-negotiable before we frost them. If you’re interested in more tips on getting a perfect bake, even when dealing with big cookies, check out this secret for crispy pan banging cookies—some of those cooling tips apply here too!
Preparing the Monster Sandwich Cookies Dough
First things first: get that oven screaming hot at 350 degrees Fahrenheit and line up those baking sheets with parchment paper. Trust me, parchment paper is your best friend when dealing with sugary dough.
In your biggest bowl, cream that 1 cup of softened butter with the granulated sugar until it looks genuinely light and fluffy—we’re talking pale yellow and almost cloud-like. Now, beat in your egg and the vanilla extract until everything looks happy and incorporated.
In a separate bowl, whisk together your flour, baking soda, and salt. Gently, and I mean gently, add these dry bits to the wet stuff. Mix just until you can’t see any more streaks of flour. Don’t overwork it, or your soft cookies turn into flat hockey pucks!
Now for the color! Divide that dough fairly into three equal piles. Take one pile and work in enough green coloring until it’s brilliantly green. Do the same for blue and purple for the other two. Expert Tip: If you use liquid coloring, add it drop by drop and mix thoroughly after each addition. If you dump it all in at once, the color tends to streak instead of distributing evenly through the dough.
Baking and Cooling the Monster Sandwich Cookies
Once your colors are vibrant, it’s time to assemble the giant cookies before baking. Take about 1 tablespoon worth of dough from each color—a bit of green, a bit of blue, and a bit of purple—and roll them into little balls in your hands. Flatten those mashed-up balls slightly.
Lay these colored bits down close together on your prepared sheets, making sure they touch slightly. As they bake, they’ll spread out and merge into one big, tie-dye-looking cookie. I usually fit about four or five of these giants on one sheet, leaving plenty of space.
Bake these colorful creations for about 10 to 12 minutes. You want the edges to look set, but the centers should still look a little soft—they keep cooking on the sheet! Let them sit right there for about 5 minutes before you transfer them carefully onto a wire rack. They need to get completely, totally, 100% cool before we even think about frosting them. If they are even slightly warm, that buttercream melts into a sad, oily puddle!
Making the Buttercream Frosting
While those cookies are chilling out, let’s make the filling. This frosting is the absolute best because it holds its fluffy shape so well! Again, start with 1 cup of softened butter, and beat that until it’s super smooth on its own. This pre-beating is what makes the final frosting so light!
Now, slowly add in the 3 cups of powdered sugar, mixing slowly at first so you don’t create a sugar cloud in your kitchen, oops! Once it starts to come together, add the vanilla extract and the milk or cream. Turn the mixer up medium-high and beat it for a solid minute or two until it looks wonderfully pale and holds soft peaks. That’s your glue!
Assembling Your Monster Sandwich Cookies
This is where the “sandwich” part comes in! Find two cookies that are roughly the same size—don’t worry if they aren’t perfect circles, they are supposed to look a little rough!
Take your knife or offset spatula and spread a generous gob of that fluffy buttercream onto the flat side of one cookie. Don’t be shy! Now, place the second cookie on top and press down gently, just enough so the frosting squishes out slightly around the edges to create that classic, messy sandwich look. If you’re using the candy eyes, this is the secret trick: stick them right onto the exposed frosting peeking out around the edges. They stick right in there and suddenly, your cookie has giant, silly eyeballs staring back at you!
Tips for Perfect Monster Sandwich Cookies
Baking is fun, but sometimes these towering creations throw a little tantrum! Don’t worry, I’ve made my share of flattened monsters and runny frosting. These few tips, learned through trial and error (and a lot of licking the spoon), should guarantee your Monster Sandwich Cookies turn out exactly right.
This next bit is gold, seriously. If you follow these few rules, you’ll bypass all the usual pitfalls. For more great cookie wisdom that covers everything from flavor depth to handling tricky doughs, you absolutely have to read through these MM cookie recipes and tips for amazing taste.
- Stop the Color Bleed Before Baking: When you are rolling the three colored dough balls together to form one giant cookie base, handle them quickly! If the dough gets too warm, the colors will start to blend into a muddy brown *before* they even hit the oven. Roll and flatten swiftly, then get them onto the sheet right away.
- Don’t Skip the 5-Minute Hangout: When the cookies come out of the oven, they are fragile, I’m telling you! Resist the urge to move them immediately. Let them sit on that hot baking sheet for those crucial five minutes. This lets the structure set up perfectly so they don’t break when you try to pick them up to move them to the cooling rack.
- Use Room Temperature Butter for the Frosting—Yes, Again!: We stressed this for the cookie dough, but it’s twice as important for the buttercream. If that 1 cup of butter for the filling is too cold, you’ll end up with little hard chunks of butter suspended in your icing after you add the powdered sugar. Beat that butter until it’s genuinely pale and fluffy *before* adding anything else. That aeration is what keeps the filling light and pipeable, not dense!
- The Eye Placement Trick: Where do the candy eyes go? You can smoosh them into the frosting before you put the top cookie on, and that works great. But for a real monster effect, spread your frosting, place the eyes slightly off-center on the *exposed* frosting edge, and then gently place the top cookie down. This makes it look like the monster is peeking out from the middle, which is infinitely cuter!
Ingredient Notes and Substitutions for Monster Sandwich Cookies
I always get messages asking if they can swap things out in this recipe, especially when it comes to getting those perfect monster colors. Look, these cookies are basically flavor sponges, so if you change a core ingredient, you’re changing the whole personality of your Monster Sandwich Cookies. I’m going to give you my honest best advice on what’s okay to change and what you should probably keep strictly as written!
If you’re out of something, don’t panic! But please know that swapping out the fat sources—that wonderful butter—will change the way these spread and firm up. We want them soft and tender, not crisp, so we have to be careful.
Best Type of Food Coloring to Use
This is a big one because the food coloring is what makes these monsters, monsters! If you use liquid food coloring, you need a lot of it, and that extra liquid can actually mess with the dough consistency. It can make the dough sticky or cause the colors to run into each other too fast when you combine them.
My strong recommendation is to use gel food coloring if you can find it. Gel is super concentrated, so you only need a tiny toothpick dip for intense color. This means you add virtually no extra liquid to your dough batches, keeping that beautiful, manageable texture we worked so hard to achieve in the first step.
Butter Substitutions in the Cookie Dough
Can we use margarine or oil instead of butter in the cookie part? Okay, technically, yes, if you absolutely have to. But here’s the thing: butter has less water and more fat than margarine. That fat is what gives the cookie its rich flavor and helps it spread just the right amount while baking.
If you use a margarine stick, the flavor won’t be as deep, and the cookie might come out a little softer or flatter than intended. If you use oil? Forget about it for this recipe. Oil makes chewy cookies, but we want these big guys to hold their shape nicely and have a slightly cakey edge, so stick to the full cup of softened real, unsalted butter for the best results.
Impact of Swapping Granulated Sugar
In the cookie dough, strictly use the granulated white sugar. If you try to replace it all with brown sugar, the cookies will be denser and chewier because brown sugar holds more moisture—we are already getting plenty of moisture from the way we combine the colored dough.
For the frosting, powdered sugar is a must. It has cornstarch mixed in, which is what stabilizes the filling and keeps it from becoming a gooey mess when it sits on the counter. There is absolutely no reasonable substitute for powdered sugar if you want that thick, pipeable buttercream filling!
Storing and Reheating Your Monster Sandwich Cookies
The biggest problem with these cookies is that they disappear too fast! But if you manage to have any leftovers (which is a huge accomplishment, by the way), storage is pretty straightforward. Because we used that wonderfully stable buttercream filling, these sandwiches are quite resilient!
You definitely shouldn’t need to refrigerate these unless your kitchen is unreasonably hot, which would make the frosting weep. We want to keep them at room temperature, just like the recipe notes suggested, to maintain that perfect soft cookie texture.
The Best Way to Store Finished Sandwich Cookies
The key word here is “airtight.” These cookies will dry out if left exposed, and if the air gets to that gorgeous frosting, it can get a little tacky.
- Find your best cookie tins or heavy-duty plastic containers. Make sure the lids seal tightly.
- Layer them carefully if you must, but I prefer to keep them in a single layer if possible. If you absolutely have to stack them, place a small square of wax paper between the layers to prevent the colorful cookie tops or the exposed frosting edges from sticking together.
- Keep the container at room temperature, away from direct sunlight or any major heat source. They stay perfectly good for three or four days this way!
Can I Freeze These Monster Cookies?
Yes, you can absolutely freeze these beauties, and it’s a great idea if you’re making them way ahead for a party. However, there’s a massive difference between freezing the plain cookies and freezing the fully assembled sandwich.
For Plain Cookies: If you freeze the baked cookies (before frosting), they do great for up to three months. Wrap the cooled cookies tightly in plastic wrap, then slip them into a freezer bag. When you want to use them, just let them thaw on the counter for an hour, then make your frosting fresh.
For Assembled Sandwiches: If you freeze the finished cookie sandwiches, the texture of the buttercream can change a little when it thaws, sometimes releasing a bit of moisture. If you must freeze them fully assembled, take them out of the freezer and let them thaw slowly in the refrigerator overnight before moving them to the counter. Don’t try to rush thawing them on the counter, or the frosting gets sweaty!
Reheating is Not Recommended—Just Thaw!
Since these are cookies, not a savory dish, we aren’t really “reheating” them! If you froze the plain cookies, just let them come to room temperature. If you froze the assembled sandwiches, follow that slow refrigerator thaw method mentioned above.
The point of this recipe is that soft, fresh cookie texture combined with creamy filling. Warming them up, even in a microwave for a few seconds (which I know is tempting!), usually leads to either dry centers or melted, slimy frosting. So, patience is key here—just let them temper back to room temperature slowly!
Variations on Monster Sandwich Cookies
So, you’ve mastered the classic green, blue, and purple monster cookies, and now you’re thinking, “What else can I do with this giant canvas?” That’s the exact spirit I love to see in the kitchen! Once you nail the basic technique of combining those three dough balls, the possibilities for customizing your Monster Sandwich Cookies are endless. You can change the colors, change the texture inside the cookie, or completely transform the filling flavor.
I often experiment when I’m making a big batch, just so everyone gets something a little unique. If you want to see how flexible cookie dough can be when you start tinkering, you should check out what people are doing with cake mix cookies—it opens up a whole new world of texture!
Flavor Twists for the Cookie Dough
The fun part is, the cookie dough recipe is really forgiving because we’re mixing three separate batches anyway. This means you can easily dedicate one color batch to a totally different flavor profile. Do this before you add the food coloring!
- A Little Chocolate Intensity: Take your purple dough portion and stir in about a quarter-cup of mini chocolate chips before you color it deep indigo or purple. Chocolate chips melting slightly during the bake give the cookie an extra layer of gooey goodness.
- The Peanut Butter Monster: If you like a nutty flavor, I suggest swapping out about a quarter of the flour in one batch for creamy peanut butter (use 1/4 cup of peanut butter in place of 1/4 cup of flour). You might need an extra tiny drizzle of milk to bring it back together, but wow, the salty-sweet combo with the vanilla cookie is amazing!
- Oatmeal Crunch: Want some texture? Mix 1/2 cup of quick oats into your green dough batch before coloring. It adds a fantastic chewiness that balances out the smooth frosting perfectly.
Switching Up the Buttercream Filling
The filling is where you can really surprise people. The base buttercream recipe is perfect, but why stop there when you have a perfectly creamy starting point?
- Chocolate Fudge Monster: For one batch of the frosting, cut the vanilla down slightly and gradually beat in 2 to 3 tablespoons of sifted unsweetened cocoa powder after the sugar is incorporated. You’ll get a dark, rich filling that looks wild peeking out between the colorful cookies!
- Lemon Zing: This is so bright and delicious, especially if you used only blue and white (or light green) cookies. Whisk in the zest of one whole lemon and a tablespoon of fresh lemon juice along with the vanilla. It cuts the sweetness of the cookie beautifully.
- Minty Fresh: Add just 1/4 teaspoon of pure peppermint extract instead of the vanilla extract, and consider adding a touch of green food coloring to the frosting itself. A minty monster sandwich is a fantastic surprise for the holidays!
Fun Topping Alternatives
Candy eyes are iconic, but after you’ve made these a few times, you might want a change. Skip the eyes sometimes and try these instead!
- Sprinkle Overload: Once you sandwich the cookie, immediately roll the outer edge of the exposed frosting in fun, colorful sprinkles—the crunchy jimmies work best here!
- Cookie Crumble Edges: Save a few of the plain, uncolored cookies before you roll them out. Once they are cooled, crush them finely. Then, roll the frosting edge in those cookie crumbs. It adds a fantastic crunchy texture when you bite into the side!
Frequently Asked Questions About Monster Sandwich Cookies
I get so many messages about these colorful giants once people try the recipe! It’s all about keeping things straightforward so the fun doesn’t get bogged down in complicated baking science. Here are the top things folks usually ask me about making their own awesome Monster Sandwich Cookies.
Can I make the dough for these Monster Sandwich Cookies ahead of time?
Oh, absolutely! Cookie dough keeps really well, and sometimes making it ahead of time gives the flavors a little chance to meld, though these are so fresh-tasting they don’t need much resting! After you’ve finished the coloring step—Step 4 in the instructions—you should wrap each colored ball of dough tightly in plastic wrap individually.
Tuck those wrapped balls into a zip-top bag or container and pop them in the fridge for up to three days. When you’re ready to bake, just let the dough sit on the counter for about 15 to 20 minutes to soften up slightly before you roll the colored portions together for baking. Don’t try to roll it while it’s rock hard, or it’ll crack!
How do I get the colors to stay separate in my Monster Sandwich Cookies?
This is the trickiest part, and it’s all about temperature and speed! If the dough gets too warm, the food coloring starts to bleed right where the colors meet, and you end up with a big muddy brown patch instead of distinct green, blue, and purple swirls merging together nicely.
My best advice is to work quickly when you combine the three colored balls into one large cookie structure. Roll them into separate small balls right before you mash them together. Keep the colored dough portions in the refrigerator or even freezer until you are ready to combine and flatten them onto the baking sheet. The colder the dough, the slower the colors blend during the pre-bake warming stage!
What is the best way to store leftover buttercream for these sandwich cookies?
Don’t let that beautiful, fluffy buttercream go to waste! If you have leftovers after you’ve made all your sandwiches, the key is keeping the air completely out of it so it doesn’t dry out and form a crust.
Scrape it all down into a clean, airtight container—one with a really good gasket seal is ideal. You can leave this on the counter for a day or so if your kitchen isn’t too warm, but for anything longer, you should definitely refrigerate it. When you pull it out to use again, give it a quick whip with your electric mixer with a tiny splash of milk or cream, and it’ll come right back to that perfect, creamy texture again!
Nutritional Estimates for Monster Sandwich Cookies
Now, I know what you’re thinking: with all that butter, sugar, and glorious frosting, these things must be calorie bombs! And honestly, these are a treat, not an everyday snack! I always look at these numbers purely for fun, because when you’re making something this delicious and gigantic, you just have to embrace it. We are making 12 large cookies, so these estimates are based on one full cookie sandwich.
Please remember that this is just my best guess based on standard ingredient measurements—the actual numbers could vary wildly depending on how big you *really* roll your dough balls and how much frosting you stack in the middle! You know my rule: if it tastes good, don’t stress the tiny details!
Here’s a breakdown of what those big, beautiful Monster Sandwich Cookies clock in at:
- Serving Size: 1 cookie sandwich
- Calories: 450
- Sugar: 45g (Yep, worth every gram!)
- Sodium: 150mg
- Fat: 25g
- Saturated Fat: 15g
- Unsaturated Fat: 10g
- Trans Fat: 0.5g
- Carbohydrates: 55g
- Fiber: 1g
- Protein: 4g
- Cholesterol: 60mg

Monster Sandwich Cookies
- Total Time: 42 min
- Yield: 12 large sandwiches 1x
- Diet: Vegetarian
Description
Make large, colorful sandwich cookies filled with buttercream frosting.
Ingredients
- 1 cup unsalted butter, softened
- 1 cup granulated sugar
- 1 large egg
- 1 teaspoon vanilla extract
- 2 1/2 cups all-purpose flour
- 1 teaspoon baking soda
- 1/2 teaspoon salt
- Green food coloring
- Blue food coloring
- Purple food coloring
- 1 cup unsalted butter, softened (for frosting)
- 3 cups powdered sugar (for frosting)
- 1 teaspoon vanilla extract (for frosting)
- 2 tablespoons milk or cream (for frosting)
- Assorted candy eyes (for decoration)
Instructions
- Preheat your oven to 350 degrees Fahrenheit. Line baking sheets with parchment paper.
- In a large bowl, cream together 1 cup softened butter and 1 cup granulated sugar until light and fluffy.
- Beat in the egg and 1 teaspoon vanilla extract.
- In a separate bowl, whisk together the flour, baking soda, and salt. Gradually add the dry ingredients to the wet ingredients, mixing until just combined.
- Divide the dough into three equal portions. Add green food coloring to one, blue to the second, and purple to the third. Mix each until the color is uniform.
- Roll each colored dough portion into small balls, about 1 tablespoon each. Flatten slightly.
- Place the colored dough balls close together on the prepared baking sheets to form large circles, pressing them together lightly so they stick.
- Bake for 10 to 12 minutes, or until the edges are set. Let cool on the baking sheets for 5 minutes before transferring to a wire rack to cool completely.
- To make the frosting, beat 1 cup softened butter until smooth. Gradually add 3 cups powdered sugar, mixing until combined. Add 1 teaspoon vanilla extract and 2 tablespoons milk. Beat until light and fluffy.
- Once cookies are cool, spread a generous layer of frosting on the flat side of one cookie. Top with another cookie, pressing gently to form a sandwich.
- Press candy eyes onto the frosting layer before placing the top cookie on, or press them onto the exposed frosting edge.
Notes
- You can use any combination of colors you prefer for the dough.
- Make sure the cookies are completely cool before frosting them.
- Store finished cookies in an airtight container at room temperature.
- Prep Time: 30 min
- Cook Time: 12 min
- Category: Dessert
- Method: Baking
- Cuisine: American
Nutrition
- Serving Size: 1 cookie sandwich
- Calories: 450
- Sugar: 45
- Sodium: 150
- Fat: 25
- Saturated Fat: 15
- Unsaturated Fat: 10
- Trans Fat: 0.5
- Carbohydrates: 55
- Fiber: 1
- Protein: 4
- Cholesterol: 60
Keywords: monster cookies, sandwich cookies, buttercream, colorful cookies, large cookies