
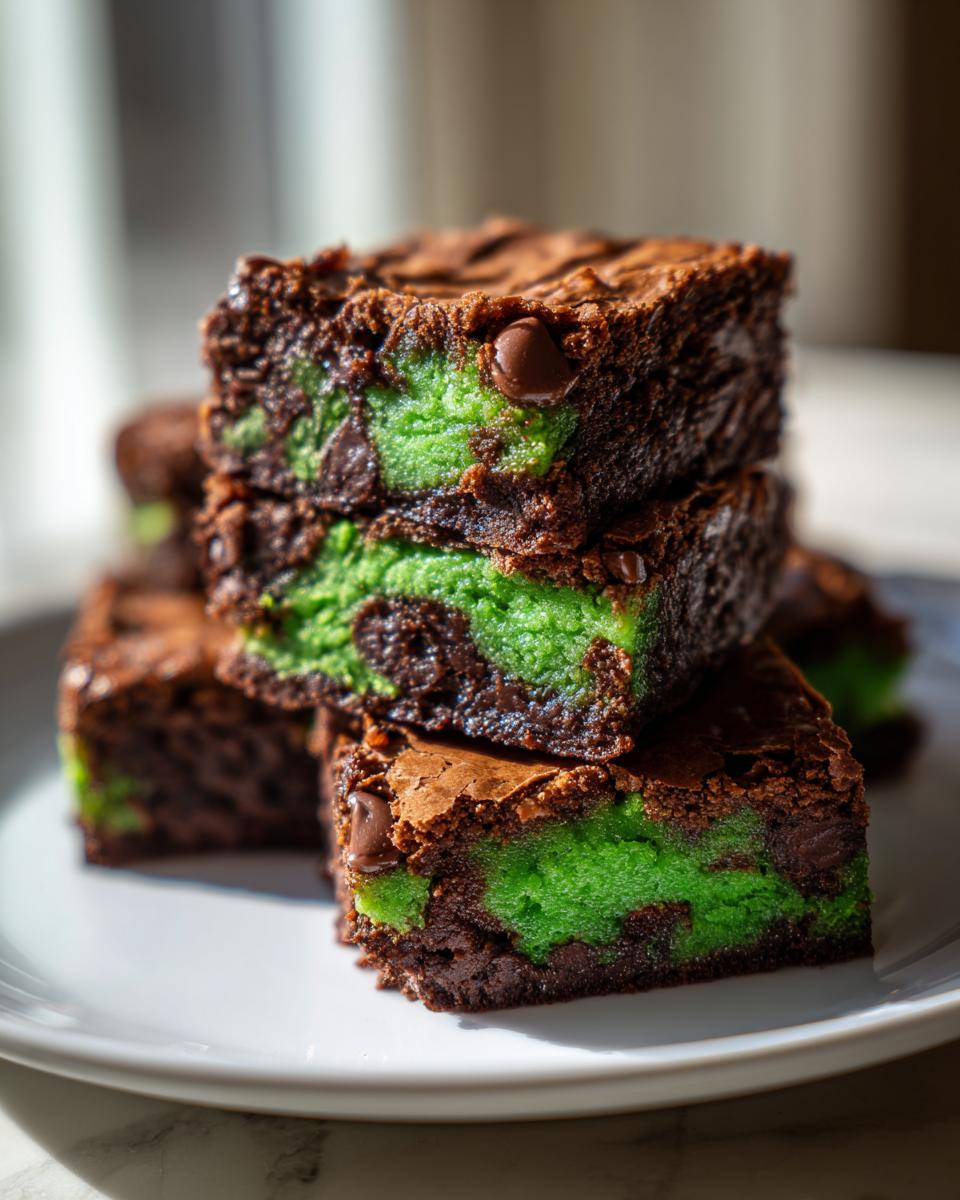
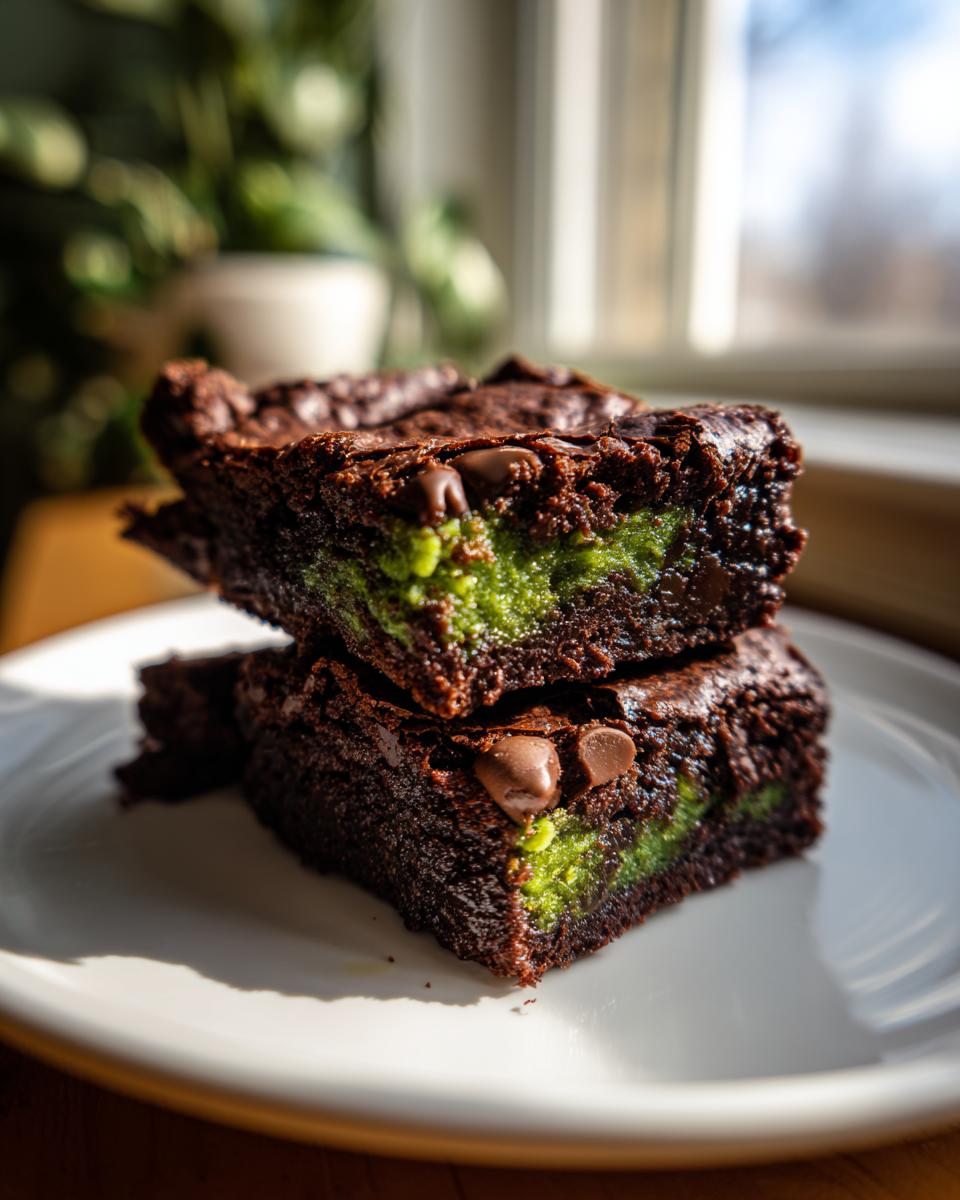
Forget those dry, boring boxed mixes! When Halloween rolls around, I need something truly decadent and a little bit weird. That’s why I put together my absolute favorite recipe for **Monster Mash Brownies**—they are insanely fudgy, deeply chocolaty, and dyed the perfect eerie green. Seriously, these aren’t your average baked good. They have that perfect dense, chewy texture that makes you take three squares instead of just one. My family expects these every October, and watching people’s faces when they realize their treat is bright green is half the fun!
We’re talking serious chocolate flavor here, folks. I’ve perfected the balance so they stay gooey right down to the center every single time. If you’re looking for simple recipes that deliver huge thematic impact without stressing you out, you’ve found it. Get ready to mash up some magic!

What Makes These Monster Mash Brownies So Fudgy and Green?
Listen, there are cakey brownies, and then there are real brownies. These are definitely the latter! We are aiming for maximum fudge factor here. The secret to that incredible dense, slightly gooey texture is all about the ratio of fat to flour. We use more sugar and butter compared to the flour and cocoa powder, which prevents them from rising too much and turning into a chocolate cake. It’s an intentional lean toward richness, trust me!
Now for the fun part: the color! You can’t have spooky treats without a vibrant, almost radioactive green, right? I strongly suggest you skip the watery liquid food coloring. If you use that, you risk messing up the batter consistency. Instead, go for a high-quality gel coloring. I usually add about ten drops starting until I get an opaque, murky green. You want to mix it in gently, just until you see the streaks disappear. If you look closely at friends who have made their own chocolate chip tahini cookies recreation, they often talk about ingredient precision like this mattering, and it does!
Gathering Ingredients for Your Monster Mash Brownies
To get started on these amazing green treats, you’ll need one cup of unsalted butter that you’ll melt down first. Then we grab two cups of granulated sugar, four large eggs for structure, and a splash of vanilla extract. For the dry team, we mix one cup of all-purpose flour, three-quarters of a cup of unsweetened cocoa powder, a half teaspoon of salt, and a quarter teaspoon of baking powder. Of course, we need plenty of that green food coloring—gel preferred! And don’t forget the cup of chocolate chips you’ll fold in last for those extra pockets of melted goodness.
Essential Ingredients for Perfect Monster Mash Brownies
Precision matters when you are aiming for peak fudginess, even if we are making things bright green! You’ll want to gather everything before you even think about turning on the heat. Trust me on this one; it keeps the process smooth, and you minimize the chance of overmixing that fragile batter later on.
For the base of these chocolatey monsters, make sure you have one cup of unsalted butter, which needs to be melted down before mixing. Then, measure out two full cups of granulated sugar—no substitutes here if you want that dense texture to shine. We need four large eggs, fresh from the carton, and one teaspoon of vanilla extract to round out the sweetness.
The dry components should be whisked thoroughly in a separate bowl! That means one cup of all-purpose flour, three-quarters of a cup of unsweetened cocoa powder—use the good stuff here—a half teaspoon of salt, and just a quarter teaspoon of baking powder. The star ingredient, of course, is the green food coloring; grab your gel version if you can, as that gives you the most intense color without adding extra liquid. Finally, make sure you have one cup of those wonderful chocolate chips ready to be folded in right at the end!
Step-by-Step Instructions to Bake Incredible Monster Mash Brownies
Alright, this is where the real magic happens! Don’t rush these steps, especially the mixing part. I know we want to get those green treats into the oven, but patience is what separates a good brownie from a spectacular, fudgy one. Remember how we talked about the texture? It all comes down to how you combine these components.
If you check out some other great baking guides, like those on Christmas brownies, they always stress the importance of technique. My biggest piece of advice? Never, ever overmix once the flour goes in. Stop mixing as soon as you barely see the dry streaks disappear. Seriously, a few tiny flour remnants are better than tough brownies!
Prepping the Pan and Oven for Your Monster Mash Brownies
First things first, you need to get your oven ready to receive these monsters! Preheat it to 350°F (175°C). While that’s warming up, grab your 9×13 inch baking pan. I always grease mine really well and then line it with parchment paper. Make sure you leave some overhang on the sides—that gives you little handles later so you can safely lift the entire pan of cooled brownies out in one piece. It makes cutting so, so much cleaner!
Mixing the Wet and Dry Ingredients for Monster Mash Brownies
We start with the wet ingredients. Take that melted butter and stir in the two cups of sugar until everything looks combined. Then, grab your eggs, one by one, beating each in well before adding the next, followed by your vanilla extract. In a totally separate bowl, whisk together your flour, cocoa powder, salt, and baking powder. You want those dry bits totally incorporated before they meet the wet, otherwise, you get weird clumps!
Achieving the Perfect Green Hue in Your Monster Mash Brownies Batter
This is the moment of transformation! Pour the dry ingredients into the wet mixture. Mix gently, just until you stop seeing flour streaks—remember that anti-overmixing rule! Once it’s just barely combined, start adding your green food coloring slowly. I drop in four or five dots of the gel, stir gently, and check the color. If it’s not monstrous enough, add a couple more drops until you’ve got that fantastic, spooky green.
When the color is perfect, gently fold in your cup of chocolate chips. You might want to swirl just an extra little drop of coloring on the very top of the batter in the pan for an extra intense color explosion before it bakes, which is a fun trick I learned years ago!
Baking and Cooling Your Monster Mash Brownies
Spread that gorgeous green batter evenly into your prepared pan. Pop it into the preheated oven for about 25 to 30 minutes. You’re looking for doneness when you stick a toothpick right near the center and it comes out with moist crumbs clinging to it—not totally wet batter, but definitely not spotless dry either! That’s the sign of a chewy center, folks. Once they look done, pull them out. And here’s the hardest part: you absolutely must let them cool completely in the pan before you even touch them with a knife. Cooling totally solidifies that fudge texture and ensures your ultimate squares are neat.
Tips for Success When Making Monster Mash Brownies
Executing these Monster Mash Brownies perfectly really just boils down to paying attention to two major points: quality and patience. First, don’t skimp on that cocoa powder! Since the whole point is intense chocolate flavor lurking under that fun green color, using a high-quality, unsweetened cocoa makes a massive difference in the depth of flavor. I learned this trick when converting my basic chocolate cake recipe, similar to how one approaches a chocolate caramel toffee cake—the chocolate has to carry the heavy load.
Secondly, and I can’t stress this enough, you MUST let them cool completely. If you try to slice these beauties while warm, you’ll end up with a gooey chocolate mess that looks less like a square and more like a melted puddle. That long cooling time is non-negotiable for achieving those sharp, satisfyingly chewy edges!
Serving Suggestions for Your Monster Mash Brownies
These green chocolate gems are delicious all on their own, especially when they’ve had time to set up perfectly after cooling down. But why stop at just a brownie when you can make the whole dessert spooky and fun? Presentation is everything, especially when you’re baking for a themed party!
My absolute favorite way to serve these is à la mode. The contrast of the cool, creamy vanilla ice cream melting slowly against the rich, dark, slightly cool green brownies is just unbeatable. It’s like sinking a scoop into a cool, sugary swamp—in the best way possible!
If you aren’t serving them right away, or if you want to amp up the visual theme, think about toppings. Sometimes I’ll crush up some dark chocolate wafer cookies and sprinkle them lightly over the top before serving. It looks like dark, disturbed earth on top of that bright green base. Or, if you’re feeling extra festive, grab some edible candy eyeballs! Sticking two or three onto each square once they are cut makes them instantly look like little monster faces peeking out at you.
They also pair surprisingly well with a lighter dessert like a simple homemade yellow cake, which I always keep in my back pocket for guests who don’t want something quite so rich. You can find my easy homestyle yellow cake recipe if you need a second option to balance out the darkness of the Monster Mash Brownies!
Storage and Reheating Instructions for Monster Mash Brownies
Okay, so you (probably) made too many Monster Mash Brownies. Don’t worry, this is a good problem to have! The great news is that these fudgy babies keep really well, perhaps even better on day two, because that extra waiting time lets the chocolate flavor really settle in. But we have to store them right to maintain that precious fudgy texture.
The number one rule for storage is airtight containment. If you leave them uncovered on the counter, you might as well have just left the pan open to the elements! Moisture is your friend when it comes to fudgy brownies, and an airtight container stops the air from stealing it.
You have a choice between room temperature and the fridge. If you plan on eating them within three days, room temperature is usually my pick. Just layer them carefully in a sturdy, airtight container—I put a small sheet of parchment paper or wax paper between the layers so the green tops don’t smudge the bottoms of the layer above. Keep that container somewhere cool, away from the oven or any direct sunlight near the window.
If you made a massive batch and need them to last closer to a week, then the refrigerator is the way to go for food safety. Pop them in the fridge, airtight, for up to seven days. Just be warned: brownies stored in the fridge will firm up a lot because of the butter content. They go from fudgy to super dense!
If you chilled them, you absolutely need to reheat them a little before serving for a proper experience. Don’t use the microwave for too long, or you’ll end up with lava. Just zap a square for about 10 to 15 seconds, maximum. That short burst warms them just enough to soften that butter back up and bring back that perfect gooey pull. If you’re serving them cold, just let them sit on the counter for about 20 minutes before cutting into them; that usually softens them up nicely without overheating!
Frequently Asked Questions About Monster Mash Brownies
It’s like I always tell my baking buddies—the more baking you do, the more questions pop up! Don’t you worry one bit if you have some lingering thoughts about getting these perfect. We’ve all been there, wondering if we can swap an ingredient or if skipping a step will ruin the magic. Here are a few things I get asked all the time about achieving fudgy texture and the perfect green hue in these brownies.
If you’ve ever tried switching things up in your chocolate covered strawberry brownies recipe, you know substitution can be risky! But sometimes it’s necessary, and sometimes you just want the classic flavor underneath the theme. Let’s dive in!
Can I make Monster Mash Brownies without food coloring?
Oh, absolutely, you can! If you’re short on gel coloring, or maybe you just prefer a super traditional look, go right ahead and skip it. What you’ll end up with are simply incredible, deeply rich chocolate brownies loaded with chocolate chips. They won’t be the spooky, vibrant green color that makes everyone comment at the party, of course. But I promise you, the flavor profile—the fudginess and the dark chocolate taste—will be exactly the same delicious standard we’ve worked so hard to achieve here!
How can I ensure my Monster Mash Brownies stay moist?
This is probably the biggest concern people have with any brownie recipe because nobody likes stale edges! To guarantee moist brownies every time, focus on two things we talked about. First, the fat-to-flour ratio is key; we use plenty of melted butter and sugar compared to our flour, which naturally prevents them from setting up like a cake. That high-fat content seals in that moisture.
The second and perhaps most crucial step is not overbaking them! You need to pull these brownies out of the oven when that toothpick test gives you moist crumbs attached. If that toothpick slides out clean, congratulations, you’ve just made a perfectly acceptable chocolate bar, but it’s going to be drier than we want. Always slightly underbake them, knowing they continue to set up as they cool completely on the counter. That residual heat does the final bit of cooking perfectly!
Nutritional Estimates for Monster Mash Brownies
Now, I know we aren’t making these because we are counting calories at a monster bash, right? They are rich, they have butter, sugar, and chocolate—they are a celebratory treat! But I always like to give a general idea of what you’re looking at per square, just so everyone knows what they are diving into.
Based on aiming for 24 squares from the 9×13 pan, here’s the breakdown. Please remember that these estimates are based on standard ingredient measurements, and the brand of cocoa powder or the exact amount of sugar you use can change these numbers a bit!
- Serving Size: 1 square
- Calories: Around 200 calories
- Sugar: Roughly 25g (That’s where the fudgy goodness comes from!)
- Fat: About 10g total fat
- Saturated Fat: 6g
- Carbohydrates: 28g
- Protein: 3g
- Sodium: A hint at 50mg
So, yes, these Monster Mash Brownies are definitely an indulgence, but they are worth every single spooky, green bite. They are perfectly vegetarian, too, which is a nice bonus if you have friends with dietary restrictions!
Share Your Spooky Baking Creations
Now listen, I’ve shared all my secrets for getting that dark chocolate flavor and that unbelievable green hue in these rich Monster Mash Brownies. The best part of this whole process for me isn’t even eating the first square—it’s hearing from you all when you try them!
Did you manage to get that perfect, crackly top layer? Did your family freak out when they saw the bright green center? Please tell me everything in the comments below! Your feedback helps me know if I should tweak anything for next year, or if maybe you found an even crazier way to make them spooky. Did you swirl in extra coloring like I mentioned? I want the full scoop!
And seriously, if you made these, you have to snap a picture! I absolutely love seeing your results. Tag me on social media! Seeing these monstrous squares showing up on your tables, maybe next to some awesome Halloween cookies or whatever spooky treats you’re whipping up, just makes my day. It proves that while baking should be precise, it should also be completely fun and messy sometimes.
Don’t be shy—leave that rating for the recipe five stars if you loved the fudginess! Let’s keep this community kitchen lively and full of dangerously delicious, eerie treats. Happy baking, friends!
Print
Monster Mash Brownies
- Total Time: 45 min
- Yield: 24 servings 1x
- Diet: Vegetarian
Description
Rich, fudgy brownies with green food coloring for a spooky look.
Ingredients
- 1 cup unsalted butter
- 2 cups granulated sugar
- 4 large eggs
- 1 teaspoon vanilla extract
- 1 cup all-purpose flour
- 3/4 cup unsweetened cocoa powder
- 1/2 teaspoon salt
- 1/4 teaspoon baking powder
- Green food coloring (gel preferred)
- 1 cup chocolate chips
Instructions
- Preheat your oven to 350°F (175°C). Grease and line a 9×13 inch baking pan with parchment paper.
- Melt the butter in a saucepan over low heat. Remove from heat.
- Stir the sugar into the melted butter until combined.
- Beat in the eggs one at a time, then stir in the vanilla extract.
- In a separate bowl, whisk together the flour, cocoa powder, salt, and baking powder.
- Gradually add the dry ingredients to the wet ingredients, mixing until just combined. Do not overmix.
- Add several drops of green food coloring until the batter reaches a desired green hue. Stir gently to incorporate.
- Fold in the chocolate chips.
- Spread the batter evenly into the prepared pan.
- Bake for 25 to 30 minutes, or until a toothpick inserted near the center comes out with moist crumbs attached.
- Let the brownies cool completely in the pan before cutting into squares.
Notes
- For extra color, you can swirl a small amount of extra green food coloring on top before baking.
- Use high-quality cocoa powder for the best chocolate flavor.
- Cooling completely makes cutting cleaner squares easier.
- Prep Time: 15 min
- Cook Time: 30 min
- Category: Dessert
- Method: Baking
- Cuisine: American
Nutrition
- Serving Size: 1 square
- Calories: 200
- Sugar: 25g
- Sodium: 50mg
- Fat: 10g
- Saturated Fat: 6g
- Unsaturated Fat: 4g
- Trans Fat: 0g
- Carbohydrates: 28g
- Fiber: 1g
- Protein: 3g
- Cholesterol: 40mg
Keywords: brownies, chocolate, green, spooky, dessert, monster mash