
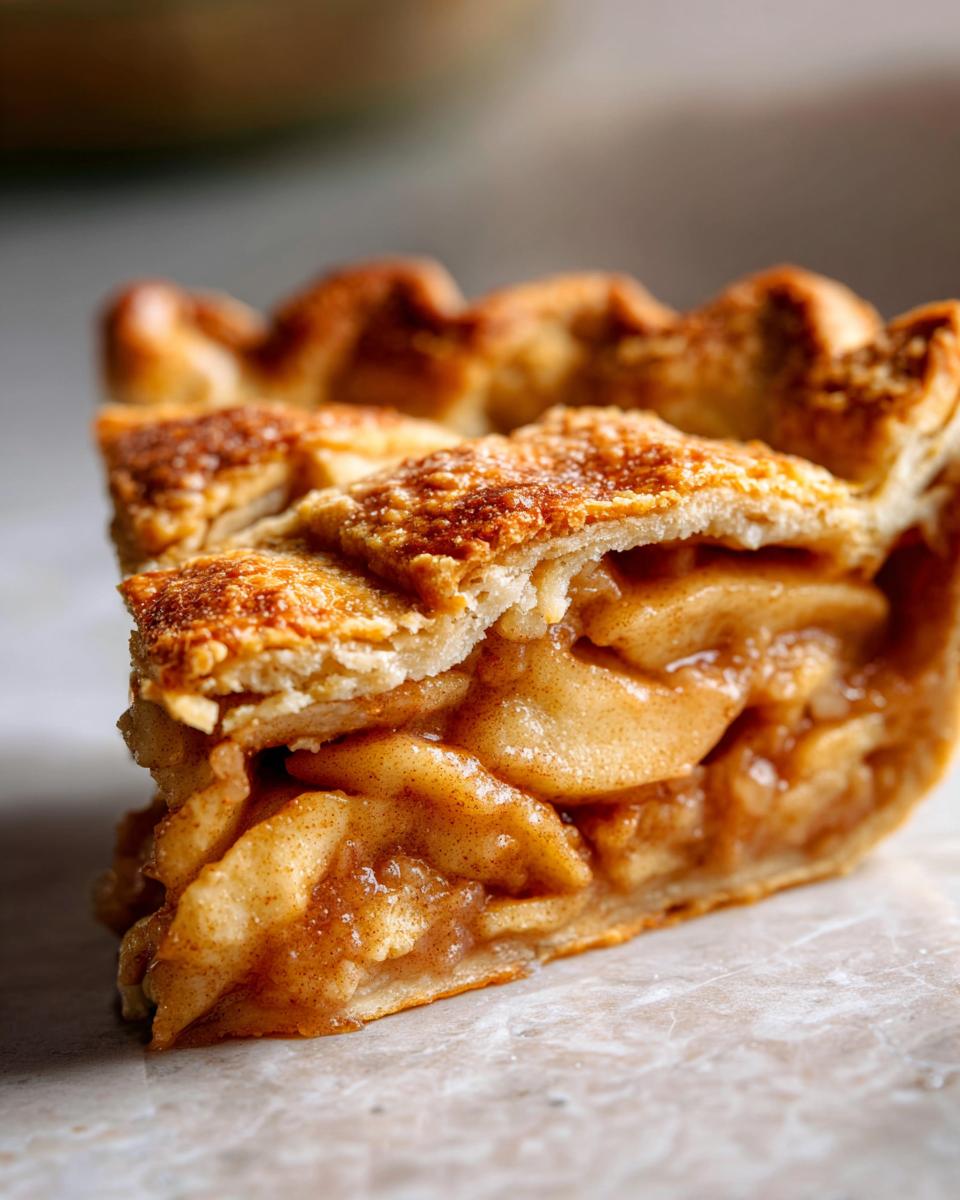
Oh my gosh, there is nothing quite as cozy as the smell of baked apples and cinnamon flooding your kitchen, right? But let’s be real: making a full, gorgeous, lattice-topped pie can feel like a whole event. Sometimes you just want that perfect slice of apple pie comfort without having to commit to a giant dessert that stares you down until Tuesday.
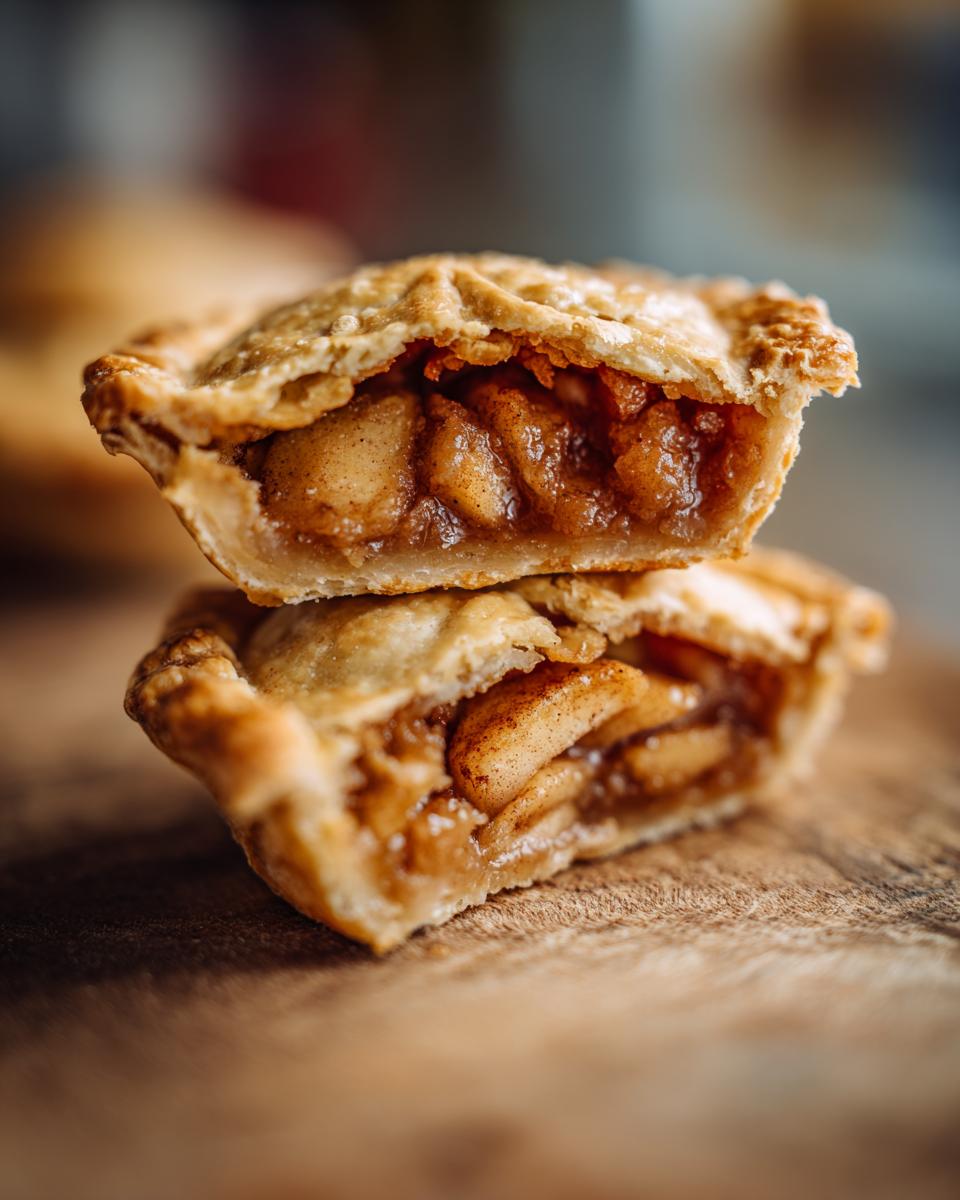
That’s precisely why I am obsessed with this recipe for **Mini Apple Pies**! Honestly, these little treats are my secret weapon when I need something impressive but fast. I’ve made my fair share of notoriously tricky traditional pies over the years—the ones where the crust shrinks or the filling runs everywhere—but these individual ones are foolproof. They are perfectly sized for portion control (which is a nice way of saying I can eat two without feeling guilty!) and they bake up beautifully golden in less than 30 minutes. Trust me, once you see how easy this recipe is, you’ll never stress over a whole pie again.
Why You Will Love These Mini Apple Pies
These aren’t just small pies; they are the ultimate individual baking experience. They are seriously quick to pull together, especially if you are short on time!
- Perfect Portions: No slicing involved! Everyone gets their own perfectly crimped, golden beauty every single time.
- Speedy Baking: Because they’re so small, they cook much faster than a standard pie. You get that warm apple goodness quicker!
- Flaky, Flaky Crust: We nail that flaky texture every time because the butter stays incredibly cold. You deserve a great crust!
- Travel & Gifting Ready: These are fantastic for picnics or bake sales since they hold their shape so well. Check out some other great treat ideas if you’re planning a party!
Essential Ingredients for Perfect Mini Apple Pies
When making these little beauties, ingredient quality really shines through because there are so few components! We have two main teams here: the crust ingredients, which need to be icy cold, and the filling ingredients that bring all the autumnal flavor.
For the crust, grab 2 cups of all-purpose flour, 1 teaspoon of salt, and the magic ingredient: 2/3 cup of cold unsalted butter, cubed up. You’ll also need about 1/4 cup of ice water to bring it together. Don’t skimp on that cold butter!
The filling is simple but robust. You need about 4 medium apples—peeled, cored, and diced small. Then mix in 1/2 cup of granulated sugar, 1 teaspoon of ground cinnamon, just a tiny dash of nutmeg (1/4 teaspoon works!), and 1 tablespoon of lemon juice to keep everything bright. Oh, and you can’t forget 1 large egg, beaten, for that gorgeous shine on top with the egg wash.
Step-by-Step Guide to Making Mini Apple Pies
Okay, let’s get down to business! The whole process moves quickly, which is why precision in timing is key here. I always get my filling mixed while my dough chills because that downtime is crucial for that beautiful, flaky texture we are aiming for. Don’t worry if your first batch of mini apple pies looks a little rustic; mine sure did when I first started!
Preparing the Flaky Pastry Dough
This is non-negotiable: everything for the crust has to be cold! Mix your flour and salt, and then cut in that cold, cubed butter. You want to work fast, using a pastry blender or even your fingertips, until it looks like coarse, pebbly crumbs. Seriously, stop when you still see some pea-sized chunks of butter in there; that’s what creates the layers!
Drizzle in the ice water just a tablespoon at a time until the mixture starts clinging together when you squeeze a bit. Form those two little disks, wrap them tightly in plastic wrap, and pop them into the fridge for at least 30 minutes. This resting time lets the gluten relax, and boy, does it make rolling out easier later.
Creating the Apple Pie Filling for Mini Apple Pies
While that pastry is getting cold and happy in the fridge, make your filling! In a medium bowl, combine your diced apples with the sugar, cinnamon, and nutmeg. That bit of lemon juice is so important—it doesn’t just keep the apples from turning brown, it adds a little necessary brightness that cuts through the sweetness. Give it a really thorough toss so every single apple piece is coated in spice. This step is what makes these little guys taste like a trip to the orchard!

Assembling and Baking Your Mini Apple Pies
Time to preheat that oven to 400 degrees Fahrenheit (200 degrees Celsius) and make sure your muffin tin is lightly greased. Roll out one dough disk to about 1/8 inch thick. Use a cutter just a bit bigger than your muffin cups and gently press those circles into the tin for your bottom crusts.
Spoon your spiced apple mixture into each cup, making sure not to overfill them—we need room for bubbling! Then, take your second dough disk for the tops. You can cut full circles or get fancy with some strips for a tiny lattice, just make sure you place the top on and crimp those edges tight to seal the delicious mini apple pies fate. Before they go in, give them a quick swipe of that beaten egg wash. Bake them for about 20 to 25 minutes. You’re looking for a beautiful golden color and that filling bubbling up slightly through the vents. Let them cool a bit in the pan before carefully turning them out onto a rack. They smell absolutely divine!
If you loved getting that perfect crust on these, you should definitely check out my recipe for flaky crust cherry pies—the pastry technique is exactly the same!
Expert Tips for Perfect Mini Apple Pies Crust
Listen, I’m going to tell you the secret that separates good mini apple pies from truly legendary ones: the crust has to be handled like it’s made of spun sugar, meaning cold, cold, cold!
First, if your kitchen is warm, I mean *really* warm, stick your flour and butter in the freezer for about ten minutes before you start mixing. Cold fat hitting dry flour creates those steam pockets that puff up into glorious, flaky layers. If you feel your dough getting sticky while you’re rolling it out—and it happens to everyone—just slide the whole thing back into the fridge for a quick five-minute timeout. It firms right back up!
Also, please, for the love of flaky pastry, do not overwork the dough once that ice water goes in. Mix only until it barely holds together. Overmixing develops gluten, and gluten makes your crust tough, not tender. We are aiming for tenderness here, so treat that dough gently when you’re pressing it into those muffin cups!
Ingredient Notes and Substitutions for Mini Apple Pies
I get asked all the time about what apples work best in these tiny wonders. You absolutely want a mix for the best results! I usually combine a tart apple, like Granny Smith, with a slightly sweeter one, maybe a Honeycrisp or Fuji. That balance keeps your mini apple pies from being either too sour or too sickly sweet.

About the butter in the crust—yes, you can use vegetable shortening sometimes if you absolutely need to, but honestly, it ruins that classic, buttery flavor we worked so hard to achieve! If you must substitute, use an equal amount of shortening, but expect a slightly less rich taste. The cold butter provides the best structure for these individual pies. Trust me here; stick to proper butter if you can!
Storage and Reheating Instructions for Mini Apple Pies
So, you managed to have leftovers of these perfect mini apple pies? That’s amazing, because they taste fantastic the next day too! But how you store them makes all the difference for that lovely flaky edge.
If you plan on eating them within a day, you can usually leave them covered loosely on the counter at room temperature. They look so tempting, so make sure they are covered well so they don’t dry out. After about 24 hours, though, or if your kitchen is really humid, it’s safer to pop them into the fridge.
When chilling, make sure they are in an airtight container. If you stack them, put a small square of parchment paper between them so the tops don’t stick to the bottom of the next pie. They’ll last nicely in the fridge for up to four days this way.
Now, the big question: reheating! Since we worked so hard on that crust, we definitely don’t want a soggy bottom when we reheat our mini apple pies.
Forget the microwave if you want crispness. The absolute best way to bring these back to life is in a toaster oven or a regular oven set to about 350 degrees Fahrenheit (175 degrees Celsius). Pop them directly on the rack for about 7 to 10 minutes. That brief blast of dry heat re-crisps the pastry shell perfectly while warming that cinnamon-spiced apple filling right up. It’s like fresh-baked all over again!
Troubleshooting Common Mini Apple Pies Issues
Even with the best recipe and the best intentions, sometimes things go a little sideways in the oven. Don’t panic! Anyone who bakes regularly hits snags, and these little guys can be tricky because of their small size. Dealing with these issues right away means you still end up with fantastic mini apple pies!
The biggest complaint I hear is the dreaded soggy bottom crust. Ugh, I hate that! This usually happens because the apple moisture has nowhere to go, or the bottom crust didn’t get hot enough initially. Remember that note about blind baking? If you have time, try that! If not, make sure your filling isn’t sitting in excess juice before you load it in. You can even gently spoon just the apples in and leave the last bit of liquid behind.
Another common issue, especially with homemade dough, is shrinkage. If your pie tops shrink down around the edges during baking, it means your dough was too warm when it went into the oven, or you were too aggressive when you pressed the bottoms into the muffin tin. Next time, chill your assembled pies for an extra 10 minutes right before they go into the 400-degree heat. That blast of cold helps set the fat quickly.
If you find your filling is oozing out the sides, that’s usually because you filled the crusts too high. Remember, the apples cook down a bit, but they definitely bubble! Only fill them about 3/4 of the way up. If you’re interested in some other quick baking fixes, I wrote a whole post about easy dump cake rescues that might come in handy!
The key to solving most problems with these mini apple pies comes down to temperature control—either keeping your dough cold or getting your oven hot enough, fast enough! Don’t let a little leak stop you from enjoying these!
Frequently Asked Questions About Making Mini Apple Pies
It’s always great to hear what you all are wondering about when baking! These little treats are pretty straightforward, but everyone has slightly different equipment or worries. Here are some of the most common questions I get about whipping up these perfect mini apple pies!
Can I use store-bought pie dough?
You totally can, and I won’t tell anyone! If time is really tight, store-bought dough, whether it’s fresh or frozen, will absolutely work. It takes away that 40 minutes of dough prep and chilling time. However, I always have to give you a heads-up: the flakiness we talk about comes from using that ice-cold, cubed butter in the homemade recipe. If you use pre-made, expect a good pie, but maybe a slightly less spectacular, flaky crust for your mini apple pies. It’s always a trade-off between convenience and homemade magic!
What is the best cutter size for muffin tins?
This is a super practical question! Standard muffin tins usually have cups that measure about 2.75 inches across at the top. For those cups, I find that a round cookie or biscuit cutter that is about 3.5 inches in diameter works like a charm for the bottom crusts. This gives you enough dough edge to gently drape over the side and crimp nicely without stretching or tearing.
For the tops, if you are cutting full circles, go just a tiny bit smaller, maybe 3 inches. If you are doing lattice work, use pastry strips cut with a knife or a lattice roller—those are easier to manage on such a small scale than trying to wrestle a round cutter!
How do I prevent the bottoms from getting soggy?
We talked about this a little bit earlier, but it’s worth repeating because a dry bottom crust on your mini apple pies is essential! The best defense is a hot oven. Make sure your oven is fully preheated to 400°F *before* they go in. The initial high heat helps set the bottom crust quickly.
If you are using a lot of very juicy apples, gently pre-baking the bottom shells—which is called blind baking—for five minutes really helps. You pull the tin out when it’s just dry (not brown), toss in your filling, seal it up, and finish baking. That five-minute head start makes a massive difference in keeping structure when you make individual pies.
If you’re looking for other quick baking ideas that skip the fuss, check out this wonderfully easy apple bread recipe that pairs wonderfully with these little pies!
Nutritional Estimates for This Recipe
Now, I know not everyone is tracking calories when they pull a warm, buttery dessert out of the oven, but a lot of you have asked for the numbers, so here they are! We calculated these approximations based on standard ingredient measurements used in this recipe for one individual pie.
Remember, these figures are just estimates, folks! If you swap regular butter for low-fat margarine or use a different sugar, the final count will definitely shift. That said, these mini apple pies are a treat, and they clock in around 280 calories, which feels pretty fair for something this delicious.
- Serving Size: 1 pie
- Calories: 280
- Sugar: 18g
- Fat: 15g (with about 9g being saturated fat from that beautiful butter!)
- Carbohydrates: 34g
- Protein: 3g
- Cholesterol: 45mg
We bake for joy, not strict tracking, but it’s always nice to know where we stand! Enjoy every single bite of that flaky crust and spiced filling.
Print
Mini Apple Pies
- Total Time: 65 min
- Yield: 12 mini pies 1x
- Diet: Vegetarian
Description
Small, individual apple pies with a flaky crust.
Ingredients
- 2 cups all-purpose flour
- 1 teaspoon salt
- 2/3 cup cold unsalted butter, cubed
- 1/4 cup ice water
- 4 medium apples, peeled, cored, and diced
- 1/2 cup granulated sugar
- 1 teaspoon ground cinnamon
- 1/4 teaspoon ground nutmeg
- 1 tablespoon lemon juice
- 1 large egg, beaten (for egg wash)
Instructions
- Prepare the crust: Mix flour and salt. Cut in the cold butter until the mixture resembles coarse crumbs. Gradually add ice water until the dough just comes together. Divide the dough in half, form into disks, wrap, and chill for 30 minutes.
- Prepare the filling: In a bowl, combine diced apples, sugar, cinnamon, nutmeg, and lemon juice. Mix well.
- Preheat your oven to 400 degrees Fahrenheit (200 degrees Celsius). Lightly grease a standard muffin tin.
- Roll out one dough disk on a lightly floured surface to about 1/8 inch thickness. Use a round cutter slightly larger than the muffin cups to cut out circles.
- Gently press the dough circles into the muffin cups, forming the bottom crusts.
- Spoon the apple filling evenly into the crusts.
- Roll out the second dough disk. Cut out tops for the pies (either full circles or strips for a lattice). Place the tops over the filling. Crimp the edges to seal. Cut a small vent in the top of each pie.
- Brush the tops with the beaten egg wash.
- Bake for 20 to 25 minutes, or until the crust is golden brown and the filling is bubbly.
- Let the pies cool in the tin for 10 minutes before carefully removing them to a wire rack to cool further.
Notes
- For a crispier bottom crust, you can blind bake the bottom shells for 5 minutes before adding the filling.
- Use a mix of tart and sweet apples for the best flavor balance.
- Prep Time: 40 min
- Cook Time: 25 min
- Category: Dessert
- Method: Baking
- Cuisine: American
Nutrition
- Serving Size: 1 pie
- Calories: 280
- Sugar: 18
- Sodium: 150
- Fat: 15
- Saturated Fat: 9
- Unsaturated Fat: 6
- Trans Fat: 0
- Carbohydrates: 34
- Fiber: 2
- Protein: 3
- Cholesterol: 45
Keywords: mini apple pies, apple pie recipe, individual pies, dessert, baked apples