
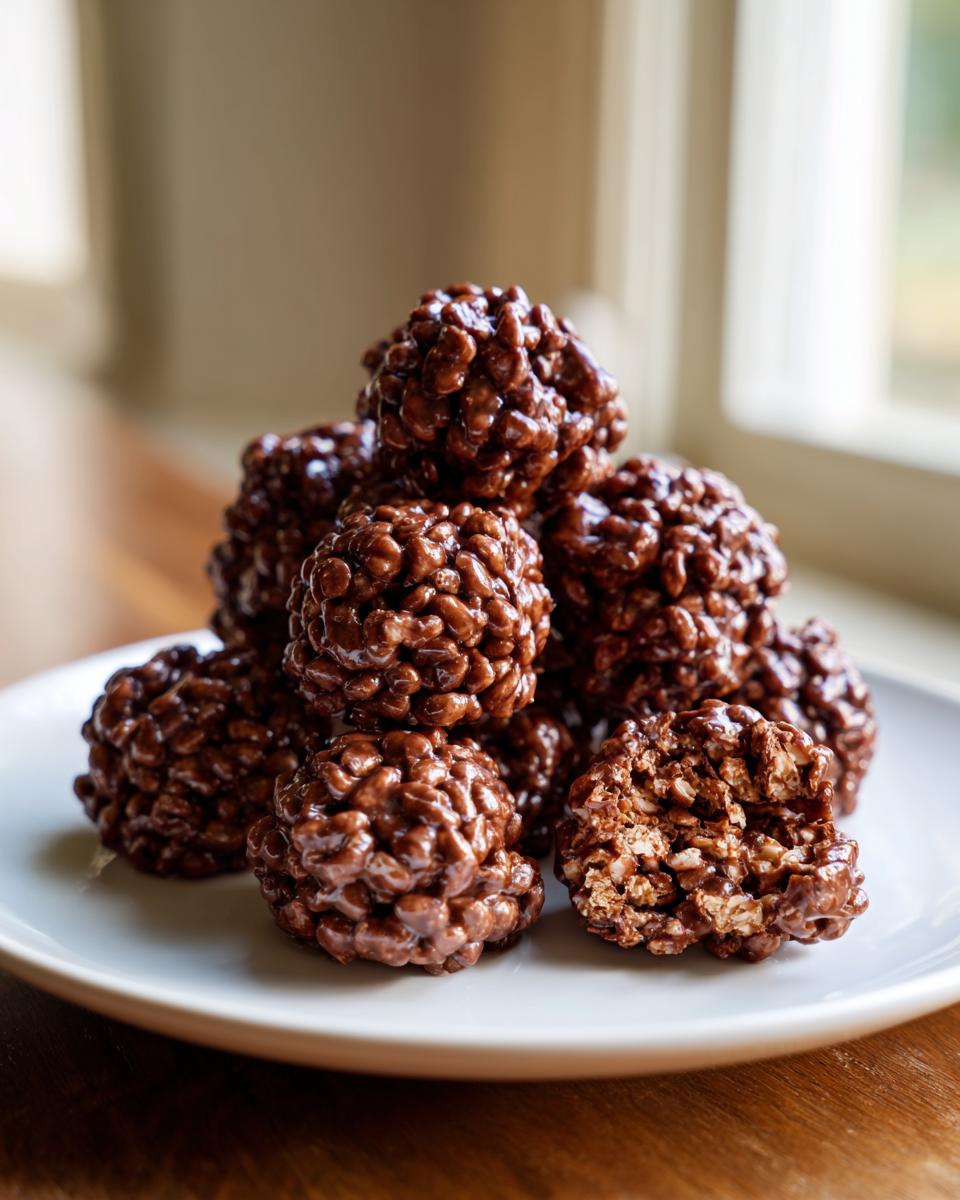
Oh, you know those days when you absolutely need a sweet fix, like, five minutes ago, but turning on the oven feels like too much effort? I live for those moments because they bring me straight back to making these **Chocolate Rice Krispie Balls**!
Seriously, these are my childhood weakness, repackaged for my super-busy adult life. They use simple pantry staples—cereal, chocolate, peanut butter—and there’s absolutely zero baking involved. If you need an unbelievably fast, no-fuss treat that tastes like pure comfort food, you’ve found your masterpiece. Trust me, these little chocolate clusters are going to save your next snack emergency!

Why You’ll Love These Easy Chocolate Rice Krispie Balls
- They are unbelievably fast! You go from zero to finished treat in under 20 minutes total, including chilling time. It’s magic, I swear.
- No oven required, ever. This is perfect for scorching summer days or when you just don’t want to heat up the kitchen for one tiny batch of something yummy.
- The chocolate and peanut butter swirl is deeply satisfying. They have that classic, familiar crispy texture but with the richness of peanut butter binding it all together.
- They are totally adaptable! If you need bright colors for a party, you can mix in sprinkles right before rolling them up. If you want to make something similar but different, this is a great base recipe to start from.
- They freeze beautifully! You can make a huge batch today and have dessert sorted for weeks, though frankly, they usually disappear on day one.
Honestly, what’s not to love when you can have chocolate goodness ready faster than it takes for your coffee to brew? This recipe is my go-to shortcut!
Essential Ingredients for Perfect Chocolate Rice Krispie Balls
You don’t need a long grocery list for these beauties, which is another reason I adore them. Keeping these items stocked means you can whip these up anytime the craving hits. Remember, the quality of the chocolate really shines through since there aren’t too many other flavors competing!
- Four big cups of puffed rice cereal—the classic stuff works perfectly.
- One cup of chocolate chips; I usually grab semi-sweet, but dark works if you like it less sweet.
- A full half-cup of creamy peanut butter. Don’t use the natural, oily kind—it gums up the works!
- One-quarter cup of light corn syrup. This is the magic glue ingredient that keeps everything smooth and pliable.
- Just one teaspoon of good vanilla extract for that background warmth.
That’s it! Four cups of cereal coated perfectly in a dreamy, no-bake chocolate shell. Check your pantry—you probably have everything right now!
Step-by-Step Instructions to Make Chocolate Rice Krispie Balls
Alright, grab your biggest microwave-safe bowl because this is where the magic happens fast! The trick here is managing the heat so you don’t burn your chocolate—don’t worry, I’ve burned batches before, so I speak from experience!
- First things first, get organized! Line a baking sheet—any size works—with parchment paper. This stops your little balls from sticking when they set up.
- In that big bowl, combine your chocolate chips, the creamy peanut butter, and the light corn syrup. See? Super simple start.
- Now, microwave time! Heat this trio on high for just 30 seconds. Pull it out and stir it really well. Trust me, the chocolate will still look chunky—that’s normal.
- Pop it back in for another 30 seconds, and check it again. Repeat this slow and steady heating process until everything is completely smooth and glossy. If you rush this, you’ll end up with seized chocolate, and nobody wants that disaster!
- Once it’s smooth as silk, stir in that teaspoon of vanilla extract. Gives it just a little something extra.
- Time for the cereal! Dump in all four cups of your puffed rice cereal. You need to mix this until every single bit of rice is coated in that warm, gooey chocolate mixture. It gets thick fast!
- Now, this next step is crucial for easy rolling, especially if you have smaller hands! Let the mixture cool down for about five to ten minutes. You want it warm enough to still be soft but cool enough that it doesn’t burn your fingers when you touch it.
- Grab small amounts—about a tablespoon—and roll them gently between your palms into little one-inch balls. Try to keep them uniform so they all look nice on the platter.
- Place those finished **Chocolate Rice Krispie Balls** onto your prepared sheet and pop the whole thing into the fridge for about 30 minutes. They need that chill time to firm up completely so they hold their shape when you serve them up. If you’re in a real hurry, you can try something else quick while you wait!
When they come out, they’ll be deliciously firm and ready to gobble down!
Tips for the Best Chocolate Rice Krispie Balls
Even the simplest recipes can go sideways if you skip a tiny detail! These little balls are pretty foolproof, but I’ve gathered my best advice over the years to ensure yours come out perfectly firm, never sticky, and packed with flavor. Seriously, get these tips down, and you’ll never look back. If you want to learn how to make another super quick treat, check out my guide for no-bake delights!
The biggest lesson I learned making these over the years is about patience during the cooling phase. I used to try rolling them when the mixture was scorching hot, and my hands ended up covered in sticky chocolate goo. Don’t do what I did! Let it sit for a solid ten minutes—it seems long when you’re craving chocolate, but it makes rolling them into perfect spheres so much easier.
When mixing the cereal in, don’t try to use a mixer or even a very stiff spatula. That just crushes the rice, and we want that satisfying *crunch*, right? Use a rubber spatula and just fold very gently. You want the cereal coated, not pulverized. A gentle hand makes all the difference when it comes to texture!
Also, for the neatest balls, lightly spray your hands with cooking spray *before* you start rolling. If your hands are prepped, the mixture won’t grab onto your skin, and you’ll get cleaner shapes. It’s a tiny cheat, but it works wonders, especially if you’re making a double batch!
Ingredient Notes and Substitutions for Chocolate Rice Krispie Balls
Even though this recipe is simple, ingredients matter! The peanut butter you use is surprisingly important. You absolutely must use the creamy, shelf-stable kind where the oil doesn’t separate. If you use natural peanut butter, the extra moisture separates, and your binding agent just won’t work right. Your balls will be oily and won’t set up properly, so stick to Jif or Skippy!
If you have a peanut allergy, swapping it out is easy enough. Almond butter or sunflower seed butter are great alternatives, but again, make sure they are the shelf-stable, processed kind for the best structural results. You can also play around with the chocolate a bit, too.
- Try using milk chocolate instead of semi-sweet for a sweeter treat, or add a tablespoon of cocoa powder to white chocolate chips if you want a white chocolate version.
- For a richer chocolate background, stir in a quarter teaspoon of instant espresso powder right when you add the vanilla. It won’t taste like coffee, I promise, it just deepens the chocolate flavor beautifully.
Don’t skimp on the corn syrup, though! That’s what keeps this recipe distinct from traditional Rice Krispie treats that rely on marshmallows. The corn syrup makes these balls denser and richer.
Variations on Classic Chocolate Rice Krispie Balls
Okay, now we get to the fun part! While I absolutely adore these **Chocolate Rice Krispie Balls** just as they are—simple, chocolatey perfection—sometimes you just need to customize a classic. Since the base is so solid, it begs for little touches of creativity! I play around with these constantly, depending on the holiday or what I have leftover in the pantry.
Here are three of my favorite ways to dress these little guys up without messing up that perfect crispy-gooey balance we worked so hard to achieve. Think of these as tiny canvases for your sweet tooth!
Adding Fun Textures and Colors
If you’re making these for a birthday party or even just a rainy Tuesday, adding a little pizzazz to the exterior makes them instantly more fun. You can toss in extras right before you start rolling them up, or you can coat them afterward!
- Sprinkle Bomb: Right after you fold the cereal into the chocolate mixture (Step 5), toss in about ½ cup of rainbow or holiday-themed sprinkles. Fold gently until they are just distributed. When you roll them, the color pops out everywhere!
- Crushed Goodness: I once crushed up some plain salted potato chips very finely and folded those in with the cereal. The saltiness cuts the sweetness of the chocolate so perfectly—it’s surprisingly complex! You could also use crushed pretzels for that same salty crunch, or even some leftover crushed sandwich cookies, similar to what I do when making other fun no-bake shapes.
The Fancy Double-Dipped Finish
If you want to make them look like fancy little truffles, you need to dip them. After you’ve rolled your cold, firm balls (Step 7), melt a separate container of white chocolate chips. Let the white chocolate cool down just a touch so it’s thick—you don’t want it running off the balls entirely.
Use two forks to dip half of each ball into the white chocolate. Set them back on the parchment paper. While the chocolate is still wet, sprinkle a little extra drizzle of melted milk chocolate over the top, or maybe some shredded coconut for texture. They look way more sophisticated than they actually are!
Switching Up Your Crunch Base
While the core recipe calls for puffed rice cereal, we can change the texture base dramatically without changing the peanut butter binder at all. This is where I start experimenting when I run out of my usual cereal!
- Oat Power: Substitute half the puffed rice cereal with quick oats. This gives them a chewier texture and a nice nutty flavor, making them feel a little more rustic and hearty.
- Crispy Corn Flakes: Corn flakes are a fantastic sub for rice cereal! They tend to absorb a little less binder, so your mixture might seem slightly looser, but they give you an even bigger, satisfying crunch factor! Just make sure you handle them gently when folding them in so they don’t break down too much.
See? So many ways to make these **Chocolate Rice Krispie Balls** uniquely yours!
Storage and Make-Ahead Tips for Your Chocolate Rice Krispie Balls
These **Chocolate Rice Krispie Balls** are honestly the best for making ahead of time. In fact, I think they taste even better the next day once all those peanut butter, chocolate, and vanilla flavors have really settled in together. They are the perfect treat to make when you’re planning a party because you can get them totally done ahead of time!
Since they are no-bake and rely on that chocolate setting up hard, storage is super important to keep them from getting soft or losing their shape. You definitely don’t want to leave these sitting out on the counter for long, especially if your kitchen is warm!
Storing Them Correctly
The rule here is simple: airtight and cold. You need a good, sturdy airtight container to keep out any fridge odors and prevent them from drying out. I always layer mine in a container but I make sure to put a piece of wax paper or parchment paper between the layers.
Why the paper? Because even when they are firm, if they sit directly on top of each other for too long, the oils in the peanut butter can cause them to stick together again. Nobody wants to pull a two-for-one Rice Krispie Ball when they want just one!
- Keep them in the refrigerator for up to one week. They stay perfectly firm this way.
- If you’re making a huge batch, you can totally freeze these! Wrap them tightly in a layer of plastic wrap first, and then pop them into a Ziploc bag or freezer-safe container. They last for about two months in the deep freeze.
- When you want to serve them after freezing, just pull them out and let them sit on the counter for maybe 15 minutes—but don’t let them warm up too much, or they get soft fast.
If you’re looking for other rich, easy desserts you can make ahead, you absolutely have to check out my recipe for Christmas Truffles; the storage rules are very similar!
Making Them Ahead of Time
You can easily knock these out the day before you need them, which is a lifesaver when hosting. I usually finish rolling them around dinnertime the night before a gathering, stick them in the fridge overnight, and they are ready to go when I need them the next day. They take about 30 minutes to fully “set” in the fridge, so if you’re in a pinch and need them faster than that, just give them a solid hour in the deep freeze and they’ll be firm enough to serve.
Honestly, the preparation takes longer than the clean-up, and since they hold up so well in the fridge, these **Chocolate Rice Krispie Balls** are my preferred do-ahead dessert every single time.
Frequently Asked Questions About Making Chocolate Rice Krispie Balls
I get so many questions about these little guys once people try them! They are so easy that sometimes people worry they must be doing something wrong if it seems too simple. Below are the things I hear most often when people are trying out their first batch of **Chocolate Rice Krispie Balls**.
Why are my Chocolate Rice Krispie Balls too sticky to roll?
Chances are, your chocolate mixture wasn’t quite cool enough, or you didn’t use the right kind of peanut butter. If it’s too hot, the mixture stays super soft and sticks fiercely to your hands. The key step I preach about—letting the mixture cool for that 5 to 10 minutes—is critical here! Also, remember my advice: use shelf-stable, creamy peanut butter. If you use natural peanut butter, the excess oil makes the mixture slimy and impossible to handle. If you’re mid-batch and they’re too sticky, just pop the whole bowl in the fridge for 15 minutes to firm up before trying to roll again!
Can I skip the corn syrup in Chocolate Rice Krispie Balls?
You really shouldn’t, unless you want a totally different kind of treat. The corn syrup does two big jobs here that marshmallows can’t quite replicate for this specific recipe. First, it keeps that melted chocolate mixture smooth, liquid, and glossy so it coats the cereal properly. Second, it acts as a binder that allows the balls to firm up nicely in the fridge without becoming rock hard or crumbly when you bite in. If you absolutely must skip it—maybe you don’t have any—you can try substituting an equal amount of honey or maple syrup, but you might need to use slightly less peanut butter next time as those syrups are often thinner overall. If you want to see what happens when you only use three ingredients, check out this simple recipe!
Do I have to use peanut butter? I’m allergic!
Nope, you absolutely do not have to use peanut butter! That’s the beauty of customizing. As I mentioned in the tips section, you can swap that out for an equal measure of creamy almond butter or sunflower seed butter. Just be mindful to use the smooth, processed kind, not one that separates or is oily, or you might run into those sticky issues again when rolling your **Chocolate Rice Krispie Balls**.
How long will these last if I store them properly?
Because the base is primarily chocolate, peanut butter, and cereal, they last quite well! As long as you keep them stored in an airtight container in the refrigerator, they should stay fresh and delicious for about a week. If you forget to seal the container, they might start to dry out a tiny bit on the outside after day four, so make sure that lid is secure!
Can I use a different cereal instead of puffed rice?
Yes, you definitely can! While I love the classic texture of puffed rice, corn flakes are a very popular substitute that offers a bigger crunch. You might notice the mixture seems a little looser because corn flakes are lighter, so be generous with your chilling time before you start rolling them up. Don’t crush them too much when you mix them in; you want that satisfying snap!
Estimated Nutritional Snapshot for Chocolate Rice Krispie Balls
Okay, so these little treats are definitely more fun than they are ‘health food,’ but it’s always good to know what you’re digging into, right? I pulled these numbers together based on standard versions of the ingredients we used—the semi-sweet chips, the creamy peanut butter, and regular puffed rice cereal.
Please remember this is just a general guideline. If you swap peanut butter for almond butter or decide to use dark chocolate instead of semi-sweet, those numbers will shift a little bit. These figures are based on one standard one-inch ball serving.
- Serving Size: 1 ball
- Calories: Right around 150 calories
- Fat: About 8g total fat
- Saturated Fat: 3g (That’s the chocolate talking!)
- Carbohydrates: 18g
- Protein: A nice little boost of 3g, thanks to that peanut butter!
- Sugar: Around 12g
- Cholesterol: Very low, about 5mg
See? Not terrible for a satisfying, no-bake dessert! They give you a decent little hit of energy from the cereal and those good fats from the peanut butter, making them feel much more substantial than a plain cookie. Enjoy them guilt-free (within reason, of course!).
Share Your Homemade Chocolate Rice Krispie Balls
That’s it, my friends! You’ve made it through the simple steps, and now you are the proud owner of some genuinely delicious, no-bake **Chocolate Rice Krispie Balls**. I truly hope you love these as much as my family does. They’re just one of those recipes that satisfies a craving perfectly without any fuss!
Now, I want to hear from you! Have you tried them? Did you stick to the classic peanut butter combination, or did you go wild with sprinkles or nuts? Don’t keep those kitchen secrets to yourself!
Please, please leave a rating at the top of the page—it helps other busy cooks find this quick recipe! And if you snapped a picture of your finished batch, I would absolutely love to see it. You can tag me or send me a note through my contact page. Seeing your crispy, chocolatey creations makes my day!
Happy rolling, and enjoy every single bite!
Print
Simple Chocolate Rice Krispie Balls
- Total Time: 16 min
- Yield: 18 servings 1x
- Diet: Vegetarian
Description
Easy-to-make no-bake balls using puffed rice cereal and chocolate.
Ingredients
- 4 cups puffed rice cereal
- 1 cup chocolate chips
- 1/2 cup peanut butter
- 1/4 cup light corn syrup
- 1 teaspoon vanilla extract
Instructions
- Line a baking sheet with parchment paper.
- In a large microwave-safe bowl, combine chocolate chips, peanut butter, and corn syrup.
- Microwave on high for 30 seconds, stir, and repeat until the mixture is smooth.
- Stir in the vanilla extract.
- Add the puffed rice cereal to the chocolate mixture and stir until fully coated.
- Let the mixture cool slightly until it is easy to handle.
- Roll the mixture into small balls, about 1 inch in diameter.
- Place the finished balls on the prepared baking sheet.
- Refrigerate for at least 30 minutes to set.
Notes
- Store leftovers in an airtight container in the refrigerator.
- For a different flavor, substitute almond butter for peanut butter.
- Prep Time: 15 min
- Cook Time: 1 min
- Category: Dessert
- Method: No-Bake
- Cuisine: American
Nutrition
- Serving Size: 1 ball
- Calories: 150
- Sugar: 12g
- Sodium: 60mg
- Fat: 8g
- Saturated Fat: 3g
- Unsaturated Fat: 5g
- Trans Fat: 0g
- Carbohydrates: 18g
- Fiber: 1g
- Protein: 3g
- Cholesterol: 5mg
Keywords: chocolate, rice krispie, no-bake, cereal treats, peanut butter balls