
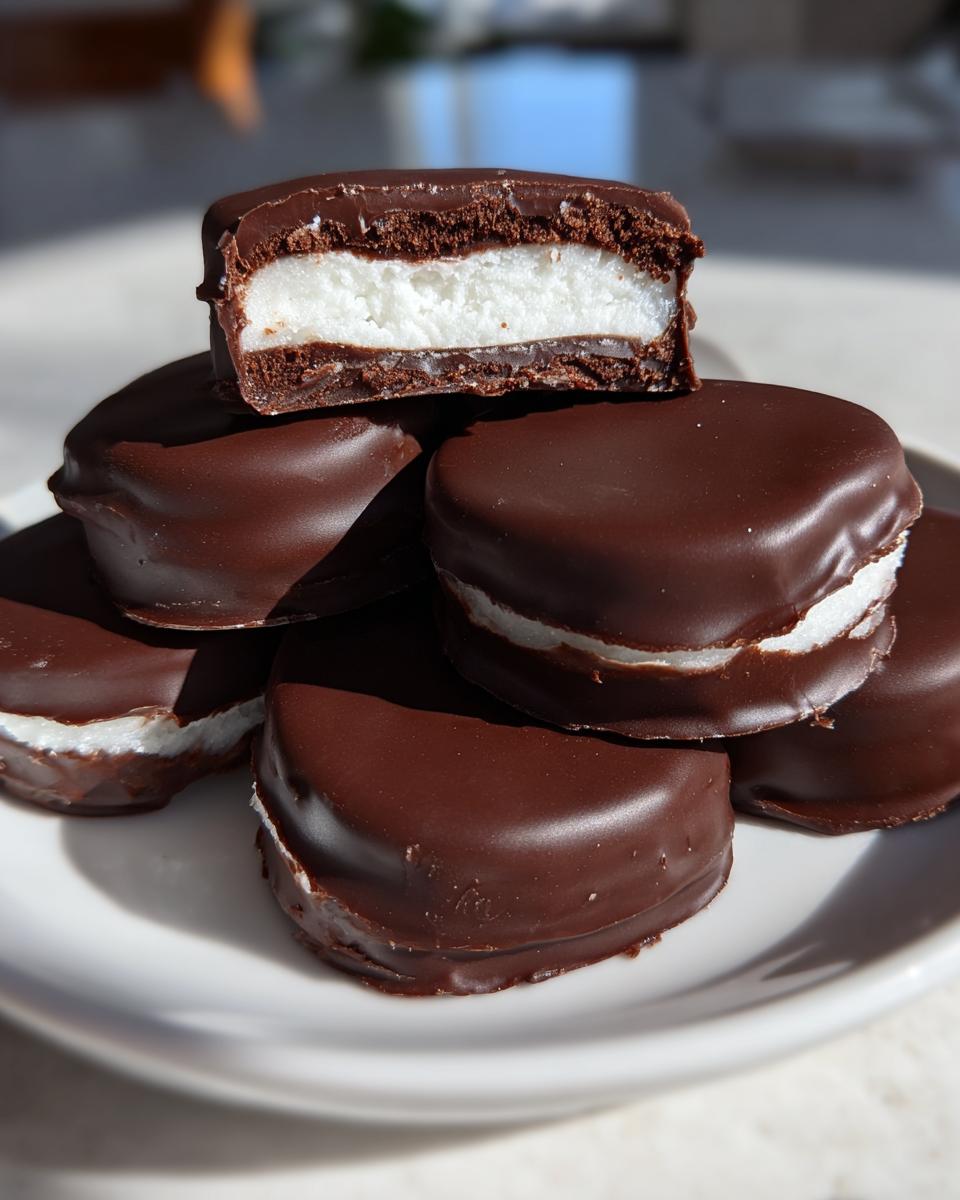
Oh, that craving hits hard, doesn’t it? That specific, cool, sweet hit you just *need* to squash immediately. Forget those waxy store-bought versions! Seriously, making your own homemade **Peppermint Patties** is one of the easiest wins in the kitchen, and trust me, your taste buds will thank you.
I used to think this candy bar knock-off was complicated, but what I discovered is that the no-bake method is hands-down superior. The filling sets up so incredibly creamy, and you control the peppermint punch! It feels luxurious, but it takes virtually no heat and just a bit of waiting time. Once you taste how fresh these are, you won’t ever go back to the foil-wrapped ones, I promise.
Why You Will Love Making Homemade Peppermint Patties
Making these at home isn’t just fun; it instantly elevates a simple treat into something truly special. If you’re on the fence, here are the major reasons I keep coming back to this recipe again and again, even when I’m feeling rushed.
- The Texture is Unbeatable: The filling comes out dense, perfectly smooth, and just melts in your mouth. You get that satisfying soft chew that the store-bought kind just can’t replicate because their filling is often drier.
- You Control the Mint Level: This is huge! Are you a subtle mint lover, or do you want to punch folks in the face with flavor? You add the peppermint extract, so you can dial it up or down until it matches your exact craving.
- Zero Oven Required: Seriously, no baking! This is my go-to candy for gifting or emergency dessert situations. As long as you have a fridge or freezer to help the chilling along, you can turn this around in under an hour of active work.
- It’s Cheaper Than Candy Bars: Let’s be honest, those little foil-wrapped treasures add up fast. This recipe yields about 20 patties using basic pantry staples, making it fantastic for holiday baking or just keeping your desk drawer happy.
Essential Ingredients for Perfect Peppermint Patties
You only need a handful of things for the filling, which is why I call this my emergency dessert recipe. Don’t try to substitute the corn syrup, though! That stuff is vital for getting that smooth, pliable texture instead of a hard, crumbly mess. Here’s what you absolutely need on hand before you start mixing.
For the mint center, grab:
- One cup of powdered sugar. Make sure it’s sifted if you notice lumps already forming in the bag!
- A half-cup of unsalted butter, and it MUST be softened. I usually take mine out about an hour before I plan to start.
- A quarter-cup of light corn syrup—don’t skip this, it’s the secret weapon!
- One teaspoon of vanilla extract for depth.
- And the star: a half-teaspoon of peppermint extract. Start small; a little peppermint goes a loooong way.
Then, for the glorious chocolate coating, you’ll need a cup-and-a-half of semi-sweet chocolate chips blended with just one tablespoon of shortening. The shortening is what keeps the chocolate from seizing up or cracking later. Check out these other amazing dessert recipes while you gather your supplies!
Equipment Needed to Prepare Your Peppermint Patties
Okay, before we dive into the mixing, let’s talk tools. The beauty of this no-bake candy is you don’t need a stand mixer or fancy dipping forks, although those things always help! But I promise, you can get professional results with just basics you probably already have hanging around your kitchen cabinets.
You’ll want to gather these items first to make sure the process flows smoothly:
- A sturdy medium mixing bowl. Something deep is best because we’re whipping butter and sugar, and we don’t want a white cloud puffing out onto your counter—oops!
- An 8×8 inch baking pan. This size is crucial for getting the right thickness for the patties, so try not to go significantly bigger or smaller.
- Parchment paper! This is non-negotiable for the 8×8 pan. It overhangs slightly, which makes lifting the whole slab of mint out so easy later when it’s time to cut.
- A microwave-safe bowl for melting our chocolate coating. A glass Pyrex bowl works perfectly here!
- A spatula or sturdy spoon for mixing the filling, and something flat—like an offset spatula or even a sturdy metal ruler if you’re feeling quirky—for pressing the mixture into the pan evenly.
That’s it! Simple setup means less cleanup, which is always a win in my book when making homemade candy.
Step-by-Step Instructions for Homemade Peppermint Patties
Alright, let’s get down to business! This is where we transform simple powders and fat into that dreamy, cool green center. The key here, like with all good candy making, is patience during the chilling phase. If you rush the cooling, your shaping will be a sticky disaster. So, let’s follow these steps exactly, and you’ll have professional-looking chocolate mint candies in no time!
Creating the Mint Filling Base
First things first: getting that base perfectly smooth is essential. You’re going to combine your powdered sugar, softened butter, light corn syrup, vanilla, and that powerful peppermint extract right into your mixing bowl. Use a sturdy spoon or a rubber spatula—no need to bring out the electric mixer for this part.
Mix everything together, and I mean *really* mix it. You need to beat away any lumps of powdered sugar you have hanging around. Keep folding and stirring until the mixture looks uniform, pale, and incredibly thick, almost like a stiff cookie dough. If you feel any grainy bits after a good two minutes of mixing, just keep working it! We are aiming for silkiness here.
Chilling and Shaping Your Peppermint Patties
Once that filling is totally smooth, it’s time to get it into its mold. Line that 8×8 pan with parchment paper, making sure it crinkles up the sides a bit so you have handles later. Scoop all that minty mixture into the lined pan, and then this part is crucial: press it down firmly and evenly.
You want an even thickness across the entire sheet, so use the bottom of a flat glass or your spatula to compact it nice and tight. Then, wrap it up—or just cover the pan with plastic wrap—and send it to the fridge. It needs to chill for a full hour. Seriously, set a timer. If you cut it warm, it’s going to squish out of shape and cling everywhere.
After that hour, lift the whole block out using the parchment overhang. Place it on a cutting board and slice it into squares or use a small round cookie cutter to make your classic patty shapes. Don’t worry about perfection yet; we are covering up any wobbly edges with chocolate!

Melting Chocolate and Dipping the Peppermint Patties
Now for the luscious chocolate coating. I always mix the chocolate chips and the shortening together in a microwave-safe bowl. The shortening is my secret for a chocolate shell that melts beautifully in your mouth instead of snapping off in a hard layer. Melt this in 30-second blasts, stirring well after every single burst. Don’t walk away—chocolate goes from perfect to scorched fast!
When it’s smooth and glossy, you’re ready to dip. I always grab my toothpick and gently pierce the side of the patty, holding it like a lollipop. Dip it completely into the warm chocolate, letting any excess drip quickly back into the bowl. Once you pull it out, use the tip of a second, clean toothpick to gently nudge the patty off the first one, dropping it onto wax paper. That way, you don’t drag chocolate all over the top surface! You can check out tips for other no-bake treats like this S’mores Lasagna while these cool down a minute.
Let them sit at room temperature or pop them in the fridge for just a few minutes until the chocolate is totally firm. That’s it—pure, homemade goodness!
Tips for Achieving Professional Peppermint Patties
Making these at home is easy, but getting that *perfect* professional look—super smooth, evenly coated, and perfectly snappy—takes just a couple of tricks I’ve picked up over the years.
Trust me, spending an extra minute here or there really pays off when you bite into that cool, minty center surrounded by crisp chocolate. These are my favorite little tweaks to ensure your homemade **peppermint patties** always look like they came straight from a fancy candy shop.
- The Peppermint Punch Rule: When adding the peppermint extract, always start with less than you think you need. It’s way easier to add another drop than it is to fix a batch that tastes like toothpaste! Mix it in, wait 30 seconds, and then taste a tiny bit of the filling mixture. If it needs more zing, add a tiny bit more peppermint, then re-mix well.
- Fixing Cracking Chocolate: If your chocolate coating is looking dull or starts cracking as it cools, chances are you either overheated it or didn’t use the shortening. If it seizes up and gets thick unevenly, take it off the heat right away, stir in one more teaspoon of shortening (or even a few drops of neutral oil), and whisk vigorously off the heat. This usually saves it!
- The Art of the Thin Dip: For that really elegant, thin chocolate shell, make sure your mint patties are totally chilled when they go into the coating. Cold filling cools the chocolate down just enough during the dip that it sets quickly and thinly. Also, right after you dip it, gently tap the bottom of your dipping tool (toothpick or fork) against the edge of the bowl—don’t bang it hard, just a light tap—to send those little excess chocolate drips back into the bowl.
- Don’t Forget to Salt: I know it sounds wild in a candy, but a tiny pinch of fine sea salt mixed right into the chocolate coating or even dusted lightly over the patties before the chocolate sets enhances the chocolate flavor beautifully. It cuts the pure sweetness just enough. You might even want to check out how salt balances the sweetness in these chocolate chip cookies while you’re considering flavor boosters!
Variations on Classic Peppermint Patties
Once you’ve mastered the basic recipe—which, let’s be real, you totally have because it’s so simple—you can start playing around! Candy making is just chemistry you can eat, and sometimes a small tweak makes things even better. I usually stick to the classic version, but every now and then, especially around the holidays, I like to jazz things up a bit.
These swaps are easy breezy and don’t require you to buy a ton of new ingredients. They just change the final flavor profile of your delicious **peppermint patties**.
For example:
- Switch Up the Chocolate: If semi-sweet is just too mild for you, try using dark chocolate chips for the coating instead! The slight bitterness of the dark chocolate pairs unbelievably well with that cool mint filling. It makes the whole thing feel a bit more grown-up. You can even try white chocolate if you’re feeling really wild, though you definitely need to use a tiny bit less corn syrup in the filling if you go that route.
- Salt in the Center: This is my absolute favorite little hack, and it’s so subtle. Before you press that mint mixture into the pan, stir in just a tiny pinch—maybe 1/8th of a teaspoon—of fine sea salt. It doesn’t make the patty salty, but it seriously deepens the sweetness and makes the chocolate taste richer. It’s like magic for your sweet tooth. You can see how small amounts of salt can balance sweetness in other bakes, like in these tahini cookies!
- Go Spearmint Crazy: If peppermint feels too sharp for you, try swapping out the extract! Spearmint extract gives you that classic mint flavor but with a softer, sweeter personality. You could even try a 1/4 tsp peppermint and 1/4 tsp spearmint if you want a complex flavor profile. Just remember: extracts are potent, so add slowly!
Keep these simple variations in mind for birthdays or when you need a quick, customized treat. They really are versatile little candies!
How to Store and Keep Your Peppermint Patties Fresh
Once you’ve gone through the effort of making these gorgeous homemade **peppermint patties**, you want to make sure they last long enough for you to enjoy them, right? The good news is that since these are a no-bake candy, they store better than most baked goods, but we do have to be polite to that chocolate shell.
My number one rule for storage is to keep them away from excessive heat and moisture. Humidity is the sworn enemy of a shiny chocolate coating! If your kitchen is damp or warm, the chocolate will start to get that dull, streaky appearance—we call that fat bloom, and it happens when the fats separate due to temperature shifts.
Here’s how I manage my stash, which almost never lasts longer than a week in my house, but these guidelines should help you stretch them further:
- Airtight Container is Key: Always store your finished patties in a quality airtight container. This keeps air out, which slows down any potential drying of the filling and protects the chocolate from absorbing any fridge odors.
- Room Temperature Storage: If your house stays relatively cool (under 70°F), you can absolutely keep these on the counter. They’ll stay nice and soft this way. In a good container, they should easily last a full week, maybe even ten days, tasting fantastic.
- The Refrigerator Trick: If you live somewhere hot, or if you’ve made a huge batch you want to last longer than a week, they are happier in the fridge. Just make sure you place a piece of wax paper or parchment between the layers of patties inside that airtight container. This stops them from sticking together. When you pull them out, let them sit on the counter for about 15 minutes before eating so the chocolate isn’t rock hard.
- Freezing for Long-Term: Yes, you can freeze these! Wrap the entire batch snugly in plastic wrap first, then pop that wrapped package into a freezer-safe zip-top bag. They freeze beautifully for up to two months. The chocolate holds up great, and the mint filling doesn’t get icy. Just thaw them slowly in the fridge first before bringing them to room temp to enjoy!
Frequently Asked Questions About Peppermint Patties
When you make something this delicious from scratch, you inevitably end up with a few questions! I’ve gathered the ones I get asked most often about these perfect no-bake **peppermint patties**. Sometimes it’s about troubleshooting, and sometimes it’s just figuring out the best way to display these gorgeous **chocolate mint** creations.
Don’t worry if your first batch isn’t exactly showroom perfect; mine certainly weren’t! Use these tips to make sure every batch is a winner. If you have questions about other easy refrigerator desserts, check out my recipes for no-bake strawberry cream pie too!
Can I skip the shortening when melting the chocolate for the Peppermint Patties?
You *can*, but I honestly wouldn’t recommend it unless you have a really good reason! The shortening (or sometimes a tsp of coconut oil works too) is what lowers the melting point just slightly and helps keep the chocolate coating super pliable and shiny after it sets. If you just melt the chips alone, the chocolate tends to become brittle. When you bite into it, instead of a nice snap, the chocolate breaks off in hard shards, and sometimes it even gets a dull look or turns slightly streaky—that dreaded bloom.
If you absolutely *must* skip it, melt the chocolate very slowly over a double boiler instead of the microwave. But if you have the tablespoon of shortening, use it! It makes dipping so much easier.
How do I get the filling to set faster for my Peppermint Patties?
I totally get it—the waiting period can feel like forever when you’re in a candy-making mood! The recipe calls for an hour in the fridge to make sure you can cut clean shapes without everything squishing, but you can shave off some of that time if you’re desperate.
I usually recommend putting the pressed filling block into the freezer for 20 to 30 minutes *after* it’s had about 20 minutes in the fridge. This rapid chill makes it firm enough to cut beautifully. However, I caution you not to leave it in the freezer too long! If it gets rock hard, cutting it can actually cause it to crack or break apart instead of slicing cleanly, which makes dipping messy. A nice hard chill is perfect; rock solid is too much!
Estimated Nutritional Information for Peppermint Patties
Now, just a little heads-up before you dive into the numbers! Because we are making these delicious homemade **peppermint patties** from scratch, the exact totals can swing slightly depending on the brand of chocolate chips you use or if you used a tad more or less peppermint extract. So, treat these figures as a really close estimate for one glorious patty, based on the recipe amounts listed.
I always find it helpful to see the breakdown, just so I know what I’m dealing with when I grab one (or three!) for an afternoon treat. This recipe is certainly more of a fun indulgence than a health food, but honestly, the satisfaction you get from making them yourself is worth every single calorie!
Here is the estimated nutritional breakdown per serving (one patty):
- Serving Size: 1 patty
- Calories: 180
- Sugar: 18g (Yep, it’s candy, folks!)
- Fat: 12g
- Saturated Fat: 7g
- Sodium: 10mg
- Carbohydrates: 19g
- Protein: 2g
- Cholesterol: 15mg
Remember, this is an estimate, but it gives you a great ballpark idea for enjoying these fantastic **no-bake candy** treats. They disappear so fast, you might not even need to track it!
Print
Homemade Peppermint Patties
- Total Time: 85 min
- Yield: About 20 patties 1x
- Diet: Vegetarian
Description
Simple recipe for making refreshing peppermint patties at home.
Ingredients
- 1 cup powdered sugar
- 1/2 cup unsalted butter, softened
- 1/4 cup light corn syrup
- 1 teaspoon vanilla extract
- 1/2 teaspoon peppermint extract
- 1 1/2 cups semi-sweet chocolate chips
- 1 tablespoon shortening
Instructions
- In a medium bowl, mix powdered sugar, softened butter, corn syrup, vanilla extract, and peppermint extract until smooth.
- Press the mixture into an 8×8 inch pan lined with parchment paper. Chill for 1 hour until firm.
- Cut the chilled mixture into small, round or square patty shapes.
- Melt the chocolate chips and shortening together in a microwave-safe bowl in 30-second intervals, stirring until smooth.
- Dip each patty into the melted chocolate, ensuring full coverage. Place on a wax paper-lined baking sheet.
- Allow the chocolate to set completely at room temperature or briefly in the refrigerator.
Notes
- For cleaner dipping, use a toothpick to hold the patty and dip it, then remove the toothpick before the chocolate sets.
- Store finished patties in an airtight container.
- Prep Time: 20 min
- Cook Time: 5 min
- Category: Dessert
- Method: No-Bake/Chilling
- Cuisine: American
Nutrition
- Serving Size: 1 patty
- Calories: 180
- Sugar: 18
- Sodium: 10
- Fat: 12
- Saturated Fat: 7
- Unsaturated Fat: 5
- Trans Fat: 0
- Carbohydrates: 19
- Fiber: 1
- Protein: 2
- Cholesterol: 15
Keywords: peppermint patties, homemade candy, chocolate mint, no-bake dessert, peppermint