
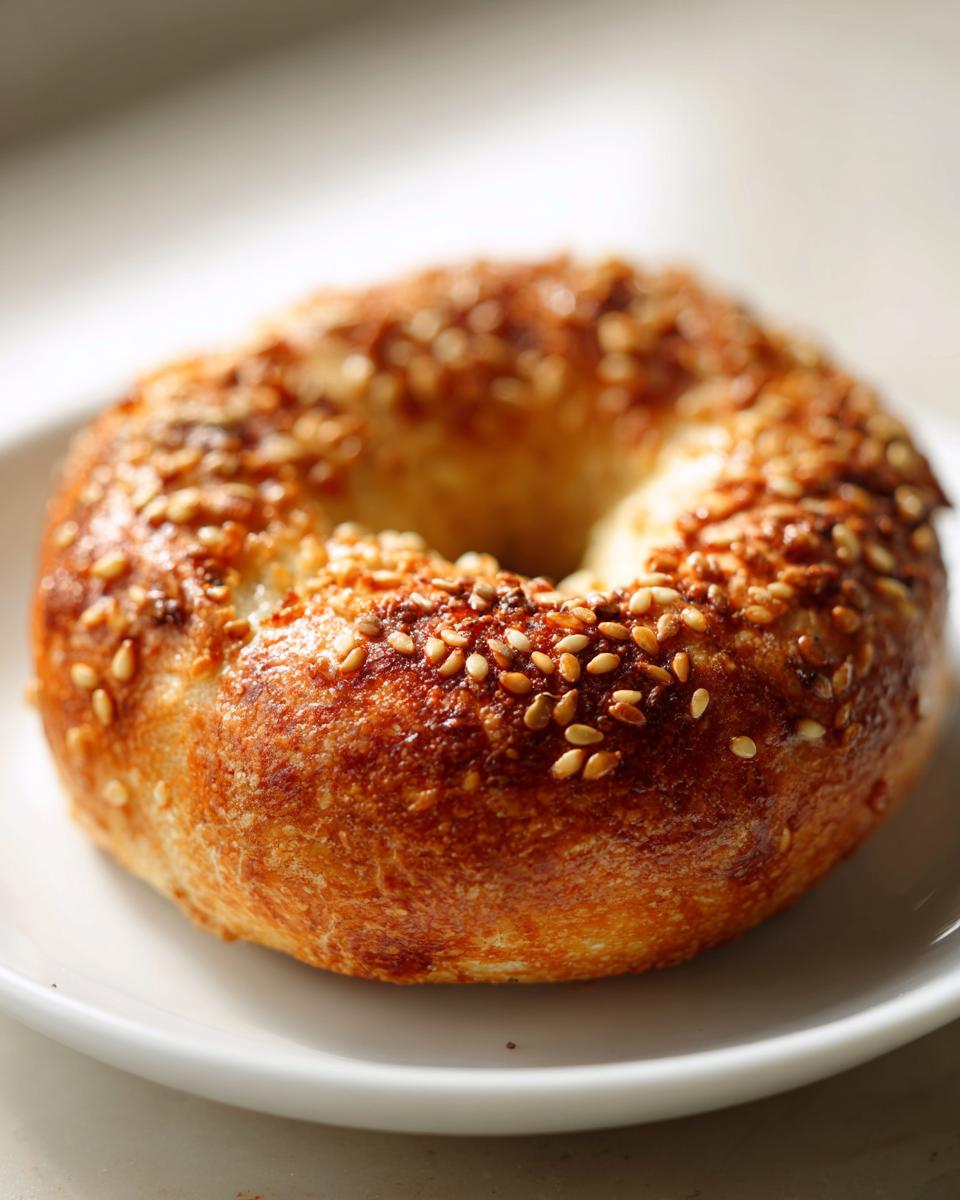
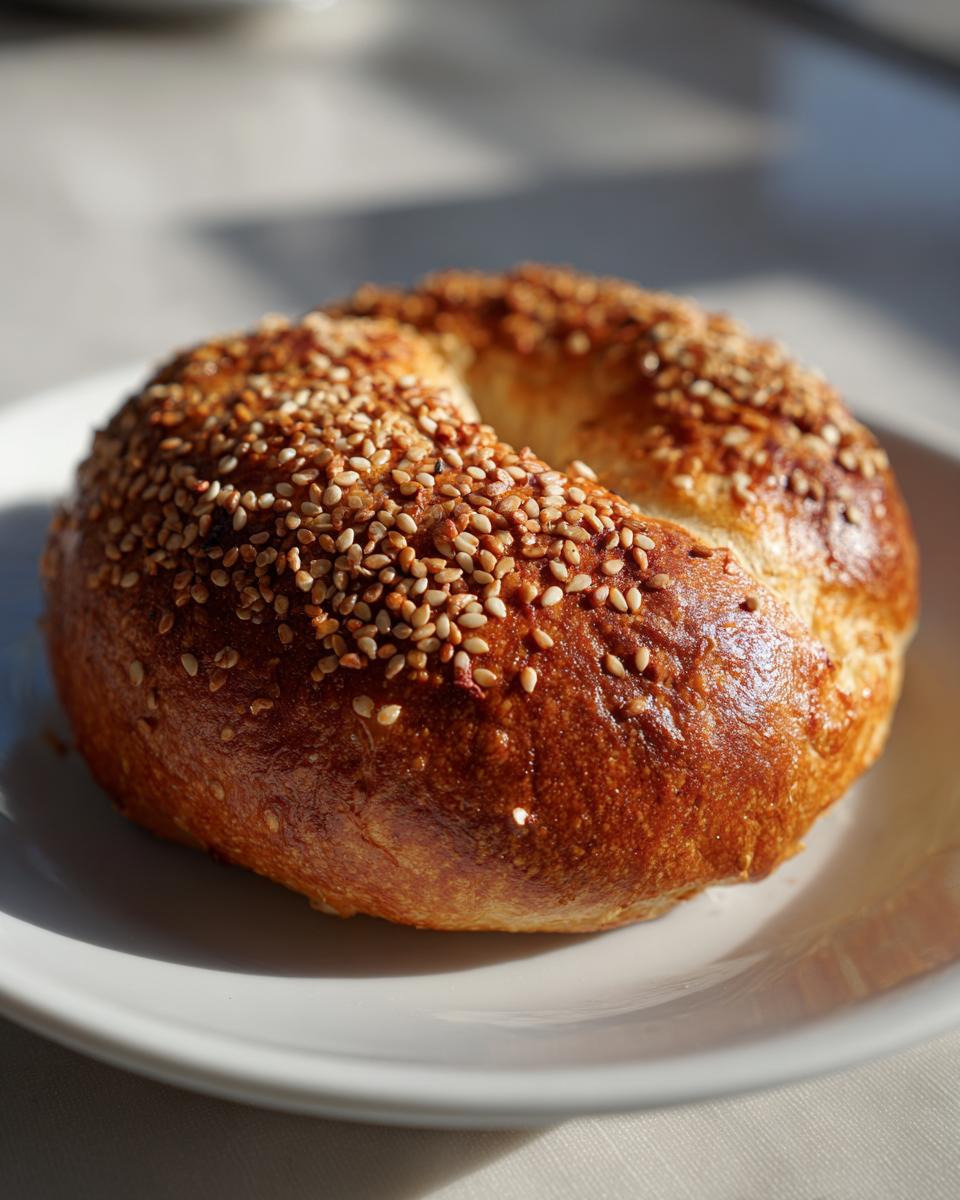
Oh, there is just *nothing* that beats the smell of yeast and hot sugar wafting through the kitchen on a Saturday morning. I’ve been chasing the perfect homemade bagel for years. You know, the kind where you bite into it and it actually fights back a little? Well, friends, I’ve cracked the code! Forget those little dainty rings you see in the store; we are making proper, substantial Monster Bagels here. These are not messing around—they are satisfying, chewy on the inside, slightly crisp on the outside, and seriously huge. I’ve had so many flat, gummy failures, but I learned the hard way that the boiling time is absolutely non-negotiable! Trust me, once you taste one of these giant breakfast breads fresh from your own oven, you’ll never look back.
Why You Will Love Making These Monster Bagels
I know what you must be thinking: making bagels from scratch sounds like a whole ordeal, right? Wrong! These Monster Bagels are surprisingly straightforward once you understand the two secrets: the long knead and the quick boil. You get all the flavor and texture of a genuine artisanal bagel, but you get way more of it! I promise you, slicing one of these babies in half after it cools is pure joy.
Key Features of Our Monster Bagels
- Truly oversized portions for maximum breakfast satisfaction.
- That perfect texture contrast: a satisfyingly chewy interior wrapped in a shiny, crisp crust.
- They freeze beautifully, so you can have ‘Monster Bagel Day’ any day of the week!
- The dough is sturdy enough to handle heavy toppings without collapsing.
Gathering Ingredients for Your Monster Bagels
Okay, let’s talk supplies! The beauty of these Monster Bagels is that they rely on pantry staples—nothing too fancy, which is why I always have what I need on hand. You do need bread flour, though. Please don’t try to skimp here with all-purpose; the higher protein in bread flour is what helps these giants hold their shape against that boiling water. Remember, warm water means the yeast wakes up happy—think lukewarm bath temperature, not scorching!
Essential Components for Perfect Monster Bagels Dough
This is where the magic starts. Measure this out carefully; it’s the foundation for a big, chewy bite!
- Bread Flour: You need 4 full cups of it. This is the backbone!
- Active Dry Yeast: Just 1 packet is perfect for this amount of dough.
- Sugar: 1 tablespoon—this is for the yeast party, not for making the bagel sweet.
- Salt: 1 teaspoon, don’t leave it out; it controls the yeast and adds flavor.
- Warm Water: About 1 1/2 cups. Test it on your wrist; it should feel nice and warm, not hot.
The Boiling Bath and Topping Ingredients
These next bits are crucial for getting that beautiful shine and color we love on a true bagel. You can get really wild here with your toppings!
- Egg White: 1 egg white, beaten lightly. This is what gives us that professional gloss.
- Water for Boiling: Just 1 tablespoon mixed with that egg white.
- Toppings: Whatever makes your heart sing! Sesame seeds, poppy seeds, maybe some dried onion flakes? Go for it!
Equipment Needed to Create Monster Bagels
Look, you don’t need a fancy stand mixer for these behemoths, though it certainly helps with the kneading if you have one! What you *do* need is patience and the right foundation pieces for handling a large, sticky dough. Since we are boiling these magnificent rings before baking, we need some serious hardware ready to go!
Don’t sweat if your equipment list looks short—it really is just about having the right vessels for the job. Having these items ready before you even start mixing the flour means things run smoothly when the dough is finally rising and you’re getting ready for that crucial bath!
- A Really Big Mixing Bowl: Seriously, get the biggest one you own. When this dough doubles in size, it needs room to breathe and stretch out without spilling over the counter.
- Large Pot for Boiling: You need a pot deep enough so that when you drop the bagel in, it’s fully submerged. I use my biggest stockpot—it needs enough water volume so the temperature doesn’t drop too fast when the cold dough goes in.
- Baking Sheets and Parchment Paper: Even though we’re boiling them, you need a safe, non-stick home for them once they come out of the water. Parchment paper is a lifesaver here!
- Wire Cooling Rack: Once these giants come out golden brown from the oven, they must cool properly. A rack lets the air circulate underneath, keeping the bottoms from getting soggy—and trust me, you want a crisp bottom on your Monster Bagels!
Step-by-Step Instructions for Perfect Monster Bagels
Alright, deep breath! This is where we turn that soft, slightly sticky mass into real, honest-to-goodness bagels. Don’t worry about rushing; some steps need you to slow down so you can appreciate the transformation. The instructions here follow the recipe exactly, but I want you to focus on the *feel* of the dough at each stage. It’s not just following a list; it’s about mastering the technique that makes these Monster Bagels so spectacular!
Mixing and Kneading the Monster Bagels Dough
First things first: combine all your dry ingredients—flour, yeast, sugar, and salt—in that big bowl we talked about earlier. Give them a quick whisk so everything is happy and evenly distributed. Now, pour in your warm water. It’s going to look shaggy and messy at first, like your dough decided it needed a nap. That’s fine! Dump that mess onto your counter and get ready to work. You must knead this dough for a good 8 to 10 minutes straight. I know, my arms get tired too! But seriously, keep going until it stops sticking to your hands and feels smooth and elastic. That’s the gluten structure building, which stops your bagel from flattening out.
First Rise and Shaping Your Monster Bagels
Once you have that beautiful, smooth dough, put it in an oiled bowl, cover the whole thing with plastic wrap or a damp tea towel, and let it chill out in a warm spot for about an hour. It needs to double in size; don’t rush this resting period! When it’s puffy, gently punch the air out. Now comes the fun part: divide that huge lump into 6 equal pieces. Roll each piece into a tight ball, and then—the iconic step—poke a hole right through the middle for your shape. Make that hole look small, even a little too small! It’s going to shrink as it boils, and if you start with a big hole, you’ll end up with a flat doughnut.
The Crucial Boiling Step for Monster Bagels
This step is what separates a chewy bagel from a sad, bread-like thing. Get that big pot of water boiling hard. Here’s our secret shine-enhancer that goes into the water: whisk that single egg white with the tablespoon of water and toss it in. It sounds strange, but it helps the outside get that gorgeous, dark crust. Drop your shaped bagels in, no more than two or three at a time so the water stays hot. You boil them for exactly 30 seconds on the first side, flip them over, and boil for another 30 seconds on the second side. Any less and they won’t be chewy enough; any more and they’ll get tough!
Baking and Cooling Your Monster Bagels
Scoop those nice, puffy, boiled bagels out and set them immediately on your parchment-lined baking sheet. While they are still damp, this is the time to brush them with any leftover egg wash and shower them with your favorite toppings—be generous! Make sure your oven is roaring hot; we preheat to 400 degrees Fahrenheit (or 200 degrees Celsius). Bake them for about 20 to 25 minutes. You are looking for a deep golden brown color! Once they are out, move them straight onto that wire rack. Resist the urge to tear one open immediately; they need that cooling time to set the texture properly. You can check out how I handle other breads like pita while you wait for these giants to cool down a bit, if you need something else bread-y on the side!

Expert Tips for Achieving the Best Monster Bagels Texture
We finally made it to the part where we perfect these Monster Bagels! Getting that bakery-quality chew isn’t just luck; it comes down to a couple of tweaks my testing taught me. The recipe itself is fantastic, but these little adjustments take things from ‘great homemade bagel’ to ‘I can’t believe I bought these!’ territory. Don’t feel like you have to do them all, but if you want that ultimate texture, listen up!
Overnight Rest for Chewier Monster Bagels
If you’re feeling ambitious and can plan ahead, this is my absolute favorite trick for deep flavor and an incredible chew. After you’ve shaped the balls and poked those precious holes in your Monster Bagels, don’t let them rise again at room temperature. Instead, brush them lightly with oil, place them on a tray, cover them tightly, and stick the whole thing in the refrigerator overnight—say, 12 to 18 hours works wonders. This slow, cold fermentation develops so much more flavor than the quick room-temp rise. When you pull them out the next morning, they are ready straight for the boiling pot. They get so much chewier!
Boiling Water Adjustments for Color
Remember how we talked about the boiling step? That’s key for the outside texture, but if you want that really dark, almost mahogany crust that the fancy places have, you need a little secret weapon: malt syrup. If you have dark malt syrup in your pantry, swap out the 1 tablespoon of sugar you used in the dough for it, and then add a tablespoon of that malt syrup right into your boiling water along with the egg wash. It gives them an amazing depth of color and a slightly richer, darker crust. It’s completely optional, but wow, does it make these bagels look professional!
Also, speaking of flour—since these are Monster Bagels and need structure, I always remind people to use bread flour. If you absolutely must substitute, use a high-protein flour, but skip all-purpose if you can help it! That extra gluten structure helps these big guys stand up to the boiling process without turning into floppy noodles.
Creative Variations for Your Monster Bagels
Now, these base Monster Bagels are fantastic all on their own—seriously, just toasted with butter is a meal! But since you’ve put in all that effort to boil and bake these beautiful behemoths, why not have some fun? I love treating the dough like a blank canvas. You can take these recipes in so many directions before they even hit the boiling water or after they cool down!
Here are a few ways I like to switch things up so we don’t get bored with perfection:
- Cheese, Please: If you’re a savory lover, mix about 1 cup of shredded sharp cheddar right into the dough, *after* the initial kneading, but *before* the rise. You want to add it late so the cheese doesn’t break down too much during the kneading process. When they come out of the oven, they smell incredible!
- The Everything Bagel Monster: This is obvious, but go wild with the toppings! After boiling, before baking, don’t just sprinkle; *press* the toppings into the moist surface. I mix my own everything blend with extra dehydrated garlic and onion flakes. If you pack it on, you get this amazing crunchy layer you just don’t get with store-bought versions.
- Cinnamon-Sugar Swirl: For a giant sweet treat, mix 1/4 cup of brown sugar with 2 teaspoons of cinnamon. After you roll your dough balls and poke the holes, gently flatten one side, sprinkle liberally with the cinnamon sugar mix, and then fold the dough back over itself before boiling. It creates a little sugary stripe when sliced open!
No matter what you choose, the boiling step remains your friend. It sets the stage for whatever crazy, delicious topping you decide to coat your fresh Monster Bagels with!
Serving Suggestions for Your Giant Monster Bagels
So, you’ve done the work. You’ve kneaded, you’ve boiled, you’ve baked these magnificent, oversized Monster Bagels! Now the real fun begins: eating them! Because these are so massive and satisfying, they can really anchor an entire meal. I’ve stopped buying tiny bagels entirely because why would I want less when I’ve worked this hard?
The first thing everyone reaches for, of course, is a thick smear of cream cheese, but don’t stop there! Even if you’re craving something savory and satisfying, these babies are perfect. They’re sturdy enough to handle everything without getting soggy underneath the weight of your fillings.
If you happen to have some leftover sausage and gravy from a weekend brunch—and I hope you do, maybe from my favorite biscuits recipe—instead of biscuits, use a toasted half of one of these Monster Bagels as the base. It soaks up that gravy beautifully!
Here are my absolute go-to ways to enjoy these:
- The Classic Works: Don’t be modest with the cream cheese! Go thick, add capers, thin slices of red onion, and a generous helping of good quality lox or smoked salmon. The surface area of these large bagels makes for the ultimate platter.
- The Ultimate Breakfast Sandwich: Because they are so big, you can build a real sandwich. Butter the toasted halves, pile high with two fried eggs, crisp bacon, maybe some avocado, and a slice of sharp provolone. It’s messy, but it’s worth every drip down your arm.
- Simple Butter Bliss: Sometimes, when they are just cooling off the rack, all you need is a generous spread of real, salted butter allowed to melt right into that chewy interior. That simple combination of crust, soft crumb, and butter is unmatched.
Honestly, once you have a Monster Bagel, even simple toast with jam tastes better because you know you’re getting a hearty serving size!
Storage and Reheating Instructions for Monster Bagels
So, you’ve made a dozen Monster Bagels, but realistically, you can’t eat all of them in one sitting—though I’ve definitely tried! Storing them properly is key because unlike regular bread, bagels can go stale on you fast if you treat them wrong. We want to keep that beautiful chewy interior intact!
For the first day, keep them on the counter. But after that, we need to be strategic, otherwise, that crisp exterior turns leathery!
Storing Fresh Monster Bagels
If you plan on eating your Monster Bagels within 24 hours, keeping them at room temperature is fine. I stack mine cut-side up in a paper bag, and then loosely wrap that whole bag in a plastic baggie. Why the paper first? To keep the crust from getting soggy from trapped moisture, but the loose outer plastic helps slow down the staling process a bit. Don’t put them in the fridge! Refrigeration is the enemy of good bread texture; it makes them go hard twice as fast.
The Freezer is Your Best Friend
If you have more than a day’s worth, you absolutely must freeze them. This is how you keep that fresh-baked taste for weeks! First step: wait until they are completely cool. Don’t you dare freeze warm bagels, or you’ll end up with a giant ice brick. Slice each one in half *before* freezing—this is a huge time saver later. Wrap each individual bagel half tightly in plastic wrap, and then toss the wrapped halves into a heavy-duty freezer bag. They will be perfect for up to two months this way.
Waking Up Those Frozen Monster Bagels
When you pull one out of the freezer, you want it to taste like you just pulled it off the cooling rack. Don’t just microwave it! That’s instant rubber. The best method involves briefly returning that boiled, baked texture to the crust. First, unwrap the frozen half and pop it directly into a toaster oven or a regular oven set to about 350 degrees Fahrenheit (175 Celsius). Let it sit for about 5 to 8 minutes. You want the center to thaw completely and the outside to crisp up again. If you’re in a huge rush, a quick 30 seconds in the microwave *followed immediately* by a minute under the broiler works in a pinch, but trust me, the oven method alone gives you that perfect contrast for your giant Monster Bagels!
Frequently Asked Questions About Making Monster Bagels
I know you’re probably getting ready to haul out that dough, but just in case you have a lingering question about what makes these Monster Bagels tick, I pulled together the most common ones I always get asked. Bagel-making can feel intimidating, but once you get past the boiling part, it’s just like making any sturdy bread dough!
Can I skip the boiling step when making Monster Bagels?
Oh, heavens, please don’t! This is the number one mistake people make when they try to bake Monster Bagels at home. If you skip the boil, you are making a very large, oddly shaped roll, not a bagel. Boiling for that short 30 seconds on each side gelatinizes the starch on the outside of the dough. That’s what creates that signature crisp, chewy ‘shell’ that resists sogginess and gives us that lovely shine. If you skip it, your crust will be soft and your texture dense and bready inside. It’s non-negotiable for real bagels!
What is the best flour substitute for these large bagels?
I always, always advocate for bread flour here. I stress it because these are Monster Bagels—they need the high protein content (usually 12% or higher) to develop strong gluten just like we talked about during the kneading stage. That strength is what holds the gas in and lets them puff up during boiling and baking without collapsing into sad, flat discs. If you absolutely can’t find bread flour, look for a ‘High-Protein All-Purpose’ blend. But honestly, for size and chew, nothing beats dedicated bread flour. You can find some great guides on flour types in general, much like what I read up on when perfecting bread doughs that need good structure.

If you have any other burning questions about yeast activity or why your shaping went sideways, drop them below! I love hearing about your baking adventures.
Estimated Nutritional Profile for These Monster Bagels
Hey there! So, we’ve baked these huge, glorious Monster Bagels, and I know some of you are wondering what kind of fuel you just put into your body. That’s fair! I’ve listed out the general counts based on the recipe using standard bread flour and no specialty toppings, but you have to listen to me on this one point:
This nutritional breakdown is just an estimate, okay? It’s a starting point, not gospel truth, because the actual figures change depending on which brand of yeast you used, exactly how much water the flour absorbed, and what kind of toppings—if any—you went totally wild with on top!
Since these are Monster Bagels, remember that one bagel is a very generous serving size compared to the tiny ones they sell in the store. I ran the numbers based on 6 equal servings, and here’s the rough idea of what you’re looking at:
- Calories: Around 280 per serving—not bad for such a huge, satisfying chunk of morning bread!
- Protein: About 11 grams, thanks largely to that fantastic bread flour.
- Fat: Really quite low, usually just 1 gram total per bagel since we aren’t adding any fatty liquids or oils into the dough structure itself.
If you load it up with half a tub of cream cheese and lox, well, those numbers are going to jump, so just keep that in mind when you’re loading up that perfectly toasted half of your Monster Bagel!
Share Your Giant Homemade Bagel Creations
Whew! We made it to the end, and you’ve got a cooling rack full of these absolutely massive, chewy, perfectly boiled Monster Bagels! Doesn’t that crust smell heavenly? I truly hope they turned out exactly how you pictured them. I pour my heart into these recipes, hoping they fill your home with that incredible yeasty, warm aroma, and I always want to see the results!
So now it’s your turn to share your success! Did your hole stay small enough during the boil? Did you manage to resist eating them all straight off the rack? I’d love to hear about your experience, especially if you tried one of the flavor variations!
Please take a second to leave a rating for the recipe right below—it helps other bakers like you know they can tackle these giants! And if you managed to snap a picture of your platter of oversized breakfast goodness, please tag me! Sharing your photos online lets me see how your gorgeous Monster Bagels turned out. I’m always looking for new ways people are enjoying their baking!
Happy toasting, and thank you for trusting me with your Saturday morning!
Print
Monster Bagels
- Total Time: 1 hour 50 min
- Yield: 6 large bagels 1x
- Diet: Vegetarian
Description
A recipe for large, satisfying bagels.
Ingredients
- 4 cups bread flour
- 1 packet active dry yeast
- 1 tablespoon sugar
- 1 teaspoon salt
- 1 1/2 cups warm water
- 1 egg white, beaten (for boiling)
- 1 tablespoon water (for boiling)
- Toppings as desired (e.g., sesame seeds, poppy seeds)
Instructions
- Mix flour, yeast, sugar, and salt in a large bowl.
- Add warm water and mix until a shaggy dough forms.
- Knead the dough on a lightly floured surface for 8-10 minutes until smooth and elastic.
- Place dough in a lightly oiled bowl, cover, and let rise in a warm place for 1 hour, or until doubled.
- Punch down the dough and divide it into 6 equal pieces.
- Shape each piece into a ball, then poke a hole through the center of each ball to form a bagel shape.
- Bring a large pot of water to a boil. Add the egg white and 1 tablespoon of water to the boiling water.
- Boil the bagels in batches for 30 seconds per side.
- Remove bagels from the water and place them on a baking sheet lined with parchment paper.
- Preheat your oven to 400 degrees Fahrenheit (200 degrees Celsius).
- Brush the tops of the bagels with any remaining egg wash or water, and sprinkle with desired toppings.
- Bake for 20-25 minutes, or until golden brown.
- Cool on a wire rack.
Notes
- For a chewier bagel, let the shaped dough rest in the refrigerator overnight before boiling.
- You can use malt syrup instead of sugar in the boiling water for a darker crust.
- Prep Time: 20 min
- Cook Time: 30 min
- Category: Breakfast
- Method: Boiling and Baking
- Cuisine: American
Nutrition
- Serving Size: 1 bagel
- Calories: 280
- Sugar: 4
- Sodium: 350
- Fat: 1
- Saturated Fat: 0
- Unsaturated Fat: 1
- Trans Fat: 0
- Carbohydrates: 58
- Fiber: 3
- Protein: 11
- Cholesterol: 0
Keywords: bagels, large bagels, homemade bagels, breakfast bread, yeast dough