
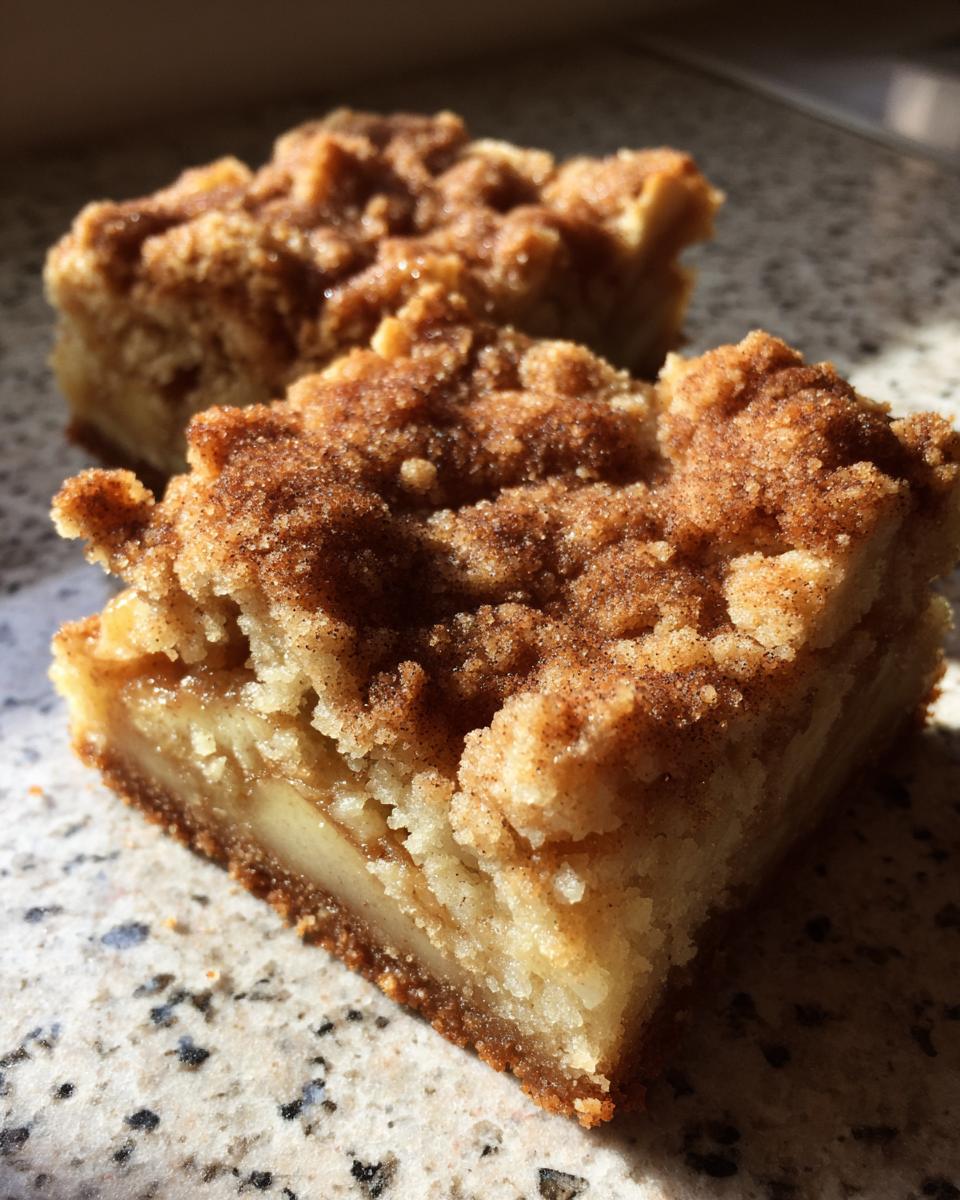
Oh my gosh, if you are looking for that one dessert that just screams cozy holidays but is secretly way easier than a full pie, stop what you are doing right now. We need to talk about these incredible Apple Snickerdoodle Bars! Seriously, these capture all the warm cinnamon spice and soft, tender fruit filling of your favorite apple pie but baked right into one perfect, chewy bar. I absolutely adore this recipe because it takes that buttery, crackly snickerdoodle experience and layers it with caramelized apples. It’s the ultimate crowd-pleaser, and I usually have to double the batch because everyone disappears them!
Why You’ll Love These Apple Snickerdoodle Bars
Honestly, these bars tick every single box for me. I keep coming back to this recipe time and again because it’s just so foolproof and delicious. People always ask for the recipe when I bring them somewhere!
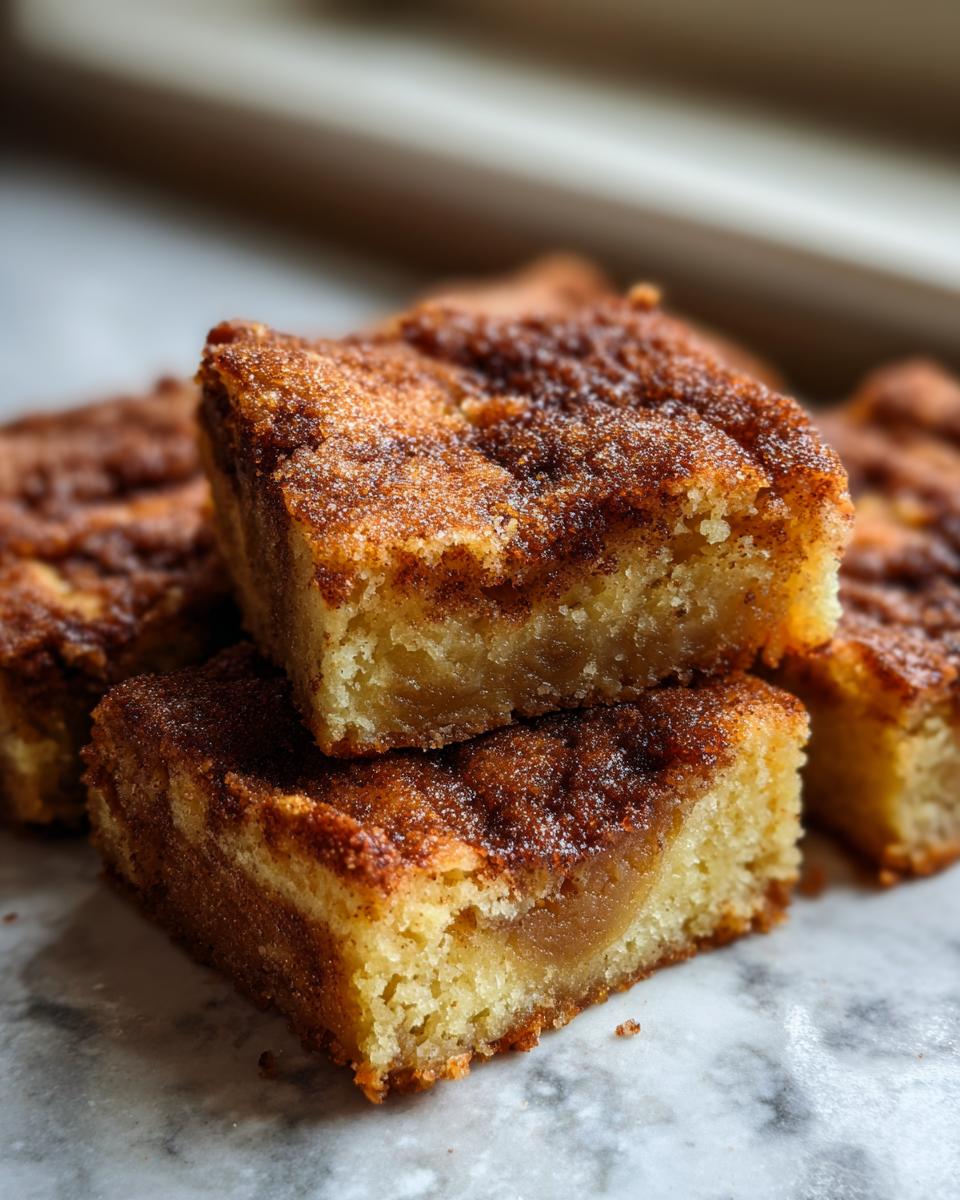
- They give you that classic snickerdoodle texture—soft, chewy, and just a little bit tangy from the cream of tartar.
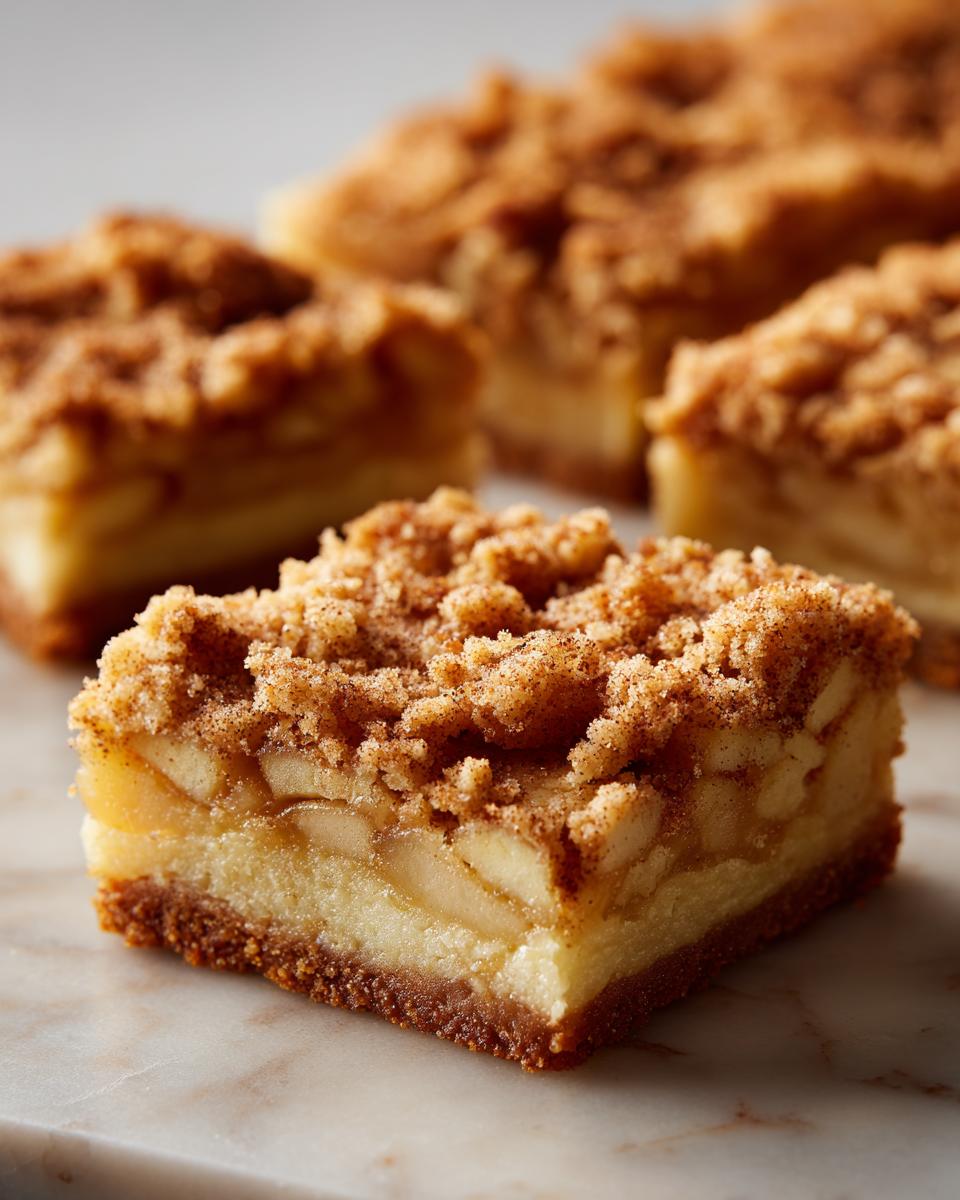
- The flavor combination is pure autumn bliss: warm cinnamon coating over tart, sweet apples baked into a cookie base.
- They bake up perfectly in an easy 9×13 pan, so cleanup is a breeze!
- You get two textures in one: the soft cookie base and the slightly jammy apple layer.

Essential Ingredients for Perfect Apple Snickerdoodle Bars
You know I always preach about starting with great ingredients, and that’s true here too! For the absolute best Apple Snickerdoodle Bars, we need two simple groups: the cookie dough, which forms our base and topping, and the apple filling nestled right in the middle. Don’t skip making sure your butter is nice and soft—it’s crucial for getting that fluffy dough!
For the dough, make sure you have your quality unsalted butter, the white sugar, two eggs, and, yes, vanilla extract. Then we hit the dry stuff: flour, cream of tartar (this is what makes them tangy!), baking soda, and salt. And don’t forget the cinnamon for the delicious topping!
The filling is straightforward, but please, use tart apples. I find that if you’re looking for great apple structure that doesn’t turn to mush, check out some great recipes over at apple cake recipes for inspiration on good apple types. We mix those diced apples with brown sugar and a splash of lemon juice to keep them bright until they bake. Every piece matters!
Step-by-Step Instructions for Amazing Apple Snickerdoodle Bars
Okay, this is where the magic really happens! Baking these bars is all about layering flavors and textures correctly so you don’t end up with a soggy bottom or a crumbly top, which, trust me, I’ve done before. We need neat layers for perfect Apple Snickerdoodle Bars. Just follow these steps closely, and baking is going to be a dream. If you can bake something like simple pumpkin bars, you can nail this!
Preparing the Dough Base and Cinnamon Sugar
First things first: get that oven warmed up to 350 degrees F (175 degrees C). While it heats, line your 9×13 pan edge-to-edge with parchment paper, leaving about an inch hanging over the sides—this is your handle for lifting the finished bars out later, a total lifesaver!
In a big bowl, cream your softened butter and the main 1 1/2 cups of sugar together until it’s pale and fluffy. Remember what I said about creaming holding air? This is it! Beat in those two eggs one at a time, then swirl in the vanilla. In a separate bowl, whisk your flour, cream of tartar, baking soda, and salt until they are totally friends. Gradually add this dry mixture into the wet—and here’s my expert tip: mix only until you *just* see no more flour streaks. Overmixing develops gluten and makes these bars tough instead of delightfully soft!
Now, make the topping! In a small bowl, vigorously mix the remaining 1/2 cup of granulated sugar with that tablespoon of cinnamon. Set this gorgeous spice mix aside.
Layering the Apple Snickerdoodle Bars
Time to build our bar! Take about two-thirds (that’s the bigger chunk!) of your cookie dough and press it gently and evenly right into the bottom of your prepared pan. Don’t press too hard, we want it slightly soft. Sprinkle exactly half of that cinnamon-sugar mixture right over the dough base.
Next up are our apples. Toss those diced apples with the lemon juice and brown sugar right in a medium bowl until they are perfectly coated. Spread this sweet, tart apple layer evenly over that first layer of dough. It should look beautiful!
Finally, take the remaining one-third of your dough and crumble it right over the apples—make sure you get coverage across the whole surface. Then, sprinkle the rest of that reserved cinnamon-sugar mixture over the very top. That’s your final layer!
Baking and Cooling the Apple Snickerdoodle Bars
Pop that beauty into the oven. You’re looking for 35 to 40 minutes of baking time. You want the edges to just start looking lightly golden brown. The biggest test, besides the color, is the toothpick test: stick one right into where the cookie dough is—avoid hitting the soft apple center—and it should come out with just moist crumbs clinging to it, not wet batter. If it’s bone dry, you baked too long!
This next part requires patience, so try your best! You must let these bars cool completely in the pan before you try to slice them. If you cut them warm, they will fall apart into an apple-cinnamon mush, and we want clean squares! Once they are totally cool, grab those parchment paper handles and lift the whole slab out onto a cutting board. Slice them up, and enjoy that perfect texture!
Expert Tips for Perfect Apple Snickerdoodle Bars
I’ve baked these Apple Snickerdoodle Bars more times than I can count, and I’ve learned a few things along the way that really push them from ‘good’ to ‘absolutely unforgettable.’ Trust me, a few tiny checks before hitting the bake button make all the difference in texture and flavor.
First up: temperature matters! Make sure that butter is softened—not melted, just soft enough that your finger leaves an easy indent. But when you add those eggs, they should absolutely be room temperature. Cold eggs can shock that lovely creamed butter mixture and make your dough look curdled. If you forget, just run the eggs in their shell under warm water for about 30 seconds. It works every time!
My second big secret is the apple choice, like I mentioned before. You really want a tart, firm apple like Granny Smith. They hold their shape during baking beautifully while giving you that necessary zing to cut through the sweetness of the cookie layers. If you want to see some other great ways to handle apples in baking, you can check out my guide on apple bread recipes here.
Finally, be paranoid about overbaking! Snickerdoodles should be soft, and these bars are no exception. Once the edges look golden, start testing immediately around the 35-minute mark. You are looking for moist crumbs, not dry ones, on your toothpick. If you pull them out when they look *just* slightly underdone in the middle, they will set up perfectly as they cool, giving you that perfect, soft, chewy center we crave.
Ingredient Notes and Substitutions for Apple Snickerdoodle Bars
Let’s talk apples for a second, because this is where so many people go wrong when they try to make any apple bar—including these Apple Snickerdoodle Bars! The recipe note mentions Granny Smith, and I can’t stress that enough. They are firm and have that beautiful, sharp tartness. That acidity is what balances out all the sweet sugar in the dough and the brown sugar in the filling. If you use something soft like a McIntosh, you’re going to end up with apple sauce instead of distinct pieces in your final bar.
If you absolutely cannot find a Granny Smith, a Honeycrisp could work, but just slice them a little thicker to give them some structural integrity while they bake. Better yet, think about a mix—use one tart one and one slightly sweeter one for complexity!
Now, about the cream of tartar, our signature snickerdoodle ingredient. That gives us that classic, slightly tangy flavor that separates a snickerdoodle from a standard sugar cookie. If you run out, you can substitute by using 1 teaspoon of freshly squeezed lemon juice mixed with 1/2 teaspoon of baking soda for every teaspoon of cream of tartar needed. It creates a similar acid/base reaction, although I’ll be honest, the flavor isn’t quite the same. It’s a last-resort fix, not my first choice!
When it comes to butter, please don’t try to swap it out for oil or margarine if you can avoid it. The fat content and structure of real butter are what give the dough that perfect crumbliness and richness. If you’re looking at alternatives for baking in general, I keep a roundup of my favorite tried-and-true ingredients over at some of my other baking posts, but for these bars, real butter keeps them tasting exactly like Mom used to make them.
Storage and Make-Ahead Advice for Apple Snickerdoodle Bars
There is nothing worse than having leftover amazing Apple Snickerdoodle Bars and not knowing how to keep them fresh for snacking the next day! The good news is that these bars are actually fantastic when made ahead of time, which is why they are one of my go-to recipes when I’m entertaining.
Because they have that lovely, dense cookie base combined with the fruit, they are super sturdy. You can absolutely make these a day in advance! In fact, I think the flavors maybe even meld together overnight, making them taste even better the next day, kind of like how a good coffee cake just deepens in flavor.
If you’re prepping for a party, bake them completely, let them cool fully in the pan on the counter, and then cover that whole pan tightly with plastic wrap. They do excellent sitting on the counter at room temperature for up to two full days. Keeping them tightly covered is essential to prevent them from drying out or absorbing any weird fridge smells, which we obviously don’t want.
If you need more time—say, you made a double batch and want to save some for next week—they freeze wonderfully! Once they are cut into squares, lay them flat on a baking sheet lined with parchment paper and stick that sheet in the freezer for about an hour until they are solid little bricks. Then, transfer them into a large freezer-safe container or bag, separating the layers with parchment sheets so they don’t stick together. They last great in the freezer for about two months!
When you’re ready to eat those frozen bars, just take out what you need and let them thaw on the counter for an hour or two. If you really want to refresh them, I sometimes pop one for about 15 seconds in the microwave—just enough to warm the apples slightly. It’s like getting a fresh-out-of-the-oven treat! If you’re interested in other make-ahead desserts, you might like checking out my guide to making coffee cake; the storage rules are surprisingly similar for keeping that tender crumb just right.
Serving Suggestions for Your Apple Snickerdoodle Bars
Once you finally manage to wait for those amazing Apple Snickerdoodle Bars to cool completely—which, trust me, is the hardest part—you’ll need to decide how to serve these beauties! They are fantastic just as they are, cut into squares and stacked on a platter, but if you want to elevate them just a little bit, I have a few simple ideas that make everyone ask for seconds.
The absolute classic way that I serve these, especially when company comes over or when it’s chilly outside, is warm with a scoop of vanilla ice cream melting right on top. The warm, spiced apple and cookie layer contrasted with that cold, creamy sweetness? It’s heaven in a bite, not kidding you. If you’re feeling fancy or making these for a big event, that cold scoop on a warm bar is picture perfect!
For a simpler, everyday treat, especially with your afternoon coffee, I just dust them lightly with a little extra powdered sugar. It gives them that beautiful, snowy look, kind of like the topping on a favorite yellow cake, but without adding the messiness of a full glaze. It lets that cinnamon flavor really shine through! If you’re looking for more inspiration on how that beautiful buttery crumb comes together, you can always check out my thoughts on homestyle yellow cake recipes for comparison.
And finally, don’t underestimate the power of a great hot beverage pairing. These bars go perfectly with a strong cup of black coffee or a warm mug of spiced cider. The slight tartness of the apple and the spice in the bar cuts right through the richness of the drink. It’s the ultimate fall afternoon setup, and frankly, I think they are best eaten while sitting down and enjoying the quiet!
Frequently Asked Questions About Apple Snickerdoodle Bars
Can I use pre-diced apples or apple pie filling?
Oh, I highly advise against using pre-diced apples if you can help it! They are often too soft and they don’t absorb the lemon juice and brown sugar as beautifully as fresh ones soak it up. If you must use them, drain them really, really well first. And please, skip the pre-made apple pie filling; it usually has too much slick syrup in it, and that guarantees you a soggy bottom for your Apple Snickerdoodle Bars. Freshly diced tart apples are the way to go!
How do I prevent the bottom layer from getting soggy?
This is the number one issue with layered bars like these! The key is twofold. First, you have to press that bottom dough layer firmly enough that it creates a decent seal, but don’t compact it so tightly that it can’t cook through. Second, and this is crucial, make sure your apples aren’t swimming in liquid! By tossing them only with the brown sugar and lemon juice, we create a thick coating rather than a watery soup. The parchment paper lining also helps wick away any stray moisture.
Can I add a glaze to these Apple Snickerdoodle Bars?
You totally can, but you have to let them cool completely first, or the glaze will just melt right off! If you want to jazz them up, whip up a simple vanilla glaze using powdered sugar, a splash of milk, and maybe a tiny bit of vanilla bean paste. Remember that the magic of these bars is the cinnamon-sugar top, so if you glaze them, you might want to skip sprinkling that topping on before baking. If you’re looking for easy coating alternatives, I have some fun ideas in my notes on cake mix cookies that might translate well here!
Why is cream of tartar so important in the dough?
Cream of tartar gives us that signature, slightly tangy ‘zing’ that makes a snickerdoodle taste like, well, a snickerdoodle! It reacts with the baking soda to give you that soft, chewy texture, not just the lift. If you skip it, you’ll just have a very sweet, chewy sugar cookie bar, and we definitely want the complex flavor profile of the classic snickerdoodle!
Estimated Nutritional Information for Apple Snickerdoodle Bars
Now, I know we bake for joy and not for the label on the back, but sometimes it’s just good to have a rough idea of what you’re getting into before you disappear half a pan sitting on the couch watching a movie! Remember, these numbers are just estimates based on the recipe I’ve laid out—if you use extra butter or a different type of sugar, things will shift a little, naturally.
These Apple Snickerdoodle Bars are a treat meant to be enjoyed! Here’s a general breakdown per serving (and the recipe yields about 24 perfect squares):
- Calories: Around 210 per bar.
- Total Fat: Roughly 11g of total fat, with about 7g coming from the saturated fats in that lovely butter.
- Carbohydrates and Sugar: You’re looking at about 28g of carbs, which includes about 18g of sugar from both the white sugar, brown sugar, and the fruit itself.
- Protein: A small boost of about 2g of protein.
We’ve kept the sodium pretty reasonable at around 110mg thanks to careful salting. Just remember that these estimates don’t account for any extra powdered sugar dusting or the scoop of ice cream you absolutely deserve to eat alongside them! Bake happy!
Print
Apple Snickerdoodle Bars
- Total Time: 60 min
- Yield: 24 bars 1x
- Diet: Vegetarian
Description
Simple bars combining the flavor of apple pie with a soft snickerdoodle cookie base and topping.
Ingredients
- 1 cup unsalted butter, softened
- 1 1/2 cups granulated sugar
- 2 large eggs
- 1 teaspoon vanilla extract
- 2 3/4 cups all-purpose flour
- 2 teaspoons cream of tartar
- 1 teaspoon baking soda
- 1/2 teaspoon salt
- 1 tablespoon ground cinnamon
- 1/2 cup granulated sugar (for coating)
- 2 cups diced apples (about 2 medium apples)
- 1 tablespoon lemon juice
- 1/4 cup packed light brown sugar
Instructions
- Preheat your oven to 350 degrees F (175 degrees C). Line a 9×13 inch baking pan with parchment paper, leaving an overhang on the sides.
- In a large bowl, cream together the softened butter and 1 1/2 cups granulated sugar until light and fluffy. Beat in the eggs one at a time, then stir in the vanilla extract.
- In a separate bowl, whisk together the flour, cream of tartar, baking soda, and salt. Gradually add the dry ingredients to the wet ingredients, mixing until just combined.
- In a small bowl, mix the 1/2 cup granulated sugar and 1 tablespoon cinnamon for the coating.
- Press two-thirds of the dough evenly into the bottom of the prepared pan. Sprinkle half of the cinnamon-sugar mixture over the dough.
- In a medium bowl, toss the diced apples with the lemon juice and brown sugar. Spread the apple mixture evenly over the dough layer.
- Crumble the remaining one-third of the dough over the apples. Sprinkle the remaining cinnamon-sugar mixture over the top layer.
- Bake for 35 to 40 minutes, or until the edges are lightly golden and a toothpick inserted into the center comes out clean (avoiding the apple layer).
- Let the bars cool completely in the pan before lifting them out using the parchment paper overhang. Cut into squares.
Notes
- Use firm, slightly tart apples like Granny Smith for the best texture and flavor contrast.
- You can substitute ground nutmeg for half of the cinnamon in the topping for a different spice profile.
- Prep Time: 20 min
- Cook Time: 40 min
- Category: Dessert
- Method: Baking
- Cuisine: American
Nutrition
- Serving Size: 1 bar
- Calories: 210
- Sugar: 18g
- Sodium: 110mg
- Fat: 11g
- Saturated Fat: 7g
- Unsaturated Fat: 4g
- Trans Fat: 0g
- Carbohydrates: 28g
- Fiber: 1g
- Protein: 2g
- Cholesterol: 35mg
Keywords: apple bars, snickerdoodle, cookie bars, cinnamon, baked dessert