
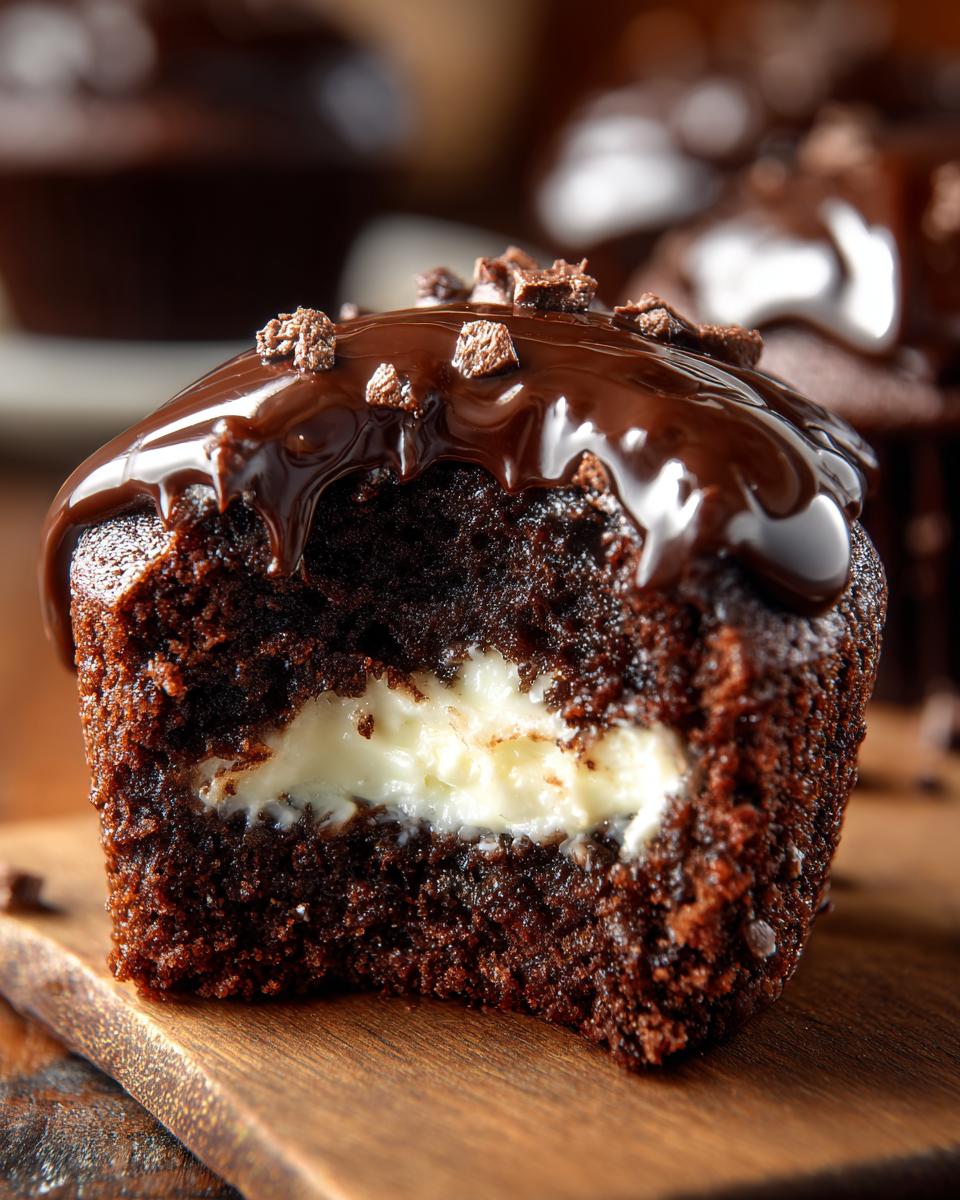
Oh my goodness, remember those little chocolate cakes you used to sneak out of the lunch box, the ones with the squishy white center and that perfect shiny glaze? Forget the dusty wrappers now, because we are making the real deal! I’m talking about the ultimate Homemade Hostess Cupcakes, made entirely from scratch right here on my countertop. If you love classic American flavors, you absolutely have to check out my homestyle yellow cake recipe for another great inspiration!
These aren’t just *like* the original; they are way better—richer, moister, and you control every single ingredient. Honestly, biting into the fluffy chocolate cake layer with that cool, creamy filling takes me right back to being eight years old, hiding in the fort to eat my treats before my brother found them. Trust me, once you try this recipe, you won’t ever buy the boxed version again. We’re going for the moistest cake, the fluffiest filling, and the shiniest chocolate coat ever!

Why You Will Love These Homemade Hostess Cupcakes
Honestly, these homemade versions just blow the store-bought ones out of the water. Once you taste them, you’ll see why I insist on doing them from scratch. They really capture that perfect nostalgic flavor but with way better texture. Check out my chocolate caramel toffee cake if you need another chocolate fix!
- The chocolate cake stays incredibly moist, thanks to swapping water for coffee!
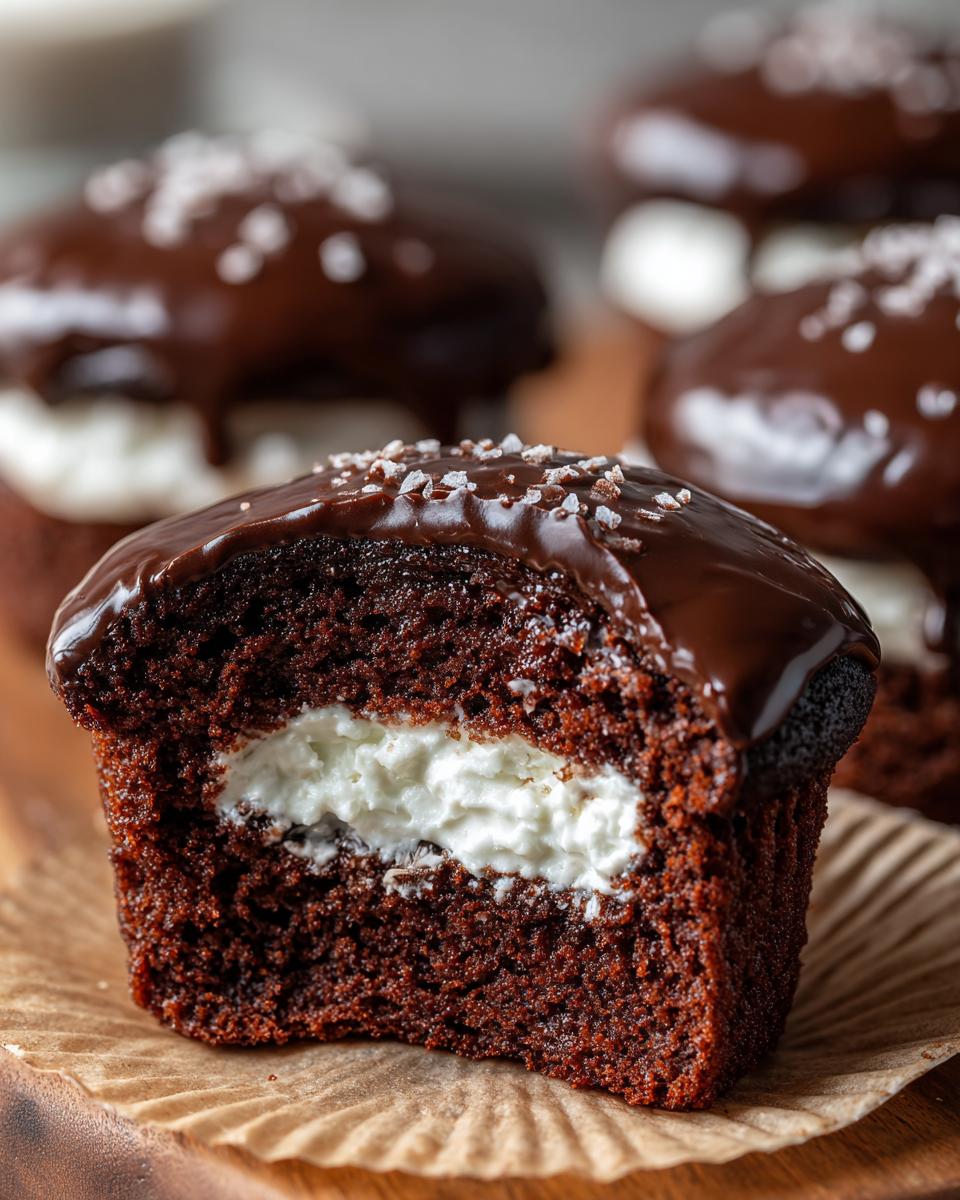
- The signature white filling is airy, creamy, and perfectly balanced—never grainy.
- That shiny chocolate glaze sets up beautifully without cracking.
- You get that true, nostalgic snack cake experience, only homemade and superior!
Ingredients for Perfect Homemade Hostess Cupcakes
Okay, gathering the supplies is half the fun, right? When you’re making something this iconic, you can’t skimp! We need three main components: the dark, rich chocolate cake, that impossibly smooth white filling, and the glossy chocolate topping. Make sure your powdered sugar is sifted for the filling—it’s the secret to avoiding lumps! If you’re looking for a simple base chocolate recipe to practice with, check out my classic chocolate cake recipe.
Don’t worry if your ingredient list looks a little long; it’s mainly just breaking down those three distinct parts!
For the Chocolate Cupcakes
- 1 3/4 cups all-purpose flour
- 3/4 cup unsweetened cocoa powder
- 1 1/2 teaspoons baking soda
- 1 teaspoon baking powder
- 1 teaspoon salt
- 2 cups granulated sugar
- 1 cup buttermilk
- 1/2 cup vegetable oil
- 2 large eggs
- 1 teaspoon vanilla extract
- 1 cup hot water or coffee (you know which one I prefer!)
For the Creamy White Filling
- 1/2 cup unsalted butter, softened
- 1/2 cup shortening (this helps it hold its shape!)
- 3 cups powdered sugar, sifted
- 1 teaspoon vanilla extract
- 2-4 tablespoons milk
For the Chocolate Glaze
- 1 cup semi-sweet chocolate chips
- 1/4 cup heavy cream
- 1 tablespoon light corn syrup (for that amazing shine!)
Step-by-Step Instructions for Homemade Hostess Cupcakes
Alright, let’s get messy! Don’t worry if it looks like a chocolate explosion happened in your kitchen; that means you’re doing it right. Remember, the key to these cakes is that you let those chocolate cupcakes cool down completely before we even think about filling them, otherwise, we’ll have melted soup instead of filling!
If you’re doing well so far, you should check out my recipe for chocolate chip tahini cookies for another easy, delicious bake!
Baking the Chocolate Cupcakes
First things first, preheat your oven to 350°F (175°C) and get that 12-cup muffin tin lined up with paper liners. In a big bowl, whisk together all your dry stuff: flour, cocoa, baking soda, baking powder, salt, and sugar. Don’t skip the whisking; it helps tame the cocoa powder!
Next, mix in the wet ingredients—buttermilk, oil, eggs, and vanilla—on medium speed, but only mix it until it just comes together. Seriously, stop mixing as soon as those streaks disappear! Overmixing builds up gluten, and we want these cakes soft!
Now for the big flavor secret: carefully stir in that hot water or coffee. Trust me, using hot coffee makes the chocolate flavor unbelievable! Pour the batter evenly into the liners—I fill mine about two-thirds full. They need 18 to 20 minutes, or until a toothpick comes out clean. Let them cool completely on a rack. Patience pays off here!
Creating the Signature Cream Filling
While those cool, we make the filling. You need softened butter and shortening—make sure they are truly soft! Beat them together until they are perfectly smooth. Now gradually beat in your sifted powdered sugar. I mean gradually! If you dump it all in, you’ll be wearing frosting!
Once it’s combined, we work on the texture. Add your vanilla, and then start adding milk one tablespoon at a time. Keep beating until it transforms into that light, fluffy texture you remember. You might only need two tablespoons, or maybe closer to four, depending on your humidity. You want it pipeable but still soft!
Assembling and Glazing Your Homemade Hostess Cupcakes
This is the fun part where they start looking like the real deal! Once the cakes are totally cool, use a piping tip (the star tip works great!) or a small paring knife to carefully core out a little hole right in the center top of each cupcake. Try not to dig too deep towards the bottom.
Pipe that glorious filling right into that hole until it’s nice and full—it should mound up just a tiny bit. For the glaze, melt those chocolate chips with the heavy cream and corn syrup. Let it sit for five minutes off the heat, then whisk until it’s super smooth and shiny. Dip the top of each filled cupcake right into that chocolate glaze. Make sure it’s fully coated, let any excess drip off, and set them gently on the rack until that beautiful glaze sets up!
Tips for Success with Homemade Hostess Cupcakes
I’ve totally messed up batches of these before, so let me save you some tears! Following these little golden rules will make sure your Homemade Hostess Cupcakes turn out looking bakery-perfect every single time. Before you start anything, you must whip up a batch of my homemade pan release, or use what I call cake goop—you can peek at how to make that perfection here!
- Cooling is Non-Negotiable: Do not cut into those cakes until they are room temperature, or even slightly cool to the touch. Filling a warm cupcake melts the butter in the filling, resulting in a soupy mess rather than a firm cream center. Been there, cried about it.
- Don’t Overmix the Cake Batter: I mentioned it before, but it bears repeating! Mix those dry and wet ingredients until *just* incorporated before you add the hot coffee. A slightly lumpy batter is far better than a tough cake.
- Glaze Consistency Matters: If your glaze seems too thick right after you remove it from the heat, add a tiny splash more cream. If it’s too thin after sitting, you might need a tiny bit more chocolate, or just let it sit a bit longer to thicken naturally on the counter.
- Use Fat in the Filling: Don’t try to skip the shortening in the filling! While I love butter, the shortening is what gives that center filling that signature firm structure that resists melting when you store it at room temp.
Variations on Homemade Hostess Cupcakes
Now, while I totally swear by keeping these classic, sometimes you just need to switch things up a little bit, right? My kids always beg for a little extra flair, especially when we have friends over. If you want something truly special, check out my recipe for raspberry almond tea bread sometime!
- Almond Twist Filling: Swap out the vanilla extract in the filling entirely for almond extract. It gives the cream a slightly marzipan-like flavor that pairs surprisingly well with the dark chocolate cake. Use just 1/2 teaspoon at first, because almond is potent!
- Sprinkle Fun: For birthdays, try sprinkling rainbow or gold sprinkles right on top of the chocolate glaze immediately after dipping, before the glaze has time to set hard. This looks super festive!
- Mocha Power: If you didn’t use coffee in the cake batter, try adding a teaspoon of instant espresso powder to your glaze mixture. It intensifies the chocolate flavor beautifully without making it taste like coffee.
- Peanut Butter Center: For the truly daring, try substituting half of the shortening in the filling with creamy peanut butter. It throws back to the classic filling but adds a nutty profile. Just beat it in with the butter!

Storage and Reheating for Homemade Hostess Cupcakes
One of the best parts about these Homemade Hostess Cupcakes is that they are actually better the next day! Unlike sponge cakes that dry out, the moisture from the filling actually seeps into the cake layer overnight. You can check out my easy banana bread recipe for tips on keeping things moist!
As the recipe notes suggest, you definitely want to store leftover cupcakes in an airtight container right on the counter at room temperature for up to three days. Keep them out of the fridge! Why? Because if you chill them, the filling gets rock hard and the cake loses its tender quality. If you live somewhere super hot and humid and *have* to refrigerate them, just pull them out onto a plate about one hour before serving so they can soften back up to that perfect room-temperature texture.
Frequently Asked Questions About Homemade Hostess Cupcakes
Can I substitute the vegetable oil in the Homemade Hostess Cupcakes cake?
You really should stick to the vegetable oil if you can for this recipe! It’s what keeps the chocolate cake so incredibly light and moist, especially when paired with buttermilk. If you absolutely must substitute, try melted coconut oil, but keep in mind the final texture might be slightly denser after cooling. Avoid applesauce or yogurt substitutions here, as they affect the delicate balance we need for that classic texture.
What is the best way to store Homemade Hostess Cupcakes?
Always store these beauties at room temperature! They really shine when they are soft, and refrigerating them totally ruins the texture of that creamy center. Pop them into a good airtight container right on your counter, and they’ll stay delicious for three days. Just make sure they are fully cooled before you seal the container!
Can I use regular milk instead of buttermilk for the chocolate cake?
You can technically use regular milk, yes, but you lose a lot of the magic! Buttermilk is acidic, and that acid reacts with the baking soda to give you a beautiful, tender rise. If that’s all you have, you can make a substitute by adding one tablespoon of white vinegar or lemon juice to one cup of regular milk and letting it sit for five minutes until it curdles slightly. That homemade buttermilk works great!
How do I get the swirl shape in the filling?
That swirl is all about the piping tip, honey! For the classic look, you want to use an open star or closed star piping tip. When you pull the tip straight out after filling the hole, the last bit of cream that extrudes will naturally form that little peak or swirl right on top. If you are using a paring knife, just dollop the filling on top generously and use the back of a teaspoon to gently shape it into a little mound before glazing!
Estimated Nutritional Data for Homemade Hostess Cupcakes
I always say you shouldn’t think about nutrition when you are eating something this nostalgic, but sometimes we just have to know! Here is the estimated breakdown based on the ingredients we used for these amazing Homemade Hostess Cupcakes. Keep in mind these numbers are just estimates, so they might vary a little bit based on how much milk you added to the filling or the brand of chocolate chips you grabbed at the store. If you’re looking for lighter fare, maybe check out my easy tuna pasta salad!
- Serving Size: 1 cupcake
- Calories: 450
- Sugar: 55g
- Sodium: 250mg
- Fat: 25g
- Saturated Fat: 10g
- Unsaturated Fat: 15g
- Trans Fat: 0g
- Carbohydrates: 60g
- Fiber: 2g
- Protein: 4g
- Cholesterol: 40mg
Share Your Homemade Hostess Cupcakes Creations
I am dying to know how yours turned out! These truly are such a fun bake, and seeing your finished cakes is what keeps me going in the kitchen. You’ve followed all the steps, you’ve made the moist cake, and you’ve got that perfect shiny top—now show me!
If you made these fabulous Homemade Hostess Cupcakes, please take a second to leave me a star rating right down below! It really helps other bakers figure out if this treat is worth their time (spoiler: it definitely is). And if you snapped a photo, tag me on social media so I can see your gorgeous work. You can even sneak a peek at my cake pops recipe for another fun handheld treat!
Tips for Success with Homemade Hostess Cupcakes
I’ve totally messed up batches of these before, so let me save you some tears! Following these little golden rules will make sure your Homemade Hostess Cupcakes turn out looking bakery-perfect every single time. Before you start anything, you must whip up a batch of my homemade pan release, or use what I call cake goop—you can peek at how to make that perfection here!
- Cooling is Non-Negotiable: Do not cut into those cakes until they are room temperature, or even slightly cool to the touch. Filling a warm cupcake melts the butter in the filling, resulting in a soupy mess rather than a firm cream center. Been there, cried about it.
- Don’t Overmix the Cake Batter: I mentioned it before, but it bears repeating! Mix those dry and wet ingredients until *just* incorporated before you add the hot coffee. A slightly lumpy batter is far better than a tough cake.
- Glaze Consistency Matters: If your glaze seems too thick right after you remove it from the heat, add a tiny splash more cream. If it’s too thin after sitting, you might need a tiny bit more chocolate, or just let it sit a bit longer to thicken naturally on the counter.
- Use Fat in the Filling: Don’t try to skip the shortening in the filling! While I love butter, the shortening is what gives that center filling that signature firm structure that resists melting when you store it at room temp.
Variations on Homemade Hostess Cupcakes
Now, while I totally swear by keeping these classic, sometimes you just need to switch things up a little bit, right? My kids always beg for a little extra flair, especially when we have friends over. If you want something truly special, check out my recipe for raspberry almond tea bread sometime!
- Almond Twist Filling: Swap out the vanilla extract in the filling entirely for almond extract. It gives the cream a slightly marzipan-like flavor that pairs surprisingly well with the dark chocolate cake. Use just 1/2 teaspoon at first, because almond is potent!
- Sprinkle Fun: For birthdays, try sprinkling rainbow or gold sprinkles right on top of the chocolate glaze immediately after dipping, before the glaze has time to set hard. This looks super festive!
- Mocha Power: If you didn’t use coffee in the cake batter, try adding a teaspoon of instant espresso powder to your glaze mixture. It intensifies the chocolate flavor beautifully without making it taste like coffee.
- Peanut Butter Center: For the truly daring, try substituting half of the shortening in the filling with creamy peanut butter. It throws back to the classic filling but adds a nutty profile. Just beat it in with the butter!
Storage and Reheating for Homemade Hostess Cupcakes
One of the best parts about these Homemade Hostess Cupcakes is that they are actually better the next day! Unlike sponge cakes that dry out, the moisture from the filling actually seeps into the cake layer overnight. You can check out my easy banana bread recipe for tips on keeping things moist!
As the recipe notes suggest, you definitely want to store leftover cupcakes in an airtight container right on the counter at room temperature for up to three days. Keep them out of the fridge! Why? Because if you chill them, the filling gets rock hard and the cake loses its tender quality. If you live somewhere super hot and humid and *have* to refrigerate them, just pull them out onto a plate about one hour before serving so they can soften back up to that perfect room-temperature texture.
Frequently Asked Questions About Homemade Hostess Cupcakes
I know you probably have questions—I did too when I first started messing around with this recipe trying to nail that perfect texture! It’s all about those little details, so let’s tackle the common snags right here. And hey, if you’re experimenting with other things, my yellow cake with mocha frosting is always a showstopper!
Can I substitute the vegetable oil in the Homemade Hostess Cupcakes cake?
You really should stick to the vegetable oil if you can for this recipe! It’s what keeps the chocolate cake so incredibly light and moist, especially when paired with buttermilk. If you absolutely must substitute, try melted coconut oil, but keep in mind the final texture might be slightly denser after cooling. Avoid applesauce or yogurt substitutions here, as they affect the delicate balance we need for that classic texture.
What is the best way to store Homemade Hostess Cupcakes?
Always store these beauties at room temperature! They really shine when they are soft, and refrigerating them totally ruins the texture of that creamy center. Pop them into a good airtight container right on your counter, and they’ll stay delicious for three days. Just make sure they are fully cooled before you seal the container!
Can I use regular milk instead of buttermilk for the chocolate cake?
You can technically use regular milk, yes, but you lose a lot of the magic! Buttermilk is acidic, and that acid reacts with the baking soda to give you a beautiful, tender rise. If that’s all you have, you can make a substitute by adding one tablespoon of white vinegar or lemon juice to one cup of regular milk and letting it sit for five minutes until it curdles slightly. That homemade buttermilk works great!
How do I get the swirl shape in the filling?
That swirl is all about the piping tip, honey! For the classic look, you want to use an open star or closed star piping tip. When you pull the tip straight out after filling the hole, the last bit of cream that extrudes will naturally form that little peak or swirl right on top. If you are using a paring knife, just dollop the filling on top generously and use the back of a teaspoon to gently shape it into a little mound before glazing!
Estimated Nutritional Data for Homemade Hostess Cupcakes
I always say you shouldn’t think about nutrition when you are eating something this nostalgic, but sometimes we just have to know! Here is the estimated breakdown based on the ingredients we used for these amazing Homemade Hostess Cupcakes. Keep in mind these numbers are just estimates, so they might vary a little bit based on how much milk you added to the filling or the brand of chocolate chips you grabbed at the store. If you’re looking for lighter fare, maybe check out my easy tuna pasta salad!
- Serving Size: 1 cupcake
- Calories: 450
- Sugar: 55g
- Sodium: 250mg
- Fat: 25g
- Saturated Fat: 10g
- Unsaturated Fat: 15g
- Trans Fat: 0g
- Carbohydrates: 60g
- Fiber: 2g
- Protein: 4g
- Cholesterol: 40mg
Just remember, these are our best guesses! Cooking is never an exact science, so take these numbers as a general guide, not gospel. The most important thing is that they taste incredible!
Share Your Homemade Hostess Cupcakes Creations
I am dying to know how yours turned out! These truly are such a fun bake, and seeing your finished cakes is what keeps me going in the kitchen. You’ve followed all the steps, you’ve made the moist cake, and you’ve got that perfect shiny top—now show me!
If you made these fabulous Homemade Hostess Cupcakes, please take a second to leave me a star rating right down below! It really helps other bakers figure out if this treat is worth their time (spoiler: it definitely is). And if you snapped a photo, tag me on social media so I can see your gorgeous work. You can even sneak a peek at my cake pops recipe for another fun handheld treat!
Print
Homemade Hostess Cupcakes
- Total Time: 50 min
- Yield: 12 cupcakes 1x
- Diet: Vegetarian
Description
Recipe for making chocolate cupcakes with a creamy white filling and chocolate glaze.
Ingredients
- 1 3/4 cups all-purpose flour
- 3/4 cup unsweetened cocoa powder
- 1 1/2 teaspoons baking soda
- 1 teaspoon baking powder
- 1 teaspoon salt
- 2 cups granulated sugar
- 1 cup buttermilk
- 1/2 cup vegetable oil
- 2 large eggs
- 1 teaspoon vanilla extract
- 1 cup hot water or coffee
- For the Filling: 1/2 cup unsalted butter, softened
- 1/2 cup shortening
- 3 cups powdered sugar, sifted
- 1 teaspoon vanilla extract
- 2–4 tablespoons milk
- For the Glaze: 1 cup semi-sweet chocolate chips
- 1/4 cup heavy cream
- 1 tablespoon light corn syrup
Instructions
- Preheat your oven to 350°F (175°C). Line a 12-cup muffin tin with paper liners.
- In a large bowl, whisk together flour, cocoa powder, baking soda, baking powder, salt, and sugar.
- Add buttermilk, oil, eggs, and vanilla extract to the dry ingredients. Mix on medium speed until just combined.
- Carefully stir in the hot water or coffee until the batter is smooth.
- Pour batter evenly into the prepared muffin cups, filling each about two-thirds full.
- Bake for 18 to 20 minutes, or until a toothpick inserted into the center comes out clean. Let the cupcakes cool completely on a wire rack.
- Prepare the filling: Beat the softened butter and shortening together until smooth. Gradually add the powdered sugar, beating until combined. Add vanilla and milk, one tablespoon at a time, until the frosting is light and fluffy.
- Fill the cupcakes: Use a piping tip to core out a small hole in the center top of each cooled cupcake. Pipe the filling into the hole until it is full.
- Prepare the glaze: Place chocolate chips in a heatproof bowl. Heat heavy cream and corn syrup in a small saucepan until just simmering. Pour the hot cream mixture over the chocolate chips. Let stand for 5 minutes, then whisk until smooth.
- Dip the top of each filled cupcake into the chocolate glaze, ensuring it is fully coated. Let the glaze set before serving.
Notes
- Using hot coffee instead of hot water deepens the chocolate flavor.
- You can use a small paring knife to core the center if you do not have a piping tip.
- Store leftover cupcakes in an airtight container at room temperature for up to three days.
- Prep Time: 30 min
- Cook Time: 20 min
- Category: Dessert
- Method: Baking
- Cuisine: American
Nutrition
- Serving Size: 1 cupcake
- Calories: 450
- Sugar: 55
- Sodium: 250
- Fat: 25
- Saturated Fat: 10
- Unsaturated Fat: 15
- Trans Fat: 0
- Carbohydrates: 60
- Fiber: 2
- Protein: 4
- Cholesterol: 40
Keywords: cupcakes, chocolate, cream filling, homemade snack cake, hostess style