
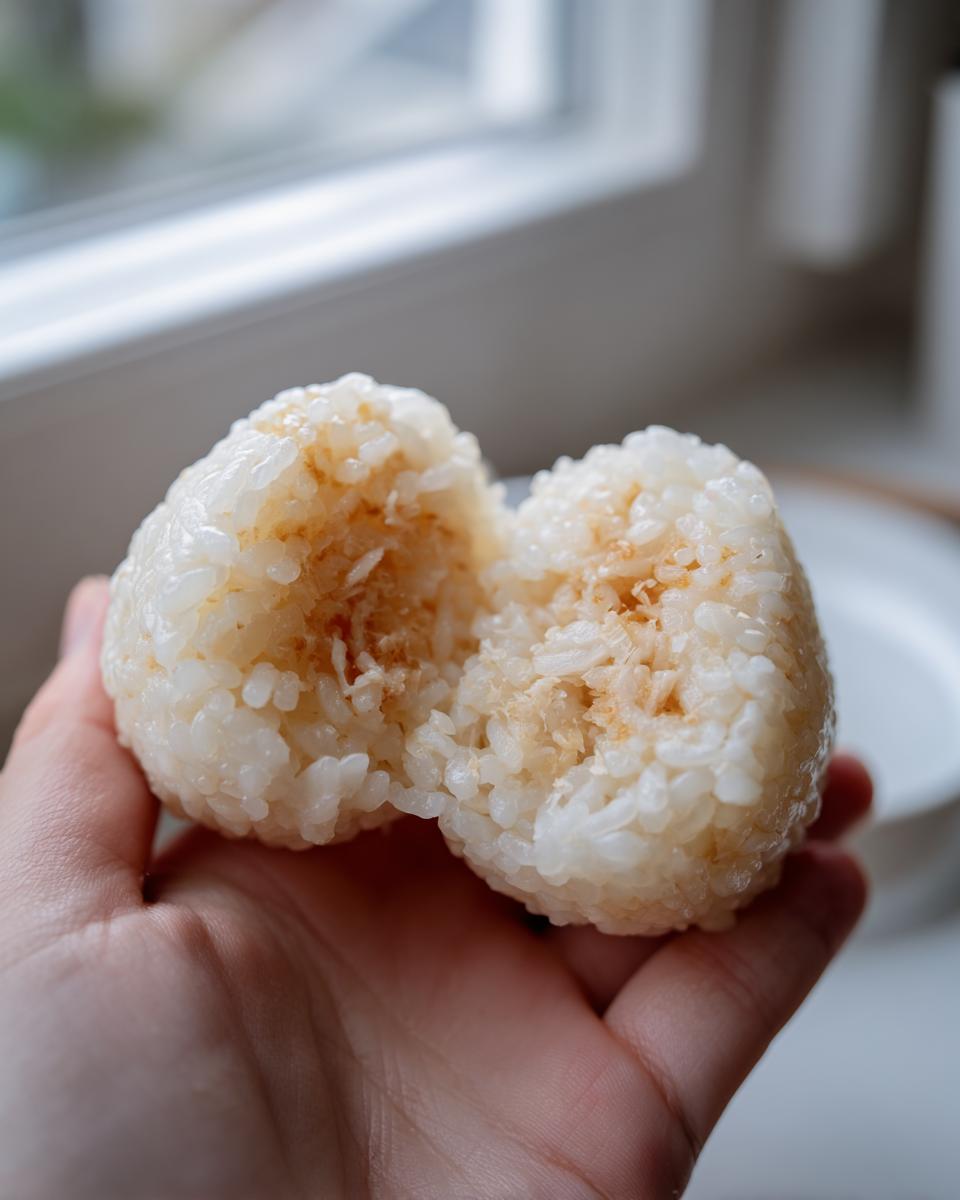
When that afternoon slump hits, you need something quick, satisfying, and ready to go—no reheating needed! Forget fancy assembly; this recipe for **Tuna Mayo Rice Balls** is my undisputed champion for emergency snacking. I’m talking about perfectly seasoned rice hugging a creamy, savory center, ready in under fifteen minutes!
I learned to make onigiri way back when I was trying to pack lunches that wouldn’t look sad by noon. I tried complicated seaweed wraps and fillings, but honestly, the simple tuna mayo version is the one that sticks. Trust me, once you master this speedy method, you’ll never look at sad desk lunches the same way again.
Why You’ll Love Making Tuna Mayo Rice Balls
Honestly, these rice balls are perfect for busy days. Why fuss with cooking when you don’t have to? You only need about fifteen minutes from start to finish if your rice is ready. They just perform wonderfully for almost any situation!
- Lightning Fast: Total prep time is about 15 minutes. We love quick snacks!
- No Oven Required: Since the rice is already cooked, there’s zero actual cooking step here. So easy!
- Ultimate Portability: Pack them up, slip them in a container, and they are ready for picnics or lunch boxes. Check out some other great lunch ideas right here!
Essential Ingredients for Perfect Tuna Mayo Rice Balls
The beauty of this recipe is its short ingredient list! We aren’t hiding anything here; it all comes down to quality flavor blending. You need about three cups of cooked short-grain rice. Seriously, don’t try this with long-grain rice—it just won’t clump right. You need that stickiness only sushi or short-grain rice provides!
For the filling, we combine one five-ounce can of tuna packed in water. Now, this is important for texture: make sure you drain that tuna really, really well. Soggy tuna means a mushy rice ball, and that’s just sad. You’ll mix that with a quarter cup of creamy mayonnaise, a tablespoon of savory soy sauce, one teaspoon of nutty sesame oil, and just a pinch of salt to balance it all out. If you want some flavor inspiration while you shop, you might like checking out this easy tuna pasta salad recipe!

Ingredient Notes and Substitutions for Your Tuna Mayo Rice Balls
Look, sometimes you’re missing an ingredient, and that’s okay! We can work around it, but I always recommend sticking to the soy sauce if you can, as it gives that deep umami flavor we want. If you need to skip the soy sauce for dietary reasons, grab some tamari—it works beautifully as a gluten-free swap.
If you don’t have sesame oil, the rice balls will still be great, but you’ll lose a hint of that signature aroma. Just carry on! Also, if you’re feeling adventurous and have an extra five minutes, try one of my favorite tweaks: gently toast the tuna mixture in a pan before you let it cool down slightly for filling. Wow, the flavor deepens!

Remember, the rice temperature matters more than anything else here. If your rice is piping hot, it’ll steam and break apart when you try to form the balls.
Equipment Needed for Preparing Tuna Mayo Rice Balls
You don’t need fancy kitchen gadgets for these beauties, thankfully! We’re keeping this ultra-simple, just like you need for a quick snack. Most of this stuff is probably already sitting in your drawers.
First off, you absolutely need a good medium mixing bowl. That’s where all the flavor magic happens with the tuna filling. Grab your measuring spoons and cups too—precision does matter when balancing salt and soy sauce!
- A sturdy spatula or spoon for mixing the filling.
- A small dish of water nearby for dipping your hands.
- Plastic wrap or a clean kitchen towel if you want to cover the rice while it cools a tiny bit.
- Those sharp scissors or kitchen shears if you are cutting your own strips of Nori seaweed.
That’s truly it! See? No stand mixer or specialized rice molds required. Just clean hands and a willingness to get a little sticky!
Step-by-Step Instructions to Make Delicious Tuna Mayo Rice Balls
Okay, time to put this all together! This is the fun part, but you have to move relatively quickly once your hands are dealing with the rice mixture. Remember, we mix the filling first so everything else can be staged properly. You’re going to rely on instinct here, but the instructions will hold your hand through the process. If you want to see another recipe that’s about maximizing flavor in minimal time, check out this perfect tuna macaroni salad for later!
Creating the Flavorful Tuna Mayo Rice Balls Filling
Grab that medium bowl we talked about. This is where we build the heart of the flavor. Take your well-drained tuna, the mayonnaise, the soy sauce, sesame oil, and that tiny pinch of salt. Now, give it a good, thorough mix. You aren’t just stirring; you need to make sure that mayo coats every bit of tuna evenly. Stop mixing when it’s all uniform and creamy. Set this aside; it’s ready to go when you are!
Shaping the Tuna Mayo Rice Balls Perfectly
This is the crucial part for cleanliness! You must moisten your hands before touching the rice. Seriously, dip your palms in water—it keeps that sticky rice from adhering to you instead of shaping nicely. Take about half a cup of your cooked rice and gently flatten it in your hand until it forms a disc shape. Remember, don’t press too hard yet!
Place just one small tablespoon of that creamy tuna filling right in the center of the disc. Now, gently fold the edges of the rice up and over that filling. You want to completely seal it up. Press softly with your fingers until you get that nice, tight ball shape, or push it into a triangle if you prefer! Repeat this process until you run out of rice. If you want to wrap a strip of nori around the center for grip and presentation, this is the moment to do it before serving!

Tips for Success When Making Tuna Mayo Rice Balls
Even though these are fast, there are a couple of tiny things that make the difference between a good rice ball and a truly fantastic one. I speak from experience, having dropped more than one half-formed ball in my early attempts!
Rice temperature is your best friend here. If the short-grain rice is too hot, it turns into a sticky, steamy mess that’s impossible to handle. If it’s fridge-cold, it often crumbles apart because the starches seize up. Aim for slightly warm—maybe just lukewarm to the touch. If you cooked your rice earlier, spreading it out on a platter for five minutes helps it cool down perfectly.
Dealing with Rice Consistency
Sometimes your rice is naturally stickier than mine, and other times it feels a little dry—we work with what we’ve got! If the rice seems too dry and you’re struggling to get it to hold shape, don’t panic! Just keep a little bowl of clean water nearby, and lightly re-wet your hands between every other rice ball. That little bit of moisture is like glue for the outer layer.
Perfecting the Filling-to-Rice Ratio
Don’t be tempted to overstuff your rice balls! It seems boring, but that one tablespoon of tuna filling I mentioned earlier is key. If you put too much filling in, the structural integrity of your ball is compromised, and it will definitely crack open when you press it. We want a gentle, even casing of rice around a rich center—it’s about balance, not overflow!
Also, if you find your filling itself seems a bit dry after mixing (maybe your tuna was exceptionally plain), just stir in an extra teaspoon of mayonnaise. It helps bind everything together beautifully before it even touches the rice.
How to Store and Reheat Your Tuna Mayo Rice Balls
Now, because these rice balls are fresh and rely on that perfect texture, they are definitely best eaten the day you make them. I know, I know, leftovers are great, but trust me on this one—the rice starts to dry out quickly!
If you absolutely must save them, put them in a truly airtight container. You want zero air exposure. Forget leaving them on the counter; they need the fridge, or the mayo will get weird. Reheating them in the microwave is technically possible, but I really don’t advise it. The rice gets chewy and firm. These are meant to be an easy, grab-and-go cold snack, so plan on making just what you need for the day!
Frequently Asked Questions About Tuna Mayo Rice Balls
When you’re making something this quick and easy, sometimes confusing little questions pop up. It happens to me all the time! Here are the things I get asked most often about preparing these awesome tuna mayo rice balls.
Can I use brown rice instead of short-grain white rice?
You *can*, but I wouldn’t recommend it for your first attempt at these simple onigiri. Brown rice has a much tougher texture, and it doesn’t have the natural sticky quality that short-grain rice has. If you try it, the balls might be much more crumbly, and you’ll have to add more water when moistening your hands. Stick to sushi or short-grain rice for that perfect, satisfying texture in a quick snack!
How long do these tuna mayo balls last, safely?
Since we’re dealing with canned tuna and mayonnaise—which has egg in it—freshness is key. They really are best eaten the same day you make them. If you absolutely have leftovers, they should be stored airtight and kept chilled, but I wouldn’t let them sit longer than 24 hours. They are so fast to whip up, it’s not worth the risk trying to eat them on day three. You should probably just plan on making a fresh batch!
Can I add other ingredients to the tuna filling mix?
Yes! Feel free to experiment, which is what makes home cooking so fun. If you want to boost the texture, try adding some finely chopped pickled ginger or maybe some crispy fried onions if you have them lying around! I sometimes mix in a tiny bit of sriracha if I want a little heat, but only use a drop or two. If you’re looking for completely different quick meal ideas, you should totally see what this BBQ chicken flatbread recipe offers!
The rice ball keeps cracking when I press it—what am I doing wrong?
That’s usually a sign of dry rice or pressing too hard! Make sure you are moistening your hands between shaping spheres—that thin layer of water prevents friction from tearing the rice layer. Also, remember that gentle pressure is better than a firm squeeze. You’re molding it, not trying to create a concrete ball!
Estimated Nutritional Information for Tuna Mayo Rice Balls
I usually don’t stress too much about the numbers when I’m making something this quickly for snack time, but I know some of you like to keep track! These figures are based on one rice ball using the ingredients listed above. Seriously, they’re surprisingly filling for the size.
Keep in mind that since everyone drains their tuna a little differently or uses a slightly different mayo, these are just guidelines. Yours might shift a tiny bit, but it gives you a good idea of what you’re eating!
- Serving Size: 1 rice ball
- Calories: 220
- Fat: 7g
- Carbohydrates: 30g
- Protein: 10g
Tuna Mayo Rice Balls
- Total Time: 15 min
- Yield: 6 servings 1x
- Diet: Low Fat
Description
Simple recipe for making seasoned rice balls filled with a tuna and mayonnaise mixture.
Ingredients
- 3 cups cooked short-grain rice
- 1 (5 ounce) can tuna in water, drained
- 1/4 cup mayonnaise
- 1 tablespoon soy sauce
- 1 teaspoon sesame oil
- Pinch of salt
- Nori seaweed sheets, cut into strips for wrapping (optional)
Instructions
- In a medium bowl, combine the drained tuna, mayonnaise, soy sauce, sesame oil, and salt. Mix well until fully incorporated. This is your filling.
- Moisten your hands with water to prevent sticking. Take about 1/2 cup of cooked rice in your palm.
- Flatten the rice slightly to form a disc shape.
- Place one tablespoon of the tuna mixture in the center of the rice disc.
- Carefully fold the edges of the rice around the filling, shaping it into a ball or a triangle shape. Gently press to seal.
- Repeat with the remaining rice and filling.
- If desired, wrap a strip of nori seaweed around the center of each rice ball before serving.
Notes
- You can toast the tuna mixture lightly in a pan before filling for a different flavor profile.
- Use short-grain or sushi rice for the best texture when forming the balls.
- For easier handling, you can lightly salt the outside of the formed rice balls.
- Prep Time: 15 min
- Cook Time: 0 min
- Category: Snack
- Method: Hand Forming
- Cuisine: Japanese
Nutrition
- Serving Size: 1 rice ball
- Calories: 220
- Sugar: 1
- Sodium: 350
- Fat: 7
- Saturated Fat: 1
- Unsaturated Fat: 6
- Trans Fat: 0
- Carbohydrates: 30
- Fiber: 1
- Protein: 10
- Cholesterol: 25
Keywords: tuna, mayo, rice balls, onigiri, quick snack, Japanese food