
Oh my gosh, there is nothing—and I mean *nothing*—that beats the smell of fresh bread baking, especially when it’s that slightly sweet, pillowy magic we all crave. Forget those store-bought versions; I’m sharing my absolute favorite, no-fuss recipe for making real, genuine **Sweet Hawaiian Bread** right on your kitchen counter. Trust me on this one: the magic is in the pineapple juice!
I remember the first time I pulled a loaf out of the oven. It was slightly scorched on one corner (oops!), but when I sliced into it, the steam smelled like pure sunshine. My kids immediately devoured three slices each, slathered in salty butter. That moment sold me forever. This recipe is straightforward, perfect for beginners, and guarantees that signature soft texture that makes Hawaiian bread famous. You are going to love this!

Gathering Ingredients for Your Sweet Hawaiian Bread
Okay, the beauty of this recipe is that most of what you need is likely already hiding in your pantry! But listen closely, because the details matter here, especially that milk temperature. You’ll need one cup of warm milk, and I mean *warm*—aim for 105 to 115 degrees Fahrenheit, anything hotter kills your yeast, and we can’t have that!
We also need 1/4 cup of granulated sugar to wake up the yeast, 2 1/4 teaspoons of active dry yeast, three large eggs, and 1/4 cup of both melted unsalted butter and that secret weapon, pineapple juice. Don’t forget 3 1/2 cups of flour, one teaspoon of salt, and that gorgeous brown sugar reserved just for the top. If you want to dive deeper into using quality ingredients, check out my notes on other quick bread recipes here: amazing homemade bread in 1 hour.
Essential Equipment for Perfect Sweet Hawaiian Bread
You don’t need fancy gadgets for this bread, but you do need the right setup! Grab a large mixing bowl, ideally one sturdy enough for some serious kneading action. You absolutely must have a greased 9×5 inch loaf pan ready to go when the dough is proofed.
Also, make sure you have a wire cooling rack—slicing into hot bread is a cardinal sin, and this rack helps it cool evenly without getting soggy bottoms. If you’re curious about setting up your baking station for other recipes, I talk about organizing my tools over here: 1 wonderful easy homemade bread recipe.
Step-by-Step Instructions to Make Sweet Hawaiian Bread
Now for the fun part—turning those ingredients into that fluffy, beautiful **Sweet Hawaiian Bread** loaf! We start gently, almost like coaxing the dough awake, before we get down to some serious work. Remember, bread building takes patience, but the rise times are worth it for that ultimate soft bite. I always preheat my oven right before the final proof, just to make sure the baking environment is perfect when the time comes.
When shaping the dough for the final rise, pack those little balls in snugly! They need to be close together so they support each other as they puff up. If you want rolls instead of a loaf, check out how I handle shapes for other soft breads here: amazing sweet fluffy dinner rolls.
Activating the Yeast and Mixing Wet Ingredients for Sweet Hawaiian Bread
First things first: get that warm milk ready—remember, 105 to 115 degrees! Sprinkle your granulated sugar and the yeast right on top. If you see a nice foamy layer after five minutes, congratulations, your yeast is happy and ready to work its magic on this **Sweet Hawaiian Bread**! After that, whisk in your eggs, melted butter, and that all-important pineapple juice until everything looks combined.

Kneading and First Rise of the Sweet Hawaiian Bread Dough
Time to bring it all together! Gradually mix in your flour and salt until you have a shaggy mess. Don’t panic; that’s normal! Turn it out onto a countertop dusted lightly with flour and knead it by hand for a good 8 to 10 minutes. This is where the structure happens! My secret tip for this dough: knead until it’s just smooth. Over-kneading can make this **Sweet Hawaiian Bread** tough, so stop when it springs back when poked lightly.
Once kneaded, pop it into an oiled bowl, cover it up, and let it relax. It needs about 1 to 1.5 hours in a warm spot. I put mine near the oven after I preheat it, just for gentle warmth. It’s doubled when it happily sits proud and puffy on the surface.
Shaping and Final Proofing for Optimal Sweet Hawaiian Bread Texture
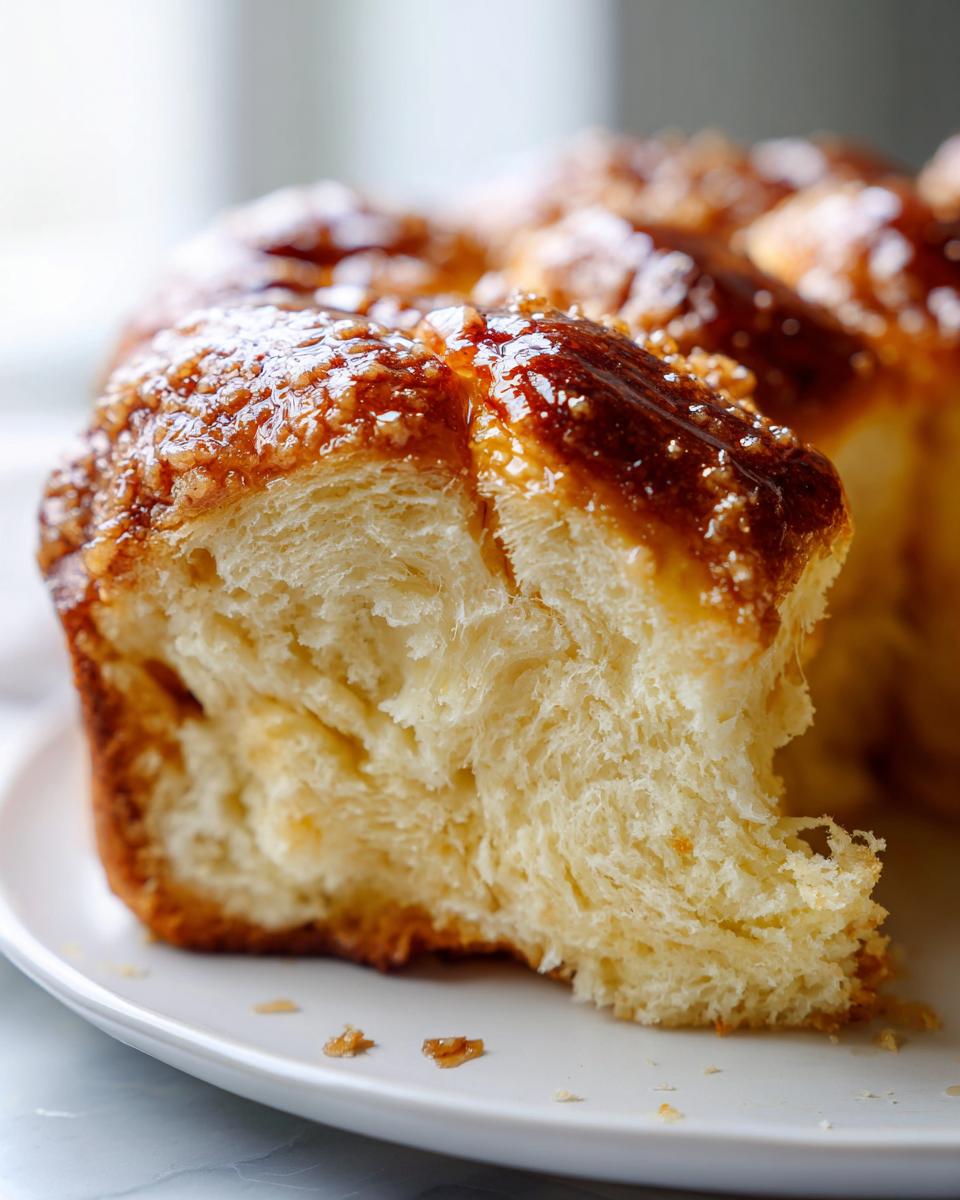
Gently knock the air out of that beautiful dough and divide it into exactly 12 equal pieces. Roll each piece tight into a little ball—think smooth, tight surface tension. Arrange those 12 balls snugly into your greased loaf pan. They should look cozy! Cover everything again and let the **Sweet Hawaiian Bread** dough proof for another 30 to 45 minutes until they look seriously puffy.
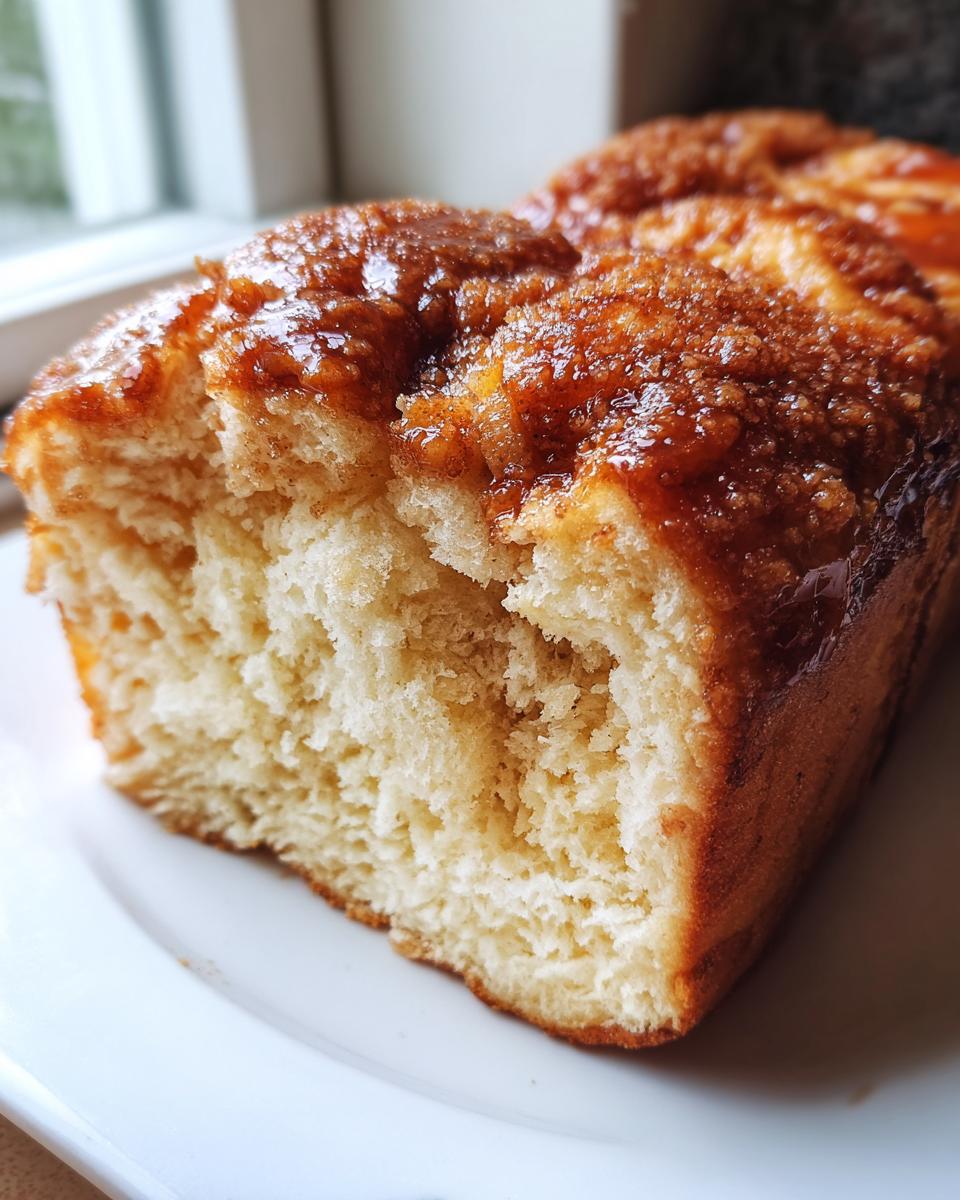
When it’s time for the oven, brush the tops lightly with water or milk, then sprinkle that brown sugar over them for that classic slightly crisp crust. Bake at 350F until they are beautifully golden brown. And promise me you won’t cut it until it cools completely! That helps lock in the softness.
Expert Tips for Achieving the Best Sweet Hawaiian Bread
I’ve made this **Sweet Hawaiian Bread** recipe so many times I could probably do the kneading in my sleep! To really elevate it from good to truly incredible, you need a couple of tweaks. First, about that yeast: if your active dry yeast just isn’t bubbling up nicely even when the milk is the perfect temperature, don’t try to force it. Toss it out and grab a fresh packet. Old yeast makes for flat bread!
Another huge game-changer is how you handle the topping. When you sprinkle that brown sugar on right before it goes into the oven, make sure you don’t overload it. We want a slight crust enhancement, not a candy shell! Also, if your oven tends to run hot on top, loosely tent that loaf with foil about 20 minutes in. This keeps the beautiful color without scorching it before the center is fully cooked through. For more tricks on making baked goods shine, take a peek at my thoughts on hummingbird bread.
Ingredient Notes and Substitutions for Sweet Hawaiian Bread
Look, I know life throws curveballs, and sometimes you’re missing that one specific ingredient called for in my **Sweet Hawaiian Bread** recipe. No sweat! The core elements—the yeast, the flour, the eggs—those are non-negotiable for structure. But we can swap smart on the flavor boosters!
If you’re out of pineapple juice, you can absolutely use the same amount of well-drained crushed pineapple. It actually adds a tiny bit more texture, which I kind of love! Also, if you use instant yeast instead of active dry? Just skip that first five-minute foaming step entirely. Dump it right into the dry mix. It saves time and works just as well for this sweet bread.
Need more inspiration on substitutions, or maybe you want to try an entirely different loaf? I wrote extensively about switching things up in my easiest loaves here—you might find some ideas for your next bake: easy banana bread.
Storing Your Homemade Sweet Hawaiian Bread
The hardest part about baking this bread is waiting for it to cool down enough to slice, but trust me, you need patience here! Once it’s completely cool—and I mean *completely*—wrap that loaf tightly in plastic wrap, and then tuck it into an airtight container. It keeps beautifully at room temperature for about three or four days; the sweetness helps it stay soft.
If you manage to have any leftovers after that, just slice what you need and pop the rest in the freezer! To bring back that fresh-from-the-oven softness, just microwave a slice or two for about 10 seconds, or wrap the whole frozen loaf in foil and warm it gently in a low oven. For tips on storing breads that have cream cheese involved, I share my methods when I make pumpkin swirl loaves: pumpkin cream cheese swirl bread.
Serving Suggestions for Sweet Hawaiian Bread
Once your loaf of **Sweet Hawaiian Bread** has completely cooled—and I know it’s tough to wait—the real fun begins! This bread is so versatile; it’s sweet enough for breakfast but sturdy enough for dinner. Toasted slices with just a thick layer of honey butter? Unbeatable.
It is absolutely fantastic served sliced thick alongside something savory, like smoky pulled pork or even good old fried chicken. It soaks up all those amazing juices! And when it starts getting just a *touch* older (though this rarely happens in my house!), it makes the most incredible, slightly sweet French toast you’ve ever had. You can even use it as the base for a great breakfast casserole! If you’re looking for a savory pairing, I talk about my favorite breakfast dish here: biscuits and sausage gravy.
Honestly, tearing off a warm chunk right out of the pan and eating it plain is my go-to, but don’t knock the savory pairings until you’ve tried them!
FAQ: Common Questions About Making Sweet Hawaiian Bread
I get asked about this recipe all the time, especially once people realize how easy homemade **Sweet Hawaiian Bread** is! Here are the things I hear most often about making this slightly sweet marvel at home.
Can I use water instead of the warm milk?
You technically can substitute water for the milk, but honestly, please don’t if you can help it! Milk provides fat and sugars that make this **sweet bread** so rich and tender. If you use water, you’re going to lose some of that signature soft texture, and it won’t brown quite as beautifully on top.
How do I know if my yeast is dead?
This is the make-or-break moment for any loaf! If you sprinkle your yeast over the warm milk and sugar mixture (remember, 105-115F is the perfect temperature zone), you should see foam bubbling up within five minutes. If it just sits there as a flat layer, your yeast is dead, and you need to start over with fresh yeast. Sad, but true for perfect **pineapple bread**!
Why do I have to let the bread cool completely before slicing?
If you cut into any moist loaf right out of the oven, you are basically releasing all the steam trapping that softness inside! When you cut it hot, you crush those delicate air pockets you worked so hard to create during the kneading and rising stages. Let it cool on the rack for at least an hour. You can find more baking tips, including cooling racks, when I talk about tea loaves here: raspberry almond tea bread.
Is browning the top crucial for this bread?
The brown sugar topping is key to the classic look! If you notice your loaf is getting too dark before the center is baked through—usually around the 20-minute mark—just gently tent a piece of aluminum foil over the top. That protects the sugar crust while the middle finishes cooking perfectly. It protects that beautiful golden hue we want on our **Sweet Hawaiian Bread**!
Nutritional Estimates for Sweet Hawaiian Bread
I always try to enjoy things mindfully, but sometimes you just want to know the basics, right? Here are the general estimates for one slice of this wonderful loaf. Remember, these figures are just a ballpark estimate because you know how much ingredient brands—and how much brown sugar you sprinkle on top—can change things!
- Serving Size: 1 slice
- Calories: 190
- Fat: 5g (3g Saturated Fat)
- Carbohydrates: 32g
- Protein: 5g
- Sugar: 9g
So, yes, it’s a treat! Any true count will vary depending on the exact brands of butter and flour you use, but this gives you a good starting point for enjoying your homemade baking!
Print
Simple Sweet Hawaiian Bread
- Total Time: 140 min
- Yield: 1 loaf (12 slices) 1x
- Diet: Vegetarian
Description
A straightforward recipe for making soft, slightly sweet Hawaiian-style bread at home.
Ingredients
- 1 cup warm milk (105-115F)
- 1/4 cup granulated sugar
- 2 1/4 teaspoons active dry yeast
- 3 large eggs
- 1/4 cup unsalted butter, melted
- 1/4 cup pineapple juice
- 3 1/2 cups all-purpose flour
- 1 teaspoon salt
- 1/4 cup brown sugar (for topping)
Instructions
- Combine warm milk and granulated sugar in a large bowl. Sprinkle yeast over the top and let it sit for 5 minutes until foamy.
- Whisk in the eggs, melted butter, and pineapple juice into the yeast mixture.
- In a separate bowl, mix the flour and salt. Gradually add the dry ingredients to the wet ingredients, mixing until a shaggy dough forms.
- Turn the dough out onto a lightly floured surface and knead for 8 to 10 minutes until smooth and elastic.
- Place the dough in a lightly oiled bowl, turning once to coat. Cover and let rise in a warm place for 1 to 1.5 hours, or until doubled in size.
- Gently punch down the dough. Divide it into 12 equal pieces. Roll each piece into a ball.
- Arrange the dough balls closely together in a greased 9×5 inch loaf pan. Cover and let rise again for 30 to 45 minutes, or until puffy.
- Preheat your oven to 350F (175C). Brush the top of the dough lightly with water or milk. Sprinkle evenly with brown sugar.
- Bake for 30 to 35 minutes, or until golden brown. If the top browns too quickly, loosely cover it with foil.
- Remove the bread from the pan immediately after baking and let it cool completely on a wire rack before slicing.
Notes
- For a richer flavor, substitute the pineapple juice with an equal amount of crushed pineapple, drained well.
- If you do not have active dry yeast, use instant yeast and skip the 5-minute proofing step.
- You can use a stand mixer with a dough hook for kneading if preferred.
- Prep Time: 25 min
- Cook Time: 35 min
- Category: Baking
- Method: Baking
- Cuisine: American
Nutrition
- Serving Size: 1 slice
- Calories: 190
- Sugar: 9
- Sodium: 210
- Fat: 5
- Saturated Fat: 3
- Unsaturated Fat: 2
- Trans Fat: 0
- Carbohydrates: 32
- Fiber: 1
- Protein: 5
- Cholesterol: 45
Keywords: Hawaiian bread, sweet bread, soft rolls, homemade bread, pineapple bread