
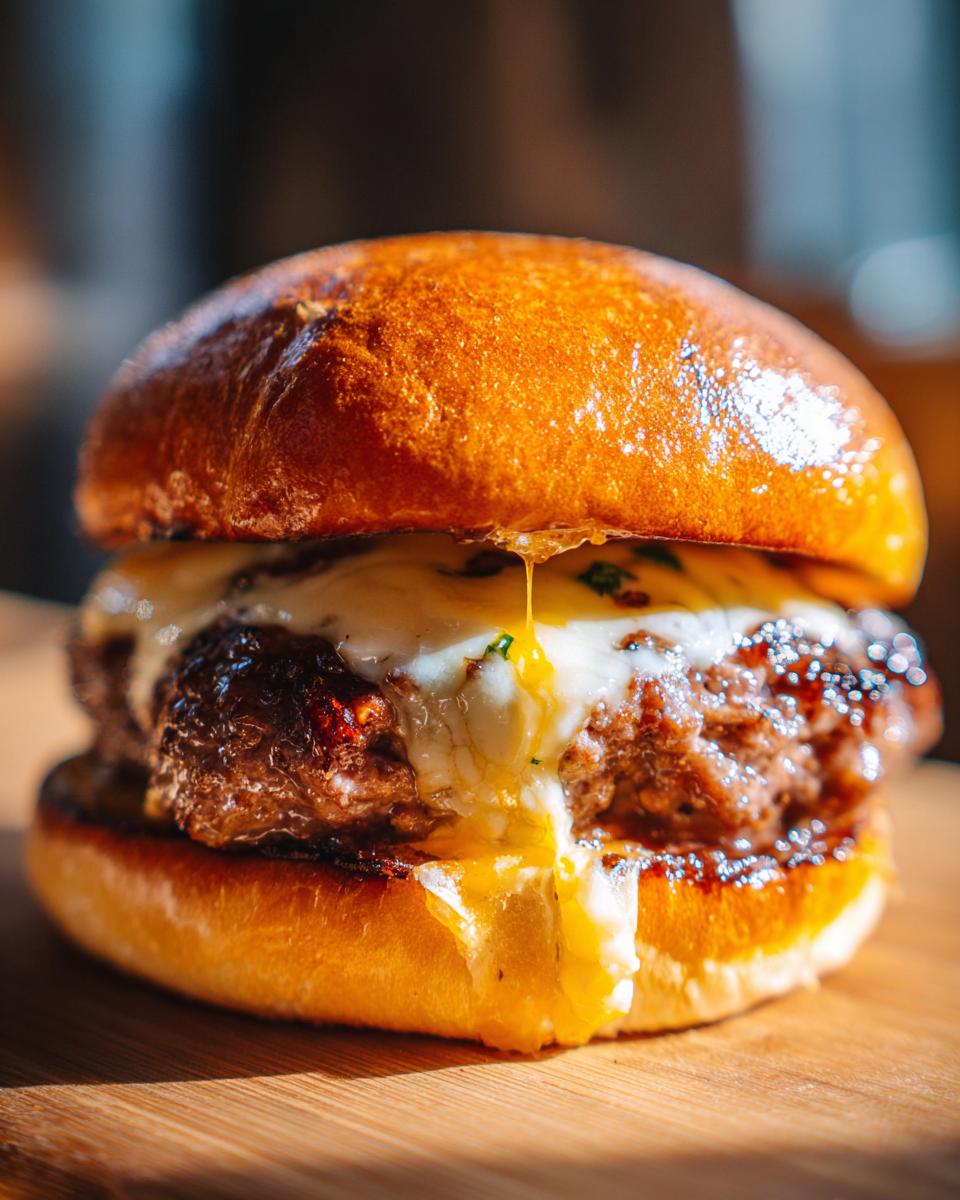
Oh my goodness, is there anything better than biting into a burger only to have that beautiful, molten cheese OOZE out? It’s pure magic, right? Well, forget flimsy patties that fall apart. I’ve spent years perfecting the art of the Stuffed Burgers, surviving countless backyard cookouts where burgers went rogue. This recipe is my absolute favorite because it delivers that incredible, juicy, cheesy center every single time, and we do it all right on the stovetop! Seriously, mastering that perfect seal so the cheese stays happily tucked inside took practice, but trust me, after making these dozens of times, I have the technique down pat for you. Quick, easy, and totally impressive!

Why These Stuffed Burgers Are a Weeknight Favorite
These are a weeknight hero for so many reasons, honestly. They take almost no time at all, making dinner stress-free.
- They cook up fast—we’re talking 10 minutes total on the skillet.
- The hidden cheese center gives such a massive flavor payoff for minimal effort.
- Cleanup is super simple since we’re pan-frying, not tending a whole grill setup.
If you want something that feels fancy but is secretly so quick, you have to try this method. You can even prep them ahead of time! Speaking of prep, you might also love this simple quick BBQ chicken flatbread when you need speed!
Essential Ingredients for Perfect Stuffed Burgers
The success of these burgers lives and dies by the quality of your main players—and just a few things from the pantry! First up, you absolutely must grab ground beef that has some fat content. I always insist on at least an 80/20 ratio if I want that incredible juice factor; anything leaner tends to dry out when you’re sealing it like this. You’ll need about 1.5 pounds of it.
For the cheesy surprise inside, we’re keeping it simple: four slices of cheddar work wonders, but don’t sweat it if you don’t have cheddar! My notes show Grandma sometimes swapped in mozzarella or Monterey Jack, so feel free to use what you love. Plus, we need simple seasonings—salt, pepper, and that splash of Worcestershire sauce which really boosts the beef flavor. If you’re looking for other ways to amp up ground beef, check out my recipe for Rotel dip with ground beef!
- 1.5 lb ground beef (80/20 fat content is the secret weapon!)
- 4 slices of cheddar cheese (or substitute Monterey Jack or mozzarella, cut in half for stuffing).
- 1 teaspoon salt
- 0.5 teaspoon black pepper
- 1 tablespoon Worcestershire sauce
- 4 hamburger buns
- 1 tablespoon vegetable oil for the pan
Step-by-Step Guide to Making Stuffed Burgers
Alright, let’s get down to business. Making these stuffed beauties takes maybe 15 minutes of prep, and they only need about 10 minutes on the heat—so you’re looking at a total time of 25 minutes for dinner! The trick here isn’t the heat; it’s the assembly. You have to treat the beef like you’re wrapping a precious, cheesy present. If you don’t seal them right, that lava cheese ends up coating your skillet instead of staying in the burger where it belongs. If you’re looking for other ways to shape patties, check out my guide for making homemade burger patties.
Preparing and Sealing Your Stuffed Burgers
First, you need to divide up your 1.5 pounds of ground beef. I grab a kitchen scale sometimes just to be sure, but generally, just eyeball it into 8 equal little balls. Take one ball and flatten it out gently into a thin disc. Now, this is where the cheese goes—put one slice right in the middle. Then, take your second portion of beef and drape it right over the cheese!
Now comes the most important part for successful Stuffed Burgers: sealing! Pinch the edges of the two patties together all around, working slowly to make sure you have zero gaps. You want a completely enclosed, sealed ball of meat. Pinch, pinch, pinch! Repeat this until you have four perfectly sealed, stuffed patties. If you leave a tiny opening, you’ll regret it when the cheese melts out! For making amazing crack burgers, you can check out my other recipe here.

Seasoning and Cooking the Stuffed Burgers
Once sealed, those four beautiful packages need seasoning. Sprinkle salt and pepper generously on both sides. If you have any little bits of seasoned beef scraps leftover (which sometimes happens!), mix them with a tiny bit of Worcestershire sauce and press that mixture onto the outside of the sealed patties—it adds flavor right to the crust!
Heat up a tablespoon of vegetable oil in your skillet over medium-high heat. Don’t overcrowd the pan, or the temperature will drop. Cook them for 4 to 5 minutes per side if you like them medium—this pan-frying method is perfect for heat control. Once they look gorgeous and crusty, take them off the heat. Before you load them up, make sure you lightly toast your hamburger buns. That toasting step keeps the bottom bun from getting soggy, which is crucial for a satisfying bite!
Tips for Mastering Your Stuffed Burgers
Listen, even with the best sealing job, sometimes those cheese pockets try to escape! The single most important thing is making sure your beef is cold when you start assembling. Warm meat is sticky and tears easily when you try to stretch it over that cheese center. Also, don’t press down on the patties too hard once they hit the hot skillet! That pressure slams the cheese outward and guarantees a blowout. Keep the heat consistent, medium-high is your sweet spot, and let them cook undisturbed for the first four minutes so that crust forms and locks everything in place.
If you want to add extra savory depth to the beef before you start stuffing, you could try marinating the meat scraps or seasoning the beef mixture lightly beforehand. I have this incredible recipe for a flavor-bomb steak marinade that works wonders, even briefly mixed into ground beef for a day! Just remember, keep the filling light—too much cheese makes sealing impossible.
Creative Variations for Your Next Batch of Stuffed Burgers
Okay, now that you’ve mastered the classic cheddar bomb, it’s time to have some real fun! The beauty of a stuffed burger is that once you nail the seal, you can stuff basically anything delicious in there. You don’t have to change our cooking method at all—just swap out that cheese center for something new. This keeps the excitement high, but the cooking process exactly the same, which I always appreciate!
My go-to next step after cheddar is adding a little bit of green. Try sautéing up some mushrooms and onions until they are deeply caramelized and soft. Let that mixture cool down completely—this is important, you don’t want hot filling melting the beef prematurely—and then pop a spoonful right in the middle instead of the cheese. It smells amazing while cooking!
Here are a few other must-try surprises I slip inside these burgers:
- Pepper Jack Kick: Swap cheddar for pepper jack cheese and add a tiny dollop of homemade jalapeño jelly right on top of the cheese before sealing. Wow, that gives you a sweet and spicy combo!
- Bacon Jam Centerpiece: If you happen to have some bacon jam lying around—and you should, because it’s amazing—use just a teaspoon of it inside, paired perhaps with some crumbled smoked gouda.
- Blue Cheese & Herb: Mix some robust blue cheese crumbles with fresh thyme and a tiny bit of cream cheese to bind it. This is definitely for the adults, but it’s so savory.
Seeing as we are keeping things beefy and satisfying, if you ever need something similar but handheld, you have to try my beef quesadillas recipe. It’s just as fast and just as satisfying!
Serving Suggestions for Stuffed Burgers
We’ve mastered the burger shell, but no burger is truly complete without the supporting cast, right? You can’t just serve up these beautifully oozing, cheesy monsters on a bare plate! Since these are rich and decadent, I usually lean towards sides that are either crisp and fresh to cut through the fat, or something truly classic and comforting.
For a straight-up classic American dinner, you absolutely have to have fries. But I’m not talking about boring frozen ones! If you have the time, homemade seasoned potato wedges, baked crispy, are unbeatable. Sprinkle them with garlic powder and a touch of oregano right when they come out of the oven. They soak up any extra cheese drippings that might escape the burger perfectly!
If you’re looking for something a little lighter but still satisfying, I often make a hearty salad. Forget boring lettuce; we need structure here! My favorite partner for a burger night is a giant, loaded cobb salad. It’s got protein, crunch, and that creamy homemade dressing really ties everything together. You can find my favorite recipe for that here—it’s amazing.

Here are a few other quick pairings that I think just work magically with a juicy, pan-fried burger:
- Crispy onion rings—the only real competition for fries, in my opinion!
- Coleslaw, preferably slightly vinegary to provide a nice little jolt of acidity.
- Good old-fashioned grilled corn on the cob when it’s in season. So sweet!
Honestly, whatever you choose, just make sure it goes well with a cold beverage, because these burgers are intense!
Storage and Reheating These Juicy Stuffed Burgers
These burgers are almost better the next day, provided you don’t ruin them during the reheat! If you have leftovers, you can totally refrigerate them for up to three days. Wrap each patty tightly in plastic wrap first, and then toss it in a zip-top bag. If you’re feeling organized, you can go straight to the freezer for longer storage.
The trick to reheating is avoiding the microwave if you can, because that’s how you end up with tough meat. I highly recommend wrapping the already-cooked burger tightly in foil and warming it in a low oven—maybe 300°F for about 10-15 minutes. That gentle heat warms it up without squeezing out the cheese. If you’re in a massive hurry, 30 seconds on medium power in the microwave is okay, but don’t walk away!
Frequently Asked Questions About Making Stuffed Burgers
I get so many questions about these things because everyone wants that perfect, cheese-filled bite without the mess! Here are the ones I hear the most often, and I hope they clear things up for your next burger night. If you love cooking with ground beef, you certainly might want to check out my super fast ground beef tacos recipe too!
How do I stop the cheese from leaking out while cooking?
This is honestly the number one concern, and it all goes back to technique right at the start. You need to make sure you are dividing the beef into two perfectly equal, thin patties, and when you put the cheese in the middle, you have to seal those edges thoroughly! Don’t just loosely meet them; pinch them hard together and smooth the seam so it’s one continuous piece of meat again. Also, don’t handle them too much once they hit the hot pan. If you crush them down early, you force the cheese out. Be patient!
Can I use leaner ground beef for Stuffed Burgers?
You can, but honestly, I wouldn’t recommend it if you’re a beginner at stuffing! If you use anything leaner than that 80/20 blend I mentioned—meaning 90/10, for example—the lack of fat means the meat has less “give” when it heats up, and it tends to tighten up and dry out faster. That lack of moisture ends up just pushing the cheese right out of any microscopic opening. The fat melts, keeps the meat tender, and acts like glue holding that delicious filling right where it belongs.
What is the best way to grill Stuffed Burgers?
Grilling is definitely possible! The main difference from pan-frying is heat control. If you put these directly over blazing hot charcoal or a super high gas flame, they will almost certainly blow out the bottoms before the inside thaws and cooks properly. What I do is use indirect heat. Get your grill hot, but place those patties over the side where there are no active flames or burners underneath. That way, they cook more gently, almost like an oven, allowing the seal to hold while the internal temp rises evenly. They still need about 4-5 minutes per side, but watch them closely!
Can I make these ahead of time?
Yes, and this is a huge time-saver before company comes over! Once you have stuffed and perfectly crimped your four patties, wrap each one tightly in plastic wrap. You can store them in the fridge for up to a day, or you can freeze them solid. If freezing, just make sure they are completely chilled first. When you cook them from frozen, you need to add about 3 to 5 extra minutes to your cooking time on each side, just to make sure that center cheese melts all the way through.
Estimated Nutritional Snapshot
Now, keep in mind these numbers are just estimates; they change depending on the specific brand of beef and how much cheese actually melts out versus stays in! But generally, for one of these beautiful, juicy Stuffed Burgers (not including the bun, as that varies wildly), here’s what you are looking at:
- Calories: Around 450
- Total Fat: Roughly 28 grams
- Protein: A fantastic 28 grams!
- Carbohydrates: About 25 grams (mostly from the bun and that splash of Worcestershire)
They are definitely a satisfying meal, packing great protein, but remember the fat content reflects that necessary 80/20 ratio we use for the best flavor and texture. These are worth every single bit, trust me!
Estimated Nutritional Snapshot
Now, keep in mind these numbers are just estimates; they change depending on the specific brand of beef and how much cheese actually melts out versus stays in! But generally, for one of these beautiful, juicy Stuffed Burgers (not including the bun, as that varies wildly), here’s what you are looking at:
- Calories: Around 450
- Total Fat: Roughly 28 grams
- Protein: A fantastic 28 grams!
- Carbohydrates: About 25 grams (mostly from the bun and that splash of Worcestershire)
They are definitely a satisfying meal, packing great protein, but remember the fat content reflects that necessary 80/20 ratio we use for the best flavor and texture. These are worth every single bit, trust me! If you’re trying to keep things lighter overall, sometimes I’ll serve a leaner version alongside my favorite low-calorie meal for variety at the table! Overall, though, a burger this good deserves the payoff.
Print
Simple Stuffed Burgers
- Total Time: 25 min
- Yield: 4 servings 1x
- Diet: Low Fat
Description
A recipe for making juicy burgers filled with cheese.
Ingredients
- 1.5 lb ground beef
- 4 slices cheddar cheese
- 1 teaspoon salt
- 0.5 teaspoon black pepper
- 1 tablespoon Worcestershire sauce
- 4 hamburger buns
- 1 tablespoon vegetable oil
Instructions
- Divide the ground beef into 8 equal portions.
- Take one portion and flatten it into a thin patty.
- Place one slice of cheese in the center of the patty.
- Take a second portion of beef and place it over the cheese, sealing the edges completely to form a stuffed patty.
- Repeat this process for the remaining portions to make 4 stuffed patties.
- Season both sides of each patty with salt and pepper.
- Mix Worcestershire sauce into the remaining beef scraps, if any, and press onto the outside of the patties for extra flavor.
- Heat vegetable oil in a skillet over medium-high heat.
- Cook the burgers for 4-5 minutes per side for medium doneness, or until cooked to your preference.
- Toast the hamburger buns lightly.
- Place each cooked burger on a toasted bun.
Notes
- Use ground beef with at least 80/20 fat ratio for juicier results.
- You can substitute cheddar cheese with mozzarella or Monterey Jack.
- Press the edges firmly when sealing to prevent cheese leakage during cooking.
- Prep Time: 15 min
- Cook Time: 10 min
- Category: Dinner
- Method: Pan Frying
- Cuisine: American
Nutrition
- Serving Size: 1 burger
- Calories: 450
- Sugar: 3
- Sodium: 550
- Fat: 28
- Saturated Fat: 12
- Unsaturated Fat: 16
- Trans Fat: 1
- Carbohydrates: 25
- Fiber: 1
- Protein: 28
- Cholesterol: 90
Keywords: stuffed burgers, cheeseburger, ground beef recipe, easy burgers, pan-fried burgers