
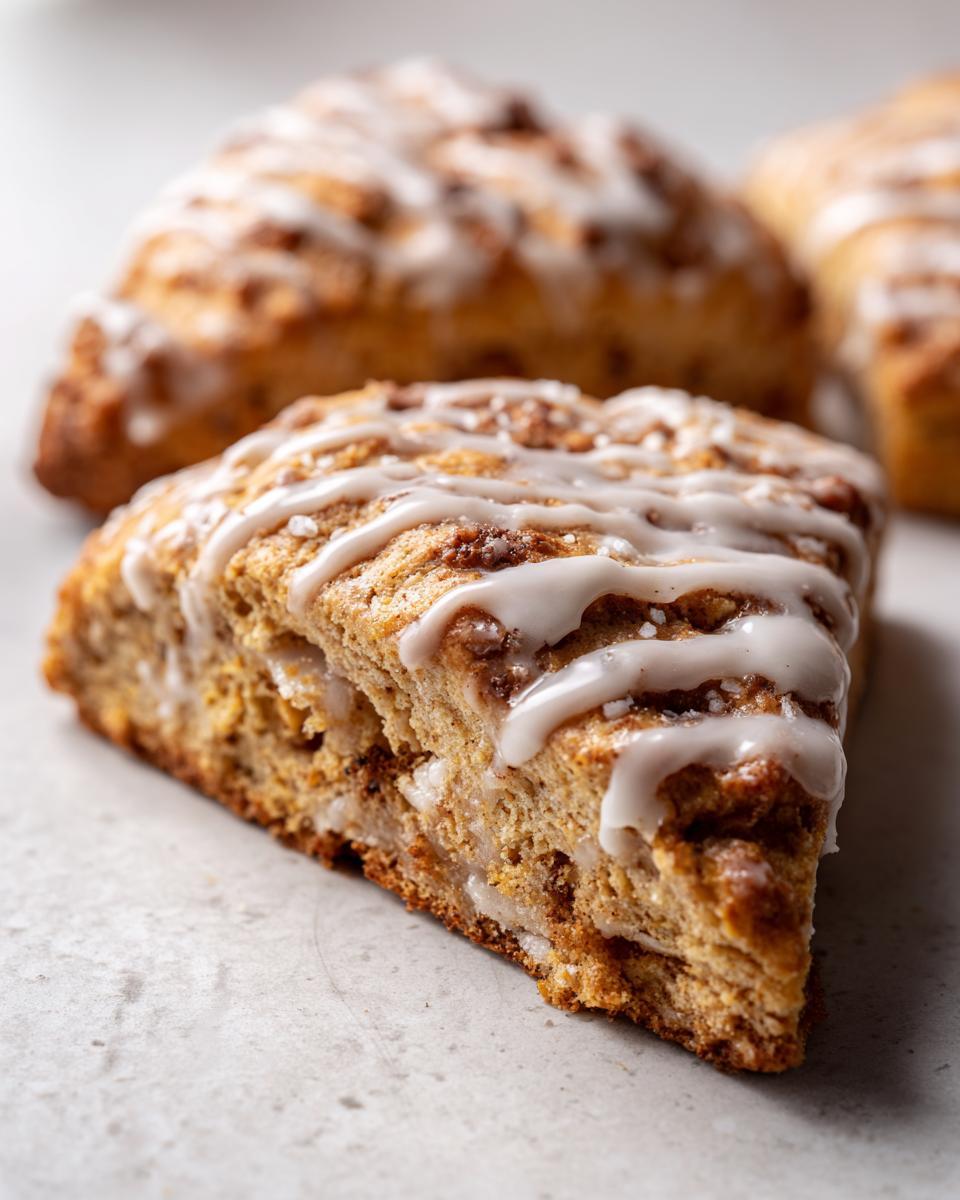
Oh, my gosh, when that first crisp breeze hits, you just know it’s time for pumpkin spice everything, right? Forget waiting in those long drive-thru lines! I mastered making the flakiest, perfectly spiced copycat Starbucks Style Pumpkin Scones right here in my own kitchen, and honestly, they are even better than the café version. My absolute favorite part of this recipe is how quickly they come together; it’s the perfect autumn baking fix when you need that cozy flavor immediately. Trust me, once you try this recipe, the seasonal madness outside your door will be replaced by the amazing smell of spiced goodness coming from your oven!
Why You Will Love These Starbucks Pumpkin Scones
I know you’re busy, so let me tell you why ditching the coffee shop line for these homemade treats is the best decision you’ll make all season. These aren’t just scones; they are your personal ticket to autumn bliss, ready almost instantly!
- They capture that authentic, slightly tangy, perfectly spiced taste you crave from your favorite seasonal stop.
- The texture is spot on—tender on the inside with just the right crumb structure.
- They are shockingly fast—seriously, you can have them ready for the oven quicker than you can drive to the café!
- That simple vanilla glaze sets up beautifully but isn’t overwhelmingly sweet.
Perfectly Spiced Flavor Profile
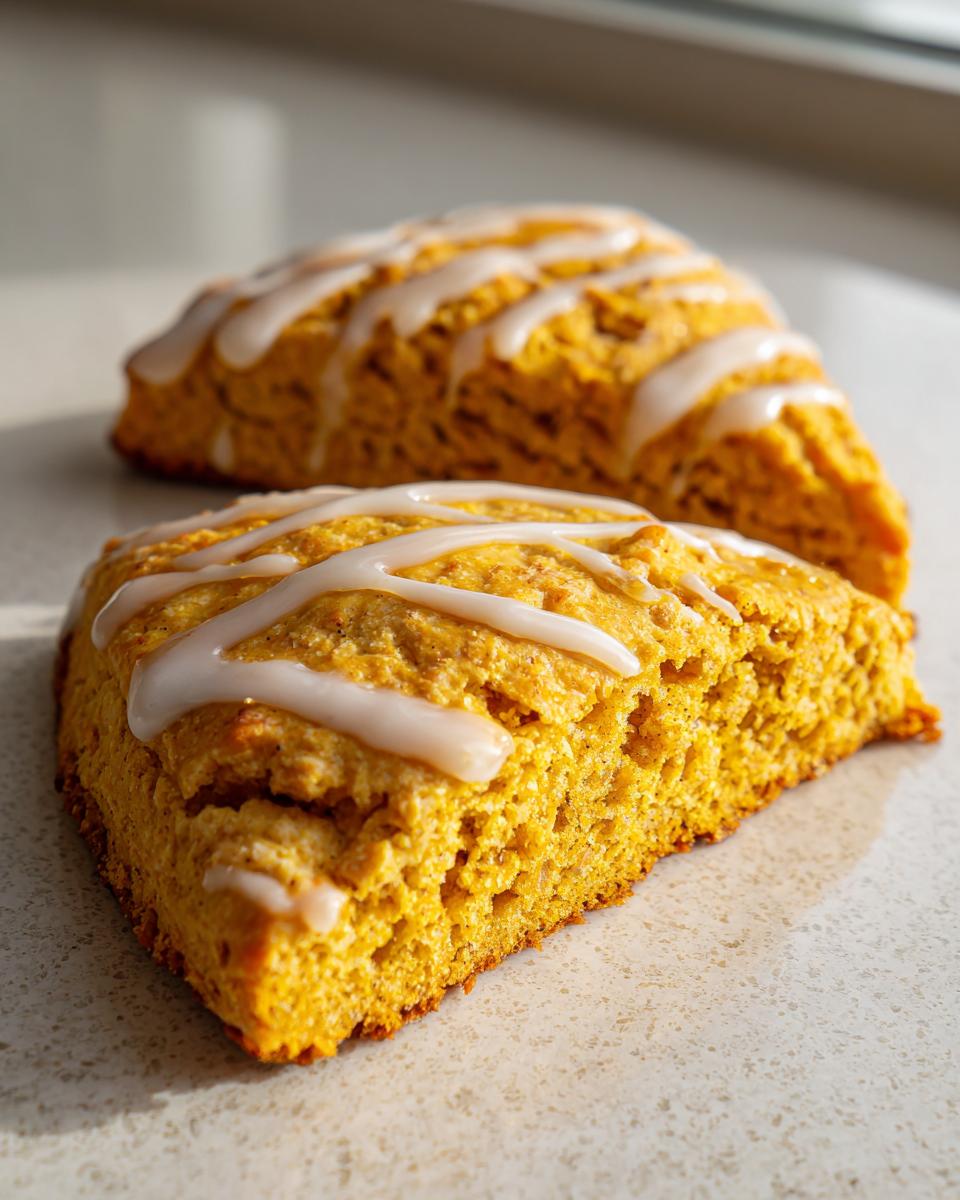
We nail that signature coffee shop warmth because we don’t skip the cinnamon, ginger, and nutmeg. It’s a cozy, deeply autumnal blend that perfumes your whole house. It truly tastes like fall in every single bite, just like you expect!

Quick Prep Time for Your Starbucks Pumpkin Scones
You only need about 15 minutes of active work to get these beauties ready for baking. That means less time measuring and mixing and more time enjoying that first glorious, steam-rising scone with your morning coffee. It’s baking efficiency at its best!
Essential Ingredients for Starbucks Pumpkin Scones
Getting the store-bought flavor just right means respecting what goes into the dough. I keep my ingredient list super precise because those little details are what separate a good scone from a truly amazing, copycat one. When you gather everything, you’ll notice we break it down into three key parts: the dry structure, the moist pumpkin mix, and the final sweet drizzle.
Dry Ingredients for the Scone Dough
We start with the foundation: 2 cups of all-purpose flour paired with 1/2 cup of granulated sugar. Then come the spices that make these legendary! We need a full 2 teaspoons of baking powder for lift, plus 1/2 teaspoon cinnamon, 1/4 teaspoon ginger, and 1/4 teaspoon nutmeg. Don’t forget that 1/4 teaspoon of salt to balance all that sweetness!
Wet Ingredients and Cold Butter
The coldness factor here is non-negotiable—you must use 1/2 cup of cold unsalted butter, cut into tiny pieces before you even start mixing! For moisture, we need 1/2 cup of smooth pumpkin puree—and please, make sure you grab puree and not the pie filling! That gets whisked together with 1/4 cup of heavy cream, 1 large egg, and 1 teaspoon of vanilla extract.
Simple Glaze Components
The topping is super easy because we’re keeping it classic. You just need 1 cup of powdered sugar, 2 tablespoons of milk to thin it down, and just 1/4 teaspoon of vanilla extract to round out that sweet vanilla finish.
Expert Tips for Perfect Starbucks Pumpkin Scones
You want that coffee shop magic, and sometimes that means tweaking a recipe just a little bit to make it work for your kitchen! I’ve learned a few tricks over the years that keep these scones tender and tasting exactly how they should. It’s all about paying attention to how the dough feels, not just what the clock says.
Ingredient Swaps and Additions for Your Starbucks Pumpkin Scones
If you want an extra tang that cuts through the sweetness, you can totally swap the heavy cream for buttermilk—it adds such a lovely depth. Also, if you like a little crunch in your scone experience, feel free to fold in about 1/2 cup of chopped pecans or walnuts right before you mix the wet into the dry ingredients. I actually love the texture they add! You might also enjoy this pumpkin cream cheese swirl bread if you’re having a major pumpkin craving!
Handling Dough Temperature
Sometimes, depending on how humid the day is, the dough can get a little sticky once you’ve mixed it all up. That’s totally fine! Don’t panic and start adding tons of extra flour; that will just dry out your final scone. If it’s feeling too messy to handle right when you turn it out, just wrap that dough disk up and pop it in the fridge for about 15 minutes. I promise, that quick chill makes cutting the wedges so much easier.
Step-by-Step Instructions for Starbucks Pumpkin Scones
Okay, it’s time to put on our aprons! Making these copycat Starbucks Pumpkin Scones is super straightforward, but the secret is moving methodically. Remember, we want tender scones, so patience during the mixing stages is truly key here. We’re going to get these spiced beauties prepped and ready to bake faster than you can finish your morning latte!
Mixing the Dry Ingredients and Cutting in Butter
First things first, preheat that oven to 400 degrees F (200 degrees C) and line a baking sheet with parchment paper—that’s your insurance against sticking! In your biggest bowl, whisk together all the dry stuff: flour, sugar, baking powder, and all those gorgeous spices, plus the salt. Now grab your cold, cubed butter and use a pastry blender or even just your fingertips to work it into the flour until it looks like coarse crumbs, maybe a little like peas. Stop when it looks mixed; we don’t want the butter melting!
Combining Wet and Dry for Starbucks Pumpkin Scones Dough
In a smaller bowl, go ahead and whisk your pumpkin puree, heavy cream, egg, and vanilla until they are nicely smooth. Then, you pour that lovely orange liquid right into your dry crumb mixture. I use a fork for this part, gently mixing everything until it *just* comes together. Seriously, if you see a few dry spots, that’s okay! Overmixing is the enemy of tender scones, so just stop stirring when everything looks barely combined.
Shaping, Cutting, and Baking the Starbucks Pumpkin Scones
Turn that shaggy dough out onto a lightly floured surface. Gently pat it down until it forms a nice, thick circle, about 3/4 of an inch high. Then, use a knife or bench scraper to slice that circle into 8 equal pizza-slice wedges. Don’t cram them together; space them about an inch apart on your prepared sheet. They bake for just 14 to 17 minutes, or until the edges just start turning golden brown. Let them sit on the sheet for about five minutes to firm up before transferring them to a wire rack to cool down completely. If you’re looking for other great baking projects, this bakery-style pumpkin muffin recipe is another star!
Preparing and Applying the Glaze
While those scones are cooling off on the rack, whip up the glaze. Just whisk the powdered sugar, milk, and vanilla extract until it’s silky smooth. You want this to be thick enough to drizzle but fluid enough to spread a little in the crevices. Once the scones are fully cooled—and I mean *cool*—you can drizzle that sweet topping everywhere! Let it set up for a few minutes before you dig in. It tastes best when the glaze is firm.
Equipment Needed for Starbucks Pumpkin Scones
You don’t need fancy gadgets for these copycat Starbucks Pumpkin Scones, but you do need the right basics to get that perfect crumb! I always make sure I have my trusty big mixing bowl ready for starting the dry ingredients. Then you’ll need a pastry blender—or just clean hands—for cutting in the cold butter until it looks sandy.
Grab a baking sheet and line it with parchment paper, which saves *so* much cleanup! Don’t forget the wire rack so the scones can cool evenly before we go crazy with that vanilla glaze. That’s really it—simple tools for a professional-tasting scone!
Storage and Reheating Your Starbucks Pumpkin Scones
Since these Starbucks Pumpkin Scones are so moist, keeping them fresh is easy. Once that glaze has fully hardened, store them in an airtight container at room temperature for up to three days. I actually sometimes make a big batch and freeze half for later!
If you freeze them, just wrap each scone tightly in plastic wrap first. When you’re ready to eat one, you can reheat it slightly in the microwave for about 10 seconds—that softens the crumb nicely. Or, for a better texture, pop it in a toaster oven for just a few minutes! If you love moist baked goods, you should check out my recipe for easy banana bread too!
Serving Suggestions for Homemade Starbucks Pumpkin Scones
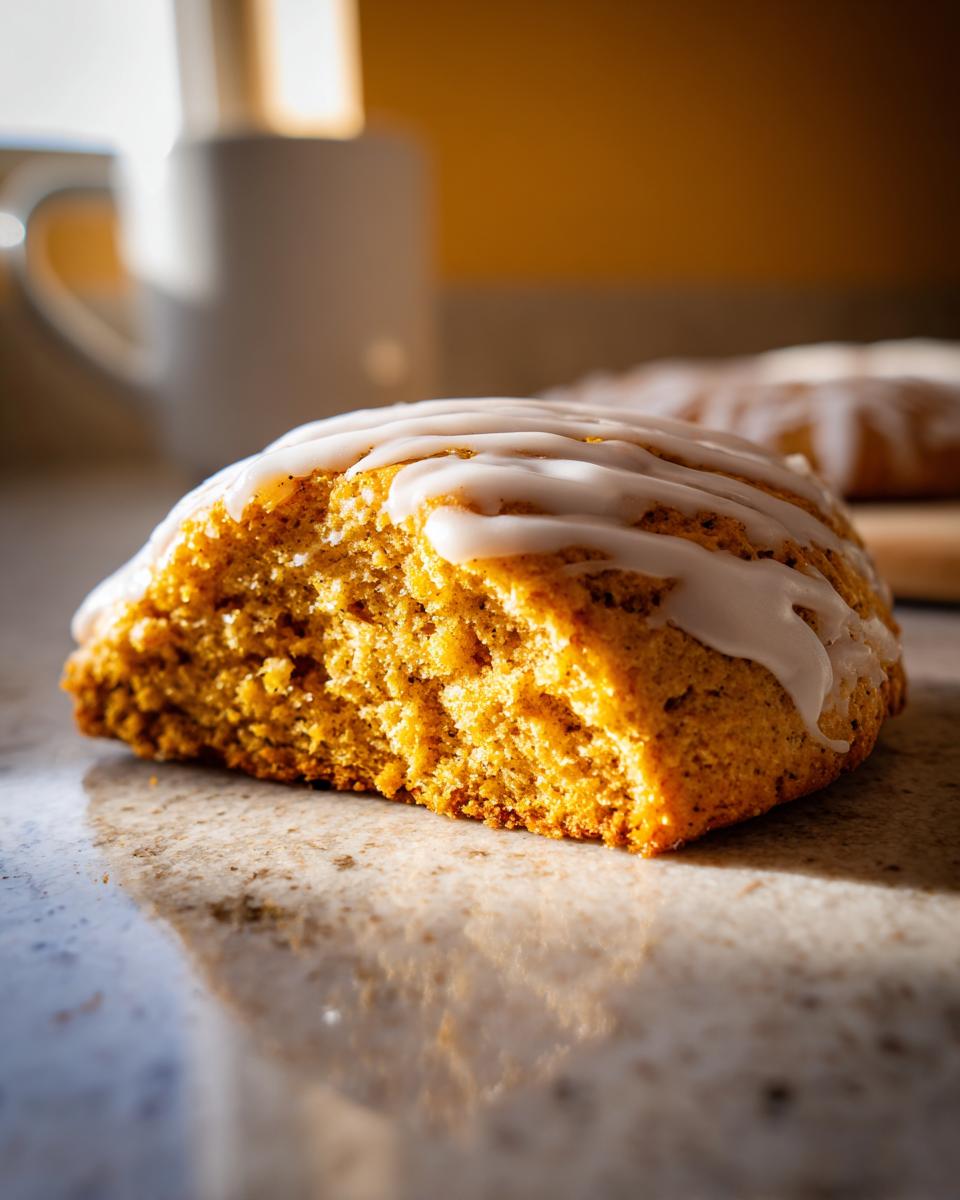
These Starbucks Pumpkin Scones are incredible slightly warm—that’s when the spices really bloom! They are spectacular paired with your morning cup of Joe, whether it’s hot or iced. I always serve mine with a generous splash of cream. If you’re looking for the perfect drink sidekick, try making my homemade iced coffee copycat recipe to go alongside!
Frequently Asked Questions About Starbucks Pumpkin Scones
I get so many questions about making sure these fall favorites turn out exactly right. Don’t worry if you’re new to scones; I’m here to help you ace that pumpkin spice flavor and texture every single time you bake!
Can I use fresh pumpkin instead of puree in these Starbucks Pumpkin Scones?
That’s a great question! You absolutely *can* use fresh pumpkin, but here’s the catch: fresh pumpkin can hold a surprising amount of extra water compared to canned puree. If you roast and steam it down yourself, you must make sure it’s very well drained and reaches the consistency of thick canned puree. Otherwise, your dough will be too wet and you’ll regret it!
How do I make the glaze thicker or thinner for my scones?
The glaze is totally adjustable based on how you like it! For a thicker glaze that holds its shape better, just whisk in another teaspoon or two of powdered sugar until you hit that perfect thick ribbon consistency. If it’s too thick and clumpy, add milk, but only add it a half teaspoon at a time. Seriously, just a tiny splash makes a huge difference!
What is the best way to prevent my Starbucks Pumpkin Scones from being dry?
The number one culprit for dry scones is overmixing once you add the wet ingredients! I stressed this before, but I’ll stress it again—stop mixing the second you don’t see any more streaks of dry flour. Developing too much gluten by working the dough too hard is what makes them tough and dry. Gentle handling equals tender pumpkin scones!
Nutritional Snapshot of Your Starbucks Pumpkin Scones
It’s always good to know what you’re fueling up with, especially when you’re making something this delicious! Because we use real butter and cream, these homemade Starbucks Pumpkin Scones are a treat, not a diet staple, right? Based on the ingredients we used, one scone comes out to about 350 calories, with 45 grams of carbs and 18 grams of fat.
Keep in mind that these numbers are just estimates, of course! If you add nuts or use buttermilk instead of cream, those values shift a little. But for a homemade indulgence that beats the coffee shop version, I think 350 calories is a sweet deal for this incredible spiced flavor!
Print
Starbucks Style Pumpkin Scones
- Total Time: 32 min
- Yield: 8 servings 1x
- Diet: Vegetarian
Description
A recipe for making pumpkin scones similar to those sold at Starbucks.
Ingredients
- 2 cups all-purpose flour
- 1/2 cup granulated sugar
- 2 teaspoons baking powder
- 1/2 teaspoon ground cinnamon
- 1/4 teaspoon ground ginger
- 1/4 teaspoon ground nutmeg
- 1/4 teaspoon salt
- 1/2 cup (1 stick) cold unsalted butter, cut into small pieces
- 1/2 cup canned pumpkin puree (not pumpkin pie filling)
- 1/4 cup heavy cream
- 1 large egg
- 1 teaspoon vanilla extract
- For the glaze: 1 cup powdered sugar
- 2 tablespoons milk
- 1/4 teaspoon vanilla extract
Instructions
- Preheat your oven to 400 degrees F (200 degrees C). Line a baking sheet with parchment paper.
- In a large bowl, whisk together the flour, granulated sugar, baking powder, cinnamon, ginger, nutmeg, and salt.
- Cut the cold butter into the flour mixture using a pastry blender or your fingers until the mixture resembles coarse crumbs.
- In a separate small bowl, whisk together the pumpkin puree, heavy cream, egg, and vanilla extract.
- Pour the wet ingredients into the dry ingredients. Mix gently with a fork until just combined. Do not overmix.
- Turn the dough out onto a lightly floured surface. Gently pat the dough into a 3/4-inch thick circle.
- Cut the circle into 8 equal wedges, like a pizza. Place the wedges on the prepared baking sheet, spacing them about 1 inch apart.
- Bake for 14 to 17 minutes, or until the edges are lightly golden brown. Let the scones cool on the baking sheet for 5 minutes before transferring them to a wire rack to cool completely.
- While the scones cool, prepare the glaze. Whisk together the powdered sugar, milk, and vanilla extract until smooth.
- Drizzle the glaze over the cooled scones. Let the glaze set before serving.
Notes
- For a richer flavor, you can substitute buttermilk for the heavy cream in the dough.
- You can add 1/2 cup of chopped pecans or walnuts to the dough mixture if desired.
- If the dough is too sticky to handle, chill it in the refrigerator for 15 minutes before cutting.
- Prep Time: 15 min
- Cook Time: 17 min
- Category: Dessert
- Method: Baking
- Cuisine: American
Nutrition
- Serving Size: 1 scone
- Calories: 350
- Sugar: 25
- Sodium: 250
- Fat: 18
- Saturated Fat: 11
- Unsaturated Fat: 7
- Trans Fat: 0
- Carbohydrates: 45
- Fiber: 2
- Protein: 5
- Cholesterol: 60
Keywords: pumpkin scones, Starbucks copycat, fall baking, spiced scones, pumpkin dessert