
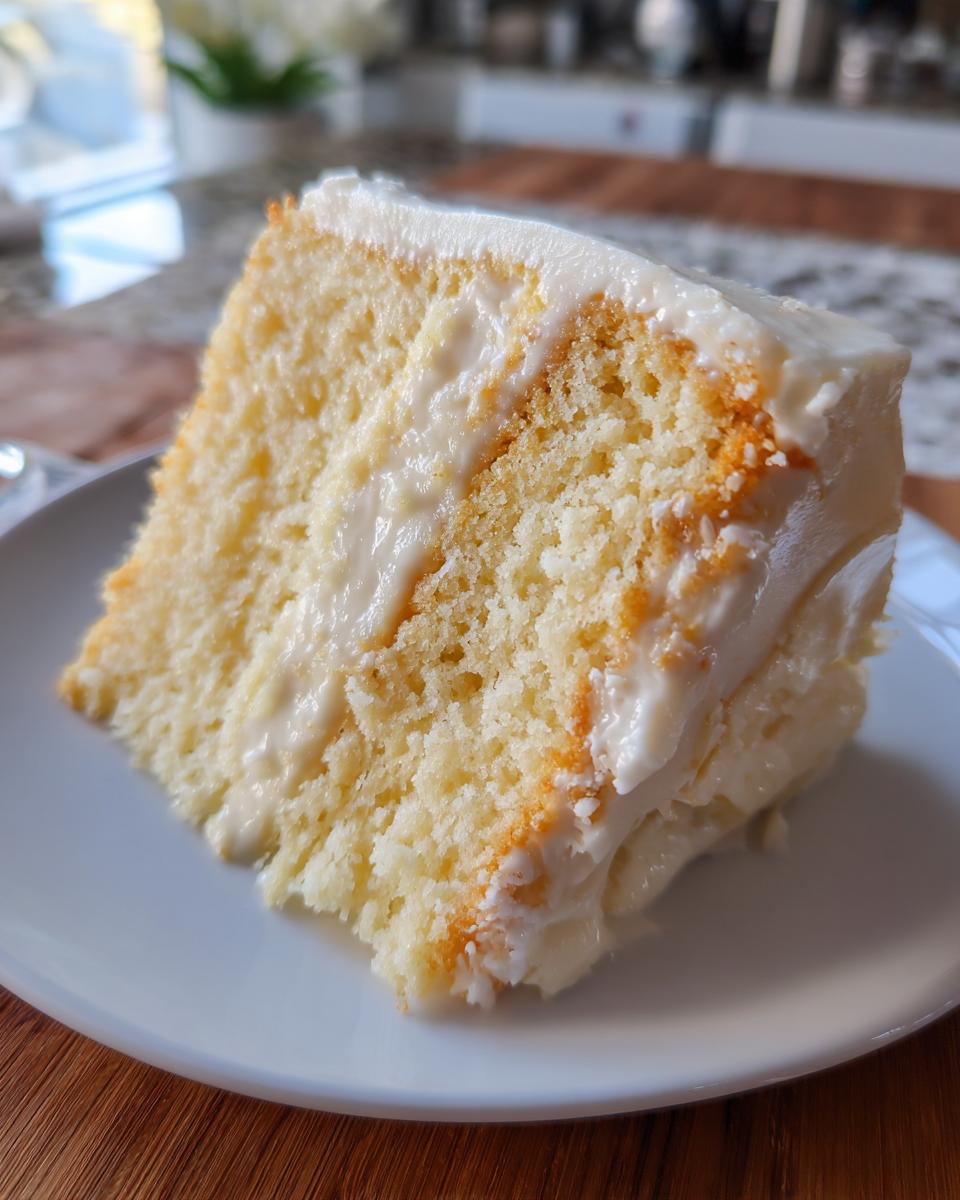
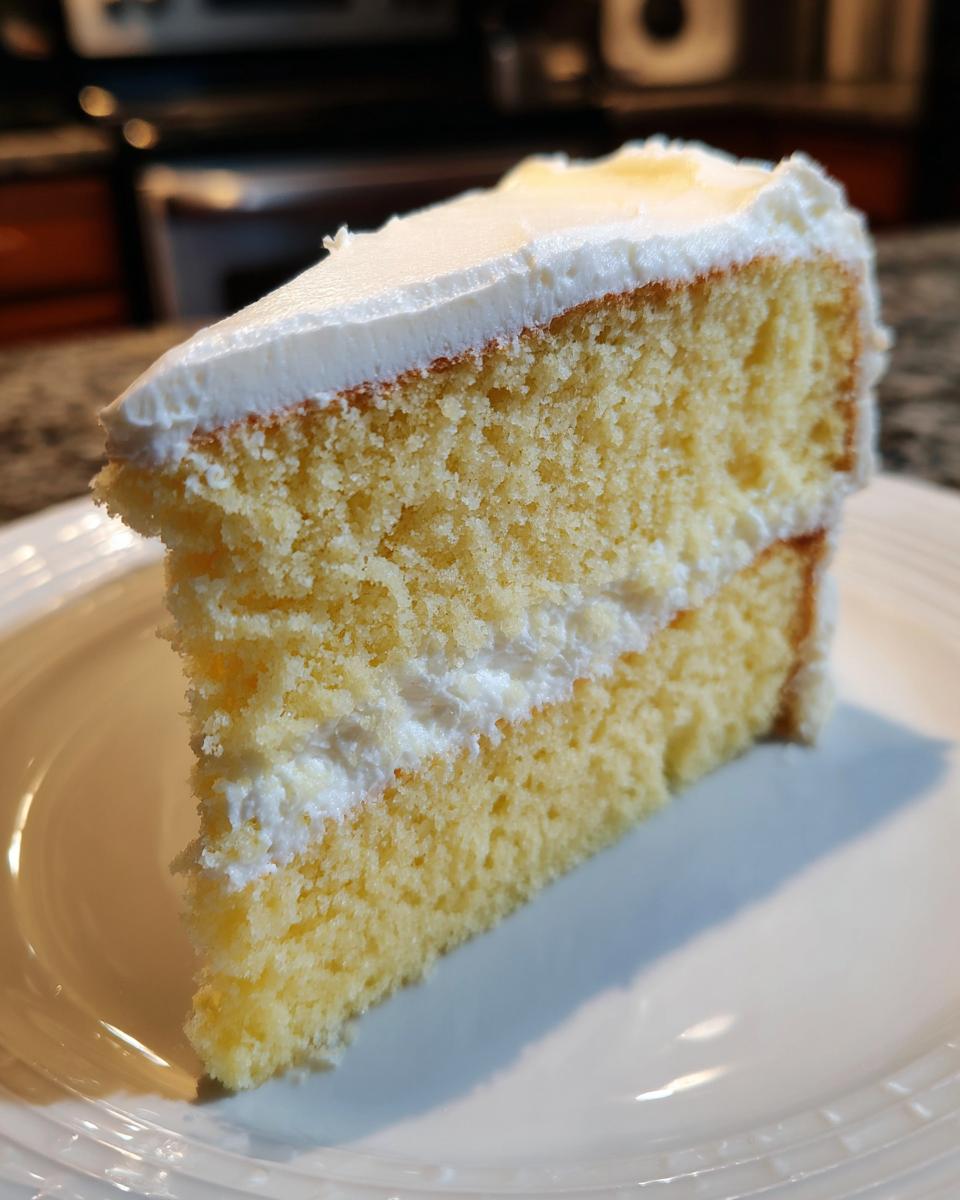
There’s just something about candles on a cake that makes everything feel special, right? Birthdays, graduations, or just making it through Tuesday—we deserve a celebration! And what’s a celebration without a perfect slice of cake? For years, my go-to when I needed something guaranteed to please everyone was this unbelievably reliable recipe for a moist vanilla birthday cake. I’m not kidding; I whip this out whenever my nephew has a surprise party because it comes together so fast! Last summer, when my sister decided she was having 30 people over the next day, I made two layers of this vanilla magic, and everyone raved. It’s simple, it’s tender, and honestly, it requires nothing fancy. I actually keep the full recipe saved on my phone now since the handwritten card is so stained with vanilla extract!
You can find the full ingredient list in the next section, but I promise you, it uses things you probably already have sitting in your pantry. This isn’t some fancy, fussy gourmet recipe—this is the classic, comforting vanilla we all crave. If you want to check out how I make my favorite paired frosting, that recipe is over here: homestyle yellow cake recipe. But trust me, this base layer cake is the star!
Gathering Ingredients for Your Birthday Cake
Okay, ingredient prep is where you build the foundation for a great cake, so don’t rush this part! Like I said, this is simple, but we need to be precise. For the dry side of things, you’ll need 1 1/2 cups of all-purpose flour, 1 1/2 teaspoons of baking powder—yep, that much gives us the lift!—and just a half teaspoon of salt to balance everything out. Make sure you whisk those together before they even think about meeting the wet stuff.
Now for the moisture and richness: we need one half cup of unsalted butter, and this is important—it needs to be softened to room temperature. Don’t even think about melting it! We need one full cup of granulated sugar, two large eggs (room temperature, please!), one teaspoon of pure vanilla extract (don’t downgrade on that vanilla!), and finally, one half cup of plain milk. Grab everything, set it out, get your two 8-inch pans ready, and you’re halfway there. You can see my favorite way to make a companion frosting here!
Step-by-Step Instructions to Bake the Perfect Birthday Cake
Now that we have everything lined up—all our butter soft, eggs not cold from the fridge—we can actually bake this thing! Remember my rule about room temperature ingredients? That’s so crucial here. If your butter is too hard, it won’t cream right; if your eggs are icy, they’ll shock that lovely creamed butter and we’ll get a curdled mess. Take the extra ten minutes to plan ahead; it pays off big time!
Preparation and Dry Ingredient Mixing for the Birthday Cake
First things first: fire up that oven to 350 degrees. Don’t wait until the batter is ready! While it’s heating up, take your two 8-inch round cake pans. I always grease mine really well with baking spray and then dust them with flour. Give the pan a good shake to coat every corner, then tap out the excess. Seriously, you do not want this beautiful cake sticking!
In a medium bowl, take your flour, baking powder, and salt—the dry team—and give them a good whisking. This just makes sure the leavening agent is totally distributed, so you don’t end up with one giant weird bubble spot in the middle of your otherwise perfect layer. Set that bowl aside for a minute.
Creaming and Wet Ingredient Incorporation for Your Birthday Cake
Time for the magic! In your big mixing bowl, beat that softened butter and the sugar together. You need to mix this until it’s genuinely light and fluffy. We’re trying to whip air into the fat—this is what gives the cake its lift! Mine usually takes three or four minutes with the electric mixer on medium-high. It should look pale in color.
Next, add the eggs, but only one at a time. Beat well after each addition, making sure the first one is fully incorporated before you drop in the second. Splashing in both at once is how you deflate all that beautiful air we just worked so hard to create! Finally, mix in that vanilla extract. Oh man, the smell right now is heavenly.
Final Batter Assembly and Baking the Birthday Cake
This part requires a little restraint! You need to add your dry flour mixture and that milk alternately. Start and end with the dry ingredients. So, about a third of the flour mix, mix on low until just combined, then half the milk, mix lightly, then another third of the flour, the rest of the milk, and finish with the final bit of flour. Stop mixing the second you don’t see any white streaks left. Seriously, stop! Overmixing develops gluten, and that makes a tough, chewy cake which is the opposite of what we want for a tender birthday cake.
Divide the batter evenly between the two prepared pans. Pop them into the preheated oven and set a timer for 25 minutes. Around 28 minutes, start checking them. You know they’re done when a wooden pick stuck right into the center comes out clean. Let them rest in the pans for about 10 minutes—no more, no less—before flipping them out onto a cooling rack. They need to be totally, completely cool before you even think about frosting them! If they’re warm, your frosting will melt into a sad, slippery puddle. Check out this recipe for quick baking if you’re running late: simple so tasty cake in 25 mins.
Expert Tips for an Unforgettable Birthday Cake
I’ve made this vanilla recipe so many times that I have a few little tricks up my sleeve that really elevate it past just “simple.” My biggest piece of advice, aside from room temperature ingredients, is really paying attention to mixing time. When you alternate the dry and wet stuff, stop mixing the second you lose the flour streaks. If you see a tiny speck of flour, that’s okay! It will disappear when you fold it by hand slightly, but overbeating that batter is the fastest way to turn a fluffy cake into something that chews back at you.
Moisture is key for a great layer cake. After the cakes cool completely, the best secret weapon against dryness is a simple syrup wash. You don’t even need sugar, just boil a tiny bit of water with a drop of vanilla, let it cool, and brush it lightly over the tops of your layers while they are still on the rack. It soaks right in and keeps them tender for days!
Now, about those pans! If you want your layers a little taller—maybe because you want that impressive height for stacking—you can totally use 9-inch pans instead of the 8-inch ones we listed. Just watch them closely! They usually bake up within 22 to 25 minutes because there’s less batter depth, so start checking them earlier than the standard 30 minutes. We don’t want them sneaking past done! If you’re into making cake pops from the scraps or leftovers, you can check out my favorite cake pop recipe for ideas.
Variations for Your Vanilla Birthday Cake
While this vanilla birthday cake is a classic for reason—it’s the perfect blank canvas—sometimes you want to jazz things up a little bit, right? You don’t need a whole new recipe to change the flavor profile, just a few simple additions. My favorite little cheat is adding zest!
If you have a lemon or an orange lying around, grab the microplane zester and grate about a teaspoon of zest right into your sugar and butter mixture when you are creaming them. Wow, does that instantly change the aroma in the kitchen! It adds such a bright, cheerful note that works perfectly for summer celebrations.
Another easy swap is your extract. Instead of using one full teaspoon of pure vanilla, try using a half teaspoon of vanilla and a half teaspoon of almond extract. The almond really deepens the flavor profile without overpowering the vanilla. Or, if you’re feeling bold, try a splash of high-quality mint extract! But honestly, trying out lemon flavors is usually the easiest way to switch it up!
Storing and Keeping Your Birthday Cake Fresh
You want this simple vanilla birthday cake to taste fresh, even if you bake it a day ahead, which I totally recommend doing! If you’ve frosted it, keep the whole thing covered tightly at cool room temperature for up to two days. Seriously, avoid the fridge unless your kitchen is blazing hot. That cold air steals the moisture right out of the cake layers.
If you only frosted the tops and haven’t stacked them yet, just wrap those individual layers tightly in plastic wrap before freezing or setting them aside. If you notice it feels a little stiff the next day, try my simple syrup trick again! Brushing on just a tiny bit of water or watered-down milk perks it right up. Don’t let your hard work go stale!
Serving Suggestions for the Best Birthday Cake Experience
So, your simple vanilla birthday cake layers are cool, stacked, and ready for their moment in the spotlight! You have options here, depending on how much effort you want to put in. Honestly, my favorite classic look is just a nice, fluffy layer of vanilla buttercream—it’s so creamy and delicious. You can find my super fast recipe for that buttercream frosting miracle right here!
If you want something lighter, a simple dusting of powdered sugar works perfectly, too. Or, go for fresh berries! A pile of slightly tart raspberries or sliced strawberries laid over the top really cuts through the sweetness. It makes the whole presentation feel very celebratory and farm-fresh!

Common Questions About Making a Birthday Cake
I get so many messages after people try this recipe, and usually, they are just questions about how to make sure everything goes perfectly for their big day! It’s totally normal to worry about things like sinking or sticking when you’re baking for an event. Don’t sweat it; we’ll troubleshoot!
If your layers look amazing but you’re curious about turning leftovers into something fun, I sometimes use leftover crumbs to make cake mix cookies—crazy, I know, but they work! Anyway, let’s tackle your most pressing concerns about this vanilla birthday cake.
Can I make this Birthday Cake ahead of time?
You absolutely can, and honestly, I think it tastes even better the next day, especially once the crumbs have settled! I usually bake my layers the afternoon before the party. Once they have cooled completely—and I mean totally cool, no residual heat whatsoever—wrap each layer tightly in plastic wrap, almost like a mummy! You can keep them like that at room temperature for a full 24 hours, or pop them in the fridge for up to two days.
The key is waiting until the last possible minute to frost them. If you frost too early, the moisture trapped between the layer and the frosting can sometimes make the cake a little gummy. Trust me, wrapping them up tight is the secret to keeping that fresh-baked tenderness for your big vanilla birthday cake reveal!
What if I only have 9-inch pans instead of 8-inch for this Birthday Cake?
That happens all the time! We all have whatever pans fits in our cabinets, right? If you use 9-inch round pans instead of the 8-inch ones this recipe calls for, you are essentially spreading the batter thinner across a slightly larger surface area. The good news is that the layers should bake faster since they aren’t as deep.
Instead of our usual 25 to 30 minutes, start checking your cake at the 20-minute mark. Stick that wooden pick in there! They might be done closer to 22 minutes. Because the layers are thinner, they also cool down faster, which is a nice little bonus when you’re on a tight schedule trying to get that frosting on!
Estimated Nutritional Profile for This Birthday Cake
Okay, so if you’re like me, you try not to think about the numbers when you’re busy celebrating, but sometimes you just need to know what you’re working with. Here is the nutritional breakdown for one slice of this simple vanilla birthday cake. Remember, these are just estimates calculated based on standard ingredient measures, and they don’t include whatever gorgeous frosting you slather on top!
We definitely prioritized taste and texture over being super light, so there’s a little sugar and fat in every slice, but frankly, it’s worth it when you take that first bite. If you want to lower the calories, you can always use a lighter buttercream, of course!
- Serving Size: 1 slice
- Calories: 300
- Sugar: 35g
- Sodium: 200mg
- Total Fat: 15g (Saturated Fat: 9g)
- Carbohydrates: 38g
- Protein: 4g
If you skip the frosting and just go for a light dusting of powdered sugar, you save yourself a good chunk of change in both fat and sugar content. But look at that protein sneaking in there—that’s just the eggs working hard!
Share Your Simple Vanilla Birthday Cake Creations
Whew! You did it! Now that your kitchen smells incredible and you have stacked layers of pure vanilla goodness, I really want to see what you created! This simple vanilla birthday cake is meant to be shared, whether it’s for a huge bash or just a Tuesday emergency.
Did you use that lemon zest trick? Or did you go classic with a mountain of buttercream? Head down to the comments section right now and let me know how it turned out! If you made an amazing creation, don’t forget to leave a star rating—it really helps other busy bakers decide if this reliable recipe is right for them!

And if you tried something fun or had a little hiccup you want to talk through, toss your questions down there too. I try to check in daily! If you’re already planning your next patriotic-themed party or need ideas for future celebrations, I’ve got some fun inspiration for other birthday cake ideas waiting for you!
Print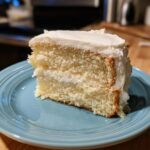
Simple Vanilla Birthday Cake
- Total Time: 50 min
- Yield: 8 servings 1x
- Diet: Vegetarian
Description
A basic recipe for a moist vanilla layer cake suitable for birthdays.
Ingredients
- 1 1/2 cups all-purpose flour
- 1 1/2 teaspoons baking powder
- 1/2 teaspoon salt
- 1/2 cup unsalted butter, softened
- 1 cup granulated sugar
- 2 large eggs
- 1 teaspoon vanilla extract
- 1/2 cup milk
Instructions
- Preheat your oven to 350 degrees Fahrenheit (175 degrees Celsius). Grease and flour two 8-inch round cake pans.
- In a medium bowl, whisk together the flour, baking powder, and salt. Set aside.
- In a large bowl, cream together the softened butter and sugar until light and fluffy.
- Beat in the eggs one at a time, mixing well after each addition. Stir in the vanilla extract.
- Gradually add the dry ingredients to the wet ingredients, alternating with the milk, beginning and ending with the dry ingredients. Mix until just combined. Do not overmix.
- Divide the batter evenly between the prepared cake pans.
- Bake for 25 to 30 minutes, or until a wooden pick inserted into the center comes out clean.
- Let the cakes cool in the pans for 10 minutes before inverting them onto a wire rack to cool completely.
- Frost as desired once completely cool.
Notes
- Use room temperature ingredients for better batter consistency.
- For a taller cake, use 9-inch pans and reduce the baking time slightly.
- Prep Time: 20 min
- Cook Time: 30 min
- Category: Dessert
- Method: Baking
- Cuisine: American
Nutrition
- Serving Size: 1 slice
- Calories: 300
- Sugar: 35
- Sodium: 200
- Fat: 15
- Saturated Fat: 9
- Unsaturated Fat: 6
- Trans Fat: 0
- Carbohydrates: 38
- Fiber: 1
- Protein: 4
- Cholesterol: 60
Keywords: birthday cake, vanilla cake, layer cake, simple cake, dessert