
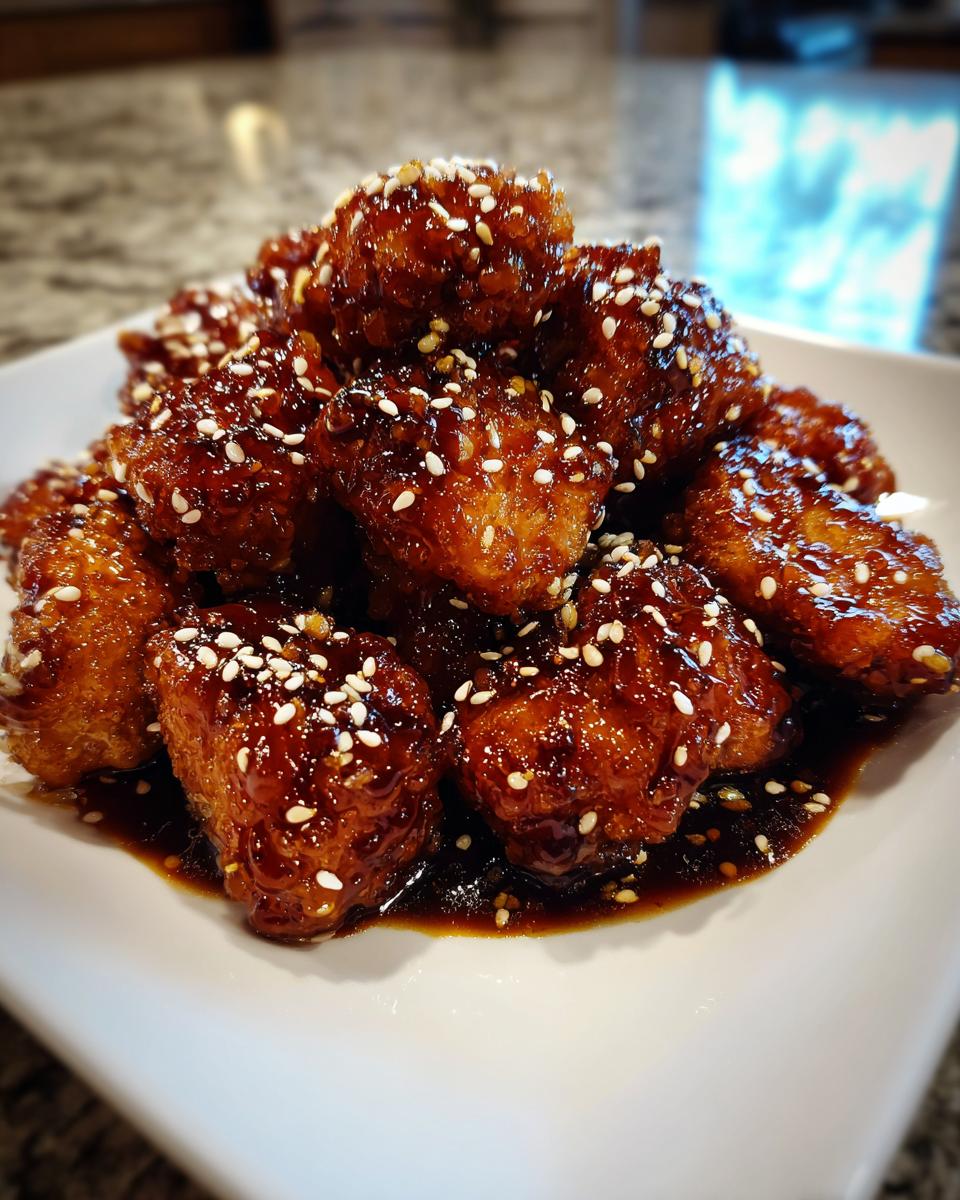
If you’re staring down the barrel of a Tuesday night and the thought of takeout feels like a financial crime waiting to happen, I’ve got you covered! Seriously, this recipe for the absolute best **Sesame Chicken** you’ll make at home is going to save your dinner routine. Forget those complicated takeout recipes that demand five different specialty sauces and an afternoon of chopping—we’re keeping this super simple and authentic, focusing on that sticky, salty-sweet glaze that makes this dish famous.

I honestly don’t know how many times this particular recipe has bailed me out when I realized at 5 PM that I had zero interesting plans for dinner. The magic here is the technique, not a huge ingredient list. By separating the sauce mixture early on and creating a perfect cornstarch slurry, we guarantee that gorgeous, thick coating without any mushy surprises. Trust me, this method ensures you hit that perfect balance of sweet, savory, and just a hint of nutty sesame flavor every single time.
Why This Sesame Chicken Recipe Works So Well
Honestly, I think this recipe stands out because it doesn’t try to be fancy; it just focuses on doing the fundamentals right. We get maximum flavor in minimal time, which is what every busy person needs! If you’re looking for something similar but with a bit more tang, you should check out my thoughts on this amazing sweet and sour chicken recipe sometime too.
But back to our star—here’s why this approach knocks it out of the park:
- Quick Prep and Cook Times: Seriously, we’re looking at thirty minutes total, start to finish! That means you can have restaurant-quality chicken on the table before the delivery apps even finish calculating the wait time. It’s truly a weeknight miracle.
- Achieving the Perfect Sauce Consistency for Sesame Chicken: The secret weapon is how we handle the cornstarch. We create a very careful slurry, and it thickens up that lovely honey-soy liquid almost instantly when you bring it to a simmer. It coats the chicken beautifully without getting gummy—that’s pure technique making a difference!
Gathering Your Ingredients for Sesame Chicken
I love this part because it reminds you just how simple good flavor can be. You don’t need a pantry full of exotic things! With just a few pantry staples, we are creating something amazing. If you ever want to try another incredible sauce, you have to check out my recipe for 5-minute teriyaki magic—it uses a similar base philosophy, just slightly different flavor notes!
Gather absolutely everything before you start mixing. This recipe moves fast once you get going, and you don’t want to be scrambling for the honey when your chicken is waiting!
Chicken Preparation Details
For the main event, grab about a pound of boneless, skinless chicken breast. Now, this is important: cut it into nice, even 1-inch pieces. Uniformity is key here, especially since we are frying in batches. If the pieces are all the same size, they cook through perfectly in that short 4 to 5 minutes, ensuring every piece is tender and not overcooked.
Key Sauce Components for Sesame Chicken
The sauce is where the real balancing act happens. We need the salty depth from soy sauce, balanced by the sweetness of honey—don’t be tempted to cut back on the honey, it’s essential for that sticky glaze!
We finish the sauce with aromatic ginger (use fresh, please—it makes a huge difference!) and garlic, and of course, that nutty sesame oil for fragrance. Finally, to get that thickness, we’re using a slurry: just 1/4 cup of water whisked really well with 2 tablespoons of cornstarch. Whisk it until it looks completely smooth and there are zero white clumps hiding at the bottom before you toss it with the chicken. Smooth whisking equals smooth sauce!
Step-by-Step Instructions for Simple Sesame Chicken
Okay, are you ready? This is where the magic happens, and it happens fast! Get your ingredients prepped because once you start the heat, there’s no time to waste. If you think this method looks like the backbone of some other quick recipes, you’re right! I use variations of this sauce technique all the time, like when I make my quick BBQ chicken flatbread—it’s all about timing!
Preparing the Two Sauce Mixtures
First things first: we make the flavor base! You need to mix up that soy sauce, rice vinegar, honey, sesame oil, ginger, and garlic. Whisk it until everything looks happy together. Now, here is the most crucial balancing act: pour out exactly half of that beautiful mixture into a separate, clean bowl. That reserved half is what we’ll use at the very end to glaze everything, so set it aside safely.
In the bowl that still has the first half of the sauce, whisk in your water and that cornstarch until it’s perfectly smooth. I mean, *smooth*. If you leave lumps, you’ll end up with little glue balls instead of a glaze!
Take your 1-inch chicken pieces and toss them right into that cornstarch-sauce mixture until every side is coated. It will look a little wet and clumpy—that’s exactly what we want for protecting the chicken and helping the crust form.
Frying the Chicken to Golden Perfection
Time to heat up the oil! Get about an inch of vegetable oil going in a large skillet over medium-high heat. You want it hot enough to sizzle immediately but not smoking like crazy! I always drop a tiny sliver of chicken in first just to test the temperature.
Fry your chicken in small batches—don’t crowd the pan, seriously! Crowding drops the oil temperature drastically, and then you steam the chicken instead of frying it. Give them about 4 to 5 minutes per batch until they are gorgeously golden brown all over. Use tongs to move them out onto a plate lined with paper towels. We need to drain off that excess oil to keep our final sticky coat from sliding right off!

Finishing the Sesame Chicken
Once all your chicken is fried and resting, pour out most of that used cooking oil from the skillet, leaving just about a teaspoon behind. Return the pan to medium heat.
Now, pour in that reserved, un-thickened sauce mixture. You have to stand there and stir constantly! As soon as it starts to bubble up, you’ll watch it transform into a beautiful, thick, syrupy glaze in practically one minute. Don’t overcook this part, or it turns into candy!
The last step: toss all that perfectly crisp chicken right back into the hot glaze. Keep tossing gently until every single piece is covered, shiny, and sticky. That’s it! Dinner is done way faster than you thought possible!
Expert Tips for the Best Sesame Chicken
Look, making this recipe once is great, but making it absolutely *perfect* every time requires the kind of tweaks that only come from experience. I’ve learned a few little secrets along the way to push this from “good” to “call the delivery guy and tell him he’s fired!” If you want a side dish that plays nicely with this powerful flavor profile, you should absolutely check out how I make my garlic butter chicken—the richness is addictive!
Chicken Thigh Substitution Note
While I use chicken breast in the main recipe because it cooks so fast, I totally recommend trying chicken thighs when you aren’t watching the clock quite so closely! Dark meat stays moister and has a richer flavor, which really complements that sticky glaze. If you want a deeper, heartier meal, feel free to swap them in without changing any of the sauce measurements at all.
Boosting Crispiness for Your Sesame Chicken
Now, for that extra special crunch, here’s a little trick I learned: before you drop those sauce-coated chicken pieces into the hot oil, take them for a quick detour! I dredge them very lightly in a bowl of all-purpose flour. You don’t want a thick coating, just a thin veil of flour that grabs onto the oil. This step really locks in moisture and gives you that incredible outer crunch that stands up beautifully against the thick glaze.
Serving Suggestions for Sesame Chicken
Once you’ve successfully coated that perfectly crisp chicken in that delicious, shiny sauce, you need the right vessel to eat it from! The instructions clearly state you need cooked rice, and honestly, you can’t beat simple steamed Jasmine rice. I have a foolproof method for making Jasmine rice in just 15 minutes if you need a quick side!
The sweetness and richness of the sesame chicken really shine when paired with something fresh. I always serve mine alongside some quickly blanched or steamed broccoli or snap peas to give the meal some color and crunch. A scattering of those toasted sesame seeds on top isn’t just for looks, either—it adds a nutty texture that balances the sticky glaze so well. It’s a complete meal right there on the plate!
Storage and Reheating Sesame Chicken
So, you made too much! Lucky you! The good news is that leftovers are almost as good, provided you handle them right. Store this Sesame Chicken in an airtight container in the fridge. It keeps really well for about three days. Honestly, after day four, the glaze starts losing its wonderful stickiness.
Now, here’s the trick for reheating: please, for the love of all that is crispy, skip the microwave if you can! The microwave is the enemy of crispiness and will steam the coating right off. Instead, the best way to wake this up is to use a skillet over medium heat. Add just a tiny splash of water or broth to the pan before adding the chicken. This helps the sauce loosen up without turning watery, and the gentle heat brings the chicken back to life gently!
Frequently Asked Questions About Sesame Chicken
I know when I try a new recipe, I always have about a million tiny questions running through my head! I tried to answer the ones I always get asked about this recipe right here. If you’ve got more, just shout them out in the comments below! By the way, if you just can’t get enough sticky chicken flavors, you absolutely must check out my review of the sweet and sour chicken recipe—it’s another winner!
Can I make this Sesame Chicken recipe without deep frying?
Oh, absolutely! I get that not everyone owns a giant pot of oil! If you want to avoid frying, you have two great options. First, you can bake the coated chicken on a wire rack placed over a baking sheet at 400°F (200°C) until it’s cooked through—it takes a little longer, maybe 15 to 20 minutes. Or, even better, pop it in the air fryer! You’ll get a decent crispness, though I’ll tell you, it just won’t have that rich, deep crunch that the hot oil gives it.
What is the best way to thicken the sauce if it is too thin?
This usually only happens if you didn’t whisk your initial cornstarch mixture well enough, or maybe you just didn’t let the reserved sauce simmer long enough. No panic necessary! Just take a tiny spoonful of cornstarch—no more than a teaspoon—and whisk it into a tablespoon of cold water until it’s totally smooth. Then, drizzle that slurry into your simmering sauce while constantly stirring! It should thicken up dramatically in about 30 seconds flat. Don’t add too much at once, or you’ll end up with glue!
How long does the Sesame Chicken stay fresh in the refrigerator?
Because this dish has that wonderful, flavorful glaze, it holds up really nicely. I find that the flavors even meld together a bit overnight! You can safely store your leftover Sesame Chicken in a sealed container in the fridge for about three good days. Just remember what I said earlier: reheat it gently in a skillet to keep that coating from getting totally soft!
Nutritional Estimates for Sesame Chicken
Now, I’m not a nutritionist—I’m just a cook who loves feeding people! So just keep in mind that all the numbers below are rough estimates based on the ingredients listed. If you’re counting macros or watching sodium, you might want to check your specific ingredients, especially the brand of soy sauce you use!
This recipe yields about three servings, so these numbers reflect what’s in one serving:
- Calories: Roughly 450 per serving—a totally reasonable number for a satisfying dinner!
- Protein: We’re packing in about 45 grams, thanks to that chicken breast, so it really keeps you full.
- Fat: It clocks in around 15 grams total. Because we are frying, we get a little bump here, but that’s why we drain it well!
- Carbohydrates: Around 30 grams, which mostly comes from the honey and cornstarch glaze.
If you’re looking for something a little lighter on the fat side, that’s why I always stress making sure you drain that oil well after frying, or even trying the baked method I mentioned earlier. Either way, this homemade Sesame Chicken is a fantastic, flavorful weeknight win!
Share Your Simple Sesame Chicken Experience
That’s it, my friends! You’ve made the best, quickest, most satisfying Sesame Chicken right in your own kitchen. I truly hope this recipe saves your busy weeknights the way it saves mine constantly!
Now, the best part of sharing recipes with you all is hearing how they turn out! If you made this sticky, sweet, and savory chicken, please do me a huge favor: scroll down and leave me a quick rating right below. Did you try the flour dusting trick? Did your kids love it?

I absolutely love seeing your pictures, so tag me if you post them on social media! And hey, if you have any lingering questions that I didn’t cover, drop them in the comments section. If you need to reach out directly for any reason, you can always use my official contact page here: Just click here to send a note. Happy cooking, everyone!
Print
Simple Sesame Chicken
- Total Time: 30 min
- Yield: 3 servings 1x
- Diet: Low Fat
Description
A straightforward recipe for sweet and savory sesame chicken.
Ingredients
- 1 pound boneless, skinless chicken breast, cut into 1-inch pieces
- 1/4 cup soy sauce
- 2 tablespoons rice vinegar
- 2 tablespoons honey
- 1 tablespoon sesame oil
- 1 teaspoon grated fresh ginger
- 1 clove garlic, minced
- 1/4 cup water
- 2 tablespoons cornstarch
- Vegetable oil for frying
- Sesame seeds for garnish
- Cooked rice for serving
Instructions
- In a bowl, whisk together soy sauce, rice vinegar, honey, sesame oil, ginger, and garlic. Set aside half of this mixture for the sauce.
- In the remaining half of the mixture, whisk in the water and cornstarch until smooth. Toss the chicken pieces in this mixture until coated.
- Heat about 1 inch of vegetable oil in a large skillet over medium-high heat.
- Fry the chicken in batches until golden brown and cooked through, about 4-5 minutes per batch. Remove chicken and drain on paper towels.
- Pour off most of the oil from the skillet, leaving about 1 teaspoon.
- Return the skillet to medium heat. Pour in the reserved sauce mixture.
- Bring the sauce to a simmer, stirring constantly until it thickens, about 1 minute.
- Return the cooked chicken to the skillet and toss to coat completely with the sauce.
- Serve immediately over cooked rice and sprinkle with sesame seeds.
Notes
- You can substitute chicken thighs for breasts if you prefer darker meat.
- For extra crispiness, dredge the coated chicken in a little flour before frying.
- Prep Time: 15 min
- Cook Time: 15 min
- Category: Dinner
- Method: Stir-Frying
- Cuisine: Asian-Inspired
Nutrition
- Serving Size: 1 serving
- Calories: 450
- Sugar: 18
- Sodium: 850
- Fat: 15
- Saturated Fat: 3
- Unsaturated Fat: 12
- Trans Fat: 0
- Carbohydrates: 30
- Fiber: 1
- Protein: 45
- Cholesterol: 110
Keywords: sesame chicken, easy chicken recipe, Asian chicken, sweet and sour chicken, stir fry