
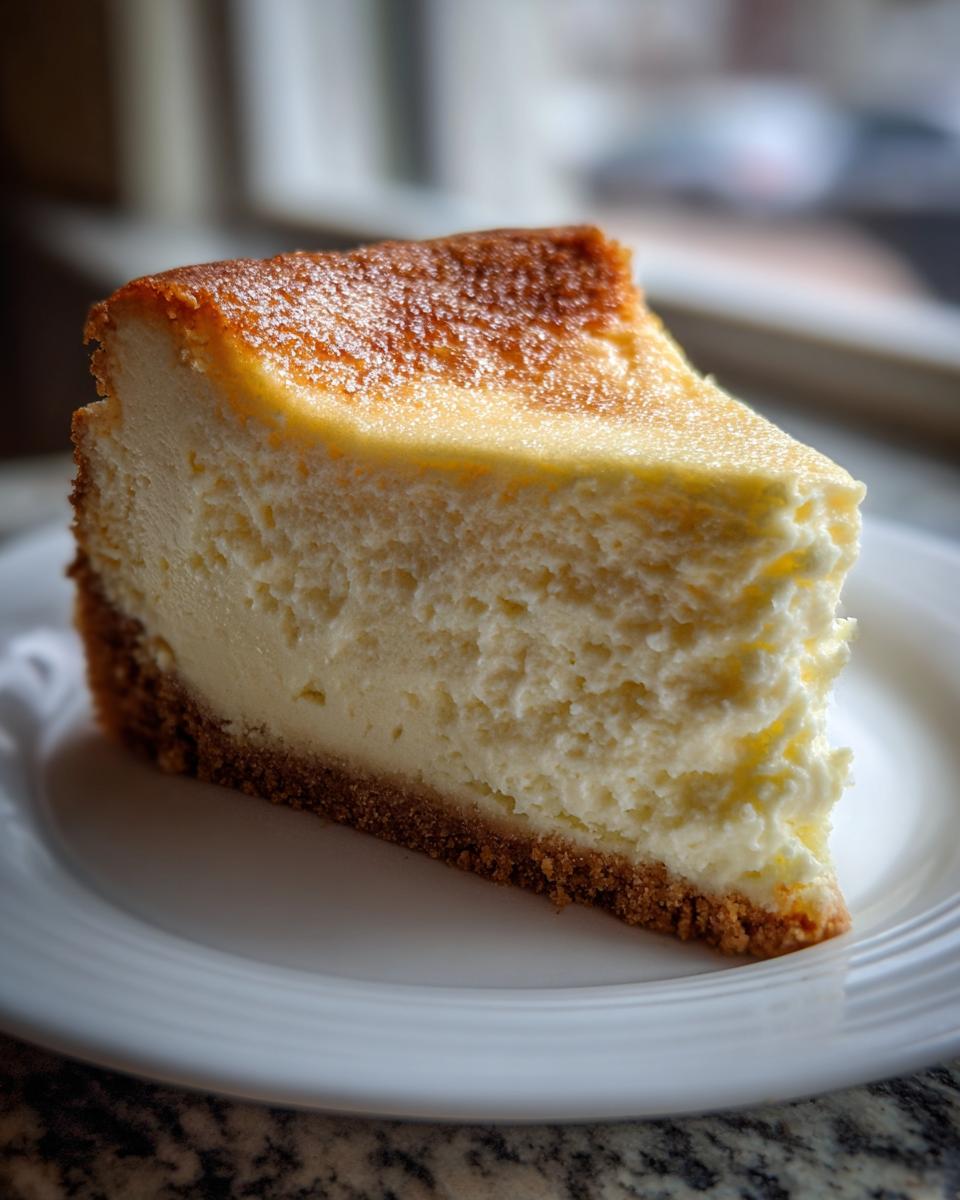
Oh, you absolutely have to try this cheesecake! For years, I chased that perfect, no-fuss, bakery-quality slice, the kind that melts on your tongue. Honestly, I must have ruined three whole cheesecakes before I finally cracked the code, resulting in a texture so spot-on creamy that it rivals any store-bought classic—yes, even that famous Sara Lee Cheesecake. That first time I pulled mine out of the oven, perfectly smooth and uncracked, I practically danced around the kitchen! This recipe cuts out all the fancy nonsense. It’s the real deal, the simple baked dessert you’ve been looking for, guaranteed to give you that smooth, satisfying slice every single time. Forget those crumbly, sad attempts of the past; we’re going straight for success here.
Achieving the Perfect Sara Lee Cheesecake Texture: Ingredient Notes
Look, if you want that unbelievably smooth, luxurious texture that makes people ask if you bought it, your ingredients have to cooperate. The absolute non-negotiable rule for this recipe—and for any creamy baked cheesecake seeking that Sara Lee Cheesecake quality—is temperature. Your cream cheese *must* be fully softened. I mean, leave it out for at least two hours, or warm it *gently* between your hands. Cold cream cheese equals lumps, and lumps mean disaster!
We aren’t trying to introduce unnecessary air into this batter, which is what causes cracking later. We want density, not fluffiness, so the right butter amount for the crust and the exact right amount of sugar in the filling makes all the difference.
Essential Components for Your Sara Lee Cheesecake
Here’s what you need whispering sweet nothings into your bowl:
- For the Crust: You’ll want 1 1/2 cups of graham cracker crumbs, 1/4 cup of granulated sugar, and 6 tablespoons of melted butter. Mix these until they look like wet sand, ready to be packed down.
- For the Filling: This is where the magic happens. You must start with 3 (8 ounce) packages of cream cheese, ensuring they are fully softened. Then, you’ll need 1 1/2 cups of granulated sugar, 1 teaspoon of pure vanilla extract, and your 4 large eggs, which should be at room temperature too.
Ingredient Substitutions for Your Sara Lee Cheesecake
I’m usually a stickler, but sometimes we run out! If you don’t have graham crackers, digestive biscuits or vanilla wafer crumbs work beautifully for the base layer. It changes the flavor slightly, but the texture holds up great.
Also, while dark brown sugar adds depth to other desserts, for this creamy style, stick to white granulated sugar. It keeps the color pale and the flavor purely vanilla-cheesy—exactly what we want to mimic that classic slice.
Step-by-Step Instructions for Your Sara Lee Cheesecake
Alright, get your 9-inch springform pan ready, because this is where we make magic happen! Don’t rush these steps, especially when adding the eggs. Rushing is the number one way to end up with air bubbles trapped in your beautiful dessert. For a truly flawless finish, think calm, steady, and smooth—just like the best slice of Sara Lee Cheesecake anyone has ever had! If you’re looking for other creamy delights once you master this, check out this divine lemon cheesecake recipe idea.
Preparing the Crust Base for Sara Lee Cheesecake
First things first, crank your oven up to 350 degrees F (175 degrees C). While it’s warming up, take those graham cracker crumbs, the initial 1/4 cup of sugar, and the melted butter. Mix them until everything is evenly moist. Then, dump that mixture into your springform pan. Now, you really need to dig in here. Use the bottom of a flat measuring cup to press that crust down firmly and evenly across the bottom. It needs to be tight so it doesn’t crumble when you slice it later.
Mixing the Creamy Filling for Sara Lee Cheesecake
This next part needs your full attention! Beat your softened cream cheese until it looks absolutely cloud-like and smooth—no lumps allowed, seriously. Slowly, beat in the remaining 1 1/2 cups of sugar and that teaspoon of vanilla until it’s just combined. Here comes the critical bit: the eggs. You have to add these one at a time. After you drop an egg in, mix only until you see *just* one streak of yellow disappear, and then stop, scrape the bowl, and add the next one. If you overmix once the eggs are in, you introduce too much air. That air expands in the heat and then collapses when it cools. We want that dense, creamy texture like a real quality Sara Lee Cheesecake, not a giant crack across the top!
Baking and Cooling: The Secret to Perfect Sara Lee Cheesecake
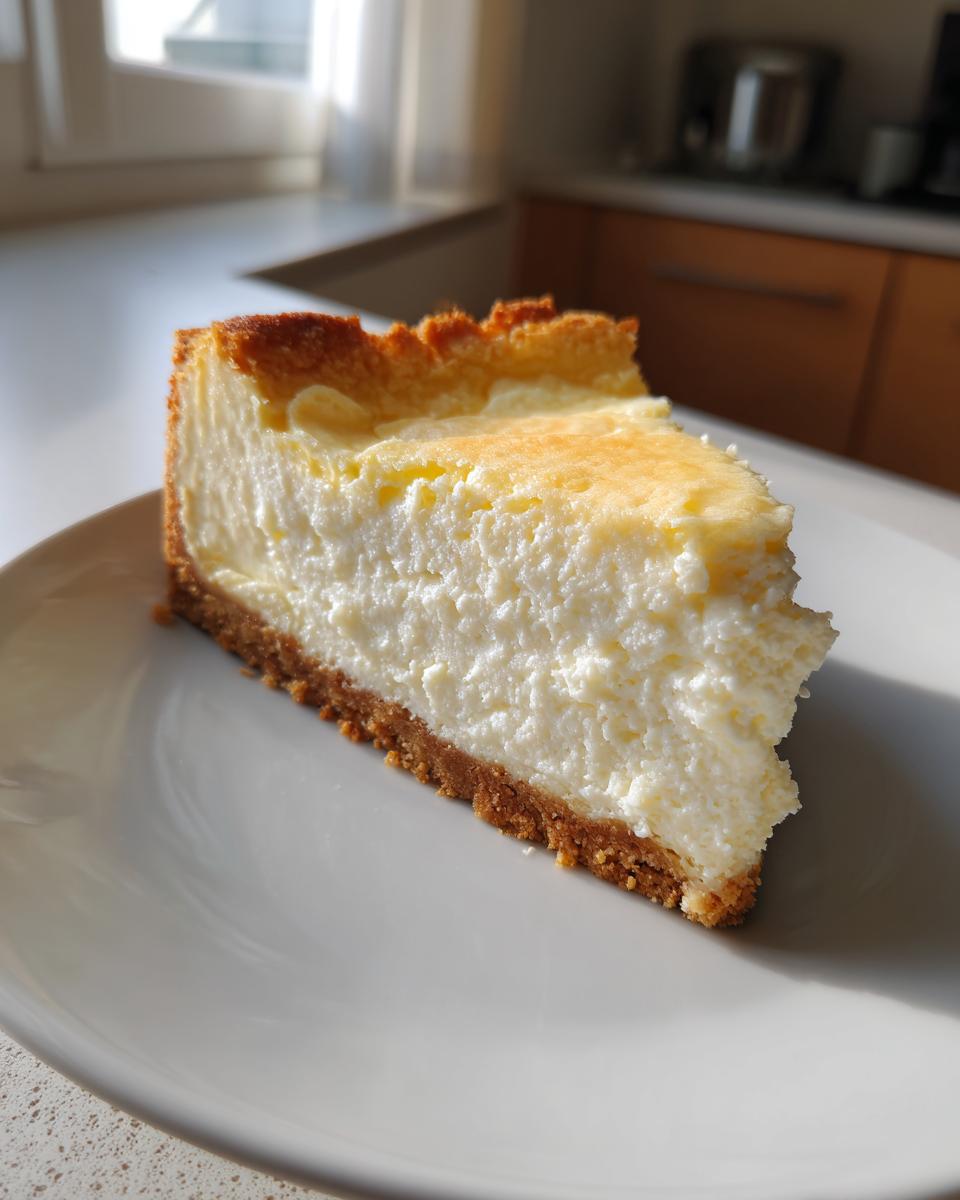
Pour all that gorgeous, creamy batter right over your crust. Pop it into the preheated oven and set the timer for 50 to 60 minutes. You’re looking for the edges to be set, but the very center should still have a slight jiggle—it needs to look almost set. Don’t panic! This is where we prevent disaster. When the time is up, do not take it out. Just turn the oven OFF. Leave the pan inside, but crack the oven door open just a tiny bit—use a wooden spoon handle if you need to prop it. Let it sit there for a full hour during this slow transition. This gradual cooling prevents that scary, sudden temperature drop, which is the main cause of cracks. Once that hour is up, *then* you can take it out and cool it completely on a wire rack before we chill it overnight for the best results!

Expert Tips for a Flawless Sara Lee Cheesecake
So, you nailed the bake, but now you’re staring at a tiny disaster zone. Don’t fret! Even professional bakers have little hiccups, but that slow cooling process I told you about is your best friend for avoiding those dreaded surface cracks. That gentle hour inside the turned-off oven is crucial for keeping that rich, dense texture we associate with a perfect Sara Lee Cheesecake.
Also, if you’re noticing any liquid pooling on top after it cools slightly—we call that weeping—it almost always points back to overmixing the batter once those eggs got introduced. Don’t stir it like cake batter; mix it like a delicate assignment!
Troubleshooting Common Sara Lee Cheesecake Issues
If you want that totally smooth result every time, pay attention to these little details:
- For Better Texture: My notes always tell people this: make sure that cream cheese is truly room temperature. If it’s even slightly firm, you’ll end up fighting little clumps that refuse to blend, no matter how long you beat them!
- For Extra Zing: If you feel your cheesecake needs a little brightness to cut through the richness, try adding just 1 tablespoon of fresh lemon juice into the filling right before the eggs go in. It gives it a tiny, beautiful lift without making it taste like a lemon dessert.
- If you need other inspiring cheesecake ideas, check out these amazing no-bake cheesecake recipes, though honestly, this baked version holds its own!
Follow those little hacks, and you’ll have a dessert that stands up proudly on the table!
Serving Suggestions for Your Classic Sara Lee Cheesecake
Now that you’ve got this beautiful, cool, and perfectly set dessert, the question becomes: to top, or not to top? With a cheesecake this perfectly balanced, honestly, you don’t *need* much, which is why the classic look of a Sara Lee Cheesecake is so iconic—it lets the cheese shine.
For me, simple is best. A light dusting of powdered sugar, just before serving, is elegant and keeps everything clean. If you want to offer something extra, go for something that contrasts the richness without fighting that vanilla flavor.
A bright, tart drizzle works wonders. Think of a simple cherry or raspberry sauce you can make quickly on the stove. My favorite is just heating up frozen berries with a splash of water and a tiny pinch of sugar until they break down—it’s so fresh!
If you’re serving this to real dessert lovers, though, a small dollop of fresh whipped cream cuts through the tanginess perfectly. Or, if you’re feeling a little more adventurous (but still keeping it classic), you could try making a batch of these strawberry cheesecake cookies later in the week for a different vibe!
Storage and Make-Ahead Guide for Sara Lee Cheesecake
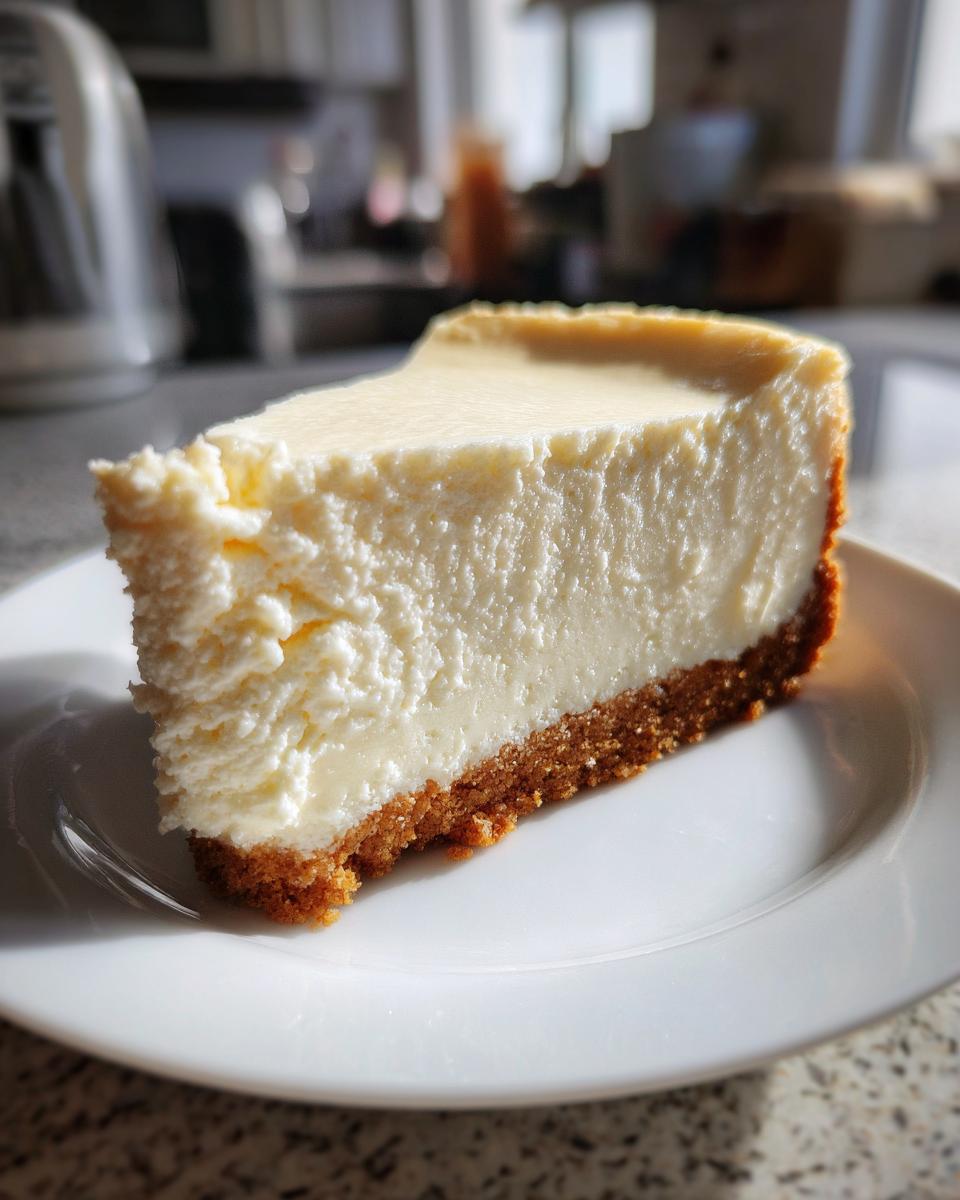
One of the best things about this recipe, besides how incredible it tastes, is that it *needs* to be made ahead of time! You can’t rush perfection, especially when it comes to chilling cheesecake. Remember that step where we cooled it slowly in the oven? Well, after that, it needs serious chilling time to firm up completely. We’re talking a minimum of 4 hours in the fridge—but trust me, overnight is where this really sings.
When it fully chills, that creamy center sets up beautifully firm, giving you that dense, satisfying bite just like a store-bought Sara Lee Cheesecake. To store it, keep it covered tightly in the springform pan (or transfer it to a plate and cover it with plastic wrap or foil). It will stay absolutely divine in the refrigerator for up to five days. We’ve tested this extensively, and it’s always perfect!
If you’re planning a big party, this is your secret weapon. You can assemble the entire thing—crust, filling, bake, and chill—a full day before you need it. That frees up your oven and your brain space on the actual day of your gathering. I hardly ever bake a cheesecake the day I plan to eat it because I love knowing it’s just waiting patiently in the fridge!
Frequently Asked Questions About Making Cheesecake
I get so many questions about cheesecake because everyone wants that perfect, smooth result! It can seem intimidating, but once you nail the technique, it’s surprisingly easy. Here are a few things people always ask me when they’re gearing up to make their own creamy baked heaven.
Can I use sour cream instead of some of the cream cheese?
That’s a fantastic question! Sour cream definitely changes the profile. If you want that classic, slightly tangy flavor that keeps the dessert from being overly sweet, you can swap out about half a cup of the cream cheese for full-fat sour cream. But, for this specific recipe aiming for that signature dense texture, I recommend sticking to using all cream cheese for the consistency, keeping the tang adjustment minimal, maybe adding just a tablespoon of lemon juice instead, as my notes suggested!
Why do I have to turn the oven off and leave the cake inside?
Seriously, don’t skip this part! This technique is what keeps your beautiful baked dessert from cracking wide open. Baking involves high heat, and when you pull a cheesecake out suddenly into the cooler kitchen air, the drastic temperature change makes the structure shrink too fast. By turning the oven off and just cracking the door open, you allow the cheesecake to cool down gently, which means it shrinks slowly and evenly. It’s like giving it a nice, warm hug goodbye before letting it chill completely!
My crust seems soggy—what did I do wrong?
Ugh, soggy isn’t the word we want for a graham cracker crust! Usually, this happens for one of two reasons. One, you probably didn’t pre-bake the crust at all, or if you did, you skipped pressing it firmly enough. Two, sometimes the melted butter wasn’t mixed in thoroughly enough, so some parts were too dry and some were too wet. Make sure that mixture looks uniformly crumbly before you press it in. If you want to try something different next time, look at these strawberry cheesecake cinnamon rolls—they have a great bottom layer too!
Is it okay if I use low-fat cream cheese?
Oh, honey, please don’t do this unless you absolutely have to! Cheesecake relies heavily on the fat content in the cream cheese to achieve that velvety mouthfeel. Low-fat versions have more water content, and that excess water just creates a softer, often weepy cheesecake that doesn’t set up nearly as rich or firm. Stick to the full-fat bricks for the best results!
How far in advance can I realistically make this?
I actually prefer mine made a day ahead. Once it’s fully chilled (remember, minimum 4 hours!), it’s incredibly stable. Making it the day before means you are totally stress-free the day you plan to serve it. Plus, I swear the flavors of the vanilla and the cream cheese just deepen and meld together overnight in the fridge. It’s glorious!
Nutritional Snapshot of This Classic Cheesecake
I know some of you are watching your macros, and others just want to know what you’re indulging in—and that’s totally fair! Keep in mind that these numbers are just estimates. I calculate these using standard ingredient database figures, so your exact results might look a tiny bit different depending on the brand of graham crackers or the exact size of the eggs you use. This isn’t a lab analysis, but it gives us a really good idea of what we’re enjoying here!
This recipe makes a quite generous yield—10 servings—so keep that in mind when looking at the per-slice breakdown. It’s a rich dessert, and honestly, one slice is usually more than enough to satisfy those creamy cravings!
Here is the general breakdown for one slice:
- Serving Size: 1 slice
- Calories: Around 350 calories
- Total Fat: About 22g (14g of that is saturated fat, because hello, cream cheese is the star!)
- Carbohydrates: Roughly 32g, with about 30g coming from the sugars.
- Protein: A respectable 7g.
You can see that the fat and sugar content are what you expect from a classic baked dessert like this. It’s a treat, not an everyday salad! If you’re looking to reduce the sugar, you might experiment with a sugar substitute in the filling next time, but that will definitely change the texture we worked so hard to achieve. For now, accept that this is pure, delicious indulgence!
Share Your Sara Lee Cheesecake Creation
Now that you’ve gone through all the steps—the careful creaming, the gentle egg addition, and the magic slow-cool in the oven—I genuinely want to see what gorgeous cheesecake you made! Honestly, my favorite part of running this kitchen blog is hearing from people who took one of my family’s favorite recipes and made it their own.
Did you manage to get that silky smooth top that rivals any professional bakery? Were you tempted to add a topping, or did you serve it plain just like we often do?
Please, please, please head down to the comments section below and leave this recipe a rating. Star ratings help other home bakers like you find this incredibly reliable guide to the perfect baked cheesecake. I read every single comment, and if you have a question about your cooling process or if you experimented with the crust, let me know!
If you snapped a picture of your perfectly chilled, sliceable masterpiece, tag me on social media! Seeing your glossy, beautiful slices of homemade goodness—that truly makes my day. It proves that you don’t need to grab a box from the freezer when you can make something ten times better right in your own kitchen. Go on, show off that incredible Sara Lee Cheesecake copycat!
Print
Simple Cheesecake Recipe
- Total Time: 7 hours
- Yield: 10 servings 1x
- Diet: Vegetarian
Description
A straightforward recipe for a classic baked cheesecake.
Ingredients
- 1 1/2 cups graham cracker crumbs
- 1/4 cup granulated sugar
- 6 tablespoons melted butter
- 3 (8 ounce) packages cream cheese, softened
- 1 1/2 cups granulated sugar
- 1 teaspoon vanilla extract
- 4 large eggs
Instructions
- Preheat your oven to 350 degrees F (175 degrees C).
- Mix graham cracker crumbs, 1/4 cup sugar, and melted butter. Press the mixture firmly into the bottom of a 9-inch springform pan.
- Beat the softened cream cheese until smooth. Gradually add 1 1/2 cups sugar and vanilla extract, beating until combined.
- Add eggs one at a time, mixing just until blended after each addition. Do not overmix.
- Pour the batter over the crust in the prepared pan.
- Bake for 50 to 60 minutes, or until the center is almost set.
- Turn off the oven and let the cheesecake cool in the oven with the door slightly ajar for 1 hour.
- Remove from the oven and cool completely on a wire rack.
- Refrigerate for at least 4 hours before serving.
Notes
- For a smoother texture, bring the cream cheese to room temperature before starting.
- If you prefer a slightly tangier flavor, you can add 1 tablespoon of lemon juice to the batter.
- Prep Time: 20 min
- Cook Time: 60 min
- Category: Dessert
- Method: Baking
- Cuisine: American
Nutrition
- Serving Size: 1 slice
- Calories: 350
- Sugar: 30g
- Sodium: 250mg
- Fat: 22g
- Saturated Fat: 14g
- Unsaturated Fat: 8g
- Trans Fat: 0g
- Carbohydrates: 32g
- Fiber: 1g
- Protein: 7g
- Cholesterol: 75mg
Keywords: cheesecake, graham cracker crust, baked dessert, cream cheese