
I don’t know about you, but when the weeknight rush hits, I need dinner on the table *fast*. Seriously, if a recipe takes more than 45 minutes, I’m reaching for frozen snacks. That’s why I’m obsessed with my immersion blender! Forget dirtying a whole blender pitcher; we’re talking about achieving that incredible, velvety texture for **Immersion Blender Recipes** right in the pot where we cooked everything. This creamy tomato soup is my absolute go-to. It’s so ridiculously quick, and honestly, it tastes way better than anything that comes out of a can. Trust me, this stick blender changed how I handle quick, comforting meals!
Why This Creamy Tomato Soup is a Top Immersion Blender Recipe
When I talk about the best uses for my stick blender, soup is always number one on the list. Frankly, it wins against every other gadget when it comes to speed and cleanup. Who wants to transfer hot, soupy liquid into a full-sized blender, risk burning themselves, and then scrub three different containers? Not me!
This tomato soup showcases exactly why these **Immersion Blender Recipes** are weeknight lifesavers:
- The entire process, from chopping onions to serving, takes about 30 minutes flat.
- You only dirty the pot you cooked the soup in and the blender wand itself—that’s it!
- It handles the simmered vegetables beautifully, turning them into pure velvet.
It’s the perfect marriage of easy cooking and fantastic results.
Speed and Simplicity in Immersion Blender Recipes
The 30-minute total time isn’t an exaggeration; it’s the beauty of using the immersion blender. Because you blend right there in the stockpot, there’s absolutely zero transfer time needed. You simmer it, take it off the heat, stick the blender in, and blend! That efficiency is what makes these quick soup recipes possible when you’re exhausted after work.
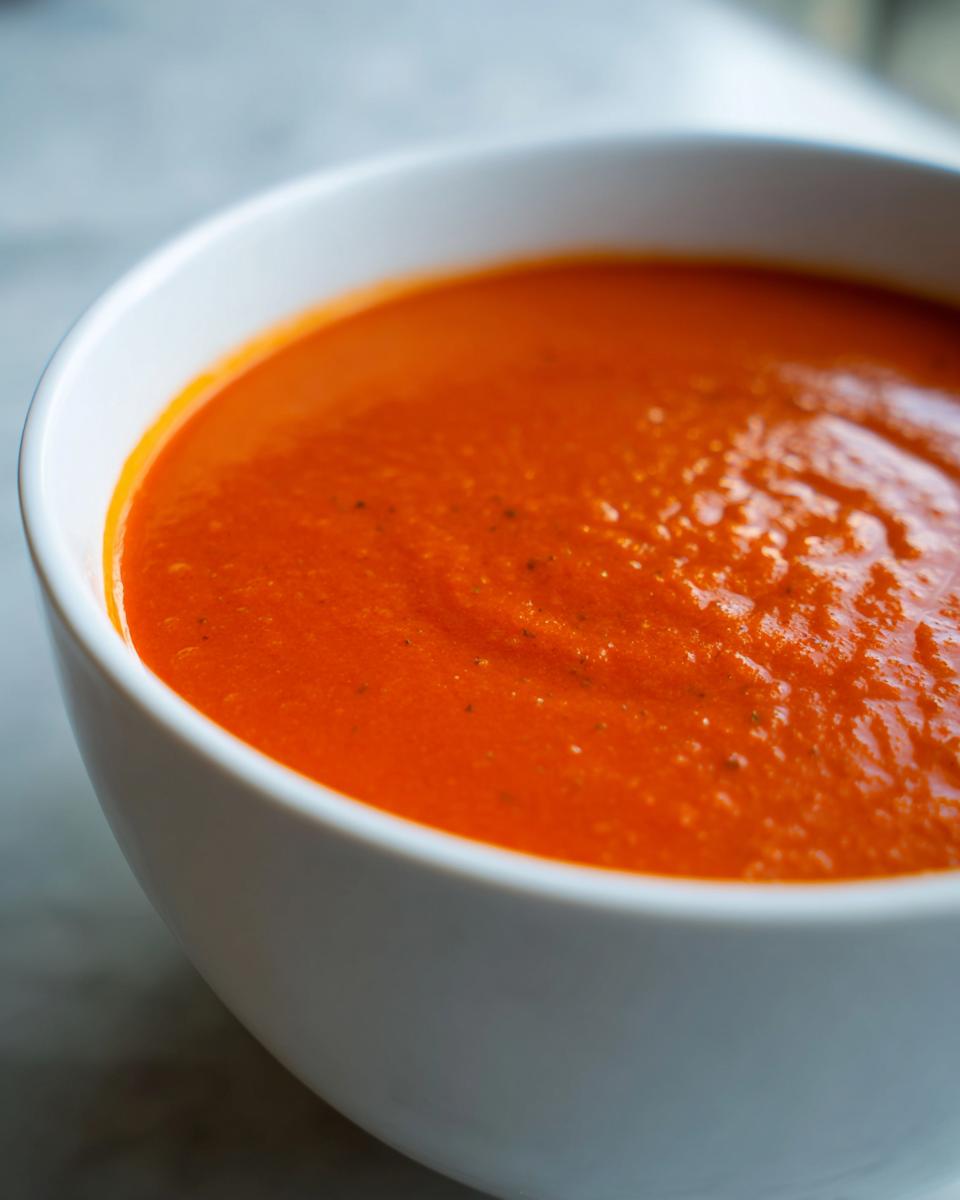
Achieving Restaurant-Quality Smoothness
Now, a regular blender can also make soup smooth, sure, but it’s a whole production. The immersion tool gets right down into the bottom corners of the pot, ensuring every single chunk of onion or tomato is pulverized. You get this incredibly fine, velvety texture that just tastes expensive. You don’t have to worry about leaving any gritty bits behind; the power these little wands have is surprising!

Essential Ingredients for Your Immersion Blender Recipes
When we’re making something this quick, the quality of the ingredients really matters because there isn’t a long simmer time to build deep flavors. Don’t skimp on the basics! Having everything prepped is key before we even turn on the stove, so we can get straight to the action later. This list is short, which is another bonus for these easy immersion blender recipes.
Here’s what you need to gather:
- Two tablespoons of good olive oil.
- One medium onion, chopped up small.
- Two cloves of garlic, minced—don’t be shy with the garlic!
- Two standard cans (about 14.5 ounces each) of diced tomatoes. And this is important: keep that juice!
- Four cups of vegetable broth. Low sodium is usually my pick so I can control the salt later.
- A half cup of heavy cream for that luxurious finish.
- Just a teaspoon of salt and a half teaspoon of black pepper to start.
Ingredient Clarity for Perfect Immersion Blender Recipes
See how simple that is? The most crucial instruction here is about those diced tomatoes. You absolutely must use them undrained. That tart liquid is essential because it helps the immersion blender get going quickly and adds necessary acidity to balance the richness of the cream we add at the very end. Skipping the liquid means you’ll be adding water or extra broth, which dilutes the tomato flavor we’re working hard to build in these fast **immersion blender recipes**.
Step-by-Step Instructions for Creamy Tomato Soup (A Great Immersion Blender Recipe)
Okay, time to cook! The best part about this recipe, especially when using the immersion blender later, is that everything cooks in one pot. We’re not dirtying any extra bowls or saucepans here, which is just smart cooking if you ask me. Just follow these steps, and you’ll have luxurious tomato soup faster than heading to the drive-thru.
First things first, heat up that olive oil in a big pot over medium heat. We need it warm enough to soften the veggies but not so hot that we scorch the garlic later on. These little timings are key for the best immersion blender recipes.
Sautéing Aromatics
Toss in your chopped onion first. Let that cook down gently. You’re looking for it to get soft and translucent, which usually takes about five minutes. Don’t rush this part; soft onions melt into the soup later better than crispy ones! Once they look good, throw in your minced garlic. Garlic cooks so fast; give it just 60 seconds until you really smell it, and then quickly move on to the next step before it burns.
The Immersion Blending Technique
Everything goes in now—the diced tomatoes (juice and all!) and the vegetable broth. Let that come up to a nice, gentle simmer. Cover it partially, reduce the heat to low, and let those flavors hang out for about 15 minutes. Now, for the magic! Take the pot completely off the heat. Seriously, put it on a cool burner or trivet. Then, stick your immersion blender right in there. Angle it slightly towards the bottom and blend until it’s completely smooth and creamy. If it splatters a little, I usually drape a kitchen towel loosely over the top of the pot—it catches most of the mess when using any of these great Immersion Blender Recipes.
Finishing and Warming
Once it’s velvety, stir in your salt, pepper, and that glorious heavy cream. Taste it right there! Adjust seasoning if you need to. The absolute rule here is *do not boil* once the cream is added. Just warm it gently until it’s hot enough to eat. Boiling cream can sometimes make it split, and that’s a sad way to finish a perfect, quick soup.
Expert Tips for Perfecting Your Immersion Blender Recipes
Even though this soup is simple, there are a few little tricks I picked up over the years to make these immersion blender recipes absolutely shine. We’re moving past just following the steps into making something really special. These little tweaks take maybe two extra minutes but make a huge difference in the final bowl.
Flavor Boosts for Tomato Soup
If you have an extra 20 minutes before starting, I highly, highly recommend roasting your tomatoes first instead of just adding them from the can when you simmer. Toss fresh tomatoes with a little olive oil, salt, and pepper, roast them at 400 degrees until they start to caramelize, and then use them in place of the canned ones. Roasting brings out all this incredible concentrated sweetness and depth of flavor that canned tomatoes just can’t mimic. It takes your weeknight soup into ‘weekend special’ territory!
Cream Substitutions in Immersion Blender Recipes
Look, sometimes you realize halfway through cooking that you’re out of heavy cream, or maybe you just want something lighter. You can definitely swap it out for regular milk, but you need to know what you’re sacrificing. Using milk means this tomato soup will be much thinner. It won’t have that rich, coating mouthfeel that the heavy cream gives you. If you use milk, maybe stir in a teaspoon of cornstarch mixed with cold water before warming the soup up again—that will help thicken it just a little bit so it doesn’t feel watery. It’s good, but it’s just not the same luxurious texture you get in the best immersion blender recipes.
Equipment Needed for These Simple Immersion Blender Recipes
See, this is what I love most about this recipe—you don’t need a kitchen full of fancy gadgets! You probably have everything you need right in your drawers already. We’re using the simplest tools for the most satisfying results, which is the hallmark of great immersion blender recipes. It proves you don’t need a 12-piece stand mixer setup to make magic happen on a Tuesday night.
Here’s the short and sweet list of what you’ll pull out:
- A large, deep stockpot. This is really important for safety when you bring out the blender!
- Your trusty cutting board and a sharp knife for the onion and garlic prep.
- A measuring cup set for the broth.
- And, of course, your fantastic immersion blender, also known as a stick blender or hand blender.
That’s genuinely it! No need to wrestle with a heavy blender pitcher or worry about multiple bowls—the deep pot keeps everything contained while you’re blending away. It’s pure, unadulterated ease, letting this tool shine in simple **immersion blender recipes**.
Serving Suggestions for Creamy Tomato Soup Immersion Blender Recipes
This simple creamy tomato soup shines all on its own, especially when you nail that velvety texture using your immersion blender. But let’s be honest, soup just begs for some crunchy sides for dipping and texture contrast, right? I always plan for a side when serving this, because it turns a quick lunch into a real, satisfying meal. These pairings work perfectly with the mild, sweet flavor profile of these immersion blender recipes.
When I make soup, I usually think about what will scoop up all that creamy goodness. Forget flimsy crackers; we need substance!
Classic Dippers That Never Fail
You can’t go wrong with the tried-and-true partners for tomato soup. I mean, a classic grilled cheese sandwich is practically mandatory. I make mine with sharp cheddar on sourdough bread for the best tang against the sweet roasted notes of the tomatoes. But if you’re trying to keep it simple, a big pile of crispy croutons sprinkled on top of the soup right before serving works wonders. I especially like homemade garlic croutons.
Creative Twists for Your Bowl
If you’re feeling a little more creative, you can really dress up the bowl. A swirl of bright green pesto drizzled right on top adds a gorgeous color pop and a fresh basil punch that wakes up the whole dish. Or, if you want something herbaceous, fresh basil leaves chiffonade on top are beautiful and smell amazing when they hit the warm soup.

If you want a bread component that’s a little flatter and easier for dipping, I often whip up some quick homemade pita bread. It gets those nice bubbles and a chewiness that absorbs the soup perfectly without getting instantly soggy like sliced bread can. These little extras make all the difference when you’re relying on quick **immersion blender recipes** for dinner!
Storage and Reheating Immersion Blender Recipes
Okay, so you made a massive pot of soup because, let’s be honest, that’s the whole point of using the immersion blender—it cooks so fast you end up with way more than you planned! That’s not a problem; it’s a blessing because this creamy tomato soup is even better the next day. Store any leftovers properly, and you have instant lunch sorted. When dealing with dairy-based **immersion blender recipes** like this, you just need to be a tiny bit careful when reheating so everything stays perfectly emulsified.
The Best Way to Store Leftovers
First, let the soup cool down completely on the counter. Don’t rush it, or you’ll steam up your fridge and potentially ruin the texture later. Once it’s room temperature, you need the right container. I always go for shallow, airtight containers rather than one giant deep tub.
Why shallower? Because the faster the soup cools down, the better the texture holds up. Pour it in, making sure to leave about an inch of space at the top, seal it tight, and pop it in the fridge. It keeps beautifully for about four to five days. I usually keep mine on the door shelf so I can see it and remember to eat it before it goes bad! This storage tip applies to almost all creamy immersion blender recipes.
Gentle Reheating for Creamy Textures
When it’s time to eat the leftovers, remember my big rule about the cream: *do not boil it*. Boiling dairy can cause it to separate or curdle, and you’ll end up with greasy soup, which defeats the whole purpose of making it smooth with the immersion blender in the first place.
I find the absolute best way to reheat this is on the stovetop over low or medium-low heat. Stir it constantly. Seriously, keep that spoon moving! If you see steam rising, that’s perfect. If you’re in a huge hurry, you can use the microwave, but you have to heat it in short bursts—maybe 60 seconds at a time—and give it a really vigorous stir in between each burst. This gentle action mimics the slow stirring on the stove and keeps that creamy magic alive!

Frequently Asked Questions About Immersion Blender Recipes
When people get their first immersion blender, they sometimes worry they’re limited to just perfectly smooth things like this tomato soup. But these tools are way more versatile than people think! I get asked a ton of questions about how to use them best in different kinds of immersion blender recipes. Let me clear up a few common sticking points for you!
Can I use an immersion blender for chunky Immersion Blender Recipes?
That’s a good question! Technically, yes, you *can* leave it chunky, but that’s not what the immersion blender is designed to do best. If you want texture, you only blend for about 10 seconds—just enough to break down the biggest chunks into smaller pieces, but not enough to make it smooth. For recipes that need serious texture, sometimes a food mill or just using an earlier step (like adding less broth) is better. But for things like this tomato soup, we want smoothness!
Do I need to use a deep pot for Immersion Blender Recipes?
Oh, you definitely do! This is a safety issue more than anything else. If you try to blend soup in a shallow pan, the second you turn on that powerful little motor, you create a tomato oil geyser all over your kitchen. When you’re using immersion blender recipes, always make sure there’s at least an inch or two of liquid above the blending head when it’s sitting on the bottom. A deep pot keeps the mess contained, which is the whole point of avoiding the big blender!
What other vegetable soups work well as Immersion Blender Recipes?
Honestly, almost any cooked vegetable soup is perfect for this tool! If you love this tomato recipe, you absolutely have to try an immersion-blended broccoli cheddar soup—it gets so creamy without needing tons of flour or roux. Potato leek soup is another winner; it turns out wonderfully rich. If you want another great creamy option, check out my recipe for creamy chicken pasta soup, though that one requires a little less blending!
Nutritional Snapshot for This Quick Soup
Now, I know some of you are tracking macros or just curious about what exactly goes into this delicious bowl of creaminess. Since we are dealing with simple ingredients—tomatoes, broth, and a bit of cream—the numbers end up being really reasonable! This information is based on dividing our total recipe yield (four servings) by the standard amounts of the ingredients listed. It’s a great way to enjoy comfort food without feeling totally guilty!
Remember, because we made this a vegetarian immersion blender recipe using vegetable broth, the sodium content can vary based on how salty your broth is, so always taste before you season!
Here is the approximate breakdown per bowl:
- Calories: Around 250 per serving. Not bad at all for something this satisfying!
- Total Fat: About 18g (with 9g of that being the saturated fat from the heavy cream, but oh, it’s worth it).
- Carbohydrates: Roughly 18g.
- Fiber: About 4g, thanks to the tomatoes.
- Protein: We get about 5g of protein.
- Sugar: Around 10g, which mostly comes naturally from the tomatoes and broth.
Please know that these are just estimates! If you use milk instead of heavy cream, or if you roast your tomatoes, those numbers will shift a little bit. But overall, this is a light yet rich soup perfect for any night of the week!
Print
Simple Creamy Tomato Soup
- Total Time: 30 min
- Yield: 4 servings 1x
- Diet: Vegetarian
Description
A quick and smooth tomato soup made easily with an immersion blender.
Ingredients
- 2 tbsp olive oil
- 1 medium onion, chopped
- 2 cloves garlic, minced
- 2 (14.5 oz) cans diced tomatoes, undrained
- 4 cups vegetable broth
- 1/2 cup heavy cream
- 1 tsp salt
- 1/2 tsp black pepper
Instructions
- Heat olive oil in a large pot over medium heat.
- Add onion and cook until soft, about 5 minutes.
- Add garlic and cook for 1 minute more until fragrant.
- Pour in diced tomatoes and vegetable broth. Bring the mixture to a simmer.
- Reduce heat to low, cover, and cook for 15 minutes.
- Remove the pot from the heat. Insert the immersion blender into the soup. Blend until completely smooth.
- Stir in the heavy cream, salt, and pepper. Heat gently until warmed through, but do not boil.
- Serve immediately.
Notes
- For a richer flavor, roast the tomatoes before adding them to the pot.
- If you do not have heavy cream, use milk, but the soup will be thinner.
- Prep Time: 10 min
- Cook Time: 20 min
- Category: Soup
- Method: Stovetop
- Cuisine: American
Nutrition
- Serving Size: 1 bowl
- Calories: 250
- Sugar: 10
- Sodium: 650
- Fat: 18
- Saturated Fat: 9
- Unsaturated Fat: 9
- Trans Fat: 0
- Carbohydrates: 18
- Fiber: 4
- Protein: 5
- Cholesterol: 45
Keywords: immersion blender, tomato soup, creamy soup, quick soup, vegetable soup