
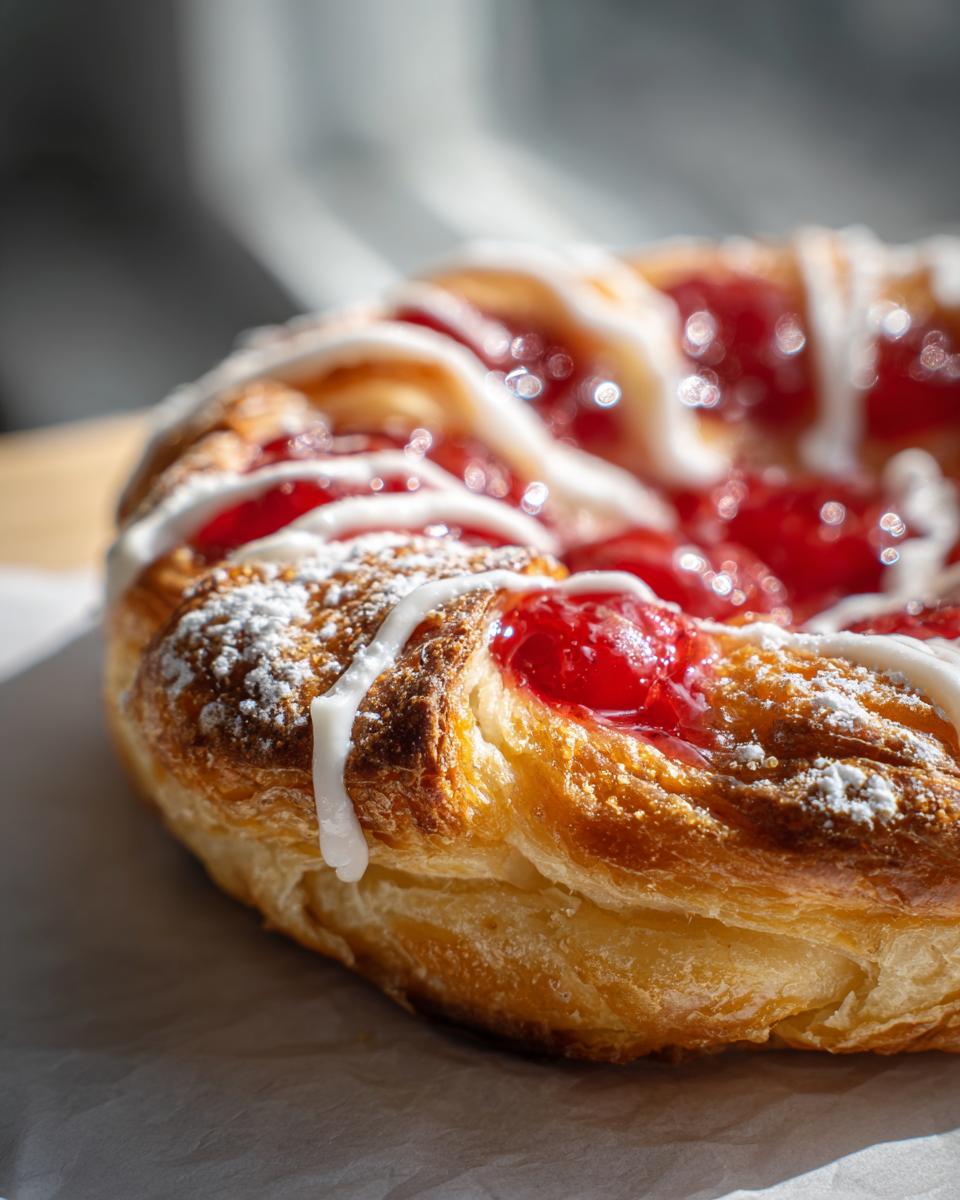
Oh, honey, sometimes you just wake up craving that perfect weekend pastry—that flaky, sweet bite of heaven you usually only see at the good bakery. But who has time for laminated dough before 8 AM? Not me! That’s why I treasure this recipe for the Easy Cherry Cheese Danish. Honestly, this shortcut recipe has rescued more sleepy mornings at my house than I can count. We’re talking about melt-in-your-mouth cream cheese, bright cherry filling, and that sweet tang, all wrapped up in golden, flaky layers. And the best part? You use store-bought crescent rolls, which means you get all the glory with none of the actual overnight work. Trust me, you need these in your breakfast rotation pronto.
Why You’ll Love This Easy Cherry Cheese Danish Recipe
This recipe absolutely gets my enthusiastic stamp of approval because it checks every box for a busy morning treat. You won’t believe the flavor packed into such a quick assembly. It’s bakery quality without the fuss!

- It’s lightning fast! Total time is often under 30 minutes, which is a dream.
- We only need a handful of ingredients, most of which you probably have already.
- The shortcut dough makes this pastry incredibly accessible for beginner bakers.
- That combination of tangy cream cheese and sweet cherry filling is just unmatched—pure comfort food for breakfast. I found some great ideas for pairing these over at brunch planning if you’re making a big spread!
Essential Ingredients for Your Easy Cherry Cheese Danish
We’re keeping this super simple because the magic here is speed, thanks to that amazing refrigerated dough! Using pre-made crescent rolls is our biggest secret for making these Easy Cherry Cheese Danish without fuss. Here’s everything you’ll need to bring this sweet treat to life.
For the Cream Cheese Filling
- 8 ounces of cream cheese, make sure it’s completely softened, don’t argue with me on this!
- 1/4 cup regular granulated sugar
- 1 large egg yolk (just the yolk, save that white for later!)
- 1 teaspoon lovely vanilla extract
For Assembly and Topping
- One package (8 ounces) of refrigerated crescent roll dough—the one that comes in a tube!
- 1/2 cup good quality cherry pie filling
- The egg white you saved and 1 tablespoon of milk for the essential egg wash
- For the final drizzle: 1/4 cup powdered sugar mixed with 1 teaspoon of milk
Step-by-Step Instructions for Perfect Easy Cherry Cheese Danish
Listen up, because these steps are what turn a can of rolls into something truly special. We don’t want soggy bottoms or oozing filling, right? Precision matters even when things are supposed to be easy! Follow my lead here, and you will have the most stunning Easy Cherry Cheese Danish pastries ever.
Preparing the Oven and Dough for Easy Cherry Cheese Danish
First things first: crank that oven up to 375 degrees F (190 degrees C). While it’s warming up, grab your baking sheet and give it a nice layer of parchment paper. This stops any drips from turning into barbecue sauce on your pan. Now, tackle that crescent roll tube. Unroll the dough carefully and separate the 8 triangles, but here’s the trick: don’t separate them along the perforated lines! Leave those little seams intact, because that’s what gives us structural integrity when we roll them up later.
Making the Cream Cheese Filling
This part is where you absolutely need soft cream cheese. If it’s cold, you’ll end up with tiny, hard cheese chunks in your smooth filling, and that’s just sad. Take your softened cream cheese, sugar, that one egg yolk, and the vanilla, and beat them together until they are perfectly silky smooth. I use a hand mixer for about a minute tops—we aren’t whipping butter for a pound cake here, just combining!
Assembling and Baking Your Easy Cherry Cheese Danish
Take each dough triangle. Spread about a tablespoon of that gorgeous cream cheese mixture onto the wide end. Don’t go too close to the edges, or it’ll squish out later! Then, spoon about a tablespoon of that sweet cherry pie filling right over the cheese. Now, roll it up tightly, starting from the wide end and rolling right down to the pointy tip. Pinch those ends really well to make sure those fillings stay tucked in for the ride. Pop them seam-side down onto your sheet. For the wash, just whisk that leftover egg and milk together and brush it generously over the tops. Into the oven they go for about 12 to 15 minutes until they are beautifully golden brown. Stop checking them after 10 minutes—they’ll tell you when they’re done!

Finishing Touches: Glazing the Easy Cherry Cheese Danish
While the danishes are cooling down just a touch—we want them warm, not piping hot—throw your glaze together. It’s just powdered sugar and a tiny splash of milk mixed until it’s thin enough to drizzle elegantly. If it’s too thick, add milk literally half a teaspoon at a time. Drizzle that pretty white glaze right over the tops. It sets up fast and makes these look like something famous chefs whipped up. For more breakfast inspiration, check out tons of tips in my main breakfast category!
Expert Tips for the Best Easy Cherry Cheese Danish
We nailed the assembly, but I have a few secret weapons that truly elevate these pastries from good to “Oh my gosh, did you *make* these?” Since we’re using crescent roll dough, the biggest trap readers fall into is letting the dough warm up too much before rolling. If it gets too slack, it stretches thin, and bam—you get leaks. I learned this the hard way when my son tried to “help” me one morning while I was cleaning my kitchen counters with my homemade spray! Keep that dough cold!
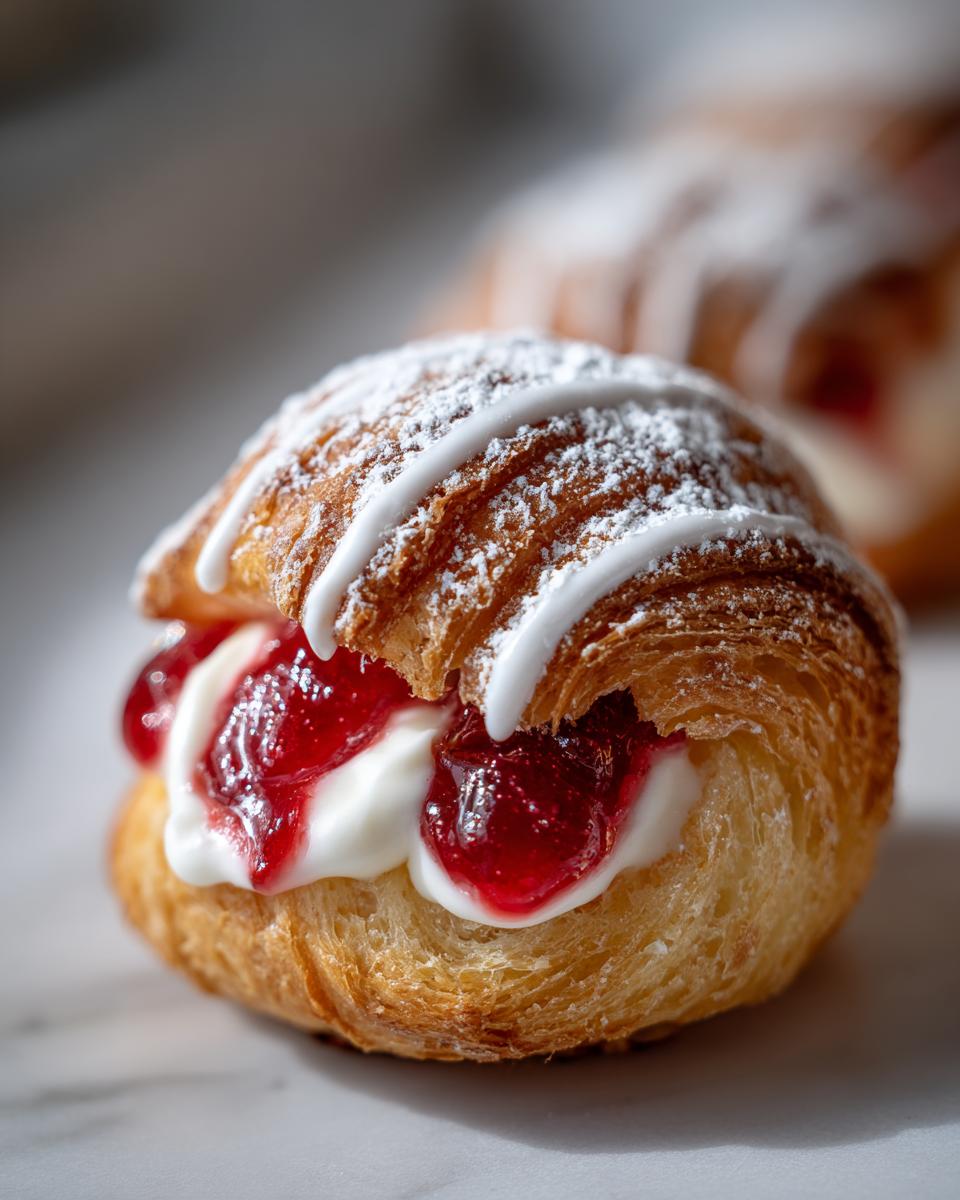
When rolling, make sure you are using a firm but gentle hand. You want that nice, tight spiral so the layers puff up correctly in the oven. Don’t press down hard on the seam when you seal it; just gently crimp it shut. A looser seal works better than a squashed seal for puffing. Serve these warm—the buttery crescent flavor with the gooey cheese filling of your Easy Cherry Cheese Danish is just perfection right out of the oven.
Ingredient Substitutions for Your Easy Cherry Cheese Danish
Look, I love cherries, but sometimes I just don’t have that specific pie filling hiding in the pantry. That’s okay! The structure of this **Easy Cherry Cheese Danish** recipe is so forgiving. If you don’t have cherry pie filling, please feel free to swap it out! Blueberry is fantastic, and apple pie filling works beautifully too. It gives you that warm, slightly spiced flavor instead of straight cherry tartness.
Also, if you’re feeling extra decadent and happen to have full-fat cream cheese on hand (as noted!), definitely use it. It gives the filling a richer mouthfeel. But if you only have light cream cheese, go ahead and use it; the texture will just be slightly less decadent. See? Flexible baking is the best baking!
Serving Suggestions for Easy Cherry Cheese Danish
Once these beauties are cooled just enough to handle—and believe me, waiting is the hardest part—you’ve got to think about what to serve with them. Because this recipe for Easy Cherry Cheese Danish is so simple and sweet, you want your accompaniments to balance it out, not compete with it.
Honestly, these are perfect with just a strong cup of coffee. I mean, a really good dark roast cuts right through that richness from the cream cheese and makes life wonderful. If you’re serving these for brunch and want something fresher on the table, keep the fruit theme going but keep it plain.
Think about a simple bowl of mixed berries—raspberries, maybe some sliced strawberries. Nothing heavy with whipped cream; we want the danish to shine! If you’re looking for other easy ideas for feeding a crowd or just making your own week less frantic, I listed a few of my favorite quick lunch ideas that might inspire your next simple meal, though these danishes definitely deserve the spotlight!
If you have kids, a glass of cold milk alongside the still-slightly-warm pastry is pure happiness. Keep it straightforward; simple is best when the pastry itself is this delicious!
Storage and Reheating for Leftover Easy Cherry Cheese Danish
I’ll be honest, there aren’t usually many “leftovers” when I make these Easy Cherry Cheese Danish because my family devours them instantly. But when I manage to hide one or two away, I have a system to keep them tasting almost as good as fresh!
First, you have to let them cool completely before you even think about sealing them up. If you wrap them warm, that steam gets trapped, and your beautiful flaky pastry turns… soggy. No thank you! Once totally cooled, wrap each individual danish tightly in plastic wrap. Then, pop that wrapped pastry into an airtight container or a heavy-duty zip-top bag. Stored this way on the counter, they’re great for a day, maybe two if your kitchen isn’t too humid.
If you want to keep them longer, the freezer is your friend! Wrap those cooled danishes extra securely in plastic wrap, then maybe wrap them again in foil to prevent freezer burn. They last beautifully for up to two months.
Now for the best part: reheating! You absolutely do not want to microwave these; it turns that lovely crescent dough rubbery. Instead, pop your room-temperature or thawed Easy Cherry Cheese Danish onto a small cookie sheet. Heat them in a toaster oven or a regular oven set to about 300 degrees F (150 degrees C) for about 5 to 7 minutes. This revives the flaky layers perfectly and gets that cream cheese just slightly melty again. It’s seriously the best way to keep this breakfast treat tasting fresh!
Frequently Asked Questions About Making Easy Cherry Cheese Danish
It’s totally normal to have questions when you’re whipping up something new, even when it uses shortcut supplies! I get asked all the time about how to make sure these Easy Cherry Cheese Danish pastries turn out perfectly flaky and how to avoid that dreaded filling escape. Here are my quick answers to the most common things readers wonder about after reading the assembly instructions.
Can I use puff pastry instead of crescent rolls for this easy pastry?
Oh, you absolutely can swap in puff pastry, but just be warned, the texture changes quite a bit! Crescent roll dough gives us that softer, chewier structure that complements the cream cheese so nicely. Puff pastry, while technically flakier, bakes up much lighter and hollower. If you use it, make sure your filling amounts are the same, but know it won’t have that same dense, satisfying chewiness that makes this particular **easy pastry** recipe so beloved.
What is the best way to prevent the cream cheese filling from oozing out?
This is critical! The number one reason for oozing is usually either overfilling or not sealing properly. When you roll up that triangle, make sure you are really pressing that seam line together. When you get to the pointy end, you need to pinch it closed firmly *and* make sure the ends of the roll itself are crimped inward a bit. You’re basically trying to create a little dough pocket to hold everything hostage until the baking is done. Keep the filling slightly away from the widest edge before you even start rolling too!
If you’re looking for more quick recipe ideas that are just as speedy, take a peek at my thoughts on quick BBQ chicken flatbread—sometimes you just need fast food that’s homemade!
Estimated Nutritional Information for Easy Cherry Cheese Danish
Now, I’m not a nutritionist, so take these numbers with a grain of salt—or maybe a drizzle of glaze! This information is just an estimate based on the standard serving size of one Easy Cherry Cheese Danish, using the ingredients listed in the recipe. We’re looking at a lovely, sweet start to the day here.
Since these are made with crescent roll dough and sugar, they are definitely a treat, but they are worth every single bite. Here’s the breakdown based on my recipe cards:
- Serving Size: 1 danish
- Calories: Around 250
- Sugar: 18g (That sweet spot!)
- Fat: 13g total
- Protein: 4g
- Carbohydrates: 30g
- Sodium: 250mg
Keep in mind that if you skip the sugary glaze or use a lighter cream cheese, those numbers will shift, but honestly, when you’re baking something this good, I say just enjoy the 18 grams of sugar and be happy!
Print
Easy Cherry Cheese Danish
- Total Time: 30 min
- Yield: 8 servings 1x
- Diet: Vegetarian
Description
Simple recipe for homemade cherry cheese danish pastries.
Ingredients
- 1 package (8 ounces) refrigerated crescent roll dough
- 1 package (8 ounces) cream cheese, softened
- 1/4 cup granulated sugar
- 1 large egg yolk
- 1 teaspoon vanilla extract
- 1/2 cup cherry pie filling
- 1 egg, beaten (for egg wash)
- 1 tablespoon milk (for egg wash)
- 1/4 cup powdered sugar (for glaze)
- 1 teaspoon milk (for glaze)
Instructions
- Preheat your oven to 375 degrees F (190 degrees C). Line a baking sheet with parchment paper.
- Unroll the crescent roll dough and separate it into 8 triangles. Do not separate the perforations.
- In a small bowl, beat the softened cream cheese, granulated sugar, egg yolk, and vanilla extract until smooth.
- Spread about 1 tablespoon of the cream cheese mixture onto the wide end of each dough triangle.
- Spoon about 1 tablespoon of cherry pie filling over the cream cheese mixture on each triangle.
- Roll each triangle up tightly, starting from the wide end and rolling toward the point. Pinch the ends to seal.
- Place the rolled pastries seam-side down on the prepared baking sheet.
- In a small bowl, whisk together the beaten egg and 1 tablespoon of milk for the egg wash. Brush the tops of the danishes with the egg wash.
- Bake for 12 to 15 minutes, or until golden brown.
- While the danishes cool slightly, mix the powdered sugar and 1 teaspoon of milk in a small bowl to create a thin glaze. Drizzle the glaze over the warm danishes.
Notes
- You can substitute other fruit pie fillings like blueberry or apple.
- For a richer flavor, use full-fat cream cheese.
- Prep Time: 15 min
- Cook Time: 15 min
- Category: Breakfast
- Method: Baking
- Cuisine: American
Nutrition
- Serving Size: 1 danish
- Calories: 250
- Sugar: 18
- Sodium: 250
- Fat: 13
- Saturated Fat: 7
- Unsaturated Fat: 6
- Trans Fat: 0
- Carbohydrates: 30
- Fiber: 1
- Protein: 4
- Cholesterol: 40
Keywords: cherry cheese danish, easy pastry, breakfast rolls, crescent roll recipe, sweet rolls