
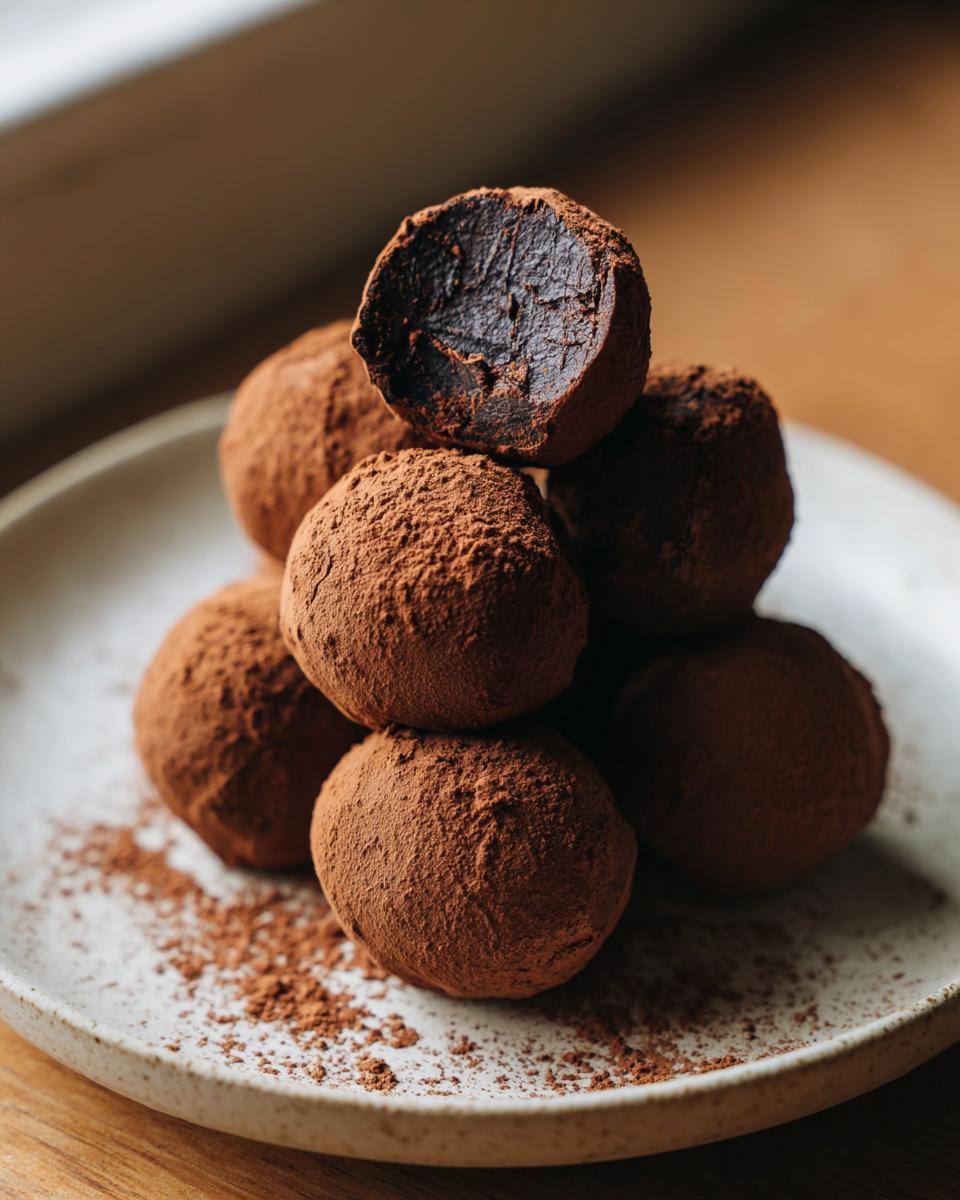
When the holiday season rolls around, you just want that rich, deeply satisfying hit of chocolate without spending hours fussing in the kitchen, right? That’s why I live and breathe by this recipe for the easiest, most decadent Christmas Truffles you will ever attempt. Seriously, this is fool-proof heaven! They look incredibly fancy, which means they are my absolute go-to treat to package up for neighbors, teachers, or even the postal carrier. There’s just something special about handing someone homemade chocolate truffles during December.

Why You Need This Simple Christmas Truffles Recipe
Listen, I get it. Life gets hectic in December, but your dessert table shouldn’t suffer! These Christmas Truffles are my secret weapon because they deliver maximum impact for minimum fuss. I promise you’ll be amazed at how quickly you can whip up something this luxurious.
- They require absolutely zero actual baking time—just stirring and chilling!
- The flavor is intensely rich thanks to the high-quality dark chocolate and cream ratio.
- They look like fancy, gourmet gifts, but they are unbelievably easy to make last minute.
- You can personalize them with different extracts or coatings for everyone on your list.
- They hold up beautifully in the fridge, making holiday prep stress-free.
Gathering Ingredients for Perfect Christmas Truffles
Okay, this is where the magic starts, but frankly, it’s almost disappointingly simple! You only need five main things to create the luscious dark chocolate ganache that forms the heart of these Christmas Truffles. Don’t let the fancy name fool you; simple ingredients, handled well, make the best candy.
- 8 ounces dark chocolate, chopped (This is important—don’t skip proper chopping!)
- 1/2 cup heavy cream
- 1 tablespoon unsalted butter
- 1/4 teaspoon vanilla extract
- Cocoa powder, for dusting (Get the good stuff, it finishes the flavor!)
My best advice for any truffle recipe, especially when you want those impressive results, is to pay attention to your chocolate. If you use anything lower than a decent quality dark chocolate—say, 60% cocoa solids at minimum—you won’t get that deep, luxurious melt you’re aiming for. Trust me on this one piece of advice; better chocolate makes better Christmas Truffles.
Ingredient Clarity and Quality Notes
Let’s talk specifics so you can bake with confidence. The heavy cream needs to be full-fat, no light cream substitutes here, or your ganache just won’t set right. And the butter? It absolutely must be unsalted.
When you add the flavorings, use pure vanilla extract. None of that imitation stuff! I find that high-quality vanilla just brings out the inherent sweetness of the dark chocolate better.
If you’re feeling extra festive and want to try that peppermint variation I mentioned, this is the spot to add it. Stir 1 teaspoon of peppermint extract in right along with the vanilla. It makes for delightful peppermint Christmas Truffles!
Step-by-Step Instructions to Make Your Christmas Truffles
This recipe is all about layering flavor and technique, even though it’s super fast. We rely heavily on a process called making ganache, which sounds fancy but it’s just melting chocolate with warmed cream. Follow these steps precisely, and you’ll have the most professional-looking Christmas Truffles ready for that holiday platter!
Creating the Rich Chocolate Ganache Base
First things first, get your chocolate chopped! Smaller pieces melt more evenly. Now, in a small saucepan over medium heat, warm up your heavy cream and that tablespoon of butter. We’re not boiling this mixture—we just want it gently simmering around the edges. Take it off the heat immediately once you see those bubbles!
Pour that hot cream right over your chopped dark chocolate in the bowl. This is the most important part you can’t rush: just let it sit there! Five whole minutes. Don’t touch it, don’t peek, don’t stir! This resting period allows the heat to gently melt the chocolate evenly before we disturb anything. After five minutes, add your vanilla extract. Then, start stirring slowly, starting right in the center and making gentle circles outward until everything comes together into this beautiful, super-shiny dark chocolate ganache. If you stir vigorously, you risk adding air bubbles, so remember: slow and steady wins this race.
Chilling and Shaping the Christmas Truffles
Once the ganache is silky and perfect, cover the bowl. It needs to chill in the refrigerator for at least two hours. Don’t try to rush this—if it’s too soft, you’ll just end up with chocolate hand smears instead of neat balls! You want it firm enough that you can easily scoop it.
Line a baking sheet with parchment paper; this makes cleanup a breeze. Grab a small spoon or a tiny melon baller to scoop out portions. Now, work quickly! The warmth from your hands melts the ganache fast. Roll the scoops between your palms into neat little balls. If you feel things getting too soft, put the tray of scoops back in the fridge for fifteen minutes before continuing. Don’t hesitate to check out other tips on truffle flavor building while you wait!
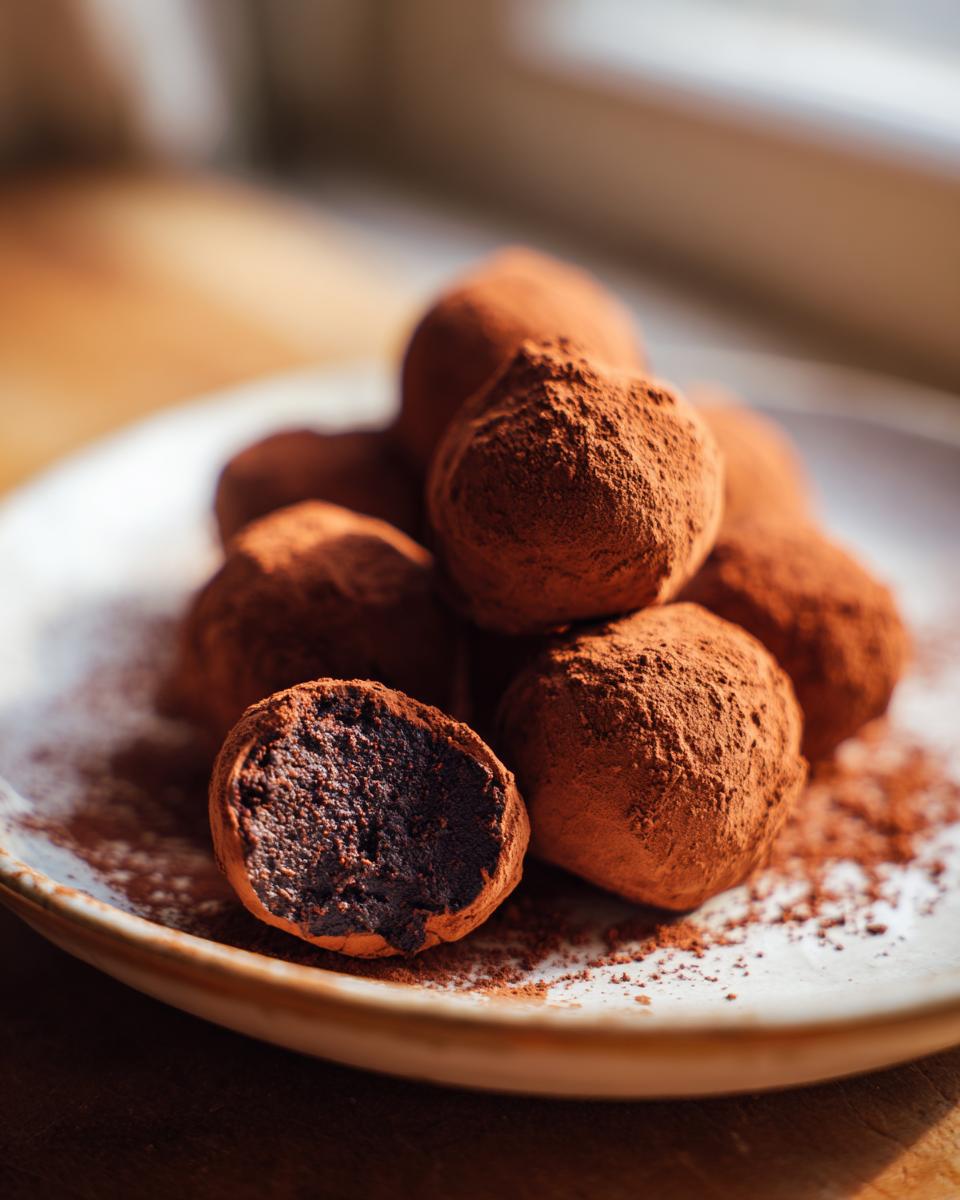
The Final Dusting and Storage of Christmas Truffles
When your Christmas Truffles are all rolled, it’s time for the finishing touch. Spread a generous layer of cocoa powder on a shallow plate. Roll each truffle quickly until it’s completely coated in a generous, dusty layer. That cocoa coating helps stop them from sticking together later on! Place the finished, dusted truffles back onto your lined baking sheet. I store all my holiday candy in an airtight container in the fridge until I’m ready to put out a platter. They stay perfect in there!
Tips for Success with Your Homemade Christmas Truffles
Look, even in the simplest candy recipes, things can sometimes go a little sideways—that’s just cooking! But don’t panic if your beautiful ganache acts a bit weird. I’ve been making Christmas Truffles for years now, and I know exactly what to do when things get messy. These little tricks are why mine always turn out perfectly smooth and rollable.
If your ganache seems a little soft when you try to scoop it, even after two hours, it just needs a little more chill time. Pop it back in the fridge for another 15 to 20 minutes. If you try to roll it when it’s warm, you’ll end up melting the rich butter right out of it and getting greasy fingers instead of perfect spheres.
What if your ganache looks a little grainy or separated after stirring? Usually, this happens if you stir too vigorously when adding the cream, or if the chocolate wasn’t chopped evenly. When this happens, try adding just a tiny splash—maybe half a teaspoon—of room-temperature milk or cream and stir *very* gently. Sometimes, that little bit of extra liquid coaxes the fat and chocolate back into balance. It’s a miracle trick!
When you are rolling the Christmas Truffles, keep a damp, cool cloth nearby. If your hands start feeling sticky or warm, just give them a quick wipe down before handling the next scoop. This tiny bit of temperature control makes a huge difference in getting those nice uniform, round shapes.
If you find yourself trying to make these on a warmer day, you might have better luck chilling your cocoa powder dusting station, too. A cold dusting bowl helps keep the surface of the truffle firm right before you coat it. For more awesome no-bake candy inspiration, you should definitely check out these cheesecake truffle recipes for next year!
Variations for Your Holiday Christmas Truffles
While the dark chocolate and cocoa powder combination is absolutely classic for Christmas Truffles, sometimes you want to mix it up just a little bit for variety, especially if you’re making a big mixed platter. I love having a couple of alternative flavor profiles sitting right alongside the classic ones. These variations are super simple since they just involve tossing in an extra ingredient during the ganache stage!
You absolutely don’t need a whole new recipe; a little extra something added to the base while you stir in the vanilla is all it takes to create a whole new experience.
Adding a Bright Citrus Note
If you want something to cut through that beautiful dark chocolate richness, citrus is the perfect answer. Before you chill the ganache, grate just a tiny bit of fresh orange zest right into the mixture. I mean *zest* only—the white pith underneath is bitter, so be careful with your microplane! The tiny oils from the fresh orange peel infuse beautifully as it chills, giving you a gorgeous, unexpected lift.
This variation pairs really nicely if you decide to dust them with a mix of cocoa powder and a little bit of powdered sugar instead of just pure cocoa. It makes them look even more delicate on the holiday platter.
For the Serious Chocolate Lover: Espresso Kick
For my fellow coffee fiends, you need to try adding espresso powder. It doesn’t make the truffles taste like coffee, exactly—instead, the espresso powder just deepens and intensifies the chocolate flavor itself. It makes the dark chocolate taste even darker and richer!
Stir in about one teaspoon of good quality instant espresso powder right when you add the vanilla. It dissolves instantly into the warm ganache. These become my favorite to have with my morning coffee in the days following Christmas!
Texture Treat: Nutty Crunch
If you want to add some lovely texture to your Christmas Truffles—and you aren’t worried about anyone having nut allergies, of course—finely chopped nuts are fantastic. Think pecans or toasted hazelnuts. You want them chopped so finely that they almost look like coarse sand.
Fold these tiny bits in *after* the ganache is completely smooth, right before it goes into the fridge to chill. They give a fantastic little crunch when you bite down. Just remember that once you add nuts, you might want to use little paper candy cups when serving them, just to keep things neat!
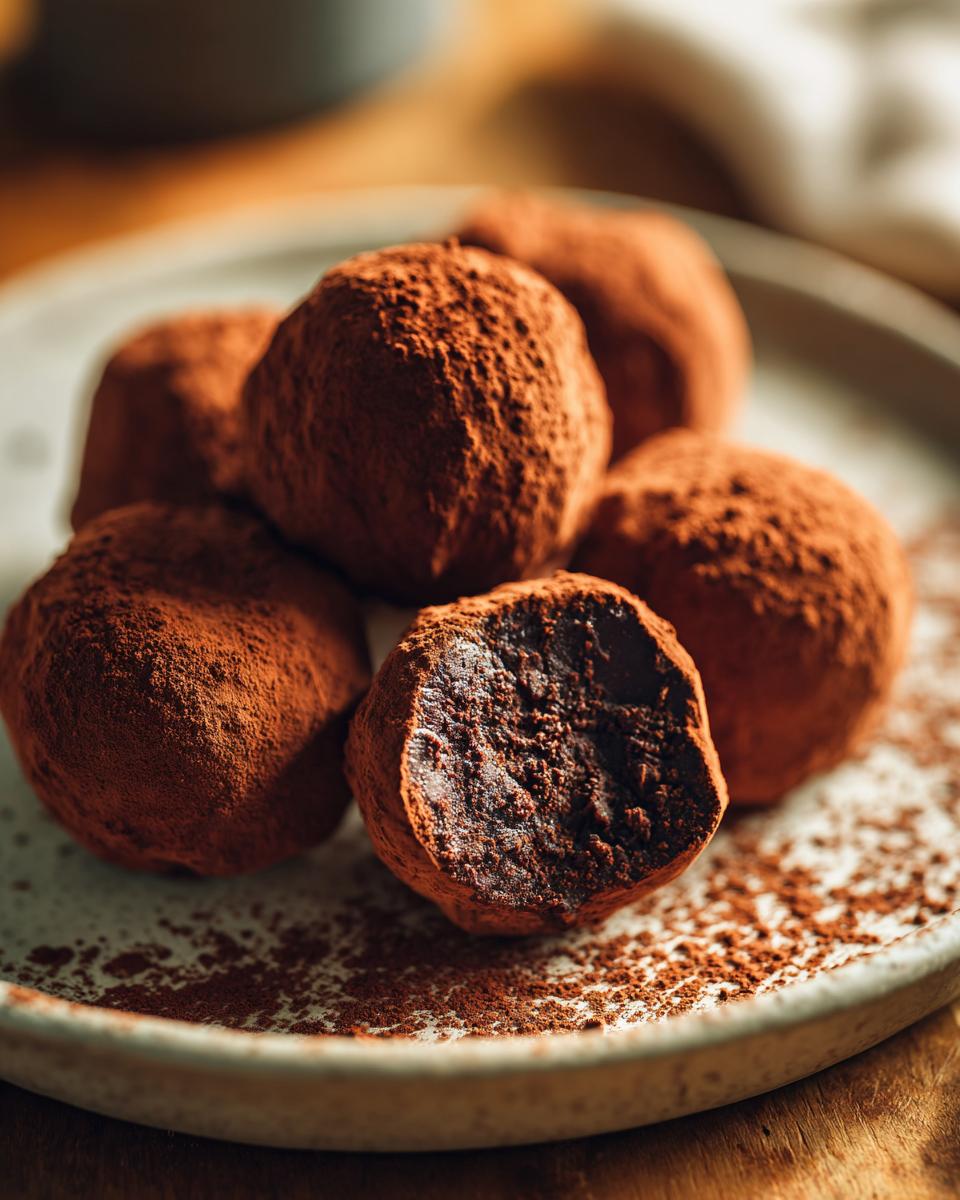
Serving Suggestions for Homemade Christmas Truffles
Now that you have these gorgeous, decadent little chocolate orbs, the final step is showing them off! Don’t just dump them on a plate, okay? They deserve a little holiday flair. Presenting these Christmas Truffles beautifully is half the fun, and frankly, it makes them seem even more special when you hand them over as gifts.
I usually stick to super simple presentation methods because I’m usually elbow-deep in cookie dough when truffle day rolls around. The goal is festive, easy, and appealing—just like the recipe itself!
Making a Stunning Holiday Platter
When I serve these at home, I go for contrast against the dark cocoa. Find yourself a nice white ceramic plate or maybe a rustic little wooden board. Scatter a few sprigs of fresh rosemary or maybe even a couple of whole cinnamon sticks around the edge of the platter. It smells amazing, and the green against the dark brown chocolate looks so incredibly Christmas-y.
Try to arrange them somewhat randomly but densely packed. They look generous that way! If you’ve made a few different flavors (like perhaps that espresso one we chatted about), try grouping the colors or coatings together so people can see the variety.
Using Mini Candy Cups for Gifting
If you are making these for gifting, the mini paper candy cups are your best friend. You can find them in every holiday color imaginable—red, gold, green, or even clear cellophane. They make the truffles look professionally packaged instantly, and it stops them from sticking to anything else in the box!
Line the bottom of your gift box or tin with crinkle-cut paper shred for a nice cushion, and then gently nestle each truffle into its own little cup. This method keeps the cocoa dusting pristine until the recipient opens the box. I always tape a little tag on the outside that says, “Please keep refrigerated!” because temperature matters for the best chocolate experience.
Perfect Pairings for Serving
These rich Christmas Truffles pair beautifully with a few things if you’re setting up a dessert station. For adults, they go wonderfully with a small glass of deep red wine, something like a robust Zinfandel, or even a nice coffee liqueur. The slight fruitiness or bitterness cuts through the richness of the ganache so nicely.
If you’re serving them in the afternoon, I love setting them out next to a hot beverage station. They are just sensational with a strong cup of coffee. If you’re like me and adore that coffee flavor, have you ever tried making a full coffee cake to go alongside? Sometimes I make both so I have a little something for everyone!
Storage and Make-Ahead Guide for Christmas Truffles
This is such a huge selling point for these Christmas Truffles, honestly—they are totally make-ahead friendly! When you’re juggling baking cookies, roasting, and wrapping, knowing you can knock out a fantastic dessert a week early is a lifesaver. The good news is that truffles love the cold, which is perfect for holiday planning.
The key here is keeping them somewhere airtight. If they are left uncovered in the fridge, they tend to pick up the scent of whatever else you have chilling in there, and nobody wants a hint of last night’s leftover casserole in their dark chocolate treat!
Refrigeration Timeline
Once you’ve rolled them and dusted them completely in cocoa powder, pop those babies into a sealed container. They will keep wonderfully in the refrigerator for up to two full weeks. Seriously, two weeks! They might even last longer, but trust me, they won’t stay around that long in my house.
When you want to serve them, take them out about 20 minutes before you plan on offering them up. Remember what I said about the butter softening? They taste their absolute best when they are slightly cool, but not rock-hard straight from the deepest part of the fridge. A gentle softening really brings out the silkiness of that beautiful ganache.
Can You Freeze Homemade Christmas Truffles?
Yes, you absolutely can freeze these little gems! This is my strategy if I make a double batch around the first week of December. Freezing lets you keep them fresh for much longer, usually for about two to three months if they are properly sealed.
The only thing you need to be mindful of when freezing Christmas Truffles is the cocoa coating. Cocoa powder tends to dry out slightly in the deep freeze. My suggestion is to roll them in the cocoa *after* they thaw. So, freeze the plain, uncoated ganache balls.
The Thawing Process for Frozen Truffles
If you’re planning on thawing frozen truffles, never try to rush it with heat! That will melt the chocolate straight out! Place the sealed container (still sealed!) directly into the refrigerator and let them thaw overnight. This gentle transition keeps the moisture locked in and prevents condensation from forming on the surface of the chocolate.
Once they are totally thawed and softened in the fridge (about 3-4 hours), take them out, roll them quickly between your palms to re-smooth any odd bumps, and then immediately roll them generously in the cocoa powder. Suddenly, you have fresh-tasting, incredible Christmas Truffles, ready for gifting or eating, with only minutes of work!
Frequently Asked Questions About Making Christmas Truffles
When people see how amazing these turn out, they always have questions! It’s totally normal; making chocolate truffles from scratch can feel intimidating, but you proved you can do it just by following the simple steps above. Here are some of the things I get asked most often about these delicious Christmas Truffles.
What exactly is ganache, and why is it so important?
Ganache is just the French term for an emulsion of chocolate and heavy cream—that’s it! It’s the foundation of these chocolate truffles. The ratio of chocolate to cream determines what you can do with it. Because we use a higher ratio of chocolate to cream in this recipe, when it chills, it gets firm enough to roll. If we used more cream, it would stay soft and soupy, which is great if you want to pour it over a cake, but not so great for hand-rolled holiday candy!
Can I use milk chocolate instead of dark chocolate for my Christmas Truffles?
You *can*, but honestly, I wouldn’t recommend it if you want that deep, decadent holiday flavor. Milk chocolate has significantly more sugar and dairy solids, which throws off the balance of the emulsion. If you use milk chocolate, the ganache will likely stay much softer and probably won’t firm up enough to roll into nice balls, even after chilling. Stick to dark chocolate, around 60-70%, for the best results for your holiday candy.
How long do the storage instructions really hold true?
They hold true because these are refrigerated items! Since they are made mostly of fat (chocolate and butter) and cream, they need that cold environment to stay firm and keep that lovely texture. They should last a solid two weeks in an airtight container in the fridge. If you want to taste-test after a week, make sure you let them sit out on the counter for 20 minutes before eating them, or the texture will be too hard!
If I add the optional peppermint extract, does that affect the freshness time?
Great question! No, adding the peppermint extract doesn’t change the storage time at all. The freshness is dictated by the fat and dairy content, not the flavoring liquid. However, remember that whatever you add (like peppermint or espresso powder) is absorbed fully into the ganache before chilling, so it stays just as stable as the original recipe. If you’re making a fun mixed box of Christmas Truffles, make sure you label or mark the peppermint ones so guests know what they are getting!
If you want to explore more rich chocolate desserts that are great for holiday parties, you might enjoy looking at this amazing chocolate caramel toffee cake recipe, too!
Estimated Nutritional Information for Your Christmas Truffles
I always feel a little nervous sharing nutritional info because honestly, when you’re making decadent holiday candy, that’s usually the last thing anyone is thinking about! But since this recipe is so simple, the numbers tend to be pretty straightforward per truffle. Remember, these delicious Christmas Truffles are rich, dense little bites, so portion control is built right in!
Below are the estimates based on the ingredients listed in the recipe, assuming you get about 20 perfect balls out of your batch. Please keep in mind that the type of dark chocolate you choose—how high the cocoa percentage is—can really swing these numbers! If you sneak in some espresso powder or use a higher-fat cream, things might shift a tad.
- Serving Size: 1 truffle
- Calories: 110
- Sugar: 7g
- Sodium: 5mg
- Fat: 9g
- Saturated Fat: 5g
- Unsaturated Fat: 4g
- Trans Fat: 0g
- Carbohydrates: 8g
- Fiber: 1g
- Protein: 1g
- Cholesterol: 25mg
One thing I always tell people is that since these are homemade chocolate truffles, the values are always just an estimate. If you use a 70% dark chocolate compared to a 55%, your sugar content will drop, and your fat content might rise slightly! Either way, they are worth every single calorie when paired with a cup of cozy holiday coffee.
Print
Simple Christmas Truffles
- Total Time: 145 min
- Yield: About 20 truffles 1x
- Diet: Vegetarian
Description
Make rich chocolate truffles perfect for holiday gifting or serving.
Ingredients
- 8 ounces dark chocolate, chopped
- 1/2 cup heavy cream
- 1 tablespoon unsalted butter
- 1/4 teaspoon vanilla extract
- Cocoa powder, for dusting
Instructions
- Place the chopped chocolate in a medium heatproof bowl.
- Heat the heavy cream and butter in a small saucepan over medium heat until it just simmers. Do not boil.
- Pour the hot cream mixture over the chocolate. Let it stand for 5 minutes without stirring.
- Add the vanilla extract. Stir the mixture gently from the center outward until smooth and fully combined into a ganache.
- Cover the bowl and refrigerate the ganache for at least 2 hours, or until firm enough to scoop.
- Line a baking sheet with parchment paper.
- Use a small spoon or melon baller to scoop out portions of the ganache. Roll each portion quickly between your palms into a ball shape.
- Roll the finished truffles in cocoa powder until fully coated.
- Store the truffles in an airtight container in the refrigerator until ready to serve.
Notes
- For a different flavor, add 1 teaspoon of peppermint extract with the vanilla.
- If the ganache becomes too soft while rolling, return it to the refrigerator for 15 minutes.
- Prep Time: 20 min
- Cook Time: 5 min
- Category: Dessert
- Method: Chilling
- Cuisine: American
Nutrition
- Serving Size: 1 truffle
- Calories: 110
- Sugar: 7
- Sodium: 5
- Fat: 9
- Saturated Fat: 5
- Unsaturated Fat: 4
- Trans Fat: 0
- Carbohydrates: 8
- Fiber: 1
- Protein: 1
- Cholesterol: 25
Keywords: Christmas truffles, chocolate truffles, holiday candy, dark chocolate ganache, easy dessert