
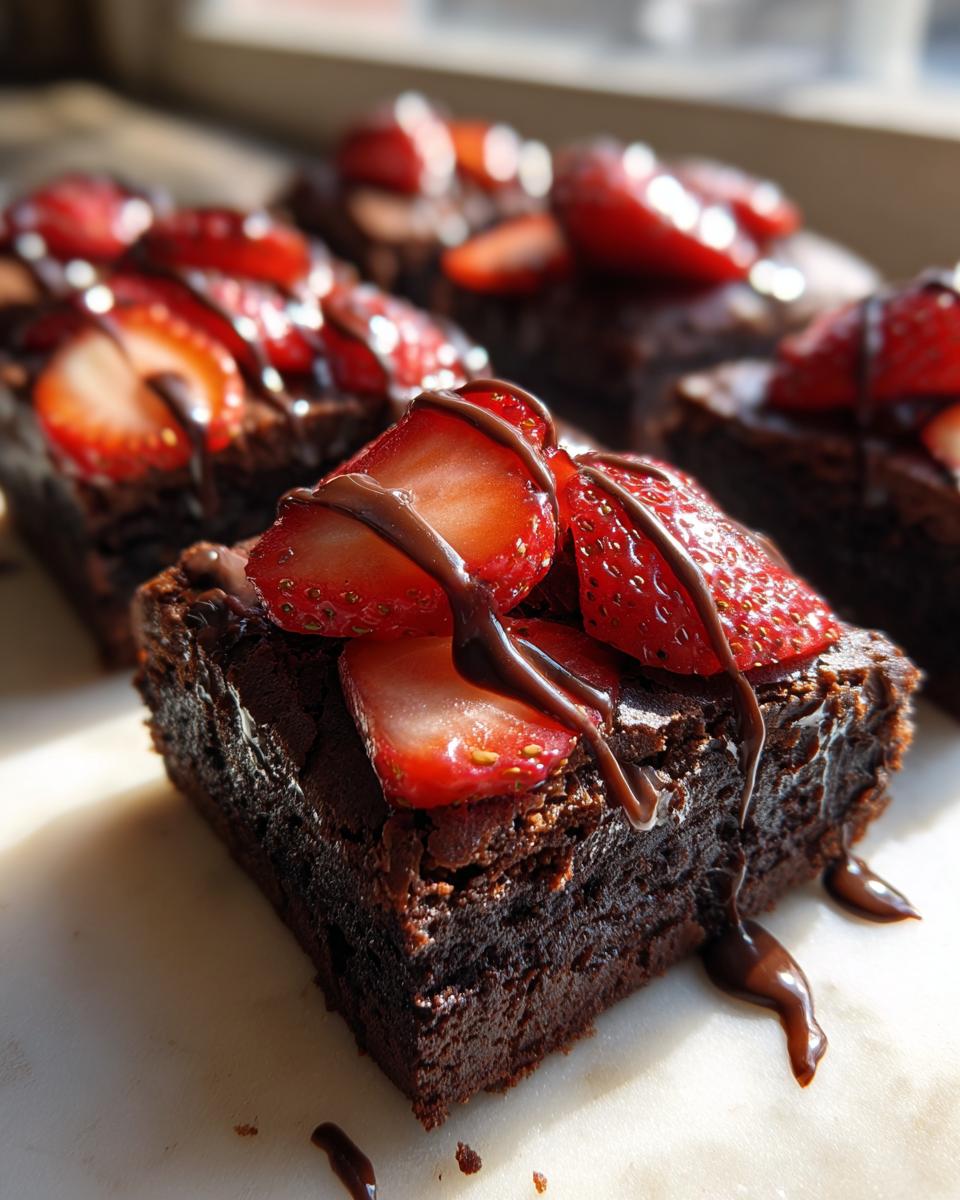
Oh, my friend, when you talk about decadent desserts, you’re talking about something that pulls out all the stops! I’ve spent years trying to strike that perfect balance between rich, dark chocolate and bright, fresh fruit on a baked good. It took forever, but I finally cracked the code on these chocolate covered strawberry brownies. They are the ultimate combination: seriously fudgy, almost creamy on the bottom, topped with gorgeous, sweet strawberries, and then drizzled with that smooth, shiny chocolate coating.

I perfected this recipe because every time I tried to buy something similar, it was either too cakey or the strawberries came out soggy. Not here! Trust me, these chocolate covered strawberry brownies are my go-to for impressing people, and they need to be yours too.
Why This Chocolate Covered Strawberry Brownies Recipe Works
You might think adding strawberries to a brownie is tricky because they can sometimes make things soggy, but I’ve got the secret sauce, so that won’t happen to you! This recipe is all about timing and those wonderful layers. When readers try this one, they tell me they can’t believe how simple it is to get such an impressive result.
- The brownie base bakes up incredibly fudgy—it’s dense without being heavy.
- We wait until the brownies are totally cool before adding the fresh fruit, which keeps everything clean and bright.
- It looks like you spent all day on it, but honestly, the assembly takes maybe ten minutes once the base is baked.
- The slight tartness from the fresh berries is the perfect foil for all that rich chocolate flavor.
If you love adding fruit to your baked goods but worry about texture, you have to check out how we managed that with these amazing strawberry cheesecake bars sometime too. But for now, let’s get down to what you need for these beauties!
Essential Ingredients for Perfect Chocolate Covered Strawberry Brownies
Okay, time to talk ingredients! You can’t rush greatness, but luckily, this brownie list is short and sweet. The real secret here is the relationship between the butter, the sugar, and that deep, dark cocoa powder. Seriously, don’t skimp on the cocoa; it’s what makes these bars so intensely chocolatey, not just sweet.
Also, while the brownies are baking, you’ll want to start prepping your stars: the strawberries. Make sure they are washed, hulled, and halved, just like I mentioned in the instructions. Nothing ruins a perfect chocolate moment like a giant, unmanageable strawberry slice, right? If you’re a big fan of chocolate chips, you should check out my chocolate chip tahini cookies—they use fantastic quality chips!
For the Fudgy Brownie Base
- 1 cup unsalted butter, melted
- 2 cups granulated sugar
- 4 large eggs
- 1 teaspoon vanilla extract
- 1 cup all-purpose flour
- 3/4 cup unsweetened cocoa powder
- 1/2 teaspoon salt
- 1/2 cup semi-sweet chocolate chips
For the Strawberry and Chocolate Topping
This part is where we bring in that fresh flavor! Remember, we need the strawberries to look beautiful sitting on top of the baked base, so cut them in half lengthwise. For the chocolate drizzle, the coconut oil is key—it makes the melted chocolate shiny and helps it set up nicely without needing to be rock hard.
- 1 pound fresh strawberries, hulled and halved
- 1 cup semi-sweet chocolate chips, for topping
- 1 tablespoon coconut oil
Step-by-Step Instructions for Chocolate Covered Strawberry Brownies
Alright, let’s get baking! This process is split into two major parts: getting that perfect gooey brownie base ready, and then assembling the fresh fruit and chocolate on top. You need patience in the middle, especially for cooling, but trust me, it’s worth it. If you’re looking for more chocolate magic, check out this incredible recipe for chocolate caramel toffee cake once you master these bars!
Preparing and Baking the Brownie Layer
First things first: get that oven warming up to 350 degrees Fahrenheit. You need a 9×13 inch pan ready. I always grease mine well and then line it with parchment paper, making sure I leave an overhang—that’s my personal shortcut for lifting the whole cooled slab out later! Mix that melted butter and sugar until they look happy together. Then, beat in your four eggs, one at a time, followed by the vanilla.
In a separate spot, whisk dry things: flour, that lovely cocoa powder, and salt. Now for the crucial part! Add the dry mixture to the wet stuff gradually. Here’s my big tip: mix only until you see the last bit of flour disappear. Seriously, stop mixing immediately! Overmixing develops gluten and turns a fudgy dream into a tough brick. Once just combined, gently fold in that first half-cup of chocolate chips, spread it into your pan, and bake for 25 to 30 minutes. Pull ’em out when a toothpick shows moist crumbs attached—not wet batter, but not dry either!
Assembling and Finishing Your Chocolate Covered Strawberry Brownies
This is the hard part: waiting. You absolutely must let these brownies cool completely in the pan before you even think about putting fruit on them. If they’re warm, the strawberries will bleed and make everything sad. So, cool them completely on a rack when they come out.
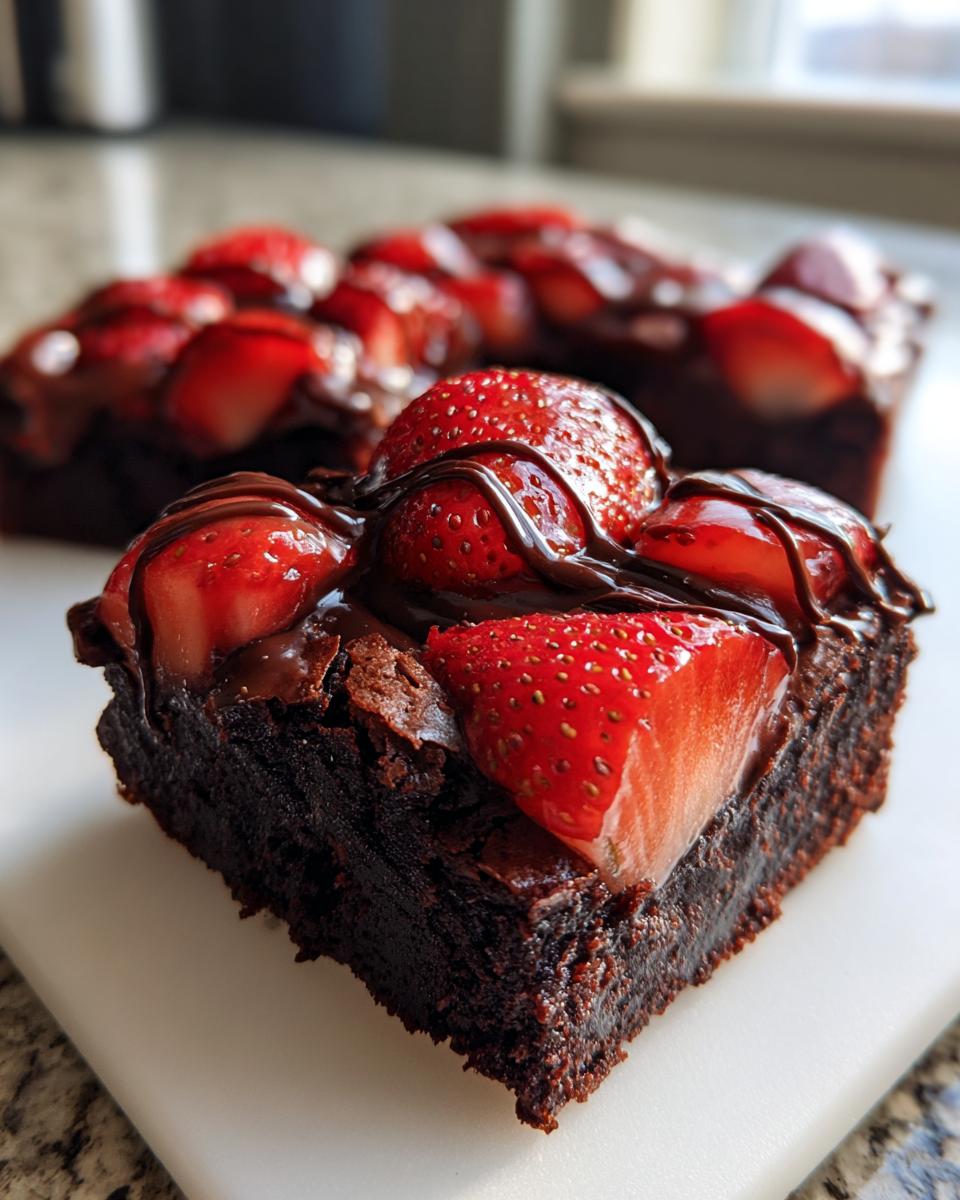
Once they are totally chilled down, arrange those halved, beautiful, fresh strawberries right over the top. Now for the drizzle! Take your final cup of topping chocolate chips and mix them with the coconut oil in a microwave-safe bowl. I microwave for 30-second bursts, taking it out and stirring hard between each one. That keeps the chocolate smooth and stops it from seizing up on you. Drizzle that melted perfection liberally over the berries. Let the topping set up, and then slice away!
Tips for Achieving the Best Chocolate Covered Strawberry Brownies
You’ve got the fudgy texture and the sweet fruit, so now let’s talk about presentation because we eat with our eyes first, right? A messy square just doesn’t cut it when you’ve put this much love into a dessert. The biggest hurdle after baking is slicing—those rich, buttery brownies can get super gooey, especially when you add the slightly slippery strawberries!
My absolute number one trick, which I learned the hard way after ruining a whole pan once, is chilling. You *must* chill the finished brownies for at least 30 minutes after the chocolate topping has set. This firms up the fat in the brownie and the chocolate, letting you get those super clean, professional-looking squares. It makes serving them at a party so much nicer!
Also, don’t feel boxed in by the semi-sweet chips! While they balance the fruit perfectly, you have options. If you like things extra dark and maybe a little more adult-tasting, swap them out for dark chocolate chips. If you prefer a sweeter topping, milk chocolate works too, though you might want to skip adding any extra sugar to the berry layer next time. These little tweaks, like making sure your batter isn’t overmixed like we talked about, really make a difference in the final product. For another great method on handling fruit in baked goods, you should check out my notes on making easy banana bread—patience with baking times always pays off!
Storage and Making Ahead for Your Chocolate Covered Strawberry Brownies
Because these brownies involve fresh fruit and a chocolate coating, storage is a little different than your standard fudgy bar. You definitely want to think about temperature control once you’ve assembled everything. If you leave them sitting out on the counter for hours, the strawberries are going to get soft pretty fast, which isn’t what we want!
I usually bake the base layer, let it cool completely, and store the plain brownies tightly wrapped at room temperature for up to two days. They stay incredibly moist, honestly. But once you add the strawberries and that chocolate drizzle, things change. You need to move them into the fridge.
Keep the finished chocolate covered strawberry brownies in an airtight container in the refrigerator. They hold up beautifully for about three days this way. The cold helps keep the strawberries nice and firm, and the chocolate topping stays perfectly set. Don’t worry too much about reheating these, because honestly, they are best served cold or at just slightly cooler than room temperature—like they just came out of a quick chill!
If you want to get a head start on the labor, definitely bake the base layer a day ahead of time and let it cool completely. Then, the day you need them, you just have to slice the strawberries, melt the topping chocolate, and assemble. It’s a huge time saver! If you’ve ever tried making my pumpkin cream cheese swirl bread ahead of time, you know how much easier it is to bake the base the day before!
Variations on Chocolate Covered Strawberry Brownies
While I think my recipe is pretty close to brownie perfection, I totally get it—sometimes you want to put your own little spin on things! That’s the real fun of home baking, right? Experimenting is how we find new favorites, and these bars are super adaptable. You don’t have to reinvent the wheel, just add a little spice or swap a topping!
One simple tweak I love, especially when the strawberries are perfectly tart, is adding just a tiny pinch of flaky sea salt right onto the melted chocolate drizzle before it sets. It sounds crazy, but that salty-sweet combination just makes the chocolate flavor explode! It’s like background music for your taste buds.
If strawberries aren’t in season or you’re feeling something slightly different, don’t hesitate to switch out the fruit entirely. Raspberries work beautifully here; they offer that pleasant tanginess that cuts through the richness just like tomatoes in a good sauce! In fact, if you love raspberries, you should look up how I handle them in my raspberry almond tea bread recipe—it’s a totally different texture but the flavor combination is similar.
Finally, let’s talk temperature in the topping. Instead of using semi-sweet chocolate chips for the drizzle, try swapping them out for white chocolate. If you do that, you might want to throw in a small amount of good quality freeze-dried strawberry powder or even a drop of strawberry extract into the melted white chocolate for an extra flavor punch. Just be careful if you add liquid extract—go slow, or you’ll end up with a runny topping disaster!
Serving Suggestions for These Decadent Chocolate Covered Strawberry Brownies
Now that you have these incredible, rich bars sitting on your counter, the big question is: how do you serve them to really make them shine? Because these are so deeply flavored—that intense chocolate mixed with the fresh fruit—you actually don’t need a lot of fancy additions. Sometimes less is more, especially when the chocolate layer is that fudgy!
If you’re serving these warm—which, fine, you can if you skipped the chilling step, I won’t judge!—you absolutely must serve it with something cold to contrast that warmth. A scoop of really good quality vanilla bean ice cream is my top pick. The way that cold creaminess slowly melts into the warm, gooey brownie edges? Perfection. It’s classic for a reason, honey!
For midday enjoyment, or maybe after a big dinner where you want something sweet but not a full ice cream sundae, a simple cup of coffee is the ticket. I prefer a strong, medium-roast black coffee. The slight bitterness of the coffee cuts right through the sweetness of the sugar and chocolate. It cleanses the palate beautifully between bites! If you’re entertaining and serving cakes instead of bars, I always recommend pairing them with something simple, sort of like how I keep the frosting light on my homestyle yellow cake.
Honestly, though, if you sliced them cleanly and let them sit out for about 15 minutes after taking them from the fridge, they are pretty perfect just as they are, sitting on a nice little dessert plate. They hardly need any encouragement!
Frequently Asked Questions About Chocolate Covered Strawberry Brownies
I know when I try a new recipe, especially one as decadent as this, I always have a few nagging questions pop up right before I start mixing. Don’t worry, I’ve been through the troubleshooting phase many times so you don’t have to! Here are the things people ask me most often about achieving these perfect chocolate covered strawberry brownies.
Can I use frozen strawberries instead of fresh ones?
Oh, I really, really wouldn’t recommend it unless you’re really in a pinch! Frozen strawberries are full of ice crystals and water; they release tons of moisture when they warm up. If you put them on the brownie base, they’ll just turn everything mushy and soggy before you even get to the chocolate drizzle. If you absolutely must use frozen, you need to thaw them completely and then pat them bone-dry between several layers of paper towels. But honestly, the textural difference isn’t worth it for this dessert.
What happens if my chocolate topping seizes when I melt it?
That’s frustrating when it happens! Chocolate seizing means it turned grainy and stiff, usually because a tiny bit of water got into the melted chocolate. Since we added coconut oil, it minimizes the risk, but if it happens, don’t panic! Take the bowl off the counter, add about a teaspoon of extra, very hot (but not boiling) water or even a tiny splash of neutral oil, and stir really vigorously. Sometimes that little bit of extra fat or liquid helps bring it back to a smooth, drizzly consistency. If it’s too far gone, you can always just use it as a thick spread instead of a drizzle!
How long do these bars stay good, and should they be refrigerated?
As I mentioned before, once the strawberries are on top, they need the fridge. They’ll last beautifully for about three days in an airtight container in the refrigerator. If you are only baking the plain brownie base without any fruit or topping, that’s good at room temperature for two days. But for the full experience, keep those fudgy bars chilled down. If you’ve ever had a key lime cake that needed chilling, this is similar—the fresh components need cool storage!
My brownies seem too fudgy—did I underbake them?
Nope, I hope not! That’s exactly what we are going for with these! I specifically designed this recipe to be an intensely fudgy bar, not a cakey one. Remember how I said we’re looking for *moist crumbs* on the toothpick, not a clean one? That moist crumb means the center is still rich and underbaked just enough to stay gooey. If you bake it till the toothpick is totally clean, you might end up with a dry brownie, which defeats the purpose of this decadent treat!
Estimated Nutritional Data for Chocolate Covered Strawberry Brownies
Now listen, I’m a baker, not a nutritionist, and I’m certainly not following any strict diet when I’m whipping up something this amazing! But I know some of you like to plan things out, so I did pull together some estimated numbers based on the ingredients we used for these incredible chocolate covered strawberry brownies.
Keep in mind, these figures are just a general guide, because whether you use a premium brand of cocoa powder or a different type of chocolate chip can totally swing the final count. If you’re tracking calories for a recipe like my yellow cake with mocha frosting, you know small substitutions make a big difference!
Consider these numbers a ballpark figure for one generous square serving:
- Calories: Around 300 per square
- Total Fat: Approximately 18 grams (with about 10 grams of that being saturated fat—hello, butter!)
- Carbohydrates: Roughly 35 grams
- Sugar: About 30 grams (It’s dessert, we know what we’re signing up for!)
- Protein: Around 4 grams
- Sodium: Roughly 100 milligrams
Again, these are just estimates, so take them with a grain of salt, or maybe a sprinkle of flaky sea salt on top of your next batch! The most important number is the one that says “delicious,” and these bars hit that mark every single time.
Share Your Chocolate Covered Strawberry Brownies Experience
Okay, you’ve made them! You’ve waited patiently for them to cool, you’ve admired that perfect strawberry-to-chocolate ratio, and now you’ve taken that first glorious, fudgy, fruity bite. Please, please, please don’t keep that success all to yourself!
I just absolutely love seeing how these turn out in your kitchens. Did they look picture-perfect enough to serve at a fancy picnic? Did the kids devour them before you could even get the topping set properly? Tell me everything!
If you followed along and these brownies made your week a little sweeter, it would make my entire afternoon if you could hop down to the comments section below and leave a rating for the recipe. Five stars if they blew your socks off!
And if you managed to snap a photo of these beauties—especially if you got a great shot of the chocolate drizzle—share it on social media! Tag me, because nothing makes me happier than knowing my Chocolate Covered Strawberry Brownies recipe is making someone else’s day better. It’s the best part of sharing these family-tested recipes, sort of like when folks send me pictures of my big yellow birthday cake!
Don’t be shy—let’s celebrate this amazing dessert together!
Print
Chocolate Covered Strawberry Brownies
- Total Time: 50 min
- Yield: 16 servings 1x
- Diet: Vegetarian
Description
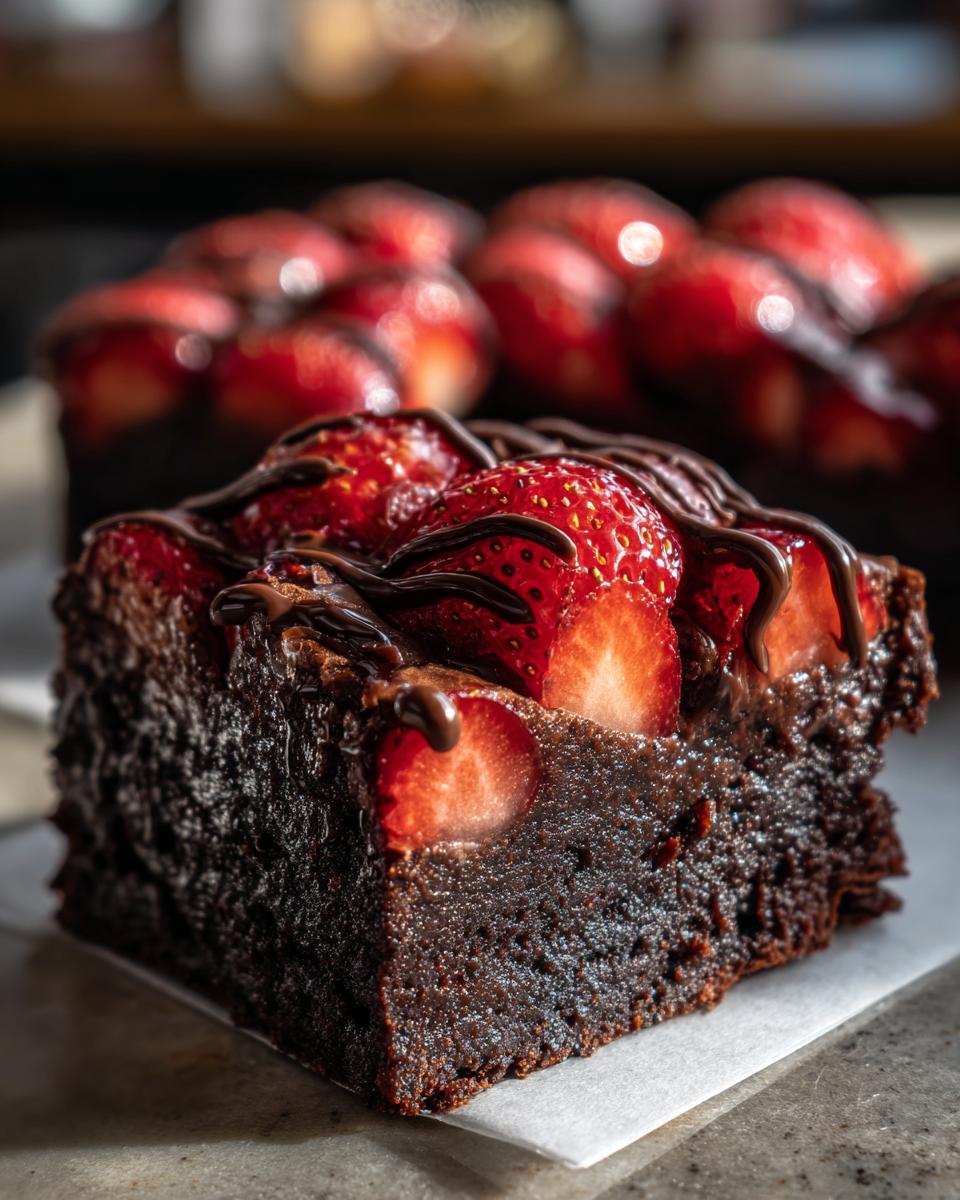
Rich, fudgy brownies topped with fresh strawberries and a chocolate coating.
Ingredients
- 1 cup unsalted butter, melted
- 2 cups granulated sugar
- 4 large eggs
- 1 teaspoon vanilla extract
- 1 cup all-purpose flour
- 3/4 cup unsweetened cocoa powder
- 1/2 teaspoon salt
- 1/2 cup semi-sweet chocolate chips
- 1 pound fresh strawberries, hulled and halved
- 1 cup semi-sweet chocolate chips, for topping
- 1 tablespoon coconut oil
Instructions
- Preheat your oven to 350 degrees Fahrenheit. Grease and line a 9×13 inch baking pan with parchment paper, leaving an overhang.
- In a large bowl, mix the melted butter and sugar until combined.
- Beat in the eggs one at a time, then stir in the vanilla extract.
- In a separate bowl, whisk together the flour, cocoa powder, and salt.
- Gradually add the dry ingredients to the wet ingredients, mixing until just combined. Do not overmix.
- Fold in the 1/2 cup of chocolate chips.
- Spread the batter evenly into the prepared pan.
- Bake for 25 to 30 minutes, or until a toothpick inserted near the center comes out with moist crumbs attached.
- Let the brownies cool completely in the pan on a wire rack.
- Arrange the halved strawberries over the cooled brownies.
- In a small, microwave-safe bowl, combine the 1 cup of topping chocolate chips and coconut oil. Microwave in 30-second intervals, stirring between each, until smooth.
- Drizzle the melted chocolate mixture over the strawberries.
- Allow the chocolate topping to set before cutting the brownies into squares.
Notes
- For cleaner cuts, chill the finished brownies for 30 minutes before slicing.
- You can use milk chocolate or dark chocolate for the topping, based on your preference.
- Prep Time: 20 min
- Cook Time: 30 min
- Category: Dessert
- Method: Baking
- Cuisine: American
Nutrition
- Serving Size: 1 square
- Calories: 300
- Sugar: 30
- Sodium: 100
- Fat: 18
- Saturated Fat: 10
- Unsaturated Fat: 8
- Trans Fat: 0
- Carbohydrates: 35
- Fiber: 2
- Protein: 4
- Cholesterol: 70
Keywords: brownies, chocolate, strawberry, dessert, baked goods, fudge