
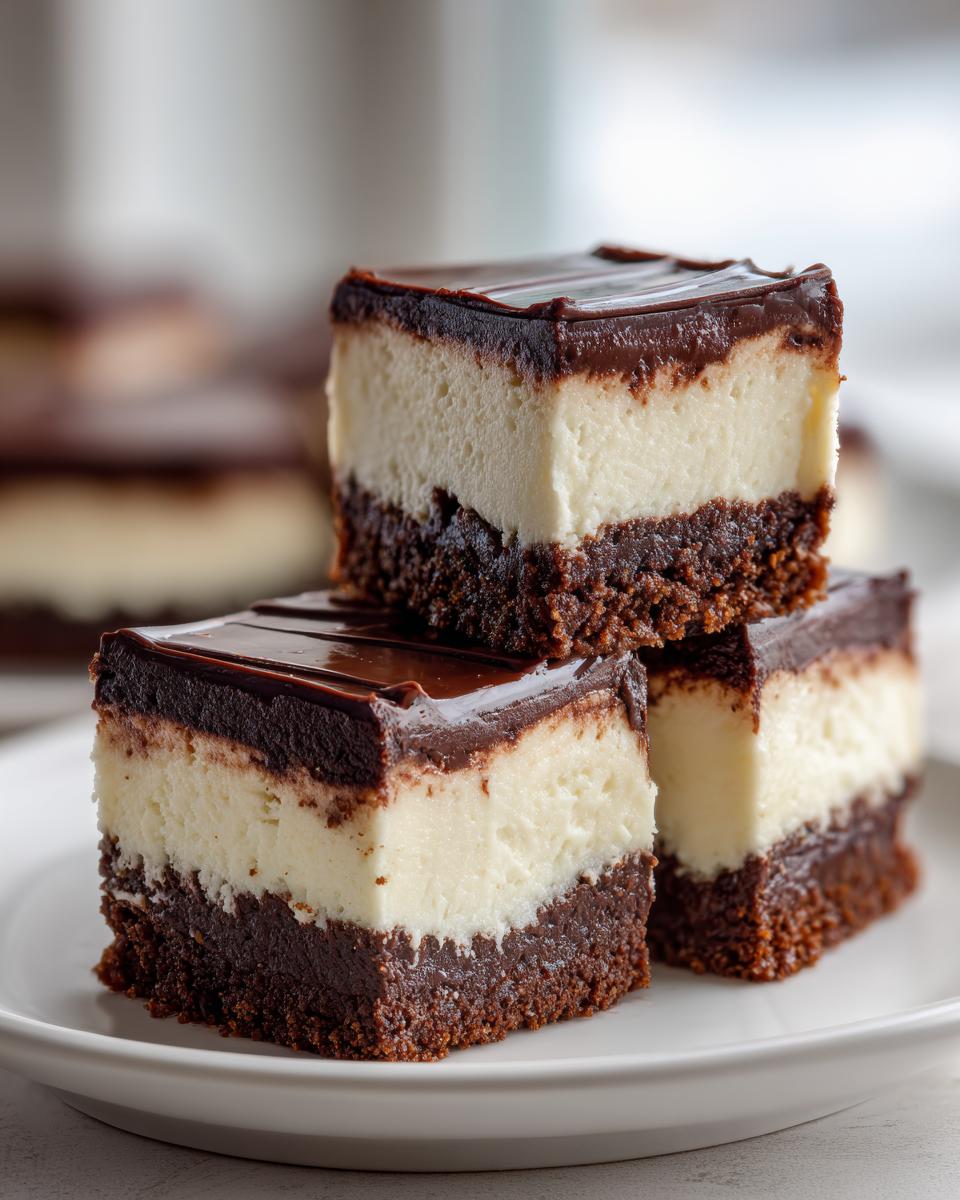
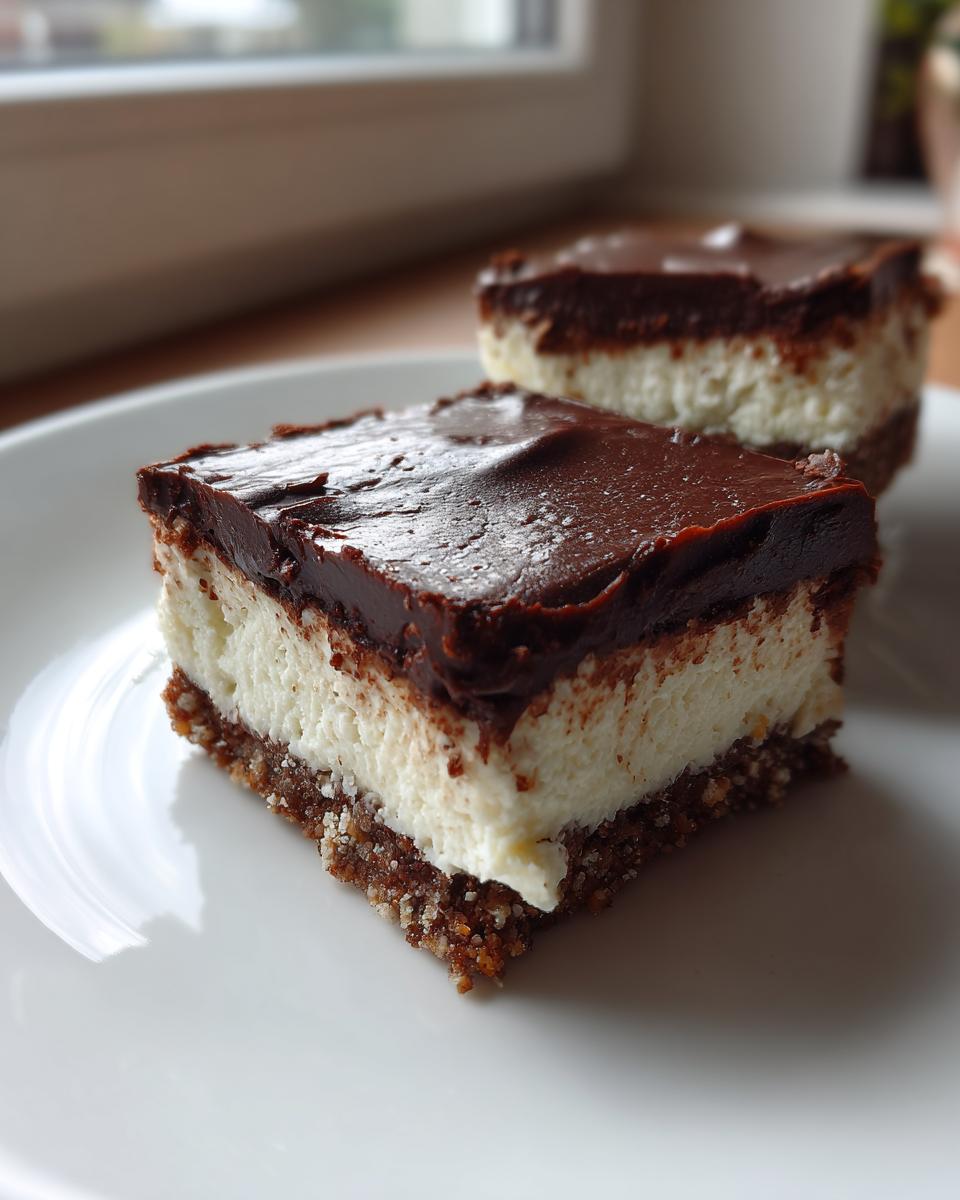
Oh, I know that craving—that moment when only something deeply, utterly decadent will do. Forget those light, airy desserts; when I need true satisfaction, I go straight for my perfected recipe for chocolate cheesecake bars. Seriously, these are the richest, silkiest bars you’ll ever bump into, all sitting on the most glorious, buttery graham cracker crust.
I’ve tinkered with cheesecakes for years, trying to get that perfect melt-in-your-mouth texture without any annoying lumps or cracks. After way too many failed attempts (and a lot of happy taste-testers taking the ‘failures’), I finally cracked the code on the balance between the cream cheese and the eggs. Trust me when I say these bars are worth every single minute of chilling time.

Why You Will Love These Chocolate Cheesecake Bars
When I tell you these bars are special, I mean it. It’s the combination of textures that gets me every time. If you’re looking for that perfect, portable dessert, look no further. I’m so happy I can share these secrets!
- The filling is unbelievably creamy—it just melts instantly on your tongue.
- We’ve got that satisfying crunch from the buttery graham cracker crust in every square.
- They are surprisingly easy! We only use a few steps, and there’s no fancy water bath required.
- The pop of semi-sweet chocolate chips keeps the richness interesting.
Honestly, these are perfect for any potluck or just because you deserve a treat. You can even check out some great summer cheesecake options if you love this style!
Essential Ingredients for Perfect Chocolate Cheesecake Bars
Okay, let’s talk supplies. The secret to a great cheesecake bar isn’t some exotic spice; it’s making sure your core ingredients behave themselves! We aren’t making soup here; we need structure, so temperature is key. I’ve consolidated everything you need below. If you mess up one thing, please don’t mess up the cream cheese temperature—it throws the whole batter off.
For the crust, we’re keeping it classic:
- 1 1/2 cups graham cracker crumbs: Don’t skimp here, this holds everything together!
- 1/4 cup granulated sugar: Just enough sweetness to complement the butter.
- 6 tablespoons unsalted butter, melted: Make sure it’s melted completely, not just soft!
Then for the main event, the creamy filling that makes these chocolate cheesecake bars so famous:
- 16 ounces cream cheese, softened: And here is my biggest tip—you absolutely MUST use room temperature cream cheese. If it’s cold at all, you’ll end up with little lumps. I usually plan ahead and pull mine out two hours before I want to start mixing.
- 1 cup granulated sugar: This blends with the cheese to create that beautiful, silky texture.
- 2 large eggs: Make sure these are room temperature too, it helps them incorporate without deflating the batter.
- 1 teaspoon vanilla extract: A classic flavor boost!
- 1/2 cup semi-sweet chocolate chips: These are spread right on top before baking, giving you little pockets of molten chocolate goodness.
If you skipped the crust prep, you might want to look at how others nail their chocolate cheesecake fillings—it really makes a difference!
Step-by-Step Guide to Making Chocolate Cheesecake Bars
These bars look fancy, but honestly, if you can work a hand mixer and you remember to preheat your oven, you’ve got this! I broke down the whole process into three simple phases. The most important thing I learned when perfecting these is that you have to treat the crust and the filling like two separate entities—they get baked at different times, and one definitely needs to cool before the other one goes in. Trust me, skip the chilling time, and you’ll regret it when you try to cut them!
Preparing the Graham Cracker Crust for Your Chocolate Cheesecake Bars
First things first, get that oven going to 350°F (175°C). While it’s heating up, grab that 8×8 inch pan. Here’s a pro trick: line it with parchment paper, but leave an overhang on two sides—this is your homemade handle for lifting the whole block out later. Say goodbye to stressing about digging them out!
In a bowl, mix up your graham cracker crumbs, the 1/4 cup of sugar, and that melted butter. You want it looking like wet sand. Press it down *firmly* into your prepared pan. Don’t be shy; really pack it in there so it doesn’t crumble apart later. Pop that crust into the oven for just 10 minutes to set it, then pull it out to cool off a bit while we mix the topping.
Mixing the Creamy Cheesecake Filling
This is where the magic—and the smoothness—happens. Remember I said the cream cheese needs to be soft? Good, because we beat that softened cream cheese and the full cup of sugar together until it looks impossibly smooth. I mean zero lumps, just creamy perfection. If you see any lumps, keep beating!
Next, we add the eggs, but we add them one at a time. Beat well after each addition. This prevents you from incorporating too much air, which causes cracks! Finally, swirl in that teaspoon of vanilla extract. Stop mixing the second it’s combined. Overmixing the eggs is amateur hour, and we aren’t amateurs!

Baking and Chilling Your Chocolate Cheesecake Bars
Pour that glorious, creamy batter right over your slightly cooled crust. Now, sprinkle those semi-sweet chocolate chips evenly all over the top. They’ll sink just a touch while baking, which is exactly what we want. Bake the whole thing for about 30 to 35 minutes. The center should look mostly set, maybe just a little jiggly, like Jell-O.
Resist the urge to slice them hot! Let them cool completely on a wire rack first. Then, this is non-negotiable: they must chill in the refrigerator for at least two hours. For truly perfect, clean-edged slices for serving, I always leave mine overnight. You can see some other great bar ideas, like these strawberry cheesecake bars, for inspiration!
Tips for Achieving the Best Chocolate Cheesecake Bars
Listen, I know patience isn’t usually part of the baking recipe, but with these rich chocolate cheesecake bars, it’s the secret sauce. If you want that picture-perfect smooth texture and slices that don’t fall apart, you need to pay attention to two things: temperature and chill time.
First, the smoothness hinges entirely on room-temperature cream cheese and eggs. If you see any lumps when mixing, take your bowl off the mixer and just scrape down the sides one more time, or gently work the lumps with a rubber spatula. Cold ingredients make lumpy batter, period.
For slicing, I’ve experimented, and chilling is everything. Yes, two hours gets you close, but if you want those gorgeous, clean squares everyone fights over, you need four hours minimum, or better yet, leave them right in the fridge overnight. It solidifies the fats properly. You can explore other quick recipes like this marshmallow whip cheesecake if you’re in a hurry, but these bars require patience!
Ingredient Notes and Substitutions for Chocolate Cheesecake Bars
So, let’s circle back to two things that really make or break these bars: the starting temperature of your dairy and what you do if you’re missing one small ingredient. We talked about room-temperature cream cheese before, but honestly, I could shout it from the rooftops—it’s that important! If it’s even slightly chilly when you try to beat it with the sugar, you’ll end up with that frustrating, slightly grainy texture we are trying to avoid in these rich chocolate cheesecake bars. Give yourself a break and plan ahead!
If you are out of graham crackers, don’t panic! You can absolutely substitute them; I’ve done it in a pinch. Vanilla wafers (the crumbly kind) work beautifully for the base. They add a slightly sweeter, vanilla component, but the texture is comparable once pressed down and baked. Just make sure you crush them finely!
As for the chocolate chips? Semi-sweet is my go-to because it cuts through the richness of the cheesecake filling. If you have a high-quality bar of dark chocolate, go ahead and chop that up instead! Chopped chocolate melts a little differently—you might get bigger pools, which, if you ask me, is a bonus! But if you’re looking for super-quick baking inspo, you might want to check out this peanut butter swirl cake roll recipe too; it’s incredible!
Storage and Reheating Instructions for Chocolate Cheesecake Bars
These amazing chocolate cheesecake bars are already the perfect make-ahead treat. Once they are chilled (and remember, chilled is best!), you want to store them properly so that creamy top doesn’t dry out or pick up any fridge smells. I always cut mine into squares *after* they’ve fully set up in the fridge, then I stack them in a single layer in an airtight container.
They keep wonderfully in the refrigerator for up to four days. And here’s the key: don’t try to reheat these! Cheesecake bars are best served cold or maybe just slightly cooled to room temperature for about 15 minutes before eating. If you try warming them up, that beautiful, firm filling turns into a puddle, which is definitely not what we want for leftovers. If you are interested in other chilled treats, this no-bake funfetti cake is another must-try!
Serving Suggestions for Your Chocolate Cheesecake Bars
These decadent chocolate cheesecake bars are pretty spectacular all on their own, but sometimes you want to dress them up just a little bit for company, or maybe just because you feel fancy that day! Because they are so rich and intensely flavored, you don’t need much to make them shine.
My absolute favorite way to serve them is straight from the fridge, maybe garnished with something tart to cut through that creaminess. A handful of fresh raspberries or thinly sliced strawberries on top? Perfection. The slight acidity of the berries is just divine against the sweet chocolate and tangy cheesecake.
If you’re feeling extra indulgent—and honestly, why wouldn’t you be with these bars?—a light drizzle goes a long way. A thin ribbon of salted caramel sauce is incredible; the salt really amplifies the chocolate flavor. Or, for a true chocolate lover’s dream, just dust the top with a fine sift of unsweetened cocoa powder right before serving. It looks so professional!
If you want to see how other people dress up their chocolate desserts, you should definitely take a peek at this amazing chocolate caramel toffee cake for more decadent ideas.
Frequently Asked Questions About Chocolate Cheesecake Bars
I get so many messages asking about cutting these beauties, or if they can be made in advance, so I figured I’d tackle the most common things coming through my inbox right here. These aren’t complicated bars, but a few small details make all the difference between a glorious square and a crumbly mess!
Can I freeze these chocolate cheesecake bars?
Yes, absolutely you can freeze them! They hold up really well, which is great if you want to bake them way ahead of time. My advice is to chill them completely first, slice them into individual squares, and then wrap each bar tightly in plastic wrap, maybe even adding a layer of foil for extra protection. They thaw perfectly on the counter after about an hour, but honestly, they are still delicious semi-frozen. For more great make-ahead dessert ideas, you have to try this divine lemon cheesecake!
What is the best way to get clean slices?
This is the most important question about serving these chocolate cheesecake bars! You need two things: patience and heat. Patience means that extended chilling time—remember, four hours minimum, but overnight is truly the gold standard for getting edges that look professionally cut. Once they are rock hard from the fridge, take a large, sharp knife and dip it in a tall glass of very hot water. Wipe the knife completely dry with a clean towel, and then make your cut. You wipe and reheat the knife for every single cut you make. It sounds fussy, but it prevents that horrible dragging and smearing!
Can I skip baking the crust?
Oh, please don’t skip it! Look, I know we are trying to save time, but that 10-minute bake on the crust is critical. If you just press the butter/crumb mixture in and pour the wet filling right on top, you are guaranteeing yourself a soggy bottom later on. That short bake evaporates just enough moisture from the butter so the crust firms up nicely. It gives it that necessary sandy, slightly crisp texture that contrasts perfectly with the creamy topping. Skip the bake, and you’ll end up with wet, dense crumbs.
Nutritional Information Estimate for Chocolate Cheesecake Bars
Now, I’m definitely not a nutritionist; I’m a baker who loves butter! So take all this information with a grain of salt, because honestly, the quality of your cream cheese or the exact brand of chocolate chips you use can make these numbers jump around a bit. This is a rich dessert, there’s no denying it, so consider this an estimate based on the standard ingredients we used!
If you’re tracking macros or counting calories, here’s the general breakdown for one glorious square of these chocolate cheesecake bars:
- Serving Size: 1 bar
- Calories: Roughly 300 calories. Yes, they’re worth it!
- Fat: Around 19g total fat. That’s the butter and cream cheese doing their job!
- Carbohydrates: About 28g. This includes all the sugars from the crust and the filling.
- Sugar: You’re looking at about 25g of sugar per serving.
- Protein: A respectable 5g, thanks to all that cream cheese and those eggs.
It’s dessert, folks! Enjoy it without guilt. These numbers are just a guideline and not a strict calculation based on lab testing, so enjoy the flavor first and foremost!
Print
Chocolate Cheesecake Bars
- Total Time: 50 min
- Yield: 16 servings 1x
- Diet: Vegetarian
Description
Simple recipe for rich chocolate cheesecake bars with a graham cracker crust.
Ingredients
- 1 1/2 cups graham cracker crumbs
- 1/4 cup granulated sugar
- 6 tablespoons unsalted butter, melted
- 16 ounces cream cheese, softened
- 1 cup granulated sugar
- 2 large eggs
- 1 teaspoon vanilla extract
- 1/2 cup semi-sweet chocolate chips
Instructions
- Preheat your oven to 350 degrees F (175 degrees C). Line an 8×8 inch baking pan with parchment paper, leaving an overhang on two sides.
- Mix graham cracker crumbs, 1/4 cup sugar, and melted butter in a bowl. Press the mixture firmly into the bottom of the prepared pan.
- Bake the crust for 10 minutes. Remove from the oven and let cool slightly.
- Beat the softened cream cheese and 1 cup sugar in a large bowl until smooth. Beat in the eggs one at a time, then mix in the vanilla extract.
- Pour the cream cheese mixture over the cooled crust. Sprinkle the chocolate chips evenly over the top.
- Bake for 30 to 35 minutes, or until the center is mostly set.
- Cool the bars completely on a wire rack. Chill in the refrigerator for at least 2 hours before cutting into squares.
Notes
- For cleaner cuts, chill the bars for 4 hours or overnight.
- Use room temperature cream cheese for a smoother batter.
- Prep Time: 15 min
- Cook Time: 35 min
- Category: Dessert
- Method: Baking
- Cuisine: American
Nutrition
- Serving Size: 1 bar
- Calories: 300
- Sugar: 25g
- Sodium: 150mg
- Fat: 19g
- Saturated Fat: 11g
- Unsaturated Fat: 8g
- Trans Fat: 0g
- Carbohydrates: 28g
- Fiber: 1g
- Protein: 5g
- Cholesterol: 55mg
Keywords: chocolate cheesecake bars, cheesecake, graham cracker crust, dessert, baked sweets