
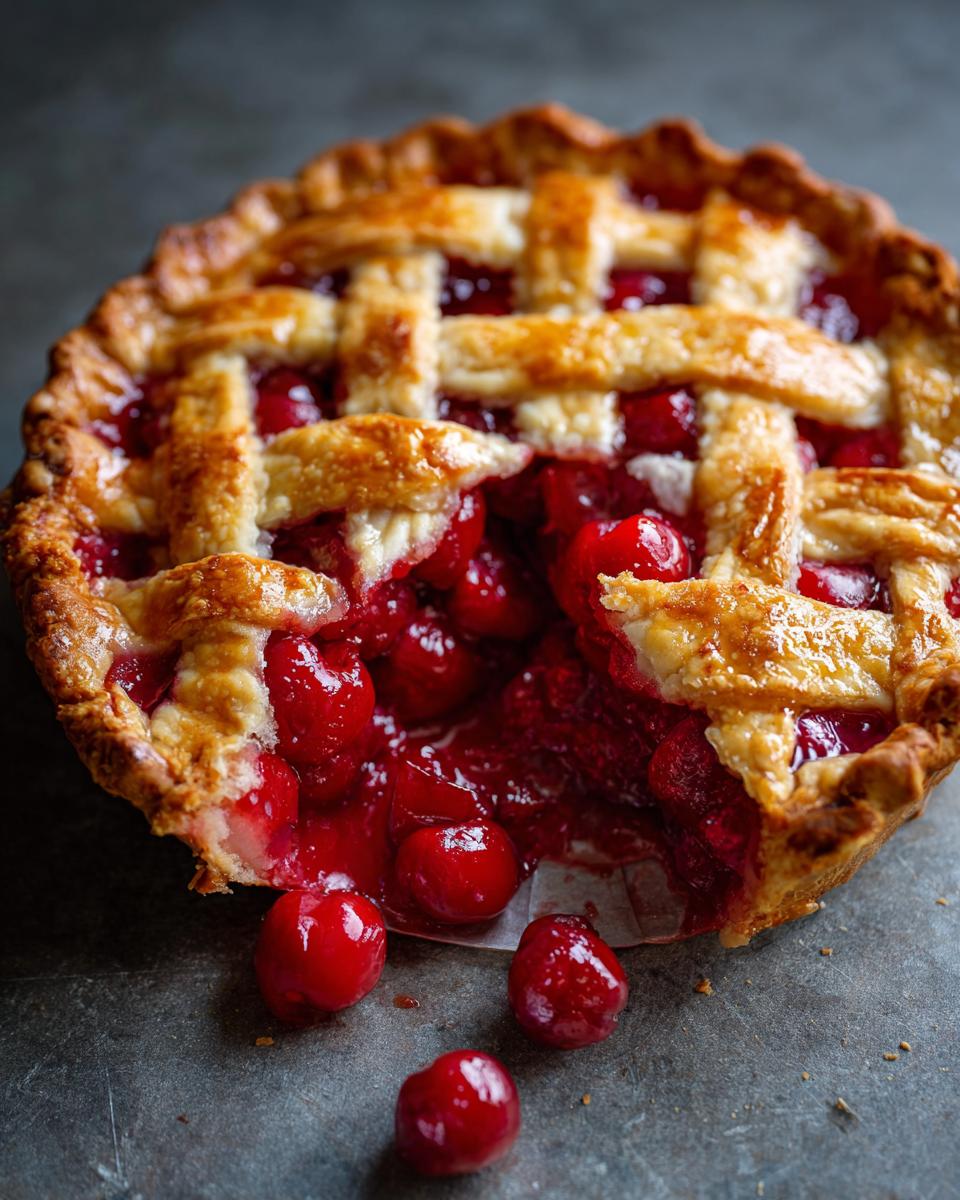
Oh, there’s just something magical about homemade pie, isn’t there? And when it’s a classic cherry pie, bursting with that perfect balance of sweet and tart, all hugged by a crust that shatters just so with every bite… well, that’s pure happiness on a plate. I remember the first time I really mastered a homemade flaky crust for my cherry pie with flaky crust, and the look on my family’s faces was just priceless! It’s not just a dessert; it’s a memory in the making. This recipe is the one I always reach for because it guarantees that wonderful crackly, buttery crust and a filling that’s just bursting with juicy cherries. Trust me, it’s totally worth the little bit of extra love you put into it!

Why This Cherry Pie With Flaky Crust Recipe Is a Must-Try
Alright, so why should *this* particular cherry pie with flaky crust be the one you make? Well, for starters, it’s surprisingly easy to whip up, even if you think you’re not a pie person! The recipe is straightforward, meaning less stress in the kitchen and more time to actually enjoy the process. But the real magic? It’s all about that incredible flavor and texture combo. You get that perfectly sweet-tart cherry filling, juicy and vibrant, nestled inside a crust that’s not just flaky, but like, *dreamily* flaky. It’s the kind of pie that disappears in minutes at any gathering, bringing smiles and “more, please!” requests. Seriously, it’s a guaranteed crowd-pleaser!
Ingredients for Your Perfect Cherry Pie With Flaky Crust
Alright, let’s get down to business! To make sure your cherry pie with flaky crust turns out absolutely dreamy, you’ll want these star players. For the crust, we need the basics: 2 ½ cups all-purpose flour, just a pinch of 1 teaspoon salt, and the secret to its flaky goodness – 1 cup (2 sticks) of cold, cold unsalted butter, cut into little cubes. Don’t forget ½ cup of ice water; it’s crucial for keeping all that butter chilly! For the filling, grab about 6 cups of fresh or frozen cherries, all pitted, then we’ll sweeten it up with ¾ cup granulated sugar, thicken it with ¼ cup cornstarch, add a bright pop with 1 tablespoon lemon juice, and that little something special, 1 teaspoon almond extract (vanilla works too if you can’t find it!). Lastly, have on hand 1 egg, beaten with a splash of water for that lovely egg wash, and 1 tablespoon granulated sugar for sprinkling on top. Easy peasy!
Crafting the Flakiest Crust for Your Cherry Pie
Okay, let’s talk about the *real* star of the show: that ridiculously flaky crust! This is where the magic *really* happens for your cherry pie with flaky crust. First things first – keep everything frosty! Cold is key here. Grab your butter and water straight from the fridge, and don’t let that butter sit out too long. In a big bowl, toss your flour and salt together, then dump in those cold butter cubes. Now, you can use a pastry blender, two knives, or yes, even your fingertips (the warmest part!), to cut the butter into the flour. You’re looking for a texture that’s like coarse crumbs with some little almond-sized bits of butter still peeking through. Those buttery pockets are what give you all those glorious flaky layers later!
Next, it’s time for the ice water. Add it just a tablespoon at a time, mixing gently with a fork or your hands until the dough *just* starts to come together. Seriously, no overmixing here! You want it shaggy, not smooth like bread dough. Dump it out onto a lightly floured surface, divide it into two equal portions, flatten each into a disk (this makes rolling easier later), wrap ’em up tight in plastic wrap, and let them chill in the fridge for at least 30 minutes. This lets the gluten relax and the butter firm up again. I like to let mine chill for an hour because it makes rolling it out so much smoother!
Tips for Achieving a Perfectly Flaky Pie Dough
Want that extra special flaky magic? Keep your ingredients super cold – I even pop my flour in the freezer for a few minutes before I start! Also, resist the urge to knead this dough; handle it as little as possible, just enough to bring it together. And remember those little nuggets of butter you left in there? They’re gold! They melt in the oven, creating steam that pushes the layers apart, giving you that amazing flakiness.
Preparing the Delicious Cherry Filling
Now for the heart of our cherry pie with flaky crust: the filling! This part is super simple and lets those gorgeous cherries shine. In a big bowl, just toss all your yummy 6 cups of pitted cherries (whether they’re fresh from the market or frozen – just a quick note, if using frozen, don’t thaw them completely, let them be a little frosty!). Add in ¾ cup of sugar to get that perfect sweetness, ¼ cup of cornstarch to thicken it up so it’s not too runny, a splash of 1 tablespoon of lemon juice to brighten all those flavors, and my favorite little secret, 1 teaspoon of almond extract. It just really makes the cherry flavor pop! Give it all a really good stir so everything’s coated evenly. You want those cherries to look like they’re getting ready for their delicious bath!
Assembling Your Cherry Pie With Flaky Crust
Alright, pie assembly time! This is where your beautiful cherry pie with flaky crust really starts to take shape. First, grab one of those chilled dough disks. On a lightly floured surface, roll it out into a circle about 12 inches across. Be gentle and try to get an even thickness. Carefully drape this dough into your 9-inch pie plate. Don’t stretch it! Just let it settle in. Trim the edges so you have about a 1-inch overhang. Now, pour in that gorgeous, juicy cherry filling you prepared. Get every last drop in there!
For the top crust, you have options! You can roll out the second dough disk and place it right over the top, then cut some vents so steam can escape. Or, for a real showstopper, you can cut it into strips and weave them into a beautiful lattice. Whichever you choose, trim the edges of the top crust and then get ready to crimp! Press the top and bottom crust edges together, folding them over and then crimping with your fingers or a fork to seal everything up nicely. Don’t forget to give the top a lovely golden sheen by brushing it all over with that beaten egg wash, and then sprinkle it with that extra tablespoon of sugar for a little crunch.
Choosing Between a Solid or Lattice Top Crust
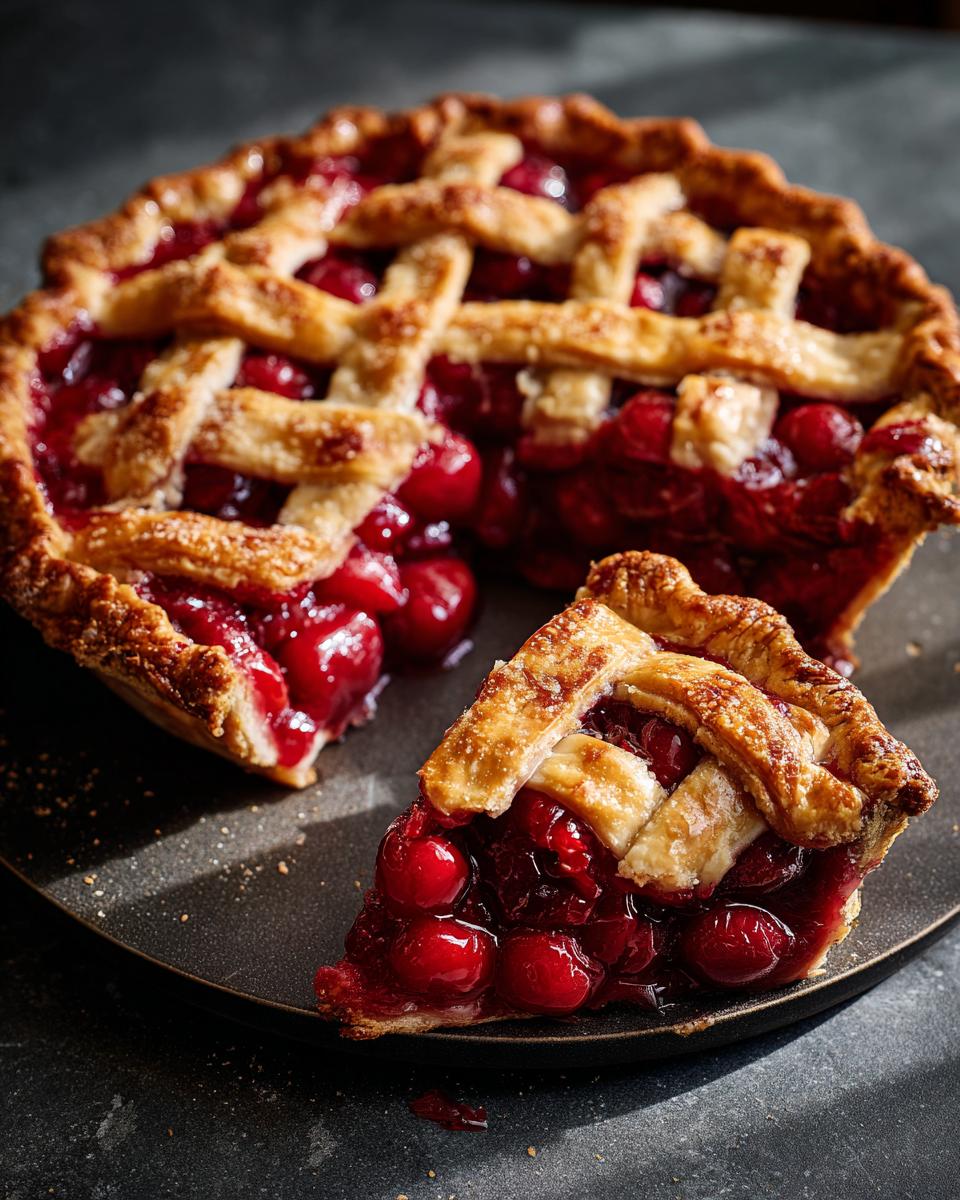
Deciding on the top crust is kind of fun! A solid top crust is super simple – roll it out, lay it on top, cut some slits (these are important for steam!), and crimp away. It’s a classic look and great for beginners. If you’re feeling a bit more adventurous, a lattice top is stunning! You just cut the dough into strips and weave them over the cherry filling. It looks fancy, and honestly, it lets you see more of that bubbly filling peek through. Both taste amazing, so pick whatever makes you happy!
Baking Your Perfect Cherry Pie With Flaky Crust
Alright, the moment of truth for your gorgeous cherry pie with flaky crust! Get that oven preheated to a nice, hot 400°F (200°C). Once it’s ready, gently place your pie inside. We’re going to give it a blast of heat for about 20 minutes until the crust starts to get a lovely golden hue. Then, and this is important for making sure we don’t burn the edges, reduce the oven temperature down to 375°F (190°C). Let it bake for another 30 to 40 minutes. You’ll know it’s ready when the crust is beautifully golden brown all over and you can see the cherry filling bubbling away happily in the center. If you notice the edges getting a little too dark before the center is done, just loosely tent them with a piece of aluminum foil – it’s my favorite little trick!
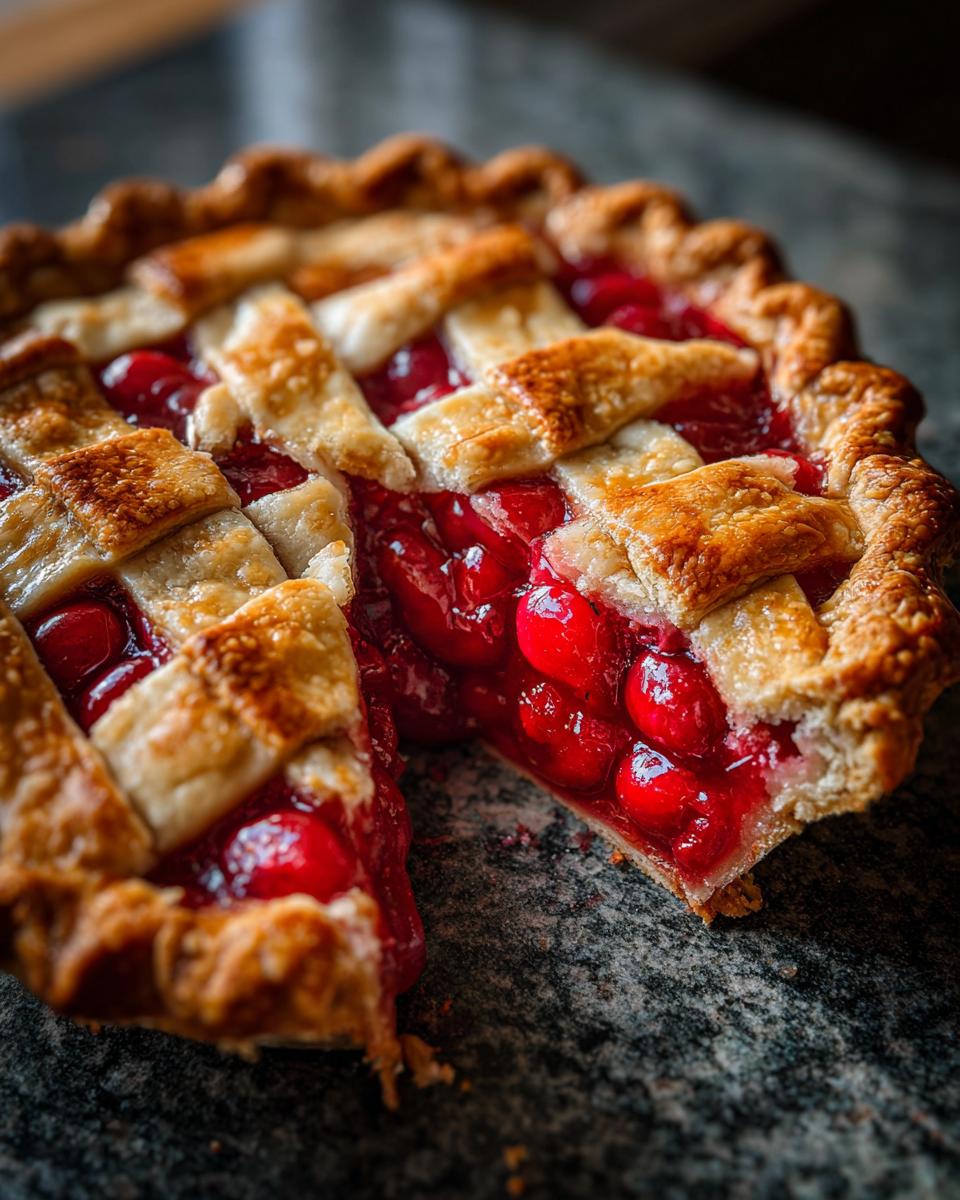
And *please*, I know it’s tempting, but let that masterpiece cool completely on a wire rack. Seriously, at least 2-3 hours! This is crucial for letting that delicious filling set up properly so you get neat, beautiful slices instead of a cherry puddle. You can sneak a peek at this pie recipe for more tips on perfecting pie baking!
Serving and Storing Your Homemade Cherry Pie
Once your cherry pie has had a good long rest and is completely cool, it’s ready to be enjoyed! It’s absolutely divine on its own, but who can resist a scoop of creamy vanilla ice cream melting into those warm cherries? A dollop of homemade whipped cream is also heavenly. If you happen to have any leftovers (which I highly doubt!), just wrap it loosely in plastic wrap or pop it into an airtight container. It can stay at room temperature for a day or two, or in the fridge for up to four days. If you want to reheat a slice, just pop it in a low oven for a few minutes until warmed through – pure bliss!
Frequently Asked Questions About Cherry Pie
Got questions about making the best cherry pie with flaky crust? I’ve got answers!
Can I use frozen cherries for this pie recipe?
Absolutely! Frozen cherries are totally fine to use, and sometimes they’re even better because they’re picked at their peak. Just make sure you don’t thaw them completely before mixing them into the filling. Keep them a little frosty; this helps prevent the pie from getting too watery. You might need to add a tiny bit more cornstarch if they seem extra juicy.
How do I prevent a soggy bottom crust on my cherry pie?
Ah, the dreaded soggy bottom! It’s all about keeping things cold and being smart with your baking. Make sure your butter and water are ice cold when making the dough, and don’t overwork it. For the filling, using cornstarch and letting the pie cool COMPLETELY are your best friends. Also, baking the pie at a higher temperature initially (like we do at 400°F) helps set the bottom crust before reducing the heat.
Can I make the pie dough ahead of time for my cherry pie?
Yes, you totally can! In fact, I often make the dough a day in advance. Once you’ve divided it into disks, wrapped it well in plastic wrap, and chilled it for at least 30 minutes, you can keep it in the refrigerator for up to 2 days. Just let it sit at room temperature for about 10-15 minutes before you plan to roll it out, so it’s not too stiff to handle. It’s a great way to get a head start on your cherry pie!
What’s the secret to getting clean slices of pie?
This is key for presentation! Let the pie cool completely is rule #1! Seriously, give it those few hours. Then, use a long, sharp knife. For super clean cuts, dip the knife in hot water and wipe it dry between each slice. This helps the knife glide through the crust and thick filling without dragging. It makes all the difference! If you ever have trouble, feel free to reach out, and we can troubleshoot together!
My pie crust is browning too fast! What should I do?
Oh, that happens! Don’t panic. The easiest fix is to simply tent the pie loosely with aluminum foil. You can just lay a piece over the top, or cover just the edges if they’re getting too dark. This shields the crust from direct heat while the inside continues to bake and bubble. You might need to do this for the last 15-20 minutes of baking.
Nutritional Information
Just a heads-up, the numbers below are estimates and can change a bit depending on exactly what you use and how big you slice it! This is for one generous slice of our cherry pie with flaky crust: around 450 calories, 25g of fat (that’s the good stuff from butter!), 5g of protein, 55g of carbohydrates, with about 40g of that being sugar from the cherries and added sweetness. Enjoy every bite!
Print
Cherry Pie With Flaky Crust
- Total Time: 1 hr 35 min
- Yield: 8 servings 1x
- Diet: Vegetarian
Description
A classic cherry pie recipe featuring a homemade flaky crust and a sweet-tart cherry filling.
Ingredients
- 2 ½ cups all-purpose flour
- 1 teaspoon salt
- 1 cup (2 sticks) cold unsalted butter, cut into cubes
- ½ cup ice water
- 6 cups fresh or frozen cherries, pitted
- ¾ cup granulated sugar
- ¼ cup cornstarch
- 1 tablespoon lemon juice
- 1 teaspoon almond extract
- 1 egg, beaten (for egg wash)
- 1 tablespoon granulated sugar (for sprinkling)
Instructions
- In a large bowl, whisk together flour and salt. Cut in the cold butter using a pastry blender or your fingertips until the mixture resembles coarse crumbs with some pea-sized pieces of butter remaining.
- Gradually add ice water, 1 tablespoon at a time, mixing until the dough just comes together. Do not overmix. Divide the dough in half, flatten each half into a disk, wrap in plastic wrap, and refrigerate for at least 30 minutes.
- In a separate bowl, combine cherries, sugar, cornstarch, lemon juice, and almond extract. Stir to coat the cherries evenly.
- Preheat your oven to 400°F (200°C).
- On a lightly floured surface, roll out one disk of dough into a 12-inch circle. Carefully transfer it to a 9-inch pie plate. Trim the edges, leaving about a 1-inch overhang.
- Pour the cherry filling into the pie crust.
- Roll out the second disk of dough. You can either place it over the filling as a solid top crust, cutting vents, or cut it into strips for a lattice top. Crimp the edges to seal.
- Brush the top crust with the beaten egg wash and sprinkle with the remaining tablespoon of sugar.
- Bake for 20 minutes at 400°F (200°C). Then, reduce the oven temperature to 375°F (190°C) and continue baking for another 30-40 minutes, or until the crust is golden brown and the filling is bubbly. If the crust starts to brown too quickly, loosely tent it with aluminum foil.
- Let the pie cool completely on a wire rack before slicing and serving. This allows the filling to set properly.
Notes
- For frozen cherries, do not thaw them completely before using.
- If you don’t have almond extract, you can use vanilla extract, but almond extract complements the cherry flavor well.
- Ensure your butter and water are very cold for the flakiest crust.
- Prep Time: 45 min
- Cook Time: 50 min
- Category: Dessert
- Method: Baking
- Cuisine: American
Nutrition
- Serving Size: 1 slice
- Calories: 450
- Sugar: 40g
- Sodium: 200mg
- Fat: 25g
- Saturated Fat: 15g
- Unsaturated Fat: 10g
- Trans Fat: 0g
- Carbohydrates: 55g
- Fiber: 4g
- Protein: 5g
- Cholesterol: 60mg
Keywords: cherry pie, flaky crust, homemade pie, fruit pie, dessert recipe, baking