
I love desserts that make people stop scrolling and do a double-take. Sure, the perfect chocolate cake is nice, but sometimes you need a little drama in your glass, right? That’s why I’ve been perfecting this incredible, striking dark treat. We’re talking about the Black Milkshake. It looks totally mysterious, almost witchy, but don’t let the color fool you—it is the easiest milkshake recipe you’ll make all year.
Forget complicated layering and long chill times. This recipe proves that the most visually stunning things are often also the simplest. In about five minutes, you’ll have this deep, dark beauty whipped up, perfect for Halloween parties, themed movie nights, or just when you’re feeling a bit goth in the kitchen!
Why This Black Milkshake Recipe Stands Out
What I love most about this recipe is that it’s all about maximum impact with minimal effort. Seriously, you can have this gorgeous dessert ready before your guests or family even realize they want one. It’s our go-to fix when we need something fast but memorable. It truly checks all the boxes while tasting like classic chocolate perfection.
- It’s impossibly fast—ready in 5 minutes flat!
- You only need four core ingredients sitting in your freezer or pantry.
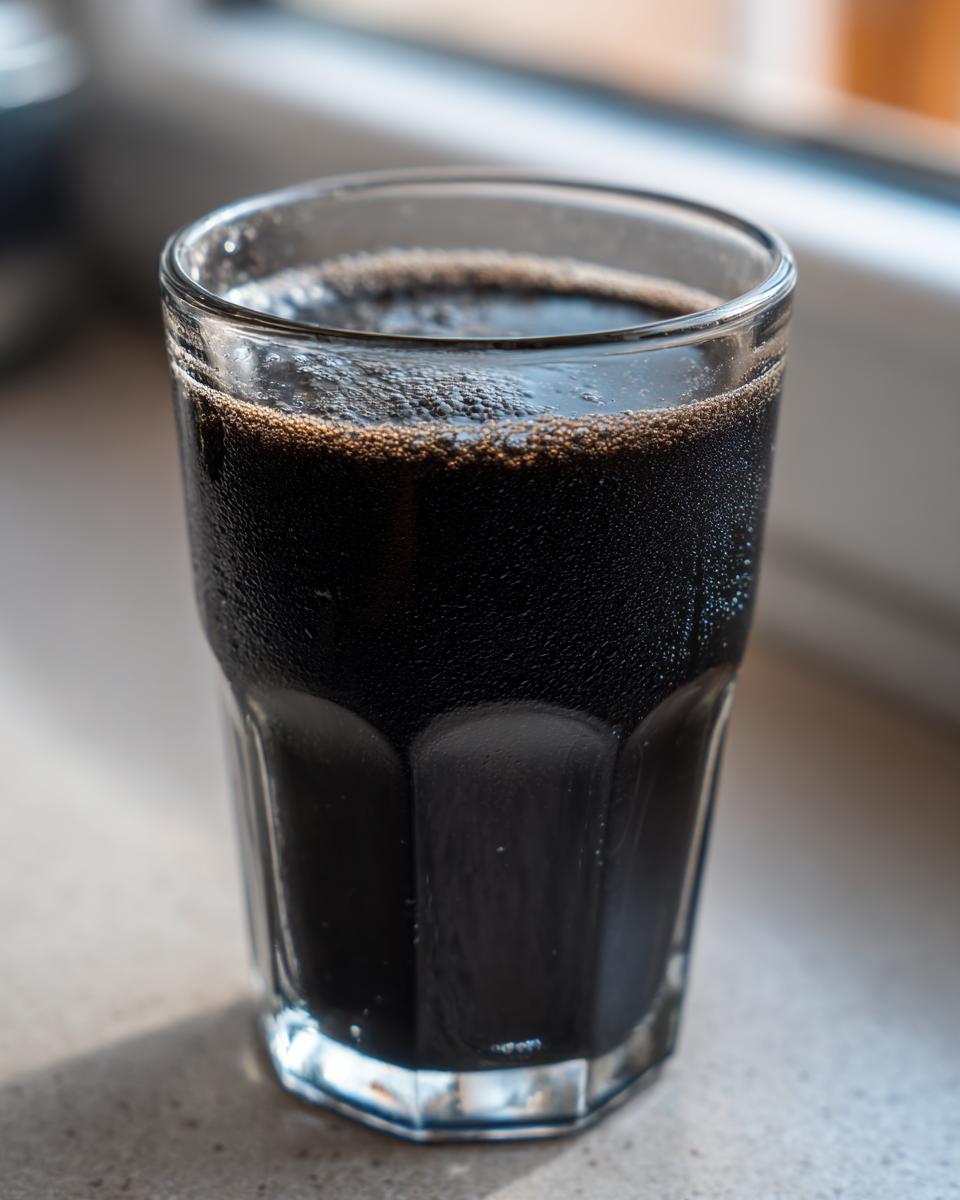
- It delivers the most dramatic, pitch-black color you can imagine.
For another lightning-fast treat, you absolutely have to check out my quick chocolate mug cake. It hits that warm, gooey spot when you need something right now!
Speed and Simplicity
This entire process takes about five minutes, start to finish. I usually have the ice cream out less time than it takes to find clean glasses! If you’re ever caught off guard by a sudden craving or need a fun, dark dessert on short notice, this is your answer. It’s honestly the definition of an easy milkshake recipe.
Achieving the Perfect Dark Color for Your Black Milkshake
The secret sauce here, obviously, is the color. We rely on the combo of rich chocolate syrup and the black food gel. The syrup gives us the depth, but the gel pushes it over the edge into true darkness. My tip? Always start small with the food coloring! You can always add more black, but if you put in too much gel right away, you’ll end up with a black milkshake that tastes slightly metallic. Add a few drops, blend, check, and add more slowly until it’s perfectly eerie.

Essential Ingredients for Your Black Milkshake
Okay, let’s talk turkey. This recipe only calls for four things, but using the right quality of each one is what keeps this from tasting like watered-down chocolate mix. We need that thick, luxurious base to hold that intense color. Don’t skimp on the main flavor contributor, or your final product won’t be as satisfying!
Here is what you need to gather before you even think about touching the blender:
- 2 cups vanilla ice cream (The good stuff, please!)
- 1/2 cup whole milk (Don’t substitute yet—we need the fat content here!)
- 1/4 cup chocolate syrup (The thick, dark kind is best.)
- 1 teaspoon black food coloring gel (This is non-negotiable for true black.)
Ingredient Notes and Substitutions for the Black Milkshake
I just have to stress this: use really high-quality vanilla ice cream. When you only have a few ingredients, the flavor of that ice cream really shines through. If you absolutely must lighten things up, you can swap the whole milk for 2% milk. Just know that your Black Milkshake might be a touch icier and less creamy because we lose some of that necessary dairy fat.
Also, the food coloring *must* be gel. Those natural liquid drops just won’t give you the deep shade we’re aiming for without making the shake too thin or tasting weird.
Step-by-Step Instructions for the Black Milkshake
Okay, here’s the fun part! Since this is a fast recipe, I like to use a standard blender, but hey, if you have a high-powered machine or even an immersion blender attachment like the one I sometimes use when I don’t want to clean the whole pitcher—check out my tips on immersion blender recipes—go for it! The key is getting that uniform, deeply dark mix without over-blending and melting the ice cream.
Here are the exact steps I take every time I whip up this spooky Black Milkshake:
- Load Smartly: Put the vanilla ice cream, the milk, and the chocolate syrup into the blender jar first. Now, add your food coloring! Putting the liquids in first helps prevent the heavy ice cream from splashing up onto the lid and splattering everywhere when you first start blending.
- Initial Mix: Secure that lid nice and tight! Start blending on a low or medium speed. You want to crank it up slowly until everything starts moving easily, usually about 30 seconds.
- Color Check: Once it’s mostly combined into a gray-brown mess, turn the blender off. Scrape down the sides with a spatula to make sure all that thick syrup near the bottom gets incorporated.
- Reach Perfection: Now blend again until the color is perfectly smooth and uniform. You’re looking for that solid, inky black.
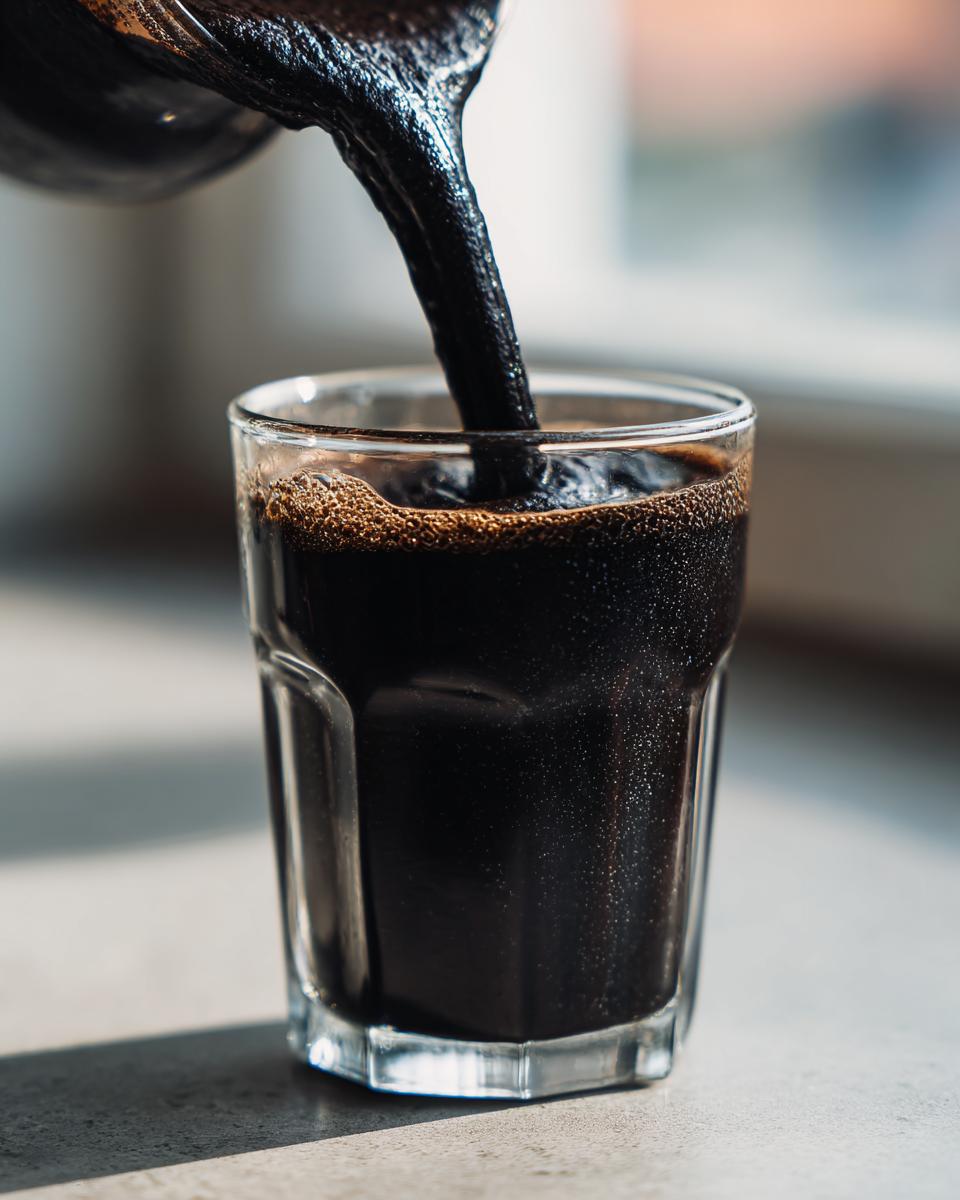
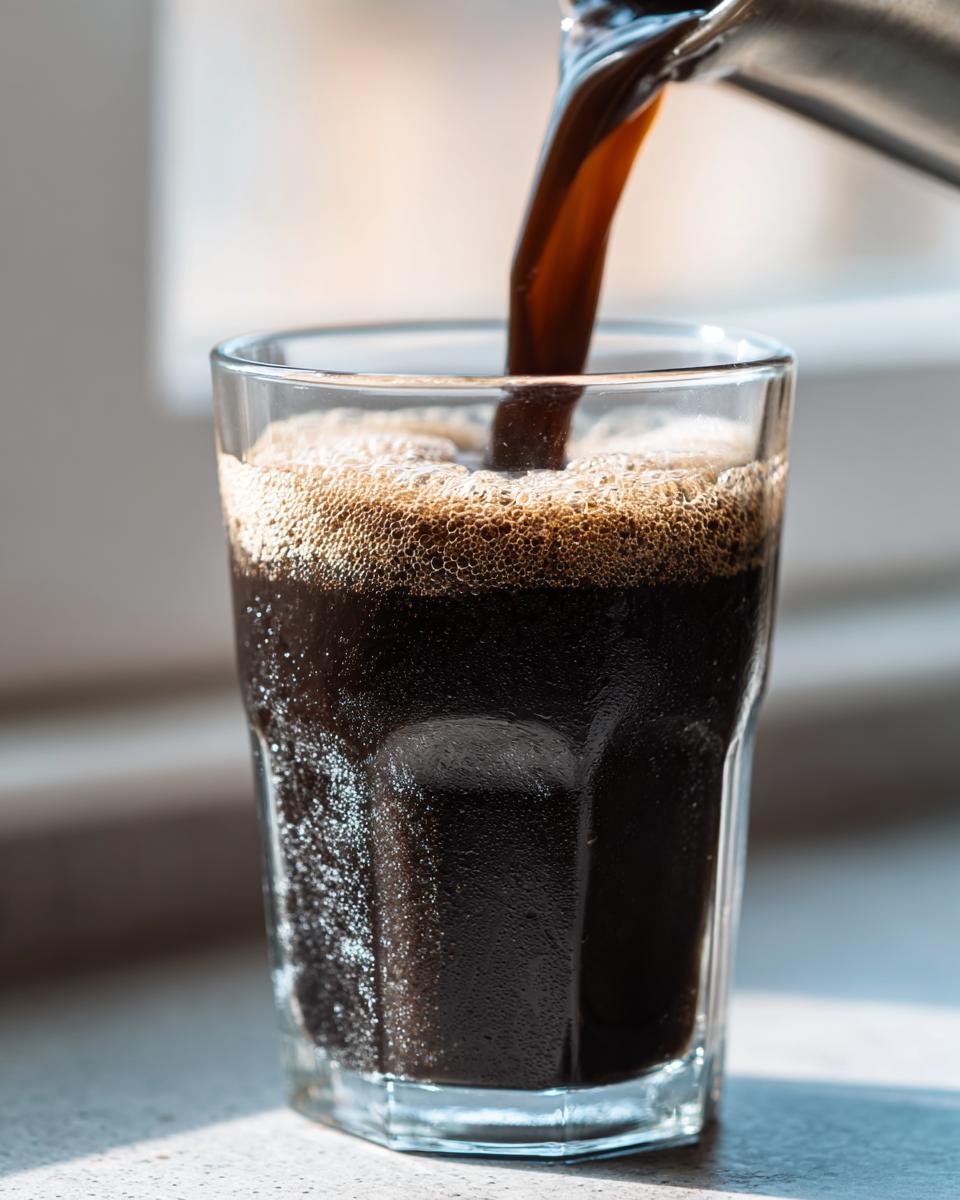
- Serve Immediately: Pour the finished milkshake into tall, chilled glasses and enjoy that dramatic color right away!
Blending Technique for a Smooth Black Milkshake
The biggest potential hiccup with any milkshake is getting it too thick or too runny. Once you reach that smooth, dark color, you might notice your blender struggling a little bit. If it sounds like the motor is straining or the blades are just spinning without grabbing the mix, don’t panic!
Turn the machine off, open it up, and add just one tablespoon of milk at a time. Seriously, just one! Blend for about five seconds after each addition. This lets the liquid work its way down to the blades without breaking the whole texture. You want it thick enough to coat a spoon but thin enough to pour easily—that’s the sweet spot every single time.
Tips for the Ultimate Black Milkshake Experience
So, you’ve got your pitch-black, perfectly thick drink poured. Awesome! But we can’t just stop there, can we? Serving a Black Milkshake deserves a little flair to really make it an event. Remember, presentation is half the fun when the color is this striking. I’ve picked up a few tricks over the years to make sure these shakes look as good as they taste. These little touches just boost your confidence when you serve these up!
First, a critical tip: Make sure your glasses are *cold*. Seriously, pop your serving glasses in the freezer for about 10 minutes before you even start blending. A cold glass keeps that thick texture firm for longer, which is always a win when dealing with ice cream.
Serving Suggestions for Your Dark Milkshake
A plain black glass is great, but adding a little contrast makes it pop! You absolutely have to try a dollop of fresh whipped cream right on top. It looks fantastic against the dark base, almost like a little white cloud.
If you want to go fancy, a single dark maraschino cherry perched on the whipped cream is just classic. Or, try dusting the whipped cream lightly with cocoa powder before you place the cherry—it adds a little earthy note against the sweet vanilla and chocolate base. If you are serving these alongside something else, that intense dark color pairs wonderfully when you aren’t overwhelming it. Speaking of complementing flavors, if you’re in a baking mood later, you simply must try my chocolate chip tahini cookies; the nutty background is surprisingly good after a deeply sweet shake!
Another fun idea for presentation is rimming the glass *before* you pour. Dip the rim lightly in corn syrup or a little melted chocolate (let it set just a second so it’s tacky, not runny), then dip that into fine black sanding sugar, if you can find it! It gives it that incredible sparkly edge right at the top.
Storage and Reheating for Leftover Black Milkshake
Honestly, if you have leftovers of this Black Milkshake, something went wrong! It’s meant to be enjoyed ice-cold and utterly perfect right after it leaves the blender pitcher. It’s not like cake; you can’t easily “reheat” a milkshake, and frankly, you wouldn’t want to!
If you do end up with a little bit left at the bottom of the glass—maybe you were serving a huge crowd and over-portioned—my advice is simple: don’t try to save it for later in the fridge. It will just melt into sad, thin, dark milk. That’s a waste of good vanilla ice cream, right?
However, if you stop the blending process early, or if you manage to save some of the initial thick mixture, the freezer is your friend. Scoop any thick remnants into a small, airtight container. It won’t stay perfectly creamy, but after an hour or two in the deep freeze, it turns into a fantastic, intensely flavored black slushy! You’ll need to let that sit out for about five minutes before it’s scoopable again, but it’s a yummy second life for the leftovers.
Just remember: once it melts, it’s done. Never put a fully liquid milkshake in the microwave—that’s just madness! You’ll just end up with warm, thin chocolate milk, and that defeats the whole purpose of making something so dramatic.
Frequently Asked Questions About Making a Black Milkshake
When you’re dealing with something as eye-catching as a dark beverage, people always have questions! I get it. You want to make sure the color is right, the texture is perfect, and that it tastes amazing, not artificial. I’ve gathered the common ones I hear all the time to iron out any wrinkles before you start blending.
If you’re interested in delving deeper into rich, deep flavors after mastering this shake, you should really check out my recipe for chocolate caramel toffee cake. It’s a different kind of dark decadence!
Can I make this Black Milkshake without black food coloring?
Oh, absolutely! The food coloring is purely for that wow factor—that true, almost unsettling darkness. If you skip it, you will still end up with a fantastically delicious chocolate vanilla shake. It will simply come out as a very, very dark brown color. Think of it as a super-rich, homemade chocolate shake. It won’t be the exact Black Milkshake we were aiming for aesthetically, but flavor-wise, you won’t notice the difference at all!
What is the best way to thicken a runny Black Milkshake?
A thin milkshake is a tragedy, and it usually happens if your ice cream wasn’t quite as frozen as you thought, or maybe you got a little too aggressive with the milk addition initially. If your shake is too liquidy after blending, turn off the machine immediately! Don’t just keep blending, which melts it further. The absolute best fix is to drop in two more solid scoops of your cold vanilla ice cream and blend again on low speed. If you don’t have extra ice cream, a few ice cubes work in a pinch, but be careful; too many can water down the flavor and make it slushy rather than creamy.
Nutritional Estimates for One Serving of Black Milkshake
Now, I know what you’re thinking. A treat this rich and creamy probably isn’t winning any health awards, and you’d be mostly right! But hey, knowing what’s in your dessert helps balance things out, right? This is a fun indulgence, not an everyday staple, and that’s okay!
The following numbers are just estimates based on the measurements listed in the recipe using standard, full-fat ingredients. If you use low-fat milk or sugar substitutes, your numbers will change, of course. But for that classic texture we’re aiming for, these assumptions hold true:
- Serving Size: 1 serving
- Calories: 450
- Sugar: 65g
- Total Fat: 18g
- Saturated Fat: 11g (That’s the butterfat talking!)
- Protein: 10g
- Carbohydrates: 70g
- Sodium: 150mg
- Cholesterol: 60mg
See? Definitely a treat! Enjoy it knowing you used high-quality ice cream to make it taste amazing. We aren’t aiming for perfection here, just deliciousness!
Share Your Black Milkshake Creations
That’s it! You’ve made the visual stunner, the ultimate easy milkshake recipe—your very own Black Milkshake! Now, here’s the part where you join the fun. I absolutely live for seeing your creations pop up online. Did you manage that perfect pitch-black shade on the first try? Did the kids freak out when they saw the color?
Don’t keep all that dark magic to yourself! Snap a photo of your masterpiece, top it with something crazy, and tag me on Instagram or wherever you hang out online. I always keep an eye out for your posts and love seeing how you jazz up the simple base recipe. If you’re looking for more of my kitchen stories and general ramblings, you can always find out more about me and my philosophy here on the blog!
And please, please leave a comment down below! Let me know what quality of ice cream you used and how long it took you to master the color. Your feedback helps the next person who wants to try this super simple, striking dessert. Happy blending, everyone!
Print
Simple Black Milkshake
- Total Time: 5 min
- Yield: 2 servings 1x
- Diet: Vegetarian
Description
A basic recipe for a dark-colored milkshake using chocolate and vanilla ice cream.
Ingredients
- 2 cups vanilla ice cream
- 1/2 cup whole milk
- 1/4 cup chocolate syrup
- 1 teaspoon black food coloring gel
Instructions
- Place the vanilla ice cream, milk, chocolate syrup, and black food coloring into a blender.
- Blend on medium speed until the mixture is smooth and uniform in color.
- If the milkshake is too thick, add milk one tablespoon at a time and blend again.
- Pour the milkshake into a glass.
- Serve immediately.
Notes
- Use high-quality vanilla ice cream for the best flavor.
- Adjust the amount of food coloring to reach your desired shade of black.
- Prep Time: 5 min
- Cook Time: 0 min
- Category: Dessert
- Method: Blending
- Cuisine: American
Nutrition
- Serving Size: 1 serving
- Calories: 450
- Sugar: 65
- Sodium: 150
- Fat: 18
- Saturated Fat: 11
- Unsaturated Fat: 7
- Trans Fat: 0.5
- Carbohydrates: 70
- Fiber: 1
- Protein: 10
- Cholesterol: 60
Keywords: black milkshake, chocolate vanilla shake, dark milkshake, easy milkshake recipe