
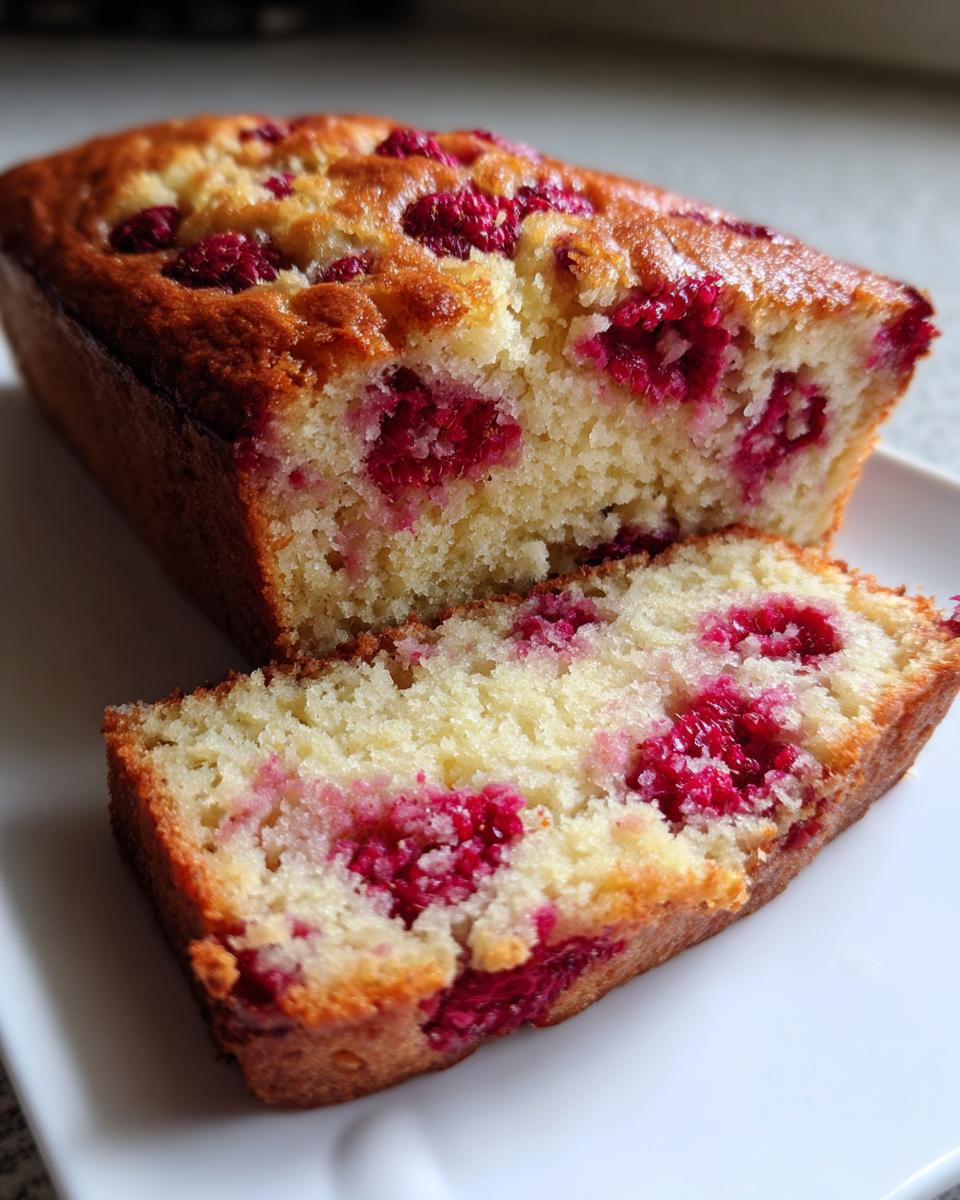
Oh, there is nothing—and I mean *nothing*—that beats pulling a loaf of fresh, warm quick bread out of the oven. The smell just fills the whole house! I’ve baked my share of loaves over the years, from banana bread fails to soggy squash bread disasters, but I finally landed on the gold standard for simple baking: my **Raspberry Bread**.
This isn’t some fancy, fussy recipe that needs a stand mixer and a degree in chemistry. Nope. This is straightforward, ridiculously moist **Raspberry Bread** perfect for a weeknight bake or for anyone who thinks they can’t make bread. When my little backyard patch explodes with raspberries every June, this is the only recipe I use.
The beauty here is the texture—it stays tender, never dry. I think it’s because we keep the process light and fast. You’ll see when we get to the mixing steps that your hands will be busy for less than ten minutes total. Seriously, you’re going to love how easy this quick bread is!
Why This Simple Raspberry Bread Recipe Works
When you’re making a quick bread, you want results, not headaches. And this recipe delivers! I’ve stripped away anything unnecessary so you can get that perfect, fruity loaf on the table fast. Trust me, I rely on this one when I need a win!
- It’s lightning fast! Prep time is seriously like 15 minutes, maybe less if you’re quick. You can have this loaf in the oven before your coffee gets cold.
- Moisture, moisture, moisture. We use just the right amount of melted butter and egg to keep things tender, which is crucial when you add fruit.
- You don’t need fancy gear. Everything mixes up easily in a couple of bowls—no need to drag out the giant stand mixer!
- It’s very forgiving. If you’re new to baking, you can give this easy banana bread template a try, and you’ll still end up with a beautiful breakfast loaf.
Ingredients for Your Perfect Raspberry Bread
Okay, let’s talk about what goes into this beautiful loaf. Having your ingredients measured out and ready (I call it my *mise en place*, fancy French for ‘get organized’) is the real secret weapon for quick breads. It stops you from frantically searching for the milk while the dry ingredients are waiting!
This recipe is fantastic because it relies almost entirely on pantry staples. You’ll see below that the star is clearly the raspberries, but everything else is simple baking gold. If you want to see how other fruits shine, check out this amazing raspberry almond tea bread for inspiration!
Here is exactly what you need lined up before you start mixing. Don’t worry about subbing things out here; these measurements create that perfect moist crumb we are aiming for:
- 2 cups all-purpose flour – Your foundation!
- 1 1/2 teaspoons baking powder – Gives us that nice lift.
- 1/2 teaspoon baking soda – Works with the other ingredients for structure.
- 1/2 teaspoon salt – Don’t skip this, it wakes up all the sweet flavors!
- 3/4 cup granulated sugar – Just enough sweetness, letting the berries shine.
- 1/4 cup unsalted butter, melted – Using melted butter keeps the texture smooth and moist, unlike creaming solid butter.
- 2 large eggs – Make sure they aren’t ice cold if you can help it.
- 1/2 cup milk – Any milk works here, whole or low-fat.
- 1 teaspoon vanilla extract – My favorite little boost of flavor!
- 1 cup fresh raspberries – The whole reason we are here!
Step-by-Step Instructions to Make Raspberry Bread
Alright, now for the fun part! Making this loaf is super satisfying because you see it come together so quickly. We’re taking all those beautiful ingredients we just measured and turning them into actual bread. Remember what I always say about quick breads: precision up front means tender results in the end. I found that following these exact steps, especially when moving between wet and dry ingredients, makes all the difference. If you want to see another great method, check out this maple walnut breakfast bread!
Preparing the Oven and Pan for Raspberry Bread
First things first, let’s get the oven ready for action—350 degrees Fahrenheit (175 Celsius) is our magic number. You need to grease and flour a standard loaf pan really well, or your beautiful bread will stick!
Mixing the Dry Ingredients for the Raspberry Bread Batter
Grab a medium bowl here. We need to whisk the flour, baking powder, baking soda, and salt together thoroughly. Getting these dry ingredients well combined guarantees that your leavening agents are evenly distributed, so you don’t get one slice that sinks!
Combining Wet Ingredients for the Raspberry Bread
In a separate, larger bowl, you’ll mix up the wet stuff: sugar, melted butter, eggs, milk, and vanilla. If you happen to have room-temperature milk handy, go ahead and use that! It incorporates into the fats much smoother than if it’s straight out of the fridge.
Folding Wet and Dry Ingredients for the Raspberry Bread
Now, pour the dry mix into the wet ingredients. This is where we have to be gentle! Mix everything until it’s *just* combined—I mean it! You might still see a tiny streak or two of flour. You absolutely cannot overmix quick bread batter, or you’ll get a tough, chewy loaf instead of the tender crumb we want. Once it’s just barely together, gently fold in those precious raspberries.

Baking and Cooling Your Fresh Raspberry Bread
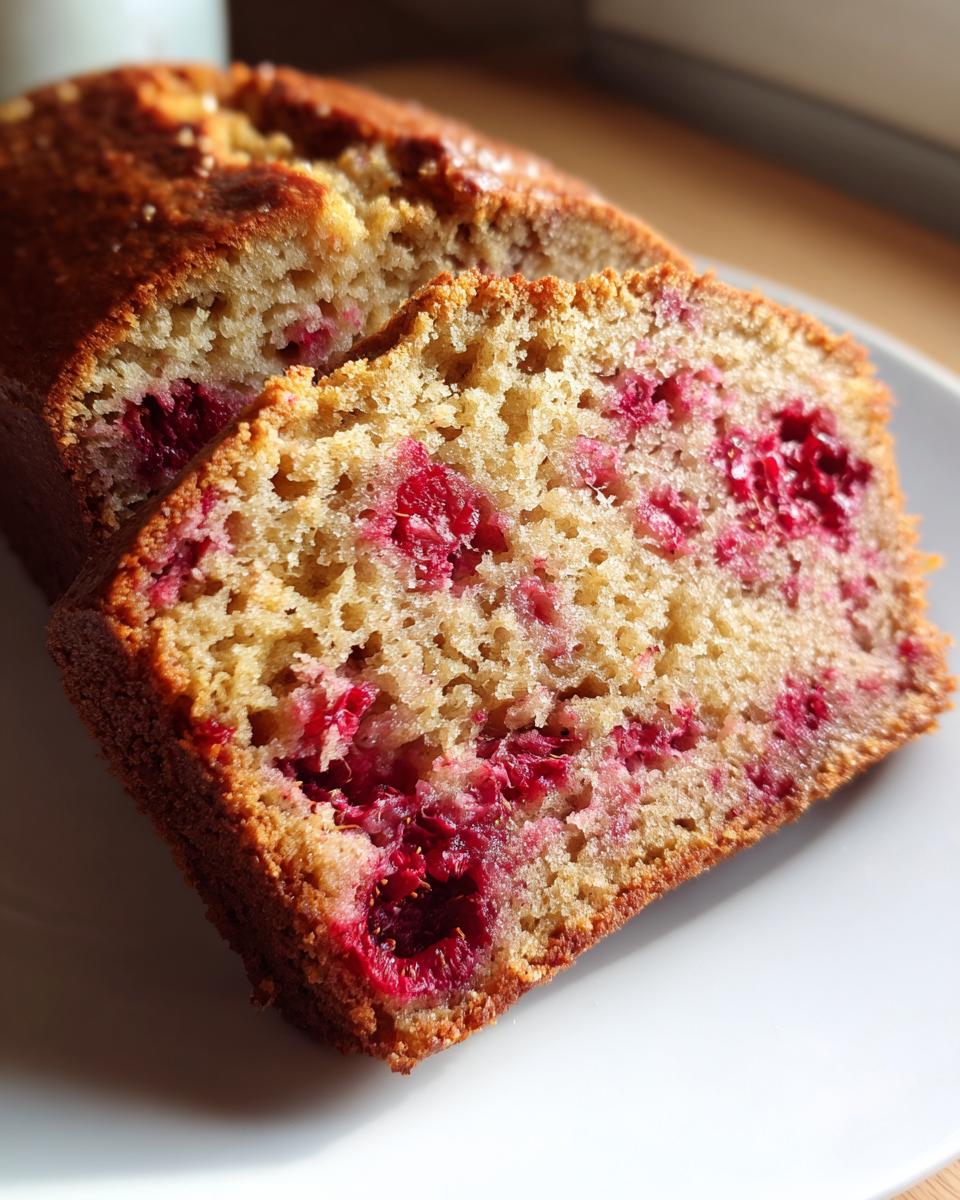
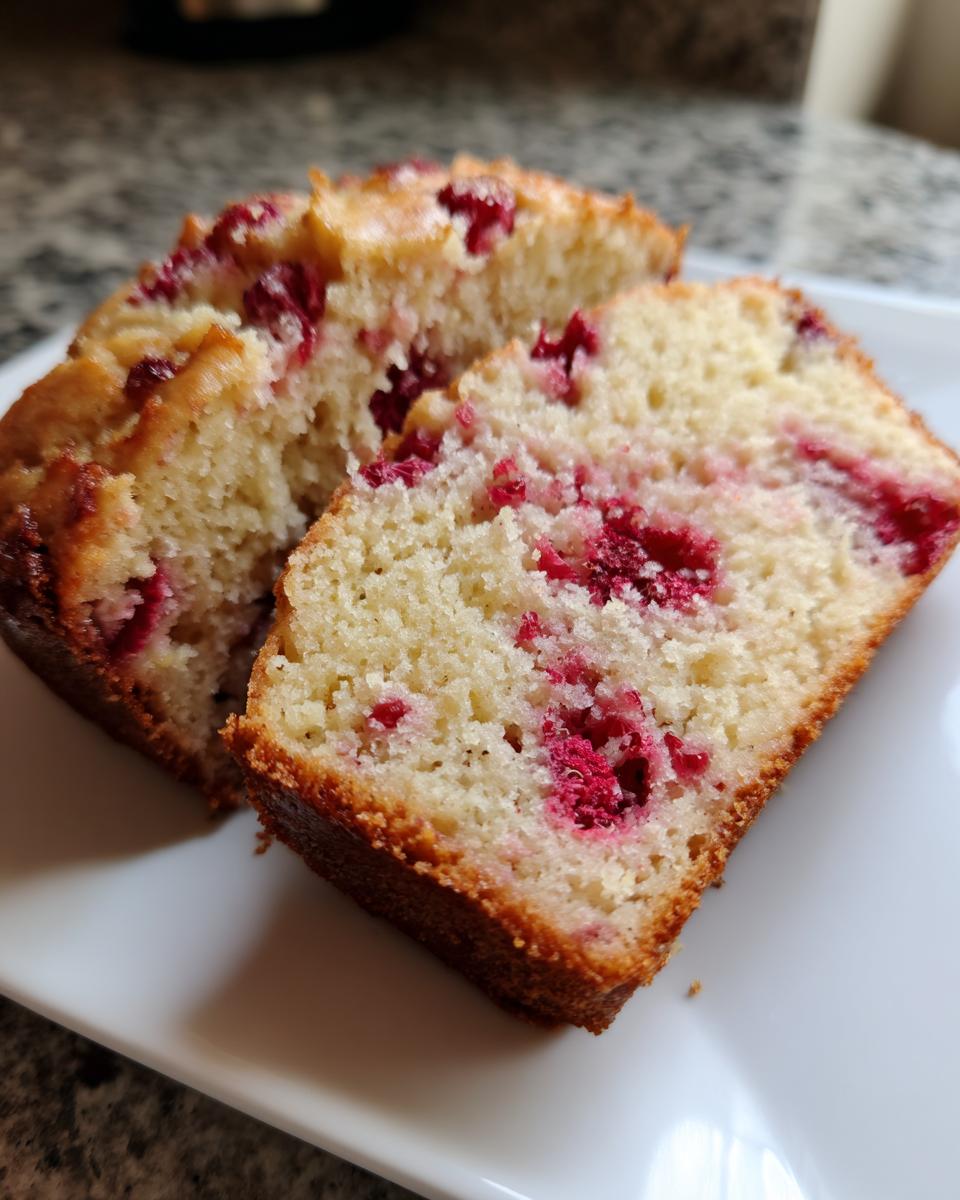
Pour that lovely batter into your prepared pan and slide it carefully into the preheated oven. It usually takes about 50 to 60 minutes, but you must test it! A wooden skewer inserted right into the center should come out clean—no wet batter clinging to it. Don’t rush this part! Once it passes the test, let the loaf rest in the hot pan for about 10 minutes before you turn it out onto a wire rack to finish cooling completely. Patience pays off here!
Tips for the Best Ever Raspberry Bread
Even though this is a wonderfully simple recipe, I’ve learned a few tricks over the years to make sure it comes out bakery-perfect every single time. Quick breads sometimes have a mind of their own, especially when you throw in delicate fruit! I always refer back to some of these small adjustments, especially if I’m experimenting with different stages of berries. For more moisture hacks, you absolutely have to check out my tips for that zucchini banana bread—it applies here, too!
Handling Juicy Raspberries in Your Raspberry Bread
This is probably the most common issue with any berry bread: the fruit sinks right to the bottom! If you’re using very fresh, very plump raspberries that look like they are bursting with juice, you need to give them a quick armor coating before they hit the batter.
Just lightly toss your cup of raspberries with about one teaspoon of flour before you fold them in. That tiny bit of flour clings to their wet surface, giving the batter something extra to grab onto while it bakes. It keeps those gorgeous red gems suspended perfectly throughout the loaf. It’s such a simple thing, but it makes all the difference!
Using Frozen Raspberries in Raspberry Bread
Sometimes fresh raspberries just aren’t available, and that’s fine! You can totally swap in frozen ones without messing up the structure of the bread. The biggest rule here, and please listen closely: do not thaw them first!
If you let frozen berries sit out, they release a ton of liquid prematurely, which throws off the water balance in your batter and can make the whole center gummy. Just pull them straight from the freezer and gently fold them into your batter mixture. They’ll thaw and cook just fine in the oven environment.
Storage and Reheating for Your Raspberry Bread
Okay, so you’ve pulled the perfect loaf out, and you just can’t eat the whole thing in one sitting (though, trust me, I’ve tried!). Storing this **Raspberry Bread** correctly is key to keeping that moisture locked in for days. Quick breads don’t do great in the fridge—they tend to dry out faster there, which is the last thing we want after all that mixing!
Keep it simple: once the bread is completely cooled—and I mean totally cool, or you’ll trap steam and create sogginess—wrap the entire loaf tightly in plastic wrap, or slip it into an airtight container. Store it on the counter at room temperature for about three to four days. It really shines on the second day, honestly!
If you happen to have more than you can eat within four days, your freezer is your friend. Wrap individual slices tightly in plastic wrap, then pop those wrapped slices into a freezer bag. They last great for up to two months!
When you’re ready to enjoy a slice later, reheating is super easy. You just need a quick blast of warmth to bring back that just-baked softness. I love popping a slice in the toaster oven for just a minute or two until it’s warm through. If you’re in a real hurry, a quick 10 to 15 seconds in the microwave works wonders, too! If you’re looking for something richer to pair with your slice, you absolutely must check out this pumpkin cream cheese swirl bread recipe for a rich topping idea!
Variations on Classic Raspberry Bread
I love that this **Raspberry Bread** recipe is a perfect starting point. It’s honest and simple, which means it’s begging for little tweaks depending on what mood I’m in! You don’t have to change the core ratios—just add a little something extra for a completely new flavor profile. My rule is always to keep the raspberries happy, so if you add anything else, make sure it complements their tart sweetness!
If you’re looking to play around a bit without stressing out, here are my top two favorite ways to switch things up. If you ever want another tangy fruit loaf adventure, this lemon zucchini bread is another winner that uses simple additions!
Try a Little Zest: My absolute favorite addition is lemon! The bright, aromatic oils in lemon peel cut through the sweetness beautifully. Before you mix your wet ingredients, zest about one whole large lemon and toss that zest right in with the sugar and butter. The lemon and raspberry combination is truly heavenly. Just be sure you’re using fresh zest and not the bitter white pith underneath!
Go Deeper on Sweetness: If you want a slightly richer crumb and a warmer, deeper colored loaf, swap out half of your granulated sugar for dark brown sugar. So, instead of 3/4 cup white sugar, you could use 1/4 cup white and 1/2 cup dark brown sugar. The molasses in the brown sugar adds a subtle caramel note that complements the fresh berries really nicely. It adds a little more moisture, too, which never hurts!
Serving Suggestions for Raspberry Bread
You’ve done the hard work, and now we need to enjoy this gorgeous **Raspberry Bread**! Since the berries already bring a nice sweet tang, you don’t need to load it up with heavy frosting or super sweet toppings. In my house, it’s all about letting the flavor of the fruit truly shine through.
If this loaf is going out for a special weekend brunch, I love to serve it slightly warmed alongside a small dish of slightly softened, good-quality butter. It just melts right into those nooks and crannies!
For something a little more substantial, especially if you’re eating it for breakfast, a thin layer of plain cream cheese is phenomenal. The slight tanginess of the cheese plays off the raspberries perfectly. Honestly, just a thin scraping is all you need.
If you’re looking for a slightly different, wholesome pairing, you might want to explore how well a drizzle goes with other breads, like this honey oatmeal breakfast bread—it’s fantastic on this raspberry loaf, too! Otherwise, honestly, this bread is perfect on its own with a big mug of black coffee or a hot cup of tea. It’s the simple things that always taste the best, right?
Frequently Asked Questions About Raspberry Bread
I get so many questions, especially when folks are trying a quick bread recipe for the first time. It’s great that people are being careful about the process! Baking should feel fun, not stressful, so let’s clear up a few common snags people run into when making this lovely **raspberry bread**.
If you’re looking for even more ideas on fruit breads, I put together a whole list of simple moist loaf recipes that you might enjoy after you master this one!
Can I use other berries instead of raspberries in this bread?
Absolutely! This recipe is wonderfully adaptable. If you’re not loving raspberries that week, or maybe you only have blueberries in the fridge, go for it! Blueberries are probably the easiest swap. Blackberries work really well too, but just watch out because they can sometimes be a little wetter than raspberries.
If you are using a different berry, maybe try tossing them with flour too, just like we discussed with the raspberries. It always helps to give the fruit a little grip on the batter so they don’t all decide to settle right at the bottom of the pan!
How do I know when my Raspberry Bread is fully baked?
This is the million-dollar question for all loaf cakes and quick breads! The visual cue is that the top should be deeply golden brown and look set—no wet jiggly spots in the middle when you gently tap the sides of the pan. But visual checks aren’t enough, especially in my oven!
You absolutely have to use the skewer test. Take a long wooden skewer or a thin metal cake tester and stick it right into the very center of the loaf (that’s always the last spot to cook). If it comes out clean, or with just a few moist, sticky crumbs attached—you are done. If you pull it out and wet batter drips off? Back it goes in the oven for another five minutes!
Can I make this Raspberry Bread recipe as muffins?
You totally can! Muffins bake up so much faster than a full loaf, which is great when you want a fast breakfast. When you put this batter into standard muffin cups (filled about 2/3 full), you’ll usually only need about 20 to 25 minutes at the same 350-degree temperature.
I still recommend checking them around the 20-minute mark, because those little paper liners can sometimes cook faster than a full loaf pan. They’re done when they have rounded tops and a skewer inserted into the center of one (check the middle one, not the edges!) comes out clean. Easy peasy!
Nutritional Estimate for Raspberry Bread
Now, I’m not a nutritionist by any means, and I always joke that the best part of this **Raspberry Bread** is the happiness it brings, not the macros! But since you asked—and because it’s fun to see what’s in your homemade treats—I pulled the estimate breakdown for you here.
This estimation is based on the exact ingredients listed above, dividing the final recipe into 10 slices (which is my preferred serving size, because who is eating just one slice of fresh bread, really?). Remember, these numbers are just estimates—they will change if you swap in whole wheat flour or use a different type of sugar, so just treat this as a general guideline!
- Serving Size: 1 slice
- Calories: 220
- Sugar: 15g
- Sodium: 200mg
- Fat: 8g
- Saturated Fat: 4g
- Unsaturated Fat: 4g
- Trans Fat: 0g
- Carbohydrates: 35g
- Fiber: 2g
- Protein: 4g
- Cholesterol: 45mg
See? That’s actually a pretty solid snack, considering how much flavor we packed into it! The butter and sugar are what drive most of the calories, but hey, it’s worth every bite, especially when you’re eating it warm!
Share Your Homemade Raspberry Bread
You’ve done it! You’ve got a beautiful loaf of fresh, moist **Raspberry Bread** cooling on the rack, and I bet your kitchen smells amazing right now. I’m so thrilled you took the time to try my favorite quick bread recipe.
Now, I really want to hear about it! Baking is always better when it’s shared. Did you try the lemon zest trick? Did your berries try to sink to the bottom, or did you use that flour trick successfully?
Seriously, don’t be shy! Drop a comment below and tell me how it turned out. Rate the recipe with stars right underneath this section so other folks know how much you loved it!
And if you made this and managed to snap a picture, please share it with me on social media! Tag me so I can see your gorgeous loaf glowing on your counter. If you share it around, it really helps keep these family-favorite recipes alive and baking in other kitchens!
Happy baking, friends!
Print
Simple Raspberry Bread
- Total Time: 70 min
- Yield: 1 loaf 1x
- Diet: Vegetarian
Description
A straightforward recipe for moist quick bread featuring fresh raspberries.
Ingredients
- 2 cups all-purpose flour
- 1 1/2 teaspoons baking powder
- 1/2 teaspoon baking soda
- 1/2 teaspoon salt
- 3/4 cup granulated sugar
- 1/4 cup unsalted butter, melted
- 2 large eggs
- 1/2 cup milk
- 1 teaspoon vanilla extract
- 1 cup fresh raspberries
Instructions
- Preheat your oven to 350 degrees F (175 degrees C). Grease and flour a standard loaf pan.
- In a medium bowl, whisk together the flour, baking powder, baking soda, and salt.
- In a separate large bowl, mix the sugar, melted butter, eggs, milk, and vanilla extract until combined.
- Add the dry ingredients to the wet ingredients and mix until just combined. Do not overmix.
- Gently fold in the fresh raspberries.
- Pour the batter into the prepared loaf pan.
- Bake for 50 to 60 minutes, or until a wooden skewer inserted into the center comes out clean.
- Let the bread cool in the pan for 10 minutes before turning it out onto a wire rack to cool completely.
Notes
- If your raspberries are very juicy, lightly toss them with one teaspoon of flour before folding them into the batter to prevent sinking.
- You can substitute frozen raspberries, but do not thaw them before using.
- Prep Time: 15 min
- Cook Time: 55 min
- Category: Dessert
- Method: Baking
- Cuisine: American
Nutrition
- Serving Size: 1 slice
- Calories: 220
- Sugar: 15
- Sodium: 200
- Fat: 8
- Saturated Fat: 4
- Unsaturated Fat: 4
- Trans Fat: 0
- Carbohydrates: 35
- Fiber: 2
- Protein: 4
- Cholesterol: 45
Keywords: raspberry bread, quick bread, sweet bread, raspberry loaf, breakfast bread