
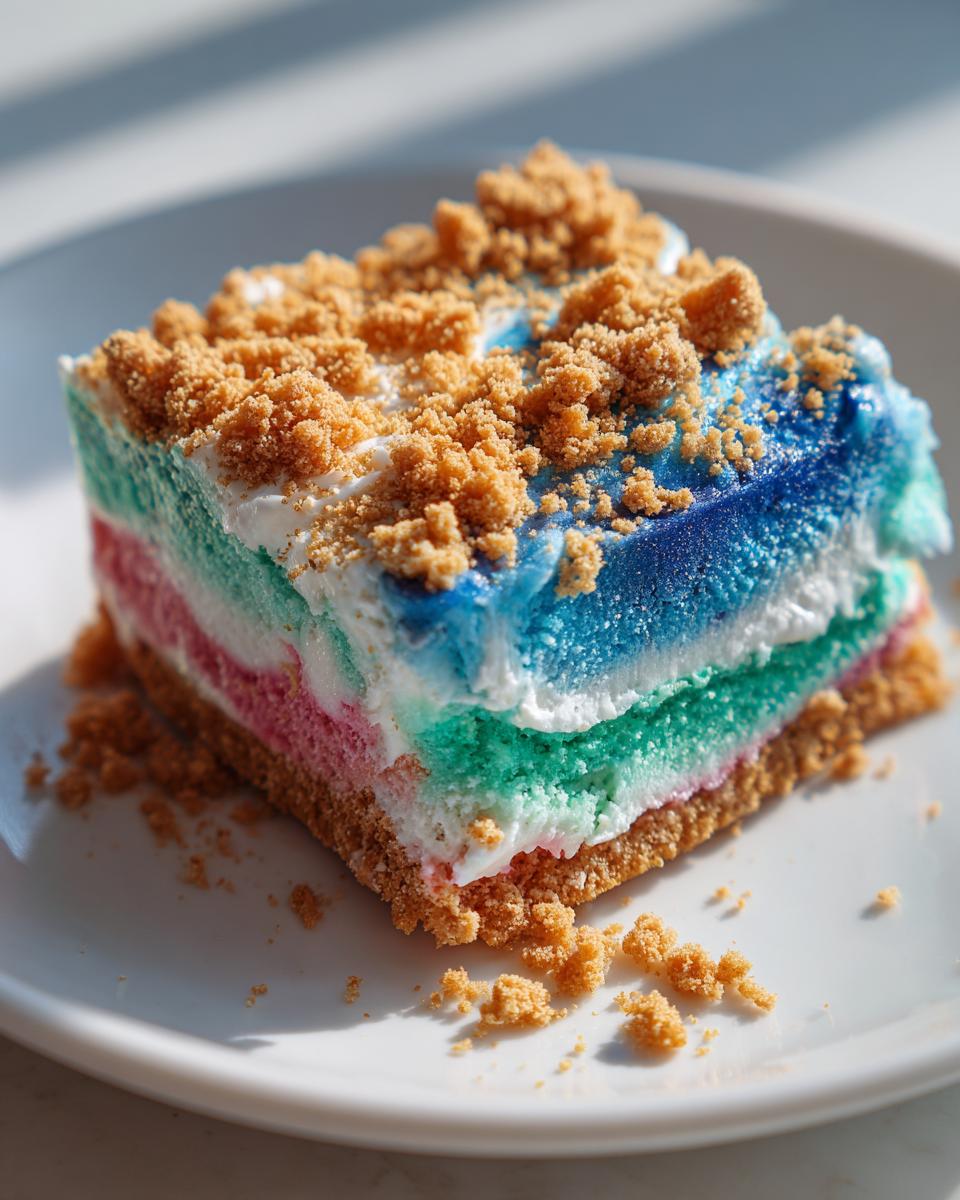
Oh my goodness, are you ready for the most magical, show-stopping dessert you can whip up in your kitchen? Forget those fussy, complicated recipes! If you’ve ever wanted a dessert that screams fun, this Mermaid Ice Cream is absolutely it. Seriously, the colors alone make me smile every single time. I’m obsessed with making food look like a tiny party, and nothing screams ‘party’ louder than brilliant blue, green, and pink swirled together!

We aren’t dealing with tempering eggs or spending hours over a stove here. This recipe proves you can get that perfect, creamy texture, those vibrant, distinct layers, and even a little crunch factor using just a standard ice cream maker and some food coloring. Trust me, this is the easiest and most visually stunning way you’ll ever make homemade Mermaid Ice Cream. It’s so much fun watching the colors come to life while it churns!
Why This Mermaid Ice Cream Recipe Works (EEAT Focus)
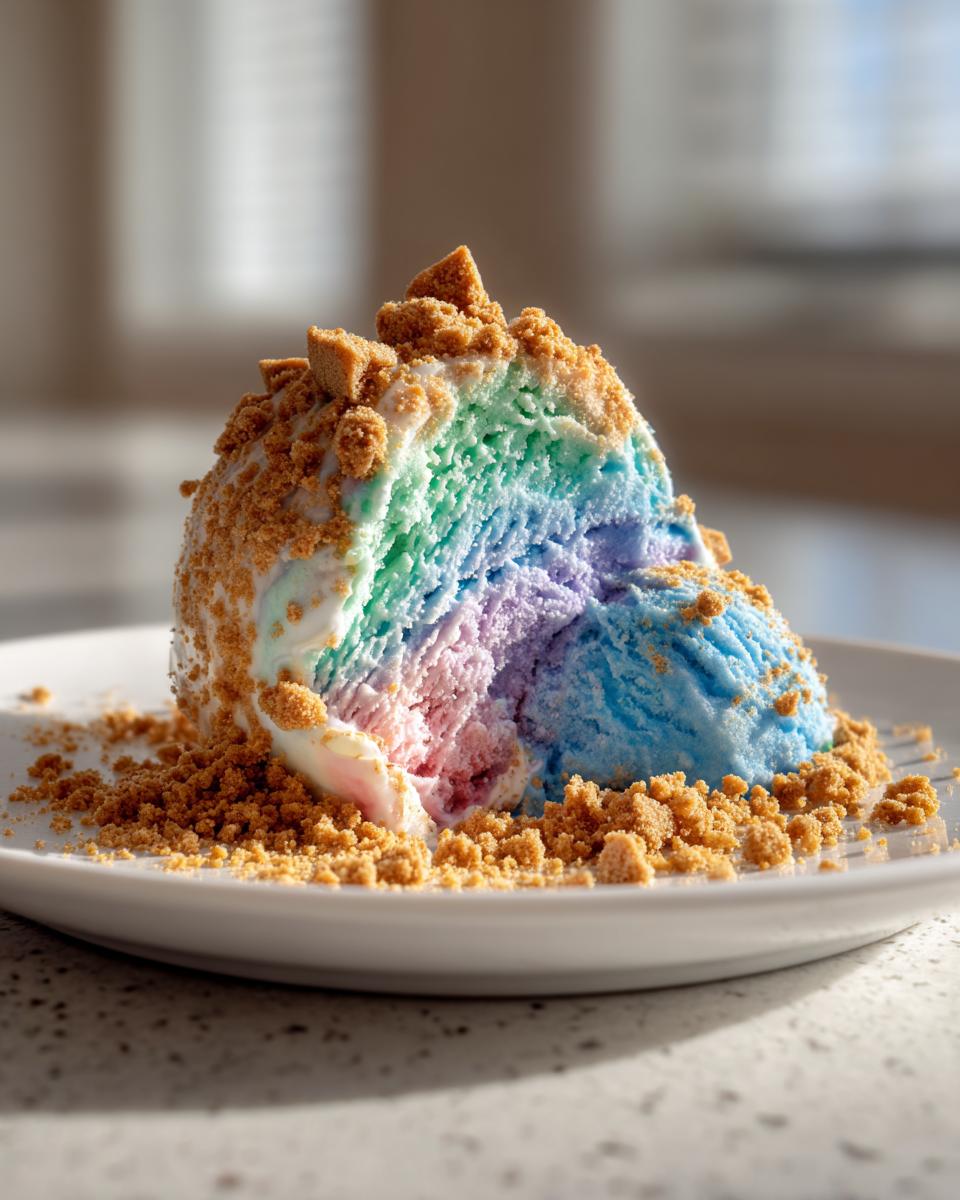
The magic here isn’t in complicated techniques; it’s in the layering! Because we are churning each color separately, you guarantee those beautiful, distinct bands of blue, green, and pink in the final product. This recipe is super reliable if you have a standard home ice cream maker. It trusts simple dairy bases instead of trying to trick you with stabilizers.
My biggest piece of advice? Don’t skimp on the color, but use it wisely. If you’re using those little liquid dye bottles, you might have to add quite a bit, which can slightly thin out your base. If you can grab gel food coloring, please do! That little bit of gel gives you incredibly intense colors without messing with the ratios. That’s how you get that ocean-worthy vibrancy every time.
Quick Look: Prep Time and Yield for Mermaid Ice Cream
For those needing a quick rundown before starting, here’s the deal:
- Prep Time: 20 min
- Total Time: 4 hr 20 min (most of that is chilling time, thankfully!)
- Yield: 4 servings
Gathering Ingredients for Your Mermaid Ice Cream
Okay, before we get into the churning madness, let’s make sure your fridge is stocked for this color explosion! This recipe keeps things wonderfully simple; we aren’t building a complicated base, which is why it comes together so fast. What you need are your standard ice cream staples, plus the fun stuff!
First up, the dairy: You definitely want to chill these overnight if you can, but they need to be cold before you start. Grab 1 cup of heavy cream and 1/2 cup of milk. We need a little sweetness too, so 1/4 cup of granulated sugar will do the trick. And don’t forget the flavor backbone—a teaspoon of good vanilla extract. This simple mix is what makes the base creamy before we add the ocean hues.
Now for the fun part! You need your colors so you can make those gorgeous layers. Have your blue food coloring ready, your green, and then whatever you pick for the third layer—I usually go with a bright pink or maybe a rich purple. Remember what I said? Gel is better if you have it! Finally, for that little crunch detail, we need 1/4 cup of graham crackers that you’ve crushed up nice and small. We want that to look like fine sand. That’s everything you need to start making magic!
Step-by-Step Instructions to Make Perfect Mermaid Ice Cream
This is where the exciting part happens! Making layers in ice cream takes a little bit of patience, but trust me, it’s worth it when you see those beautiful stripes. If you’re looking for more incredibly easy frozen treats, check out my guide to some other simple homemade ice cream ideas right here. Now, let’s get churning!
Preparing the Base and Coloring the Layers
First things first, we need our base mixed up. In a regular bowl—no need for fancy gadgets yet—whisk together your chilled heavy cream, milk, sugar, and vanilla extract. Keep whisking until you can’t feel any grittiness from the sugar anymore. That’s step one done, easy peasy!
Now, for the color separation! You need to divide that entire mixture into three identical bowls. Use a measuring cup if you have to make sure they are perfectly equal—we want three nice, thick layers, not one skinny one. In the first bowl, add your blue coloring. In the second, drop in the green. For the third, go with your pink or purple choice. Stir each one slowly until the color is beautifully uniform throughout. If you’re using gel colors, this is the point where they really shine and give you that incredible depth!
Churning and Layering the Mermaid Ice Cream
This is the most critical part if you want distinct results! Put the blue mixture into your ice cream maker and churn it exactly as your machine suggests until it hits that soft-serve consistency. Scoop that soft blue ice cream immediately into your freezer-safe container. Don’t stop there! You absolutely must wash out the ice cream maker bowl thoroughly before moving on. We do not want blue streaks in our green layer!
Once the bowl is clean and cold, churn the green mixture and layer it right on top of the set blue layer in your container. Wash the bowl *again*! Seriously, cleaning between colors is the secret handshake for professional-looking layered ice cream. Churn that final pink/purple batch and gently layer it last, spreading it out carefully so you don’t disturb the green underneath too much.
Final Freezing and Serving the Mermaid Ice Cream
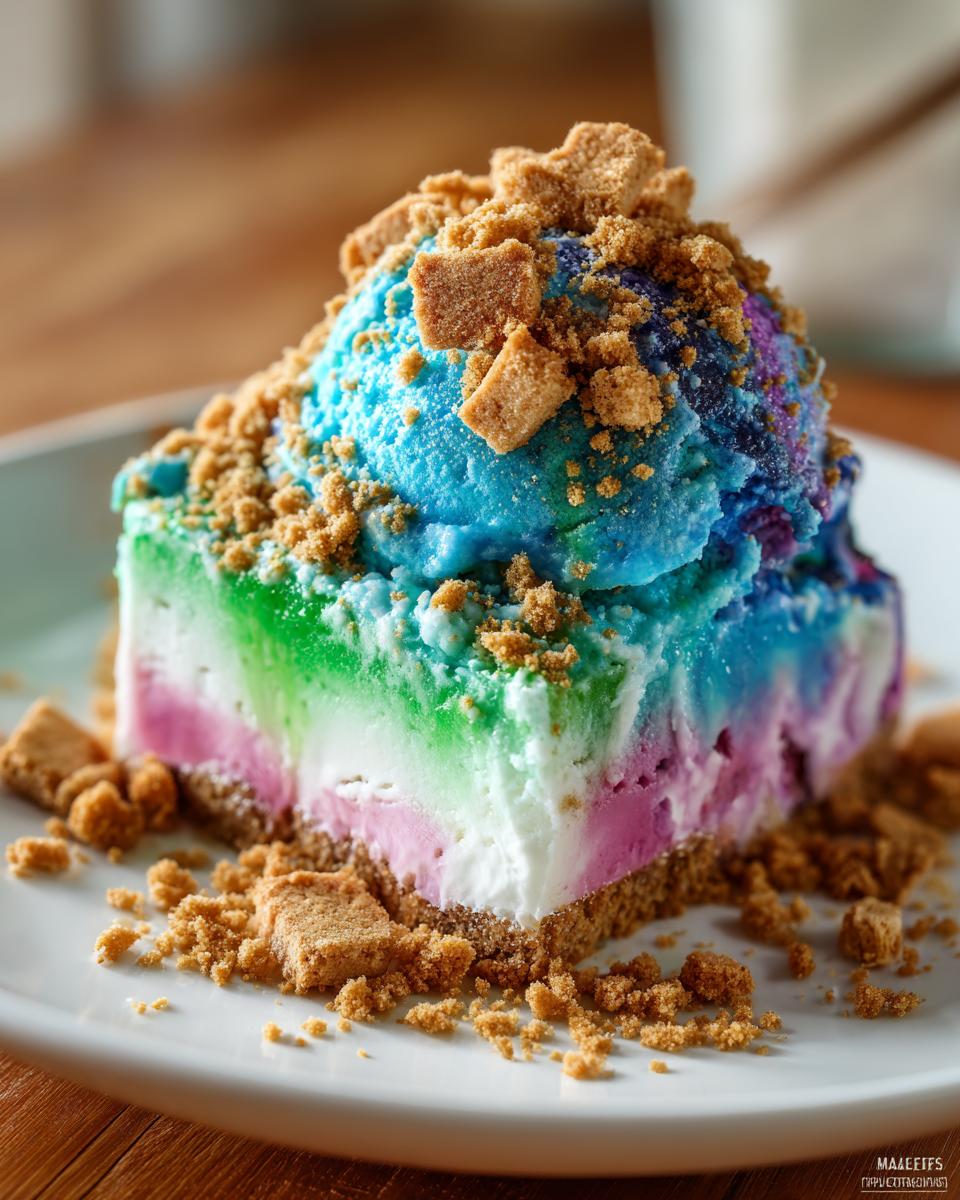
Time to bring in the ‘sand’! Take those crushed graham crackers and sprinkle them lightly across the very top surface of that final pink layer. They look just like tiny pieces of mermaid shore, don’t they? Cover your container tightly with a lid or plastic wrap. It needs a long nap in the freezer—at least four hours is my minimum recommendation, but overnight is even better until it’s completely firm.
When you are ready to serve, run your scoop under hot water for a second, and it’ll glide right through those frozen, colorful layers. If you decided to be extra whimsical, throw some extra sprinkles on top of those scoops!
Tips for Success When Making Your Mermaid Ice Cream
Even though this recipe is super straightforward, there are a couple of little things that can make or break your layered look. First and foremost: temperature! Make sure that cream and milk base is absolutely freezing when it goes into the machine, or it’ll take forever to churn. If you’re running behind, you can stick the *colored* bases in the freezer for about 30 minutes before churning just to help them along.
Now, what if your machine decided to take a vacation? No worries at all! We can totally do this no-churn style. When whipping the cream mixture *before* you color it, you need to whip it until you get stiff peaks—that means when you pull the beaters out, the tips stand straight up without slumping over. Check out my tips for getting the ultimate stiff peak, especially if you want to try skipping the machine sometime, over here! Once you have those stiff peaks, gently fold in your colors rather than stirring hard. That way, you keep all that beautiful air you just whipped in.
Storage and Reheating Instructions for Mermaid Ice Cream
Keeping this colorful wonder perfect is easy, but you gotta treat it right! Because these are bright colors, you want to keep air away from the surface to stop freezer burn and keep those blues and greens looking vibrant. Always use an airtight container. Press a layer of plastic wrap right onto the surface of the ice cream before you put the lid on. This makes a huge difference!
Now, you can’t exactly microwave ice cream, can you? So, when I say ‘reheating,’ I just mean letting it sit out on the counter for about 10 to 15 minutes before you plan to scoop it. This softens it up just enough so you can get perfect, colorful scoops without chipping your favorite spoon!
Variations on the Classic Mermaid Ice Cream Flavor Profile
While the look of this ice cream is 100% Mermaid goals, we can definitely play around with the flavor profile if you want something a little different than just vanilla sweetness. The beautiful thing is that the base is so neutral, it takes on other flavors like a dream! I love shaking things up for birthdays.
If you’re feeling tropical, try adding a splash of coconut extract to your base mixture *before* you even divide it up for coloring. A little bit of pineapple extract works too, making it taste like a creamy, fruity ocean breeze. If you want to go full island vibe, swap out the graham cracker ‘sand’ on top for some lightly toasted coconut shreds instead. Yummy! You can even check out how pineapple pairs with creamy desserts in my pineapple cream cake recipe for more inspiration on tropical flavors!
Serving Suggestions for Your Colorful Mermaid Ice Cream
Scooping this amazing layered ice cream is the fun finale! Since the flavor is sweet and fruity, you want pairings that enhance that without overpowering the colors. Those classic waffle cones are a must for that perfect crunch contrast. If you’re serving it in a bowl, toss in some fresh raspberries or blueberries—they look fantastic resting against the blue and green.
For a final touch of magic, you can drizzle just a little bit of melted white chocolate sauce over the top before serving. It looks like seafoam! If you need a great simple cake to serve alongside, check out my go-to vanilla cake recipe here!
Frequently Asked Questions About This Mermaid Ice Cream
I get so many questions about this recipe once people see the pictures! It’s usually because they think it’s way more complicated than it actually is. Let’s clear up anything you might be wondering before you dive in.
Can I make Mermaid Ice Cream without an ice cream maker?
You absolutely can! Don’t let a lack of equipment stop you from enjoying this treat. If you don’t have a machine, you need to follow the no-churn steps we talked about in the tips section. Basically, you beat your cream mixture until it holds stiff peaks—think really fluffy whipped cream—and *then* gently fold in the colors. Freeze that mixture for a good six hours until it’s firm.
How do I get the colors to stay separate in the Mermaid Ice Cream?
This is the key to that beautiful layered look we’re going for! The separation happens because we churn each color batch individually. Seriously, wash that ice cream bowl between every color change. Pour the blue in, let it churn to soft-serve, layer it, and then clean the bowl completely before churning the green, and so on. Layering them carefully before the final long freeze locks those distinct bands in place.
Is it possible to make this Mermaid Ice Cream completely dairy-free?
Yes, you can swap out the dairy for a vegan alternative! Instead of heavy cream and milk, you can use full-fat canned coconut milk or coconut cream. Make sure the coconut part is super chilled and thick. It works beautifully, though it might be slightly softer upon churning. You can find lots of tips on working with coconut creams over here if you need extra guidance!
What is the best kind of food coloring to use for bright results?
I mentioned this before, but it bears repeating: gel food coloring is your best friend here. Liquid coloring often requires you to add too much just to get a deep color, which risks thinning out your base. Gel colors are intensely concentrated, so a tiny drop gives you a vibrant blue or green that holds up perfectly in the churning process.
Nutritional Estimate for Homemade Mermaid Ice Cream
I always like to give you a little peek at what’s in the magic potion, even though I know when we’re eating rainbow ice cream, we aren’t exactly looking for a salad substitute! We have to be open and honest about what’s going into our fun treats, right?
This nutritional breakdown is based on the ingredients listed above and assumes you are getting approximately four even servings from the batch. Remember, since we are using real cream and sugar, these numbers reflect a rich, homemade experience. If you swap out the heavy cream for coconut cream, for example, these numbers will definitely change!
Here is the rough estimate based on a 1/2 cup serving size:
- Calories: 250
- Sugar: 20g
- Fat: 16g
- Saturated Fat: 10g
- Carbohydrates: 22g
- Protein: 4g
- Cholesterol: 60mg
- Sodium: 40mg
Please take this as a general guide. The exact fat and sugar content will swing depending on the brands you use for your cream and sugar—that’s just the reality of cooking with real stuff! Enjoy it, and don’t worry too much about the numbers when you’re dealing with something this colorful!
Print
Mermaid Ice Cream
- Total Time: 4 hr 20 min
- Yield: 4 servings 1x
- Diet: Vegetarian
Description
A colorful, layered ice cream treat with a sweet, fruity flavor.
Ingredients
- 1 cup heavy cream
- 1/2 cup milk
- 1/4 cup granulated sugar
- 1 teaspoon vanilla extract
- Blue food coloring
- Green food coloring
- Pink or purple food coloring
- 1/4 cup crushed graham crackers (for ‘sand’ layer)
- Sprinkles (optional)
Instructions
- In a bowl, combine heavy cream, milk, sugar, and vanilla extract. Mix until sugar dissolves.
- Divide the mixture into three equal portions in separate bowls.
- Add blue food coloring to the first portion, green to the second, and pink/purple to the third. Stir each until the color is uniform.
- Pour the blue mixture into an ice cream maker and churn according to the manufacturer’s directions until soft-serve consistency is reached. Transfer to a freezer-safe container.
- Wash the ice cream maker bowl. Repeat the churning process with the green mixture. Layer the green mixture over the blue layer in the container.
- Wash the ice cream maker bowl again. Churn the pink/purple mixture and layer it on top of the green layer.
- Sprinkle the crushed graham crackers over the top layer to resemble sand.
- Cover the container and freeze for at least 4 hours, or until firm.
- Serve scoops topped with extra sprinkles if desired.
Notes
- For a richer color, use gel food coloring instead of liquid.
- If you do not have an ice cream maker, you can use a no-churn method by whipping the cream mixture until stiff peaks form before coloring and layering. Freeze for 6 hours.
- Prep Time: 20 min
- Cook Time: 0 min
- Category: Dessert
- Method: Freezing
- Cuisine: American
Nutrition
- Serving Size: 1/2 cup
- Calories: 250
- Sugar: 20
- Sodium: 40
- Fat: 16
- Saturated Fat: 10
- Unsaturated Fat: 6
- Trans Fat: 0
- Carbohydrates: 22
- Fiber: 0
- Protein: 4
- Cholesterol: 60
Keywords: mermaid, ice cream, colorful, sweet, frozen dessert, blue, green, pink